How to Import Photos from iPhone to Windows 10
If your iPhone’s memory is full or you wish to create a backup of your cherished photos, you should import all your iPhone photos to your PC.
There are several quick solutions to import photos from iPhone to Windows 10. In this post, the TC team went ahead and drafted a complete guide on how to import photos from iPhone to Windows 10. Here are all the simple ways to import your iPhone photos to Windows 10 in minutes.
How to Import Photos from iPhone to Windows 10 in 5 Ways
To import photos from iPhone to Windows 10, you have multiple options via a USB cable or wirelessly. For your ease, we are sharing the five prominent ways to transfer iPhone photos to Windows 10, including:
1. How to Import Photos from iPhone to Windows 10 Using the Windows Photos App
The Windows Photos app or Microsoft Photos comes pre-installed on your PC. So, to import photos from iPhone to Windows 10 using the Windows Photos app, you gotta first install the latest version of iTunes on your PC. To do so:
- Open iTunes on your computer.
- Click Help.
- Next, click on the Check for Updates option.
- Just follow the on-screen instructions to install the latest version of iTunes software.
Once you have updated iTunes on your PC, you are ready to bulk transfer photos from your iPhone to your computer. Follow these steps:
- Using a USB cable, connect your iPhone to your computer.
- From the Start Menu, click open the Photos app. You can type Photos in the search bar to launch the program.
- On the Photos window, click on the Import button located in the upper right corner.
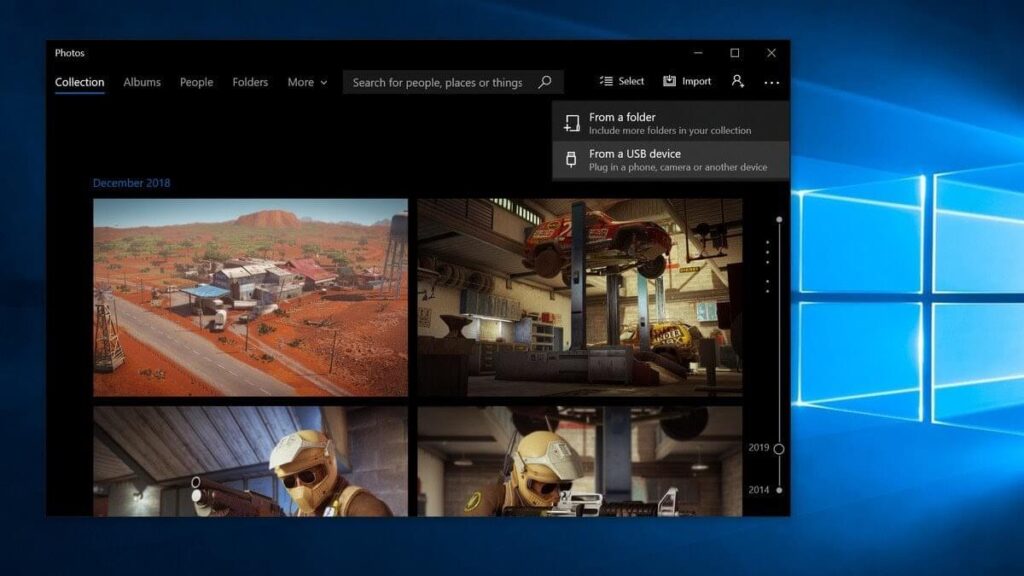
- Now, select all the photos that you want to import to your PC, click on the Import to ignite the process.
- Once the process is completed, you can easily access your iPhone photos through the Windows Photos app.
2. How to Import Photos from iPhone to Windows 10 Using File Explorer
If you want to import photos from iPhone to Windows 10 without any software, you can use File Explorer. This importing process works as:
- Connect your iPhone with your PC using a suitable USB cable.
- Next, open Windows Explorer on your PC. You can also use the Windows + E keys shortcut to launch it.
- Click on the Arrow (>) located next to This PC in the menu.
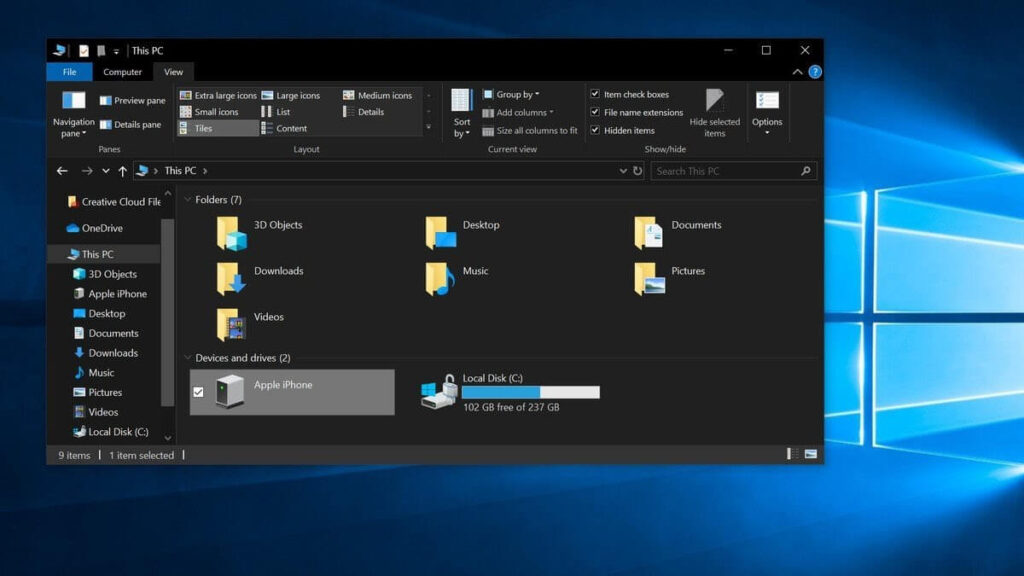
- Click on your iPhone’s Name in This PC submenu.
- Double-click on the Internal Storage and then on DCIM.
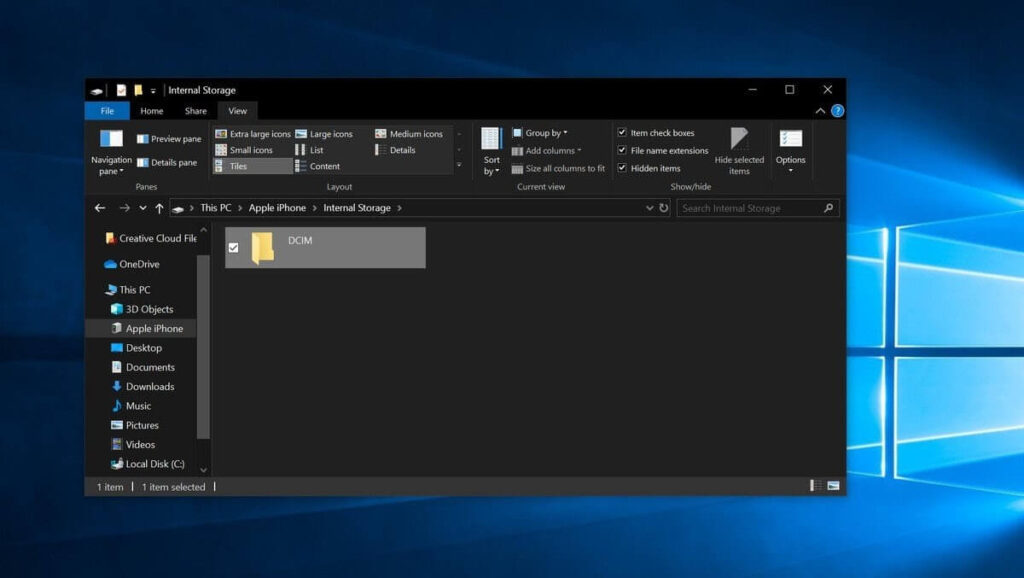
- Click open a Folder that contains all the photos.
- Select a picture. You can also hold the Ctrl key to click multiple pictures simultaneously. Or, use Ctrl + A keys to select all the photos together.
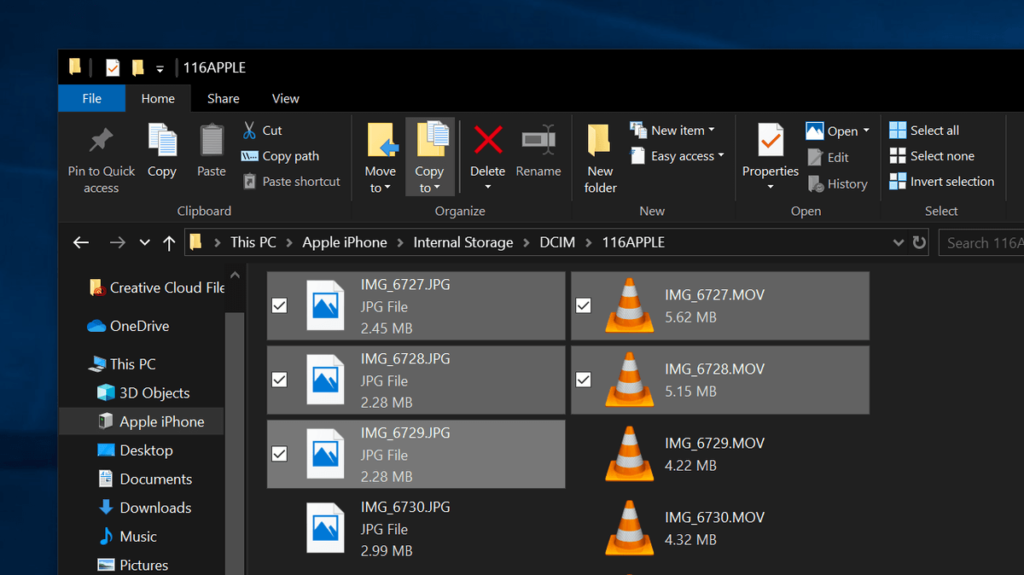
- On the top of the Window, click on the Copy To and select a location to save photos from the Choose Location dropdown menu.
- Select a destination to save the photos and click Copy. Don’t unplug your iPhone until the process completes.
3. How to Import Photos from iPhone to Windows 10 Using iCloud Photos
If you want to import photos from iPhone to Windows 10 without a USB cable, you can use the iCloud Photos app. This process is something like this:
- Foremost, ensure that the iCloud Photo Library is enabled on your iPhone. For that, go to Settings > Photos > select iCloud Photos.
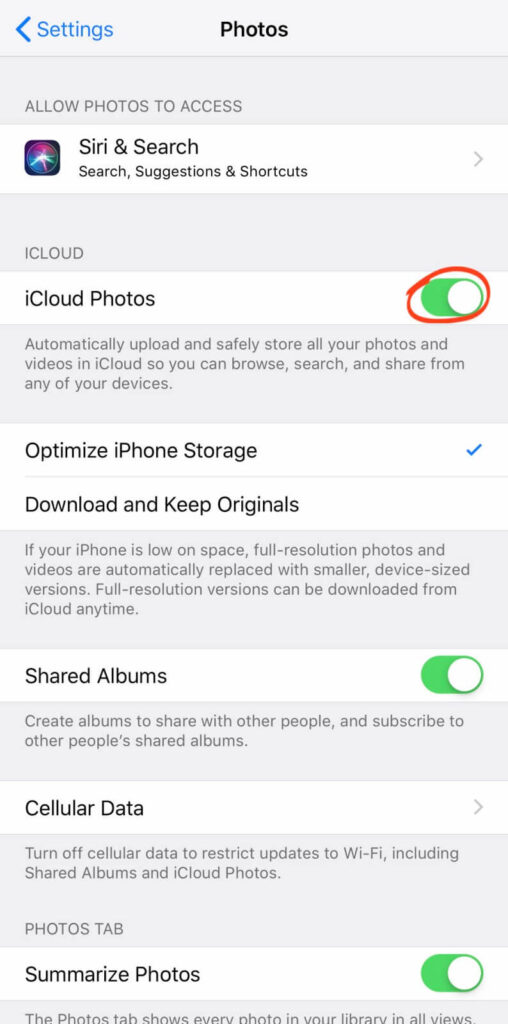
- Now, whenever you click a picture on your iPhone, it will automatically upload to iCloud while you are connected to WiFi.
- Next, you have to download the iCloud for Windows app on your PC. It is a free app that you can download from Microsoft App Store or Apple website.
- Once the iCloud for Windows app is installed, sign in using your Apple ID.
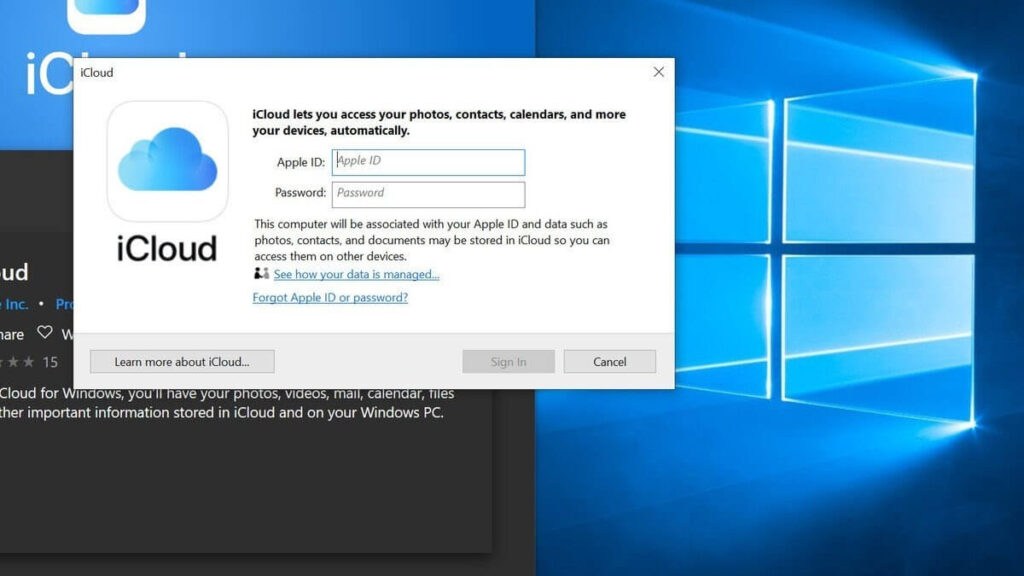
- Ensure to put a checkmark next to Photos and then tap on the Options button.
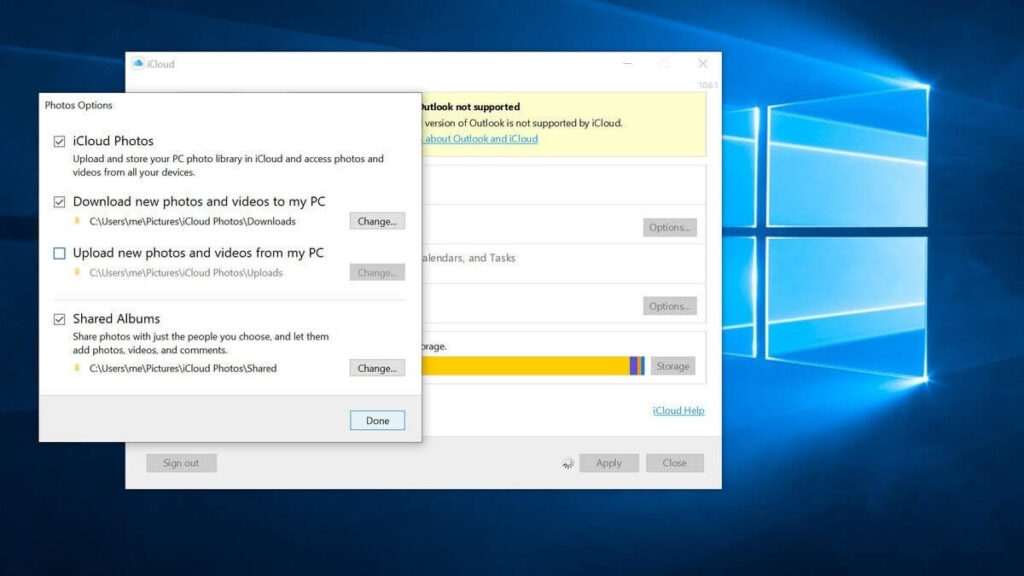
- Click on the iCloud Photo Library and Download new photos and videos to my PC options. Further, you can also check the Upload new photos and videos from my PC option to automatically upload photos and videos from your PC to your iCloud account.
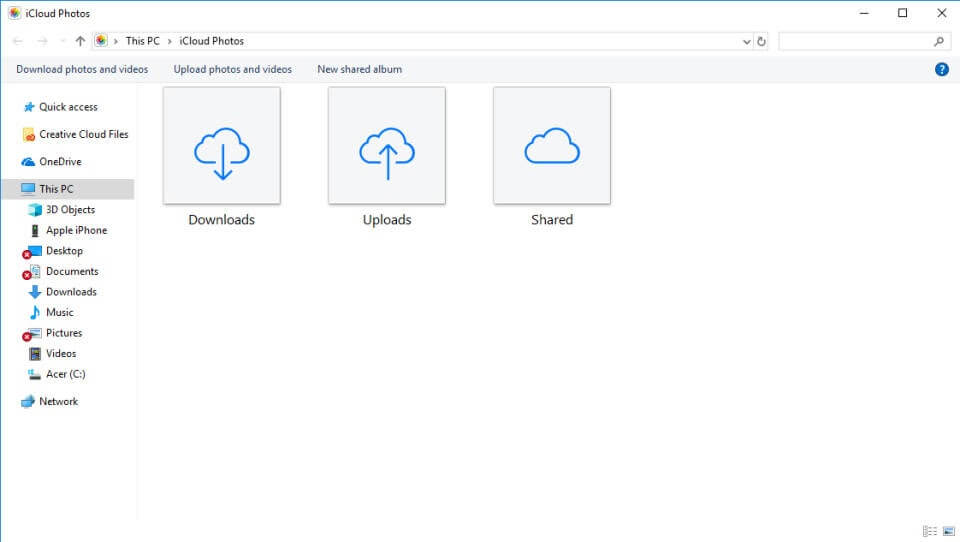
- Click Done and Apply.
Now, whenever you are connected to WiFi, all your iPhone photos will automatically download to your PC. To retrieve downloaded photos, you have to use File Explorer (a process already disclosed above).
4. How to Import Photos from iPhone to Windows 10 Using iCloud.com
For iCloud users, there’s also an option to import photos from iPhone to Windows 10 via iCloud.com. For that:
- On your iPhone, go to Settings > Photos > iCloud Photos and activate it.
- On your computer, open a web browser and go to iCloud.com.
- Sign in using your Apple ID and password. If you use two-factor authentication on your iPhone, you have to enter a six digits code on your PC.
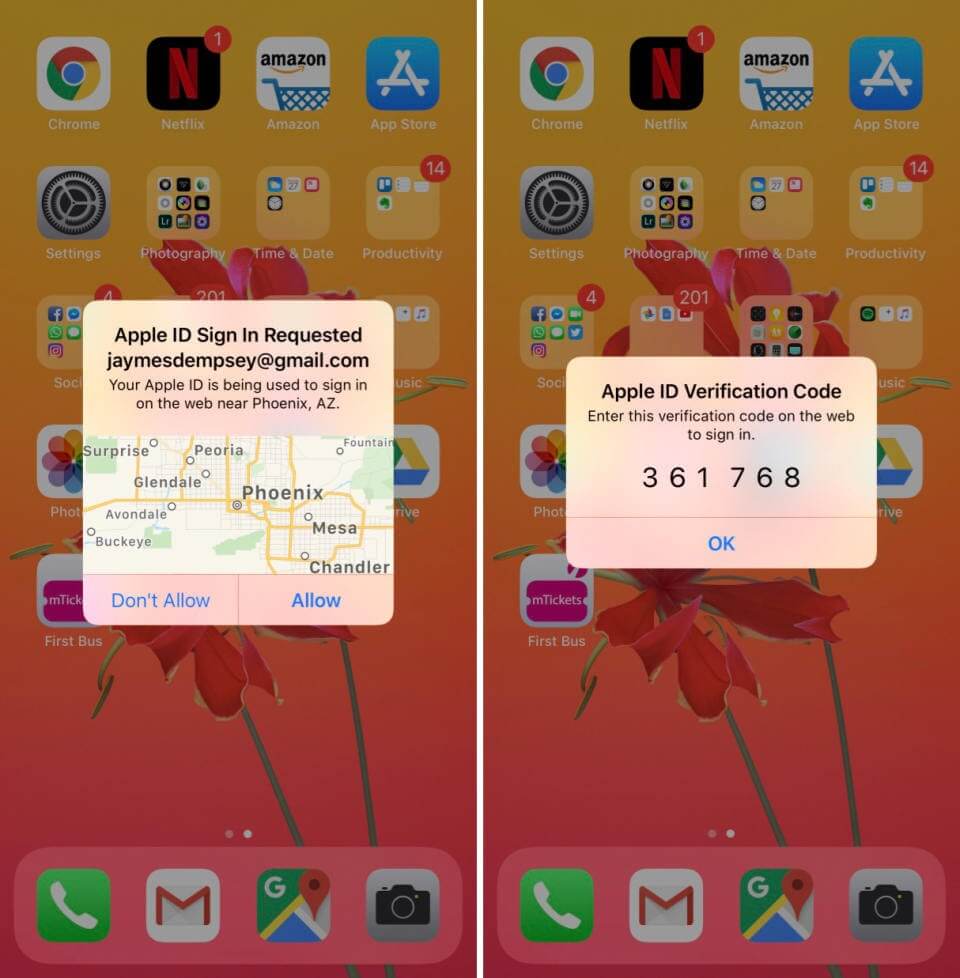
- From iCloud.com, click on the Photos.
- Now, you can access your iPhone photos library on your PC.
- From the left-hand sidebar, click on Media Type to access your iPhone photos.
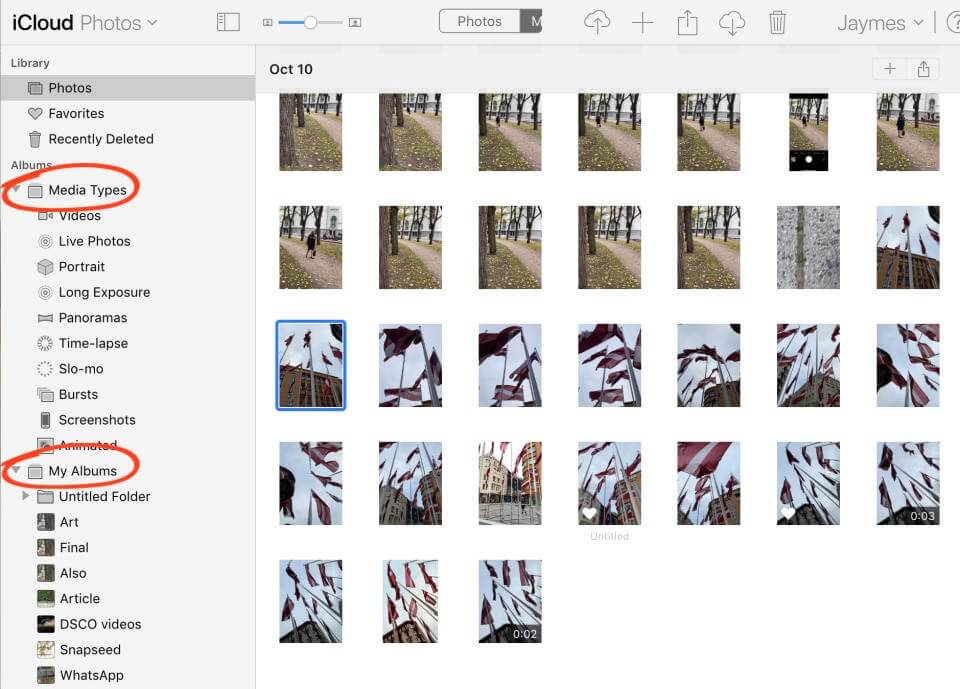
- Select photos that you wish to download to your PC and then, click on the Download icon at the top of the screen.

- Your downloaded photos will appear in the Downloads folder. From here, you can move photos to the Photos folder.
5. How to Import Photos from iPhone to Windows 10 Using Third-party Tools
You can also use various third-party tools to import photos from iPhone to Windows 10. Every tool follows different directions to import pictures that you should check before using it. However, we can give you an overview by using EaseUS MobiMover:
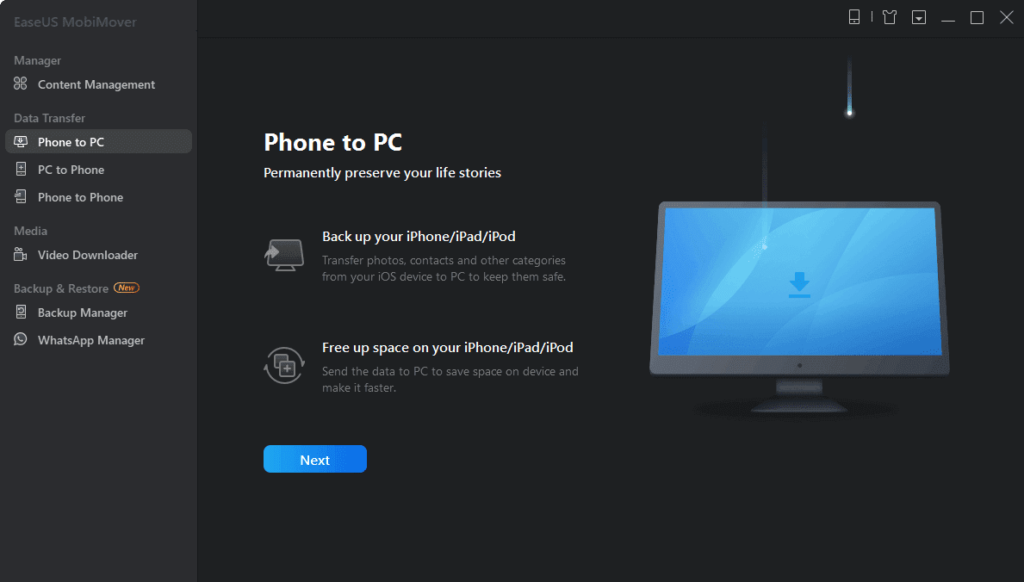
- Connect your iPhone to PC, run EaseUS MobiMover on your PC, select the ‘Phone to PC,’, and then click on the Next button.
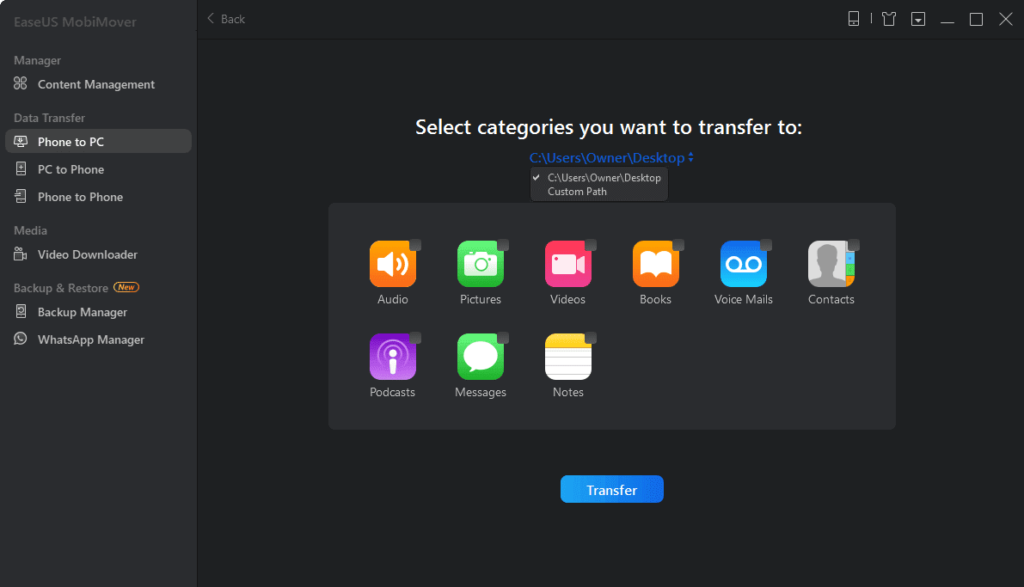
- Select the ‘Pictures’ only as the tool transfers all types of media files, including books, contacts, audio files, etc.
- Next, click on the Transfer button, and photos will start transferring from your iPhone to PC.
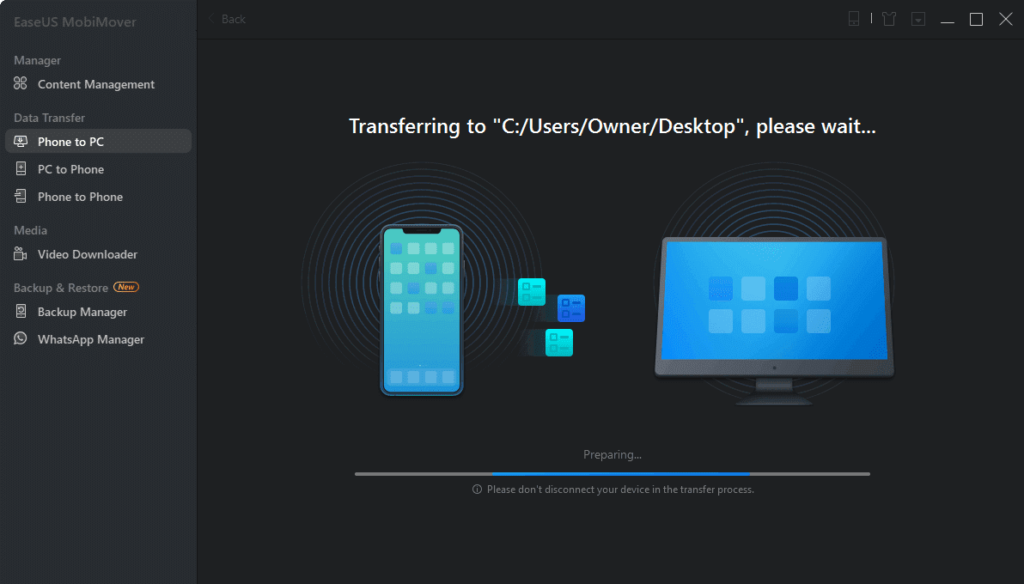
- Based on the file size, your photo transfer process will complete within a few minutes.
Can’t Import Photos from iPhone to Windows 10
Despite following simple steps, if you can’t import photos from iPhone to Windows 10, you should try these solutions:
iTunes Apple Mobile Device USB Driver Not Installed
If you find the down arrow next to Apple Mobile Device USB driver name, it means that it isn’t successfully installed. And, this is the reason behind photos not importing between iPhone and PC. To fix this problem, you can manually update the driver or can download automatic driver updating tools like AVG on your PC. The tool will ensure that all your Windows 10 drivers always stay up to date.
Photos Are in HEIFs Format
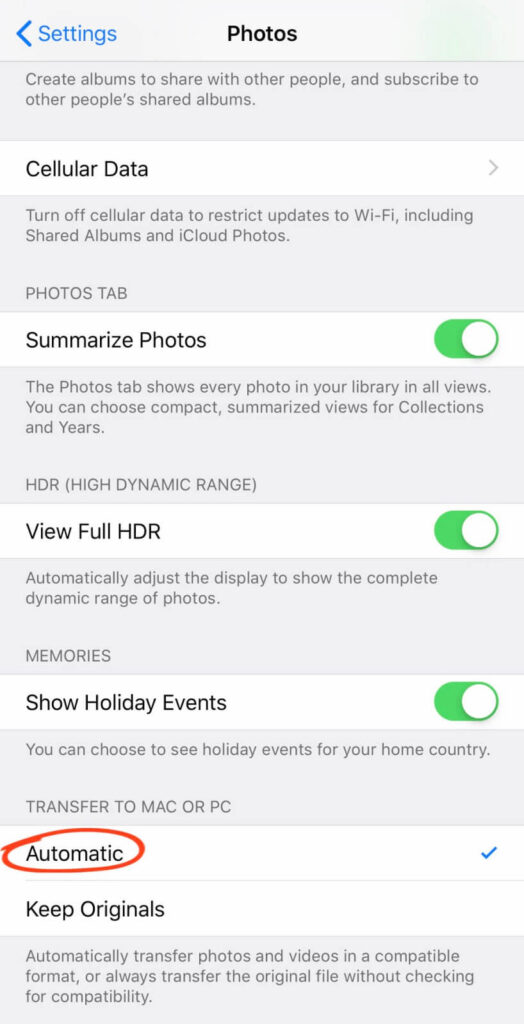
iPhones support a new image format called HEIFs. If your photos end with .HEIC, you can’t access them via File Explorer on your PC. Therefore, make sure that your iPhone automatically converts HEIF photos to JPEGs before importing them to your PC. To do so, open iPhone Settings > Photos > check Automatic under Transfer To Mac Or PC.
Unlock iPhone
If you have never synced your iPhone and computer before, make sure that your iPhone is unlocked before transferring photos. Enter your iOS password to unlock your iPhone for a smooth transfer.
Outdated OS
From your iOS to your Windows 10 OS, everything needs to be updated to the latest version to smoothly import photos from iPhone to Windows 10. If you are using iTunes or any other third-party tools to import photos, also update them. Go to your system settings to check whether a new update is available for your device or not.
Check a USB Cable
Ensure that your USB cable is working properly. If there’s any crack or dust present on your USB cable, it might cause problems while connecting the iPhone to Windows 10. Additionally, if you are using a third-party cable, it can cause connection problems too. Therefore, if your original iPhone USB cable isn’t working properly, use the iCloud method to import photos from iPhone to Windows 10.
Let’s Import Photos!
So, folks, after knowing how to import photos from iPhone to Windows 10 in five different ways, you are ready to import your iPhone photos. You just need to follow all the instructions to the dot, and you can seamlessly import photos.
However, if you get stuck somewhere while transferring photos, you can refer to troubleshoots we have already shared, or you can comment below. So, let’s import your iPhone photos to your PC now and keep on sharing and liking our posts.
Popular Post
Recent Post
Top 10 Best Folder Lock Software For Windows In 2024
Information is currency- it is imperative to keep all data safe from unwanted viewers, whether professional or personal. It protects information by preventing other users from deleting, viewing, or editing any data. Here, tools like folder lock software help safeguard directories and files in the system. The best options, such as Iobit Protected Folder, come […]
How to Share Your Location in Google Maps?
Google Maps is a valuable feature available for people to quickly and efficiently find locations, plan routes, and avoid traffic. The application is an essential tool for tracking delivery and movement to any place via a detailed map. However, while this application is widely used, many people do not know the real-time location sharing feature. […]
YouTube Marketing Trends For 2024
YouTube has been the largest video platform since 2006 and is now the second-largest search engine in the world. As well as being a popular video platform, YouTube remains the second largest search engine in the world. So what will the future of YouTube look like? You won’t believe how many people are using YouTube […]
How to Create a Windows 10 Bootable USB Drive (3 Methods)
Alone the word “Windows 10 bootable USB” sounds daunting. Creating a Windows 10 installation media with lots of steps and terminal commands seems like a complicated thing. But, let’s break a myth – it is not hard to create a Windows 10 bootable flash drive. In fact, it takes up a few simple steps to […]
Is SD WAN a good fit for your startup?
SD WAN, or Software Defined Networking as part of a Wide Area Network, has been causing quite the buzz in the world of business IT. You might have heard some of this for yourself if you have interest in the area. The problem is, there is just so much questionable information on the internet surrounding […]
Top 5 Best Cloud Gaming Services In 2024
The gaming craze is increasing like never before. Many video gamers have started it as a hobby and now all the leading games are a part of their mobile devices, systems, laptops, etc. The main needs of the gaming include hardware that is the minimum system requirements or recommended system requirements. All the RAM and […]
Let’s See How to Block Adverts and Stop Pop-ups on Chrome
Adverts and pop-ups are simply annoying. Suppose you are in the middle of searching for quick information for your project. And suddenly, adverts after pop-ups keep on appearing in your Chrome browser. You will definitely want to pull your hair in frustration after this! But, hey, don’t be dramatic when you can easily block adverts […]
Here’s How to Stop Receiving Spam Emails (Top 4 Tips)
Spam emails are simply annoying. They clutter your inbox, hide your important emails, and, importantly, threaten your privacy. But unfortunately, spam emails are something that you can’t avoid either. Whenever you subscribe to a newsletter or use your email to create an account on a third-party site or app, it is an open invitation to […]
10 Best Google Chrome Extensions in 2024
Google Chrome is the most popular, clean, and fast web browser of all time. On the top, several Google Chrome extensions are available to improve your browsing experience. Using the Chrome extensions, you can perform multiple operations without downloading a full program like password storage, control mouse gestures, run antivirus scans, and more. However, downloading […]
Ways to Completely Clear Search History on Your Mac
People use their Mac devices for various reasons, one of the most prominent ones being for browsing purposes. However, after visiting any website on the device, the browser version stores cache and other records of the query in the system. This affects the performance of the system as the excess records can lag the disk […]
