How to Import Photos from iPhone to Windows 10
If your iPhone’s memory is full or you wish to create a backup of your cherished photos, you should import all your iPhone photos to your PC.
There are several quick solutions to import photos from iPhone to Windows 10. In this post, the TC team went ahead and drafted a complete guide on how to import photos from iPhone to Windows 10. Here are all the simple ways to import your iPhone photos to Windows 10 in minutes.
How to Import Photos from iPhone to Windows 10 in 5 Ways
To import photos from iPhone to Windows 10, you have multiple options via a USB cable or wirelessly. For your ease, we are sharing the five prominent ways to transfer iPhone photos to Windows 10, including:
1. How to Import Photos from iPhone to Windows 10 Using the Windows Photos App
The Windows Photos app or Microsoft Photos comes pre-installed on your PC. So, to import photos from iPhone to Windows 10 using the Windows Photos app, you gotta first install the latest version of iTunes on your PC. To do so:
- Open iTunes on your computer.
- Click Help.
- Next, click on the Check for Updates option.
- Just follow the on-screen instructions to install the latest version of iTunes software.
Once you have updated iTunes on your PC, you are ready to bulk transfer photos from your iPhone to your computer. Follow these steps:
- Using a USB cable, connect your iPhone to your computer.
- From the Start Menu, click open the Photos app. You can type Photos in the search bar to launch the program.
- On the Photos window, click on the Import button located in the upper right corner.
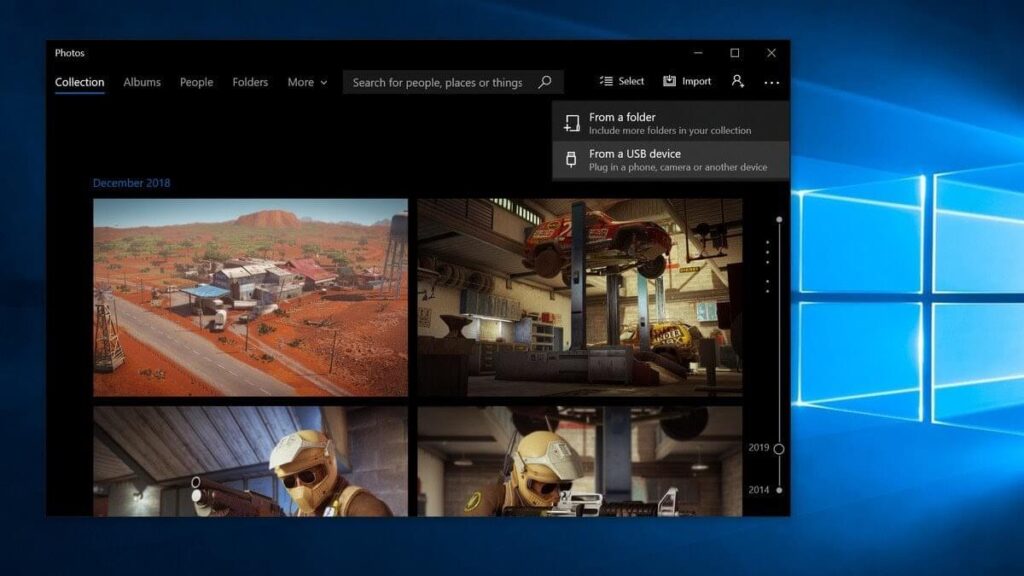
- Now, select all the photos that you want to import to your PC, click on the Import to ignite the process.
- Once the process is completed, you can easily access your iPhone photos through the Windows Photos app.
2. How to Import Photos from iPhone to Windows 10 Using File Explorer
If you want to import photos from iPhone to Windows 10 without any software, you can use File Explorer. This importing process works as:
- Connect your iPhone with your PC using a suitable USB cable.
- Next, open Windows Explorer on your PC. You can also use the Windows + E keys shortcut to launch it.
- Click on the Arrow (>) located next to This PC in the menu.
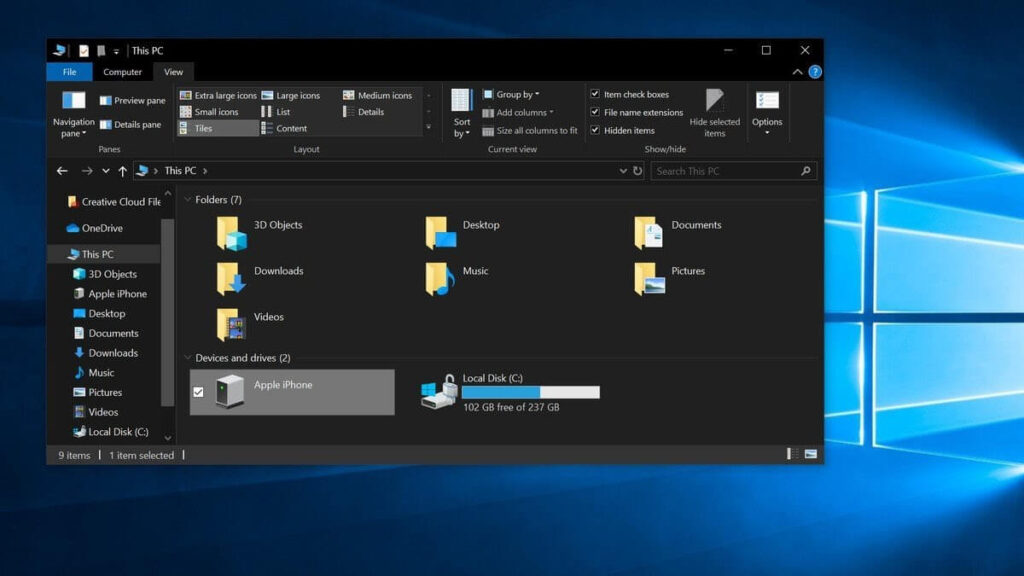
- Click on your iPhone’s Name in This PC submenu.
- Double-click on the Internal Storage and then on DCIM.
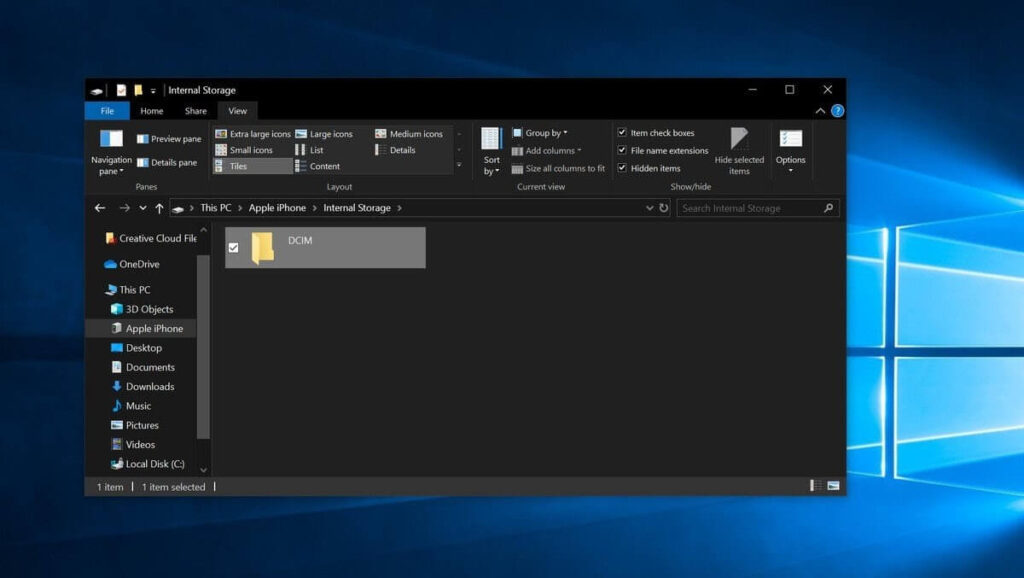
- Click open a Folder that contains all the photos.
- Select a picture. You can also hold the Ctrl key to click multiple pictures simultaneously. Or, use Ctrl + A keys to select all the photos together.
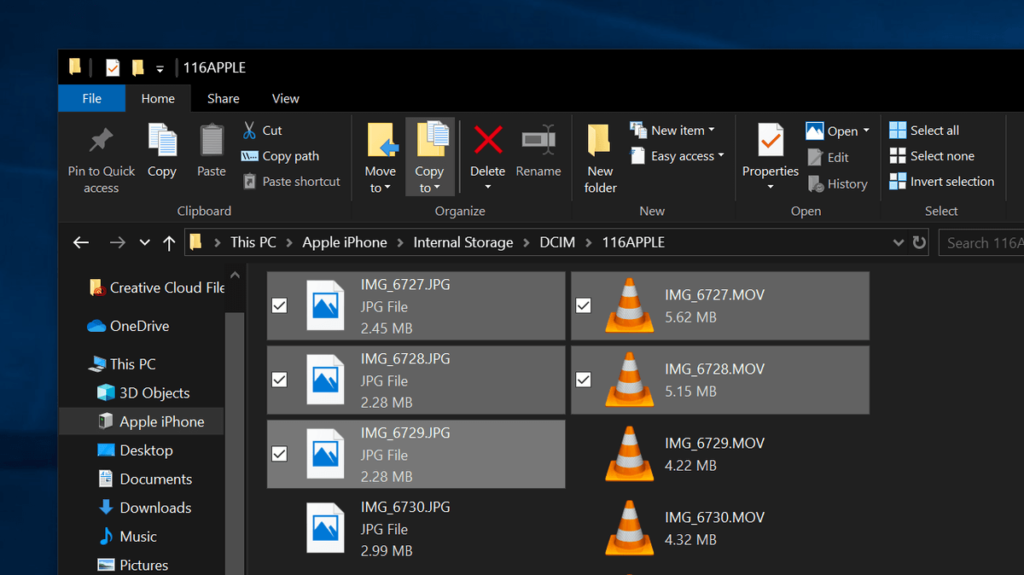
- On the top of the Window, click on the Copy To and select a location to save photos from the Choose Location dropdown menu.
- Select a destination to save the photos and click Copy. Don’t unplug your iPhone until the process completes.
3. How to Import Photos from iPhone to Windows 10 Using iCloud Photos
If you want to import photos from iPhone to Windows 10 without a USB cable, you can use the iCloud Photos app. This process is something like this:
- Foremost, ensure that the iCloud Photo Library is enabled on your iPhone. For that, go to Settings > Photos > select iCloud Photos.
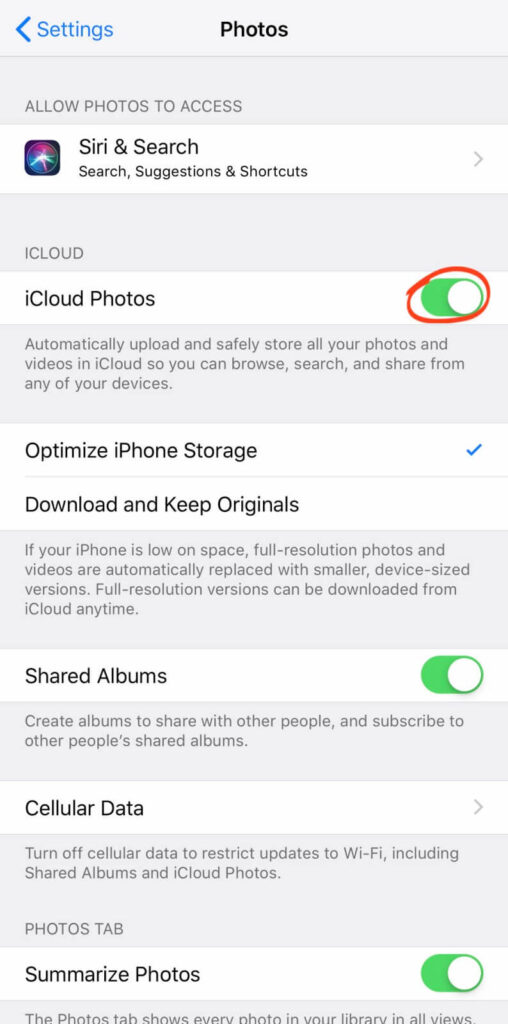
- Now, whenever you click a picture on your iPhone, it will automatically upload to iCloud while you are connected to WiFi.
- Next, you have to download the iCloud for Windows app on your PC. It is a free app that you can download from Microsoft App Store or Apple website.
- Once the iCloud for Windows app is installed, sign in using your Apple ID.
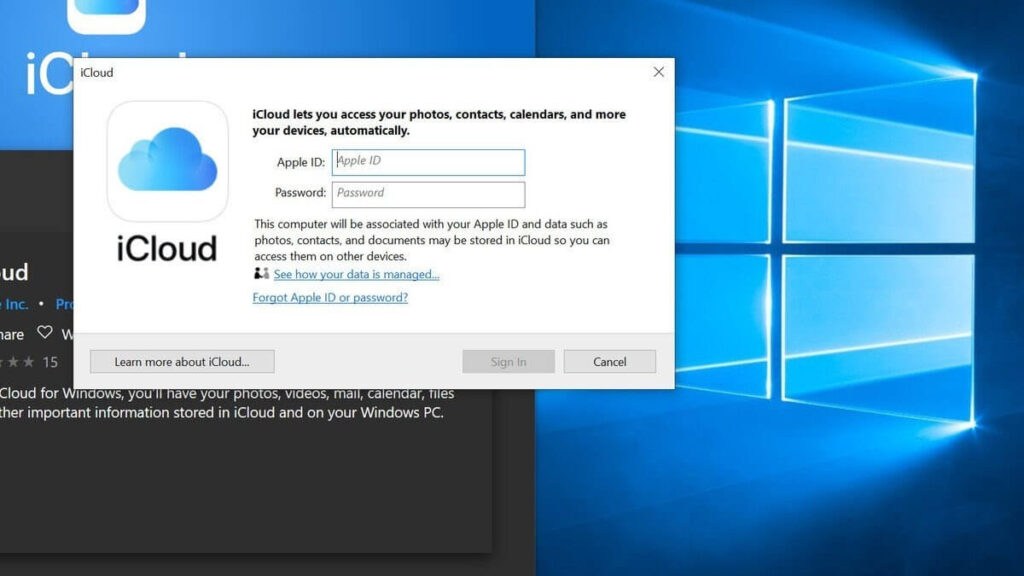
- Ensure to put a checkmark next to Photos and then tap on the Options button.
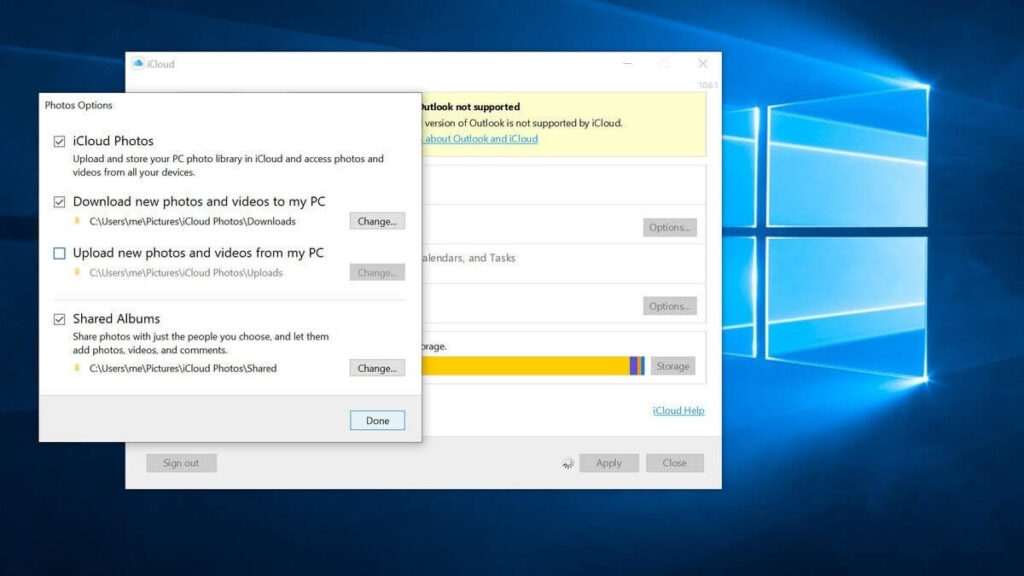
- Click on the iCloud Photo Library and Download new photos and videos to my PC options. Further, you can also check the Upload new photos and videos from my PC option to automatically upload photos and videos from your PC to your iCloud account.
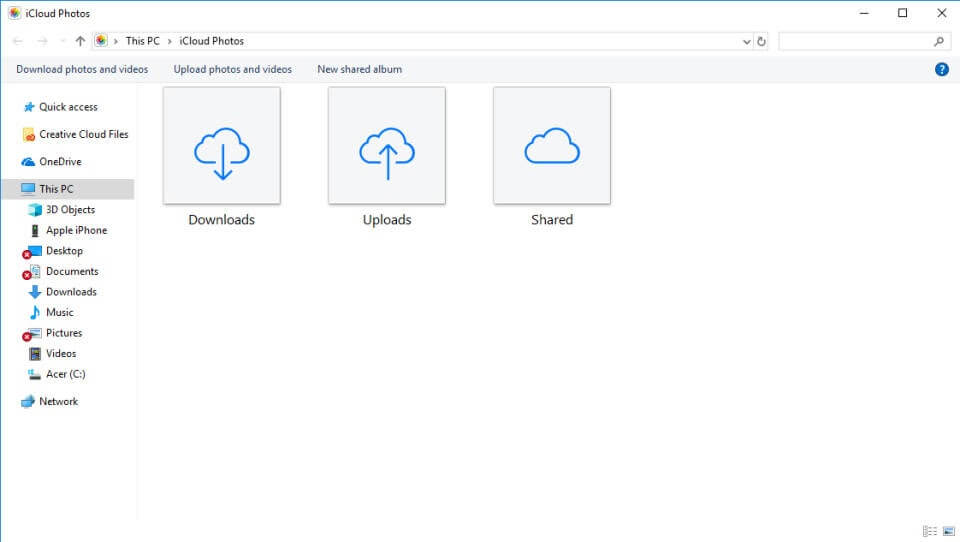
- Click Done and Apply.
Now, whenever you are connected to WiFi, all your iPhone photos will automatically download to your PC. To retrieve downloaded photos, you have to use File Explorer (a process already disclosed above).
4. How to Import Photos from iPhone to Windows 10 Using iCloud.com
For iCloud users, there’s also an option to import photos from iPhone to Windows 10 via iCloud.com. For that:
- On your iPhone, go to Settings > Photos > iCloud Photos and activate it.
- On your computer, open a web browser and go to iCloud.com.
- Sign in using your Apple ID and password. If you use two-factor authentication on your iPhone, you have to enter a six digits code on your PC.
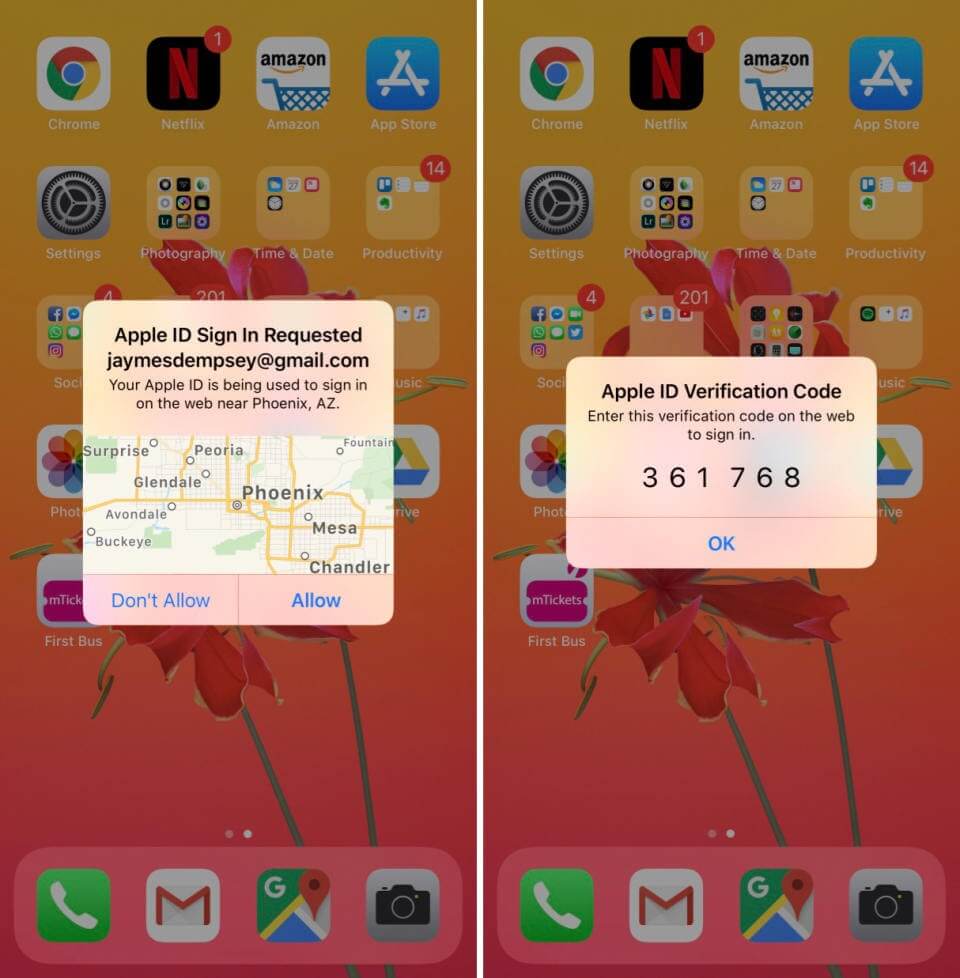
- From iCloud.com, click on the Photos.
- Now, you can access your iPhone photos library on your PC.
- From the left-hand sidebar, click on Media Type to access your iPhone photos.
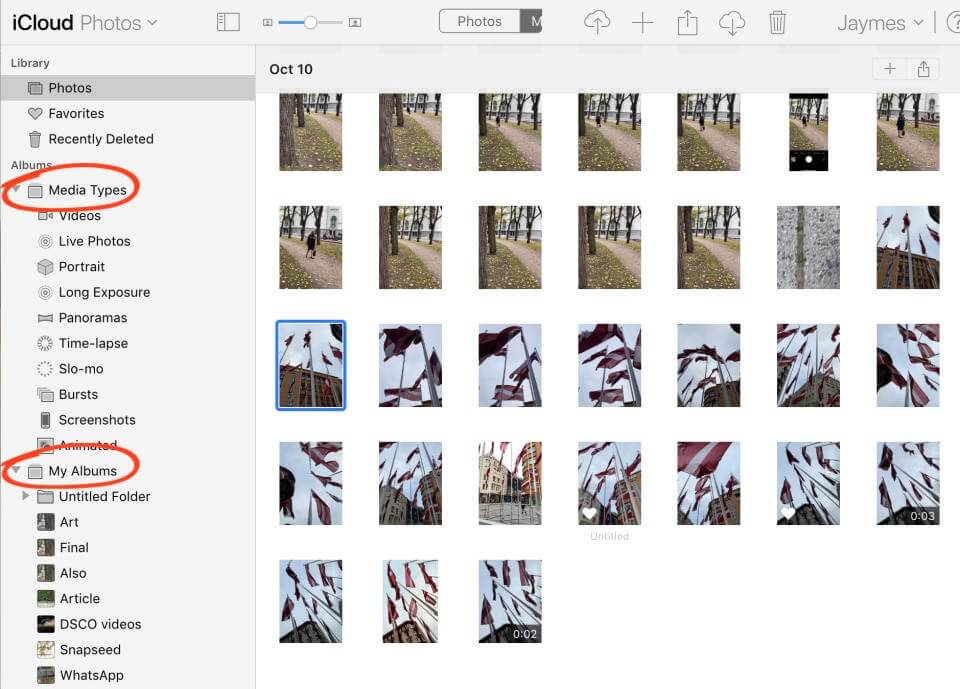
- Select photos that you wish to download to your PC and then, click on the Download icon at the top of the screen.
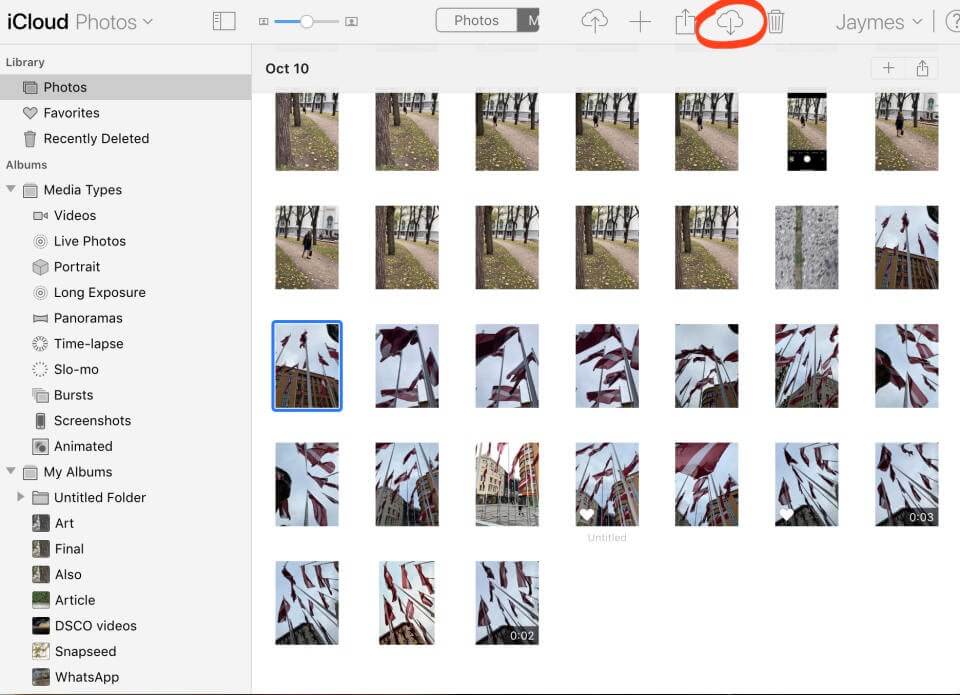
- Your downloaded photos will appear in the Downloads folder. From here, you can move photos to the Photos folder.
5. How to Import Photos from iPhone to Windows 10 Using Third-party Tools
You can also use various third-party tools to import photos from iPhone to Windows 10. Every tool follows different directions to import pictures that you should check before using it. However, we can give you an overview by using EaseUS MobiMover:
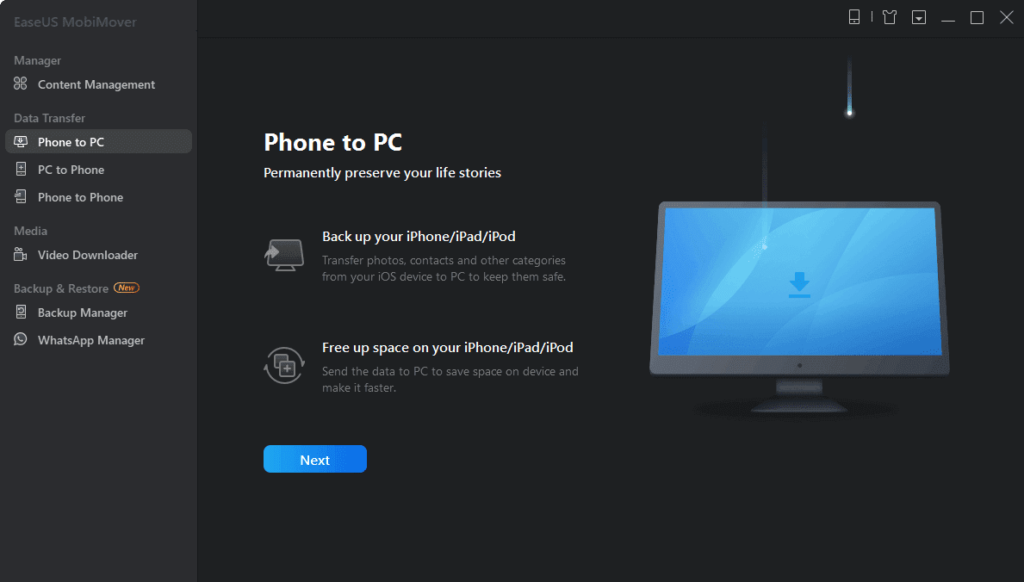
- Connect your iPhone to PC, run EaseUS MobiMover on your PC, select the ‘Phone to PC,’, and then click on the Next button.
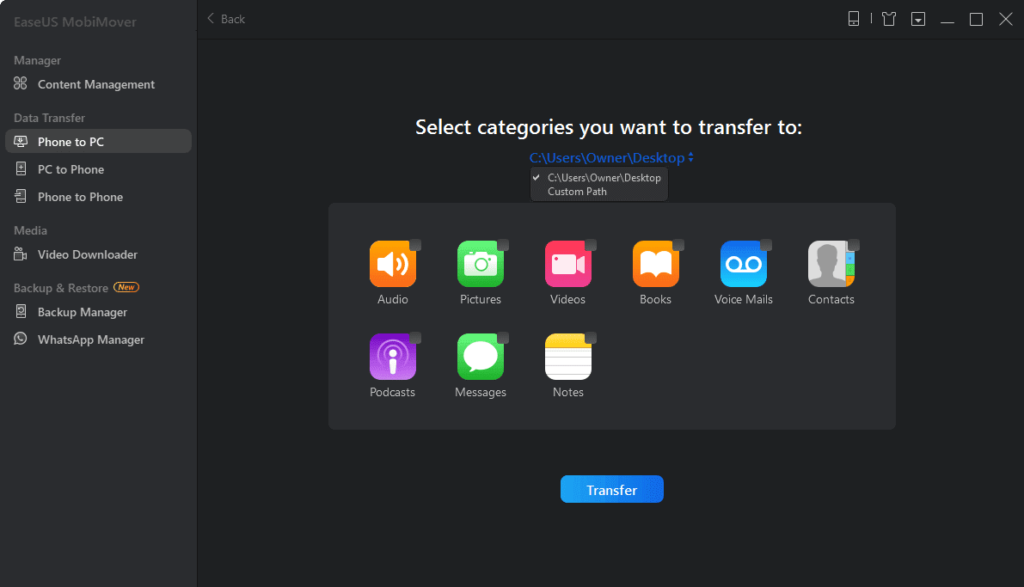
- Select the ‘Pictures’ only as the tool transfers all types of media files, including books, contacts, audio files, etc.
- Next, click on the Transfer button, and photos will start transferring from your iPhone to PC.
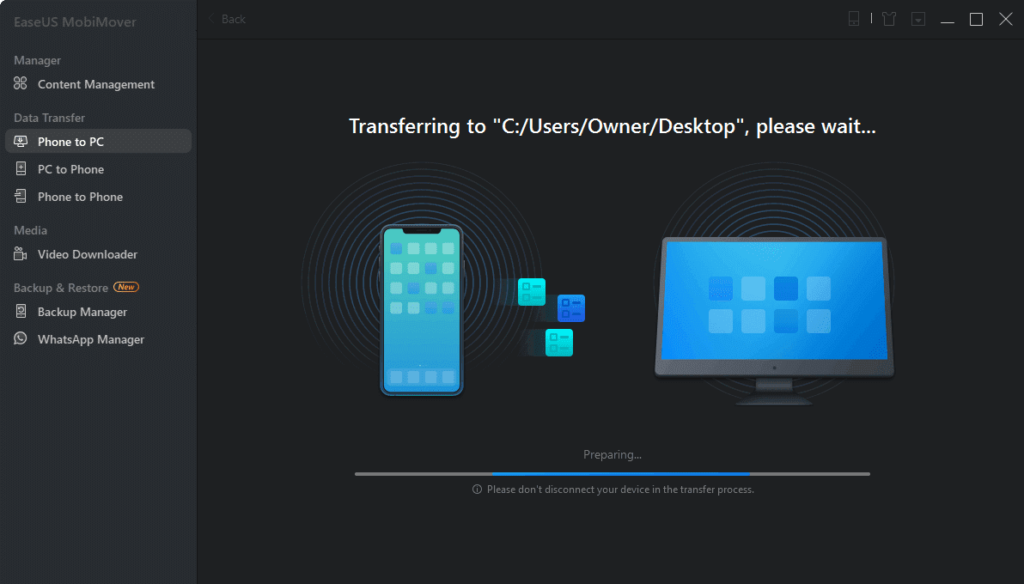
- Based on the file size, your photo transfer process will complete within a few minutes.
Can’t Import Photos from iPhone to Windows 10
Despite following simple steps, if you can’t import photos from iPhone to Windows 10, you should try these solutions:
iTunes Apple Mobile Device USB Driver Not Installed
If you find the down arrow next to Apple Mobile Device USB driver name, it means that it isn’t successfully installed. And, this is the reason behind photos not importing between iPhone and PC. To fix this problem, you can manually update the driver or can download automatic driver updating tools like AVG on your PC. The tool will ensure that all your Windows 10 drivers always stay up to date.
Photos Are in HEIFs Format
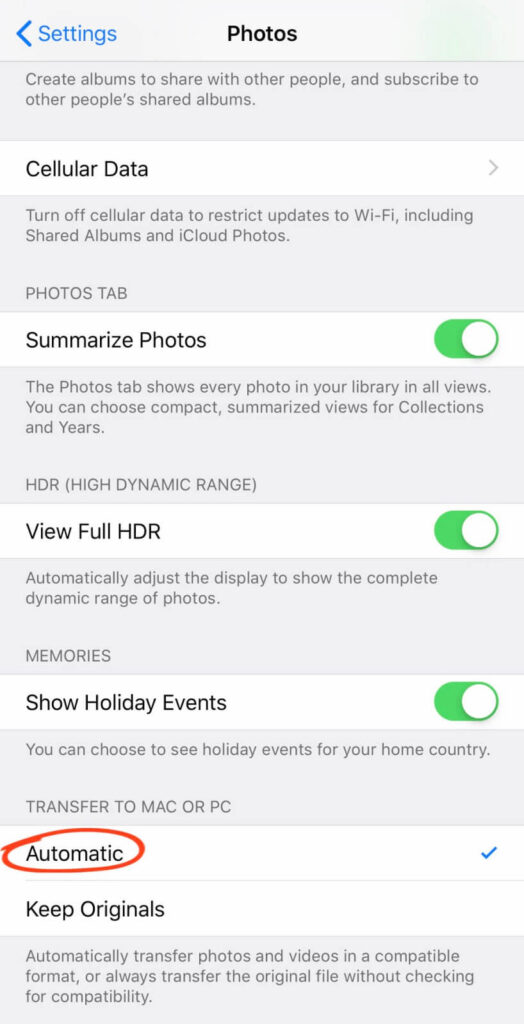
iPhones support a new image format called HEIFs. If your photos end with .HEIC, you can’t access them via File Explorer on your PC. Therefore, make sure that your iPhone automatically converts HEIF photos to JPEGs before importing them to your PC. To do so, open iPhone Settings > Photos > check Automatic under Transfer To Mac Or PC.
Unlock iPhone
If you have never synced your iPhone and computer before, make sure that your iPhone is unlocked before transferring photos. Enter your iOS password to unlock your iPhone for a smooth transfer.
Outdated OS
From your iOS to your Windows 10 OS, everything needs to be updated to the latest version to smoothly import photos from iPhone to Windows 10. If you are using iTunes or any other third-party tools to import photos, also update them. Go to your system settings to check whether a new update is available for your device or not.
Check a USB Cable
Ensure that your USB cable is working properly. If there’s any crack or dust present on your USB cable, it might cause problems while connecting the iPhone to Windows 10. Additionally, if you are using a third-party cable, it can cause connection problems too. Therefore, if your original iPhone USB cable isn’t working properly, use the iCloud method to import photos from iPhone to Windows 10.
Let’s Import Photos!
So, folks, after knowing how to import photos from iPhone to Windows 10 in five different ways, you are ready to import your iPhone photos. You just need to follow all the instructions to the dot, and you can seamlessly import photos.
However, if you get stuck somewhere while transferring photos, you can refer to troubleshoots we have already shared, or you can comment below. So, let’s import your iPhone photos to your PC now and keep on sharing and liking our posts.
Popular Post
Recent Post
How to Troubleshoot Xbox Game Bar Windows 10: 8 Solutions
Learn how to troubleshoot and fix issues with the Xbox Game Bar not working on Windows 10. This comprehensive guide provides 8 proven solutions to resolve common problems.
How To Record A Game Clip On Your PC With Game Bar Site
Learn how to easily record smooth, high-quality game clips on Windows 11 using the built-in Xbox Game Bar. This comprehensive guide covers enabling, and recording Game Bar on PC.
Top 10 Bass Booster & Equalizer for Android in 2024
Overview If you want to enjoy high-fidelity music play with bass booster and music equalizer, then you should try best Android equalizer & bass booster apps. While a lot of these apps are available online, here we have tested and reviewed 5 best apps you should use. It will help you improve music, audio, and […]
10 Best Video Player for Windows 11/10/8/7 (Free & Paid) in 2024
The advanced video players for Windows are designed to support high quality videos while option to stream content on various sites. These powerful tools support most file formats with support to audio and video files. In this article, we have tested & reviewed some of the best videos player for Windows. 10 Best Videos Player […]
11 Best Call Recording Apps for Android in 2024
Whether you want to record an important business meeting or interview call, you can easily do that using a call recording app. Android users have multiple great options too. Due to Android’s better connectivity with third-party resources, it is easy to record and manage call recordings on an Android device. However it is always good […]
10 Best iPhone and iPad Cleaner Apps of 2024
Agree or not, our iPhones and iPads have seamlessly integrated into our lives as essential companions, safeguarding our precious memories, sensitive information, and crucial apps. However, with constant use, these devices can accumulate a substantial amount of clutter, leading to sluggish performance, dwindling storage space, and frustration. Fortunately, the app ecosystem has responded with a […]
10 Free Best Barcode Scanner for Android in 2024
In our digital world, scanning barcodes and QR codes has become second nature. Whether you’re tracking packages, accessing information, or making payments, these little codes have made our lives incredibly convenient. But with so many barcode scanner apps out there for Android, choosing the right one can be overwhelming. That’s where this guide comes in! […]
11 Best Duplicate Contacts Remover Apps for iPhone in 2024
Your search for the best duplicate contacts remover apps for iPhone ends here. Let’s review some advanced free and premium apps you should try in 2024.
How To Unsubscribe From Emails On Gmail In Bulk – Mass Unsubscribe Gmail
Need to clean up your cluttered Gmail inbox? This guide covers how to mass unsubscribe from emails in Gmail using simple built-in tools. Learn the best practices today!
7 Best Free Methods to Recover Data in Windows
Lost your data on Windows PC? Here are the 5 best methods to recover your data on a Windows Computer.
