How to Clean & Optimize Mac to Speed up Performance
If you are short on time:
Manually cleaning disk storage could be an option, but it consumes a lot of time & efforts. To save time and get accurate results, it is always suggested to use the best Mac cleaner software. These smart cleaning software helps you clean & optimize Mac to speed up performance. One such tool is CleanMyMac X that offers advanced cleaning modules to free up disk space on Mac. You can download this powerful Mac cleaner now:
Overview
If your Mac is running slow, then it is time to clean & optimize it for better performance. The primary reasons behind sluggish Mac performance could be over occupied disk space, software & hardware issues, malware issues, and device settings issues. Now that we know over occupied disk space is one possible reason behind slow system performance, you should consider cleaning & optimizing disk storage for seamless Mac performance.
What is the solution to clean disk space in Mac?
As we have discussed, using the best Mac cleaner software is the easiest & safest solution to boost Mac performance, next thing you should try is manual cleaning. In this article, we have discussed multiple ways to clean & optimize Mac following built-in features & utilities.
Ways to Disk Clean up & Optimize Mac
The primary steps to clean Mac includes cleaning up disk storage using built-in features, emptying Trash, uninstalling unnecessary apps & programs, managing login items, and cleaning cache files. Let’s discuss more methods here.
Step 1: Clean up Disk Storage
If you are on macOS Sierra or later versions, then you find a built-in feature to check and manage storage space effortlessly. It helps you check total occupied disk space and also helps you manage it. To free up disk space in Mac, select Apple Menu and go to About This Mac > Storage. Here, you can hover over these pointers to check space occupied by them.

Now to free up disk space in Mac, click on Manage button. Now you will find different recommendations to clean & optimize Mac for better performance. It also helps you move your files to iCloud and save space on the local storage driver.
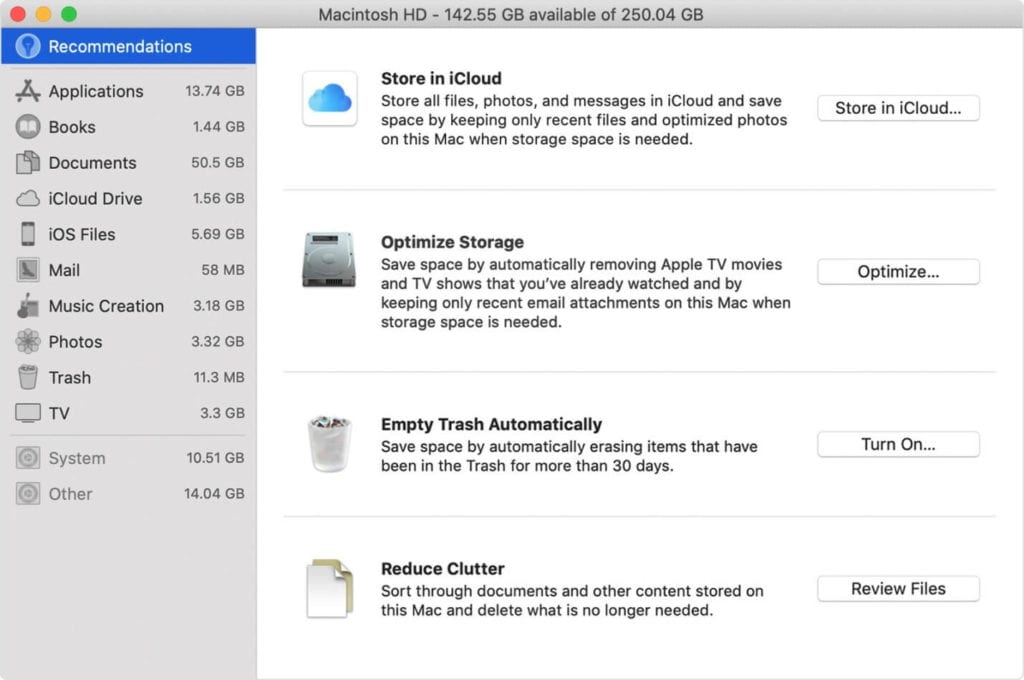
Here, you will find four options to optimize your storage. If you have already turned on some recommendations, then you will see fewer recommendations. These four recommendations include:
- Store in iCloud to move your data to iCloud
- Optimize Storage to remove unnecessary junk from Mac
- Empty Trash Automatically to remove Trash items automatically after 30 days
- Reduce Clutter to manage and delete data that is no longer needed.
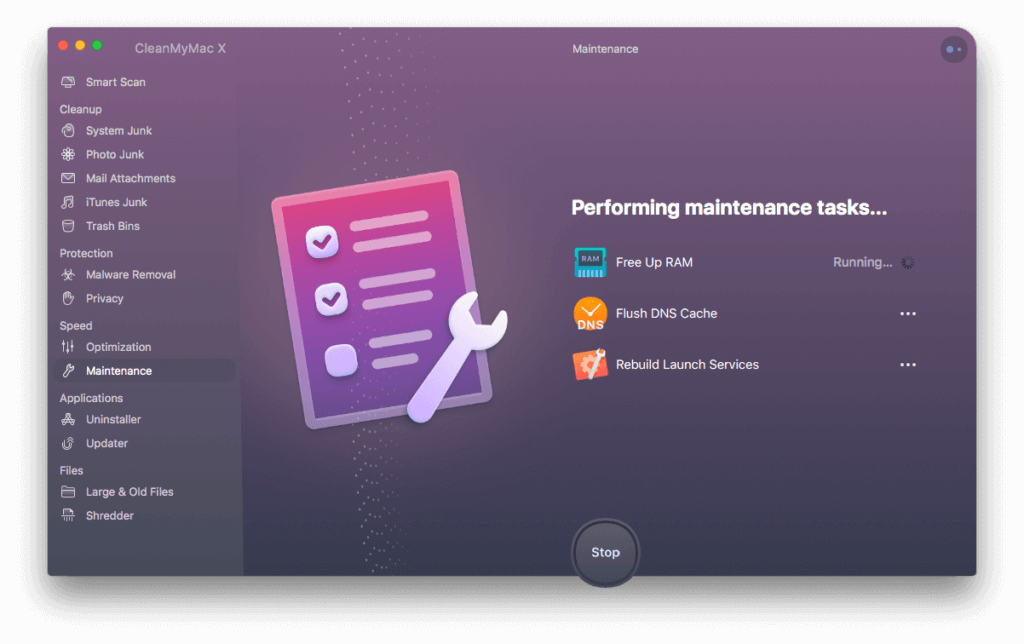
Now if you find manual cleaning tool complicated task, then we suggest using the best Mac cleaner tools. Working on advanced algorithms, CleanMyMac X helps you clean & optimize Mac to speed up performance. It is compatible to all Mac versions. If you are looking for a complete set of cleaning & optimization tools, then consider Setapp to boost your productivity.
Important features of CleanMyMac X
- It helps you remove unused apps.
- You can use CleanMyMac X to empty out the Trash.
- You can compress old files to free up disk space.
- It helps you clean system logs, temporary files, and old iOS backups.
- You can run disk utility to verify and repair Permissions.
- It helps you protect your Mac from malware threats.
Step 2: Empty the Trash
Whatever you delete on your Mac goes directly to the Trash folder. It remains here occupying valuable storage space, until you empty Trash folder or you have set it to clean automatically after specified time. To empty Trash, follow these steps:
- Click and hold on the Trash can icon in the Dock.
- Click Empty and then Empty Bin when prompted.

Step 3: Remove obsolete old Mail Attachments
If you have mistakenly downloaded mail attachments such as images, documents, etc. on your Mac, then it is time to get rid of it to free up valuable disk space. To do this, press Command + Space to make the search field appear. Here, you need to type Mail Downloads to check these obsolete downloads in the Mail Downloads folder. Now open the folder and find & delete all junk files.

Step 4: Uninstall Unnecessary Apps
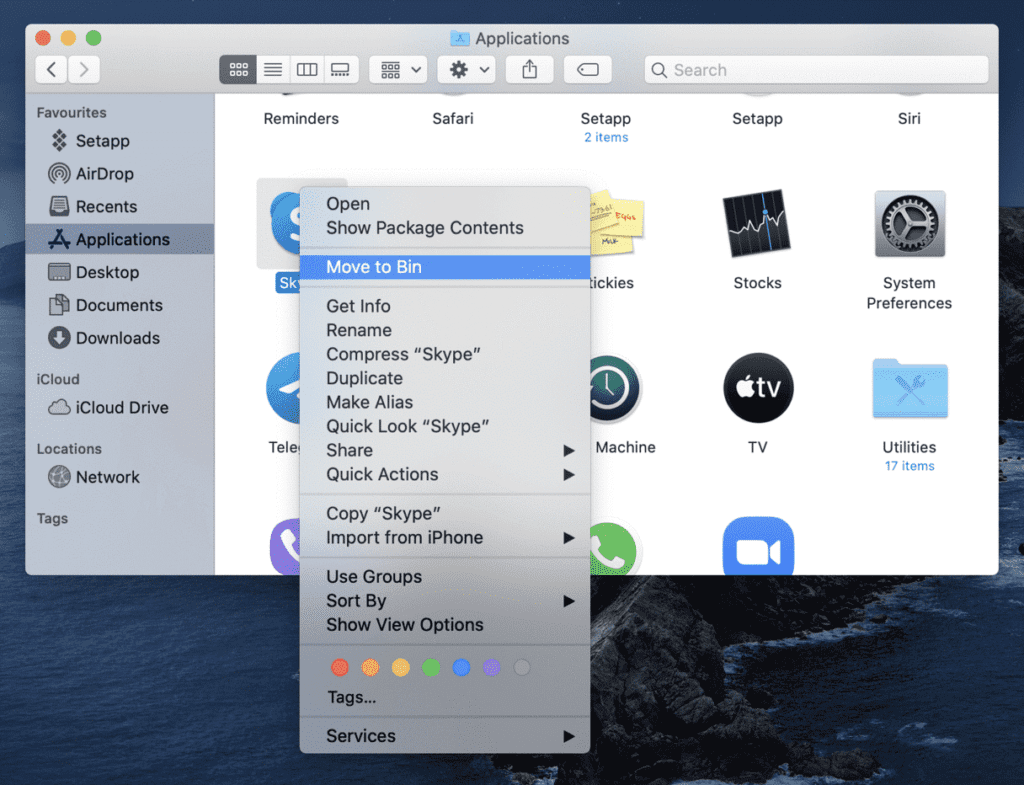
This is another effective step to clean and optimize Mac to speed up performance. You install a lot of apps over a period of time and stop using many of them after some time. To uninstall unnecessary apps on Mac, follow these steps:
- Open Finder and select Applications.
- Select the app that you want to delete.
- Once selected, press Command + Delete.
- Now open Trash and Empty it to remove the app completely.
Even though the app is uninstalled, still there remain certain associated files of the app on your system. It not only occupied valuable disk space, but it also affects your system performance negatively. To get rid of this digital junk, you can consider using CleanMyMac X for deep cleaning.
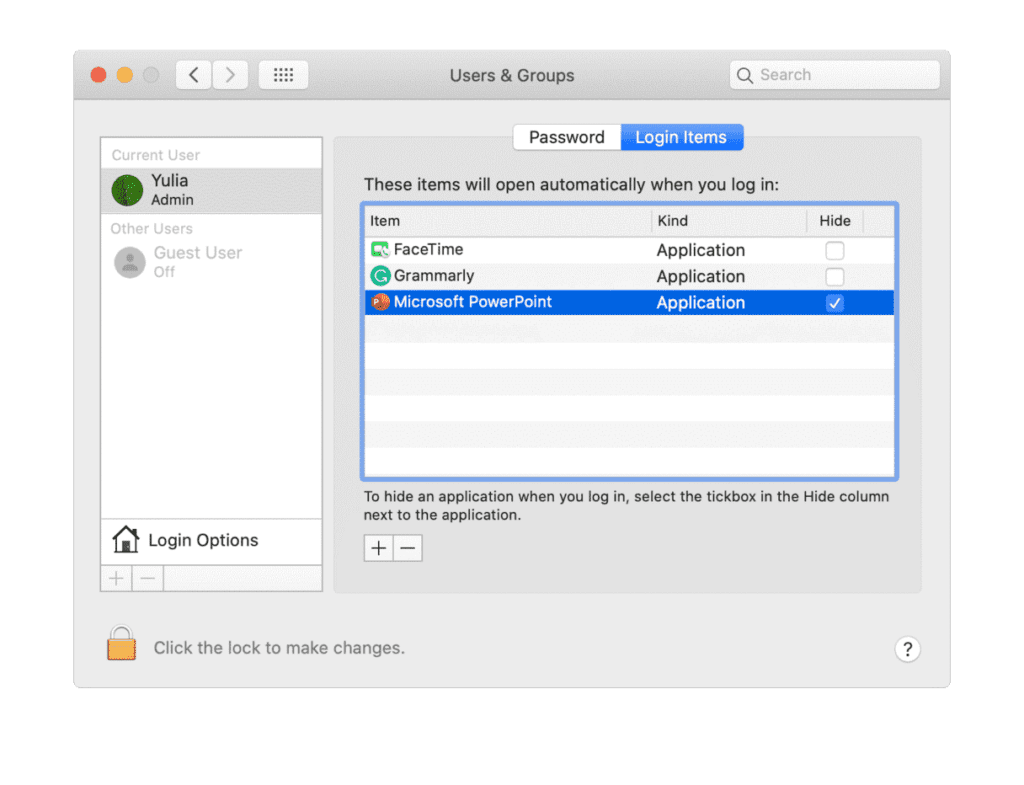
Step 5: Manage Login Items
A lot of applications run during startup unnecessarily causing long boot time. You can remove these applications from login items to save system resources. To do this, follow these steps:
- Go to System Preferences > Users & Groups.
- Select your nickname on the right.
- Select Login Items tab.
- Select the program that you want to remove.
- Once selected press the “-“ sign below.
Step 6: Clear Cache
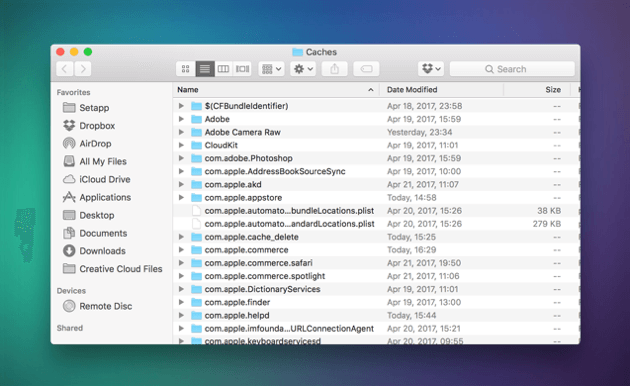
Cache files accumulate in tons on your system and occupy GBs of disk space. To delete user cache files on Mac, follow these steps:
- Select Go to Folder in the Go menu in Finder.
- Now type ~/Library/Caches and hit enter.
- Now copy all the content from here to different folder in case you need it later if something goes wrong.
- Next is to open each folder and clean out everything from it.
Note: Remember you need to clean content within the folders not the folders itself.
Next, you need to repeat the same steps above, by substituting:
~/Library/Caches with /Library/Caches
Once done empty the Trash and restart your Mac. Now your system will create fresh cache files.
Step 7: Delete old DMGs
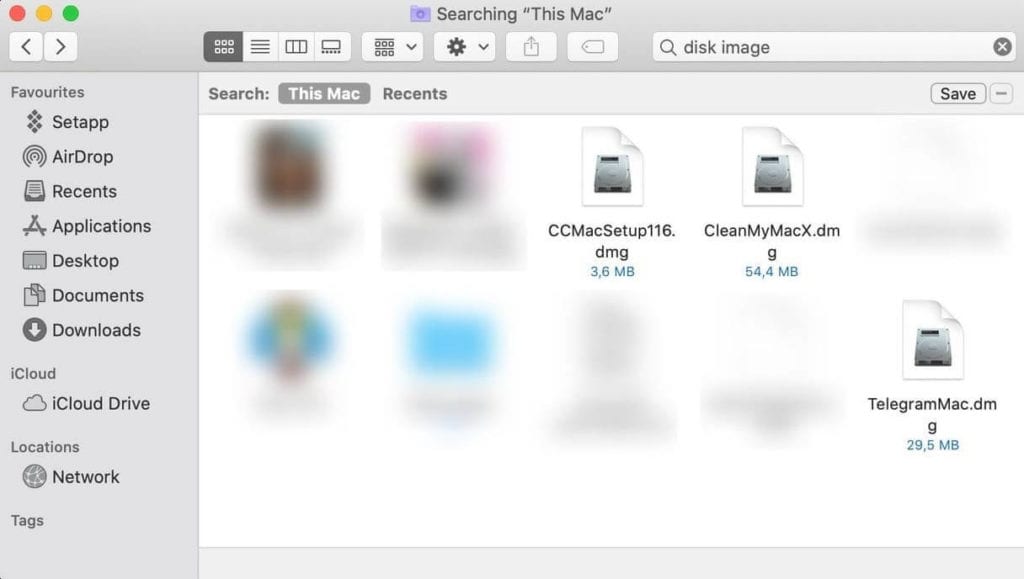
Disk Image files are next space hogs that occupy a lot of space. To clean these unnecessary junk files, open Finder, type disk image and press Enter. On the window that appears, you need to delete all files with .dmg extension. Once done, empty your Trash.
Step 8: Remove Duplicates and other Junk Files
The last step you should follow is to delete other junk files on your Mac. It may include duplicate files, old iOS backups, obsolete large files, old downloads, and more. To delete old iOS backups, go to Apple menu > About This Mac > Storage. Click the Manage button and select iOS files. Next is to select the old backup files that you wish to delete and click Delete.
If you are looking for instant results, you can use Gemini 2 that helps you find & delete all duplicate files automatically. You can use this app to recover disk space instantly.
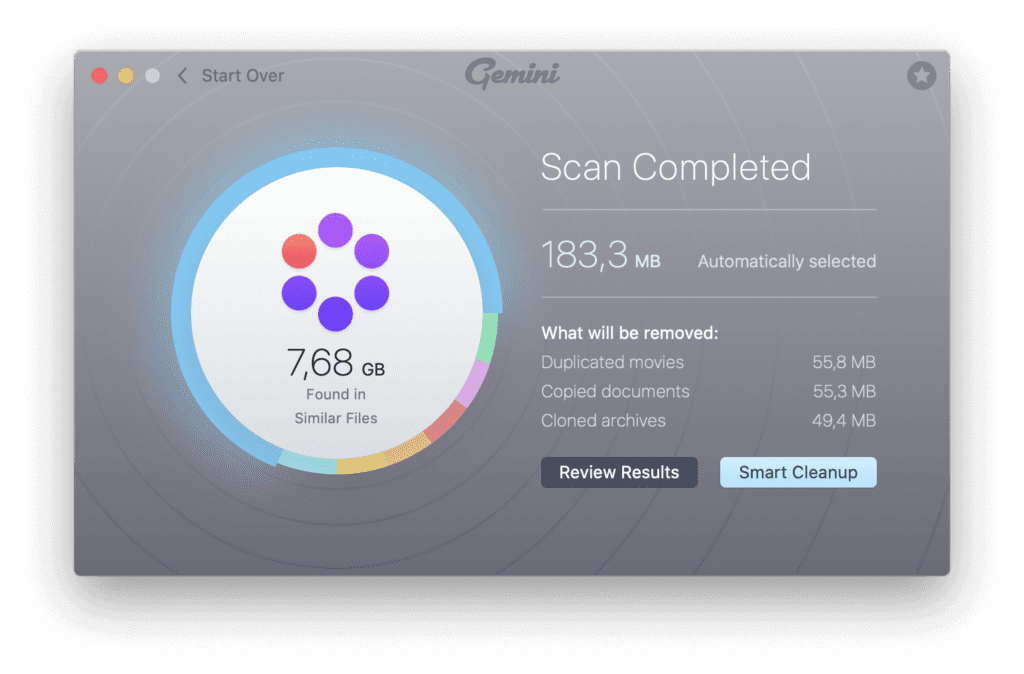
To delete other junk files, you can always use CleanMyMac X. If you are on Windows, you can try CleanMyPC that is also offered by MacPaw.
Conclusion
Now this was a quick discussion on how to clean & optimize Mac to speed up performance. Do try these steps and don’t forget to share your experience in the comments below.
Popular Post
Recent Post
How to Troubleshoot Xbox Game Bar Windows 10: 8 Solutions
Learn how to troubleshoot and fix issues with the Xbox Game Bar not working on Windows 10. This comprehensive guide provides 8 proven solutions to resolve common problems.
How To Record A Game Clip On Your PC With Game Bar Site
Learn how to easily record smooth, high-quality game clips on Windows 11 using the built-in Xbox Game Bar. This comprehensive guide covers enabling, and recording Game Bar on PC.
Top 10 Bass Booster & Equalizer for Android in 2024
Overview If you want to enjoy high-fidelity music play with bass booster and music equalizer, then you should try best Android equalizer & bass booster apps. While a lot of these apps are available online, here we have tested and reviewed 5 best apps you should use. It will help you improve music, audio, and […]
10 Best Video Player for Windows 11/10/8/7 (Free & Paid) in 2024
The advanced video players for Windows are designed to support high quality videos while option to stream content on various sites. These powerful tools support most file formats with support to audio and video files. In this article, we have tested & reviewed some of the best videos player for Windows. 10 Best Videos Player […]
11 Best Call Recording Apps for Android in 2024
Whether you want to record an important business meeting or interview call, you can easily do that using a call recording app. Android users have multiple great options too. Due to Android’s better connectivity with third-party resources, it is easy to record and manage call recordings on an Android device. However it is always good […]
10 Best iPhone and iPad Cleaner Apps of 2024
Agree or not, our iPhones and iPads have seamlessly integrated into our lives as essential companions, safeguarding our precious memories, sensitive information, and crucial apps. However, with constant use, these devices can accumulate a substantial amount of clutter, leading to sluggish performance, dwindling storage space, and frustration. Fortunately, the app ecosystem has responded with a […]
10 Free Best Barcode Scanner for Android in 2024
In our digital world, scanning barcodes and QR codes has become second nature. Whether you’re tracking packages, accessing information, or making payments, these little codes have made our lives incredibly convenient. But with so many barcode scanner apps out there for Android, choosing the right one can be overwhelming. That’s where this guide comes in! […]
11 Best Duplicate Contacts Remover Apps for iPhone in 2024
Your search for the best duplicate contacts remover apps for iPhone ends here. Let’s review some advanced free and premium apps you should try in 2024.
How To Unsubscribe From Emails On Gmail In Bulk – Mass Unsubscribe Gmail
Need to clean up your cluttered Gmail inbox? This guide covers how to mass unsubscribe from emails in Gmail using simple built-in tools. Learn the best practices today!
7 Best Free Methods to Recover Data in Windows
Lost your data on Windows PC? Here are the 5 best methods to recover your data on a Windows Computer.


