


A slow computer makes it hard to focus. Programs take too long to open. Free space keeps shrinking until the disk is almost full. This happens to most PC owners at some point. Even new machines can slow down after a while. That is the exact problem cleanup tools are built to solve. They comb […]
10 Ways To Fix No DP Signal From Your Device Dell Monitor
Introduction:
Experiencing the dreaded “No DP Signal from your device Dell monitor” can be a frustrating ordeal, halting your productivity or entertainment plans. Fear not, as there are effective solutions to tackle this vexing problem.
In this comprehensive guide, we’ll explore ten practical ways to troubleshoot and resolve the “No DP Signal” error on your Dell monitor. These step-by-step solutions will help you get your display back up and running in no time, ensuring a seamless and uninterrupted computing experience.
What is a DisplayPort?
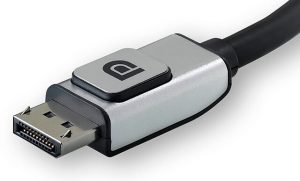
DisplayPort (DP), an interface crafted by the Video Electronics Standards Association (VESA), serves as a digital display connection. Its purpose is to link a video source, such as a computer, to a display device, such as a monitor. With the capability to transmit both audio and video signals, DisplayPort facilitates high bandwidth transfers and delivers uncompressed audio and video.
What Causes the No DP Signal From Your Device Dell Monitor Error?
Some common causes for DisplayPort not working properly on a Windows PC include loose cable connections, outdated drivers, graphics card issues, incorrect display settings, and hardware malfunctions. When using a Dell monitor specifically, you may encounter the ‘No DP Signal from your device’ error message if there is a problem with the DP connection.
In this article, we will provide 10 effective solutions to fix the ‘No DP Signal from your device’ error on a Dell monitor.
How to Fix the No DP Signal From Your Device Dell Monitor Error?
Following proper troubleshooting steps can help identify and resolve the underlying cause, restoring full DP functionality.
1. Unplug and Reconnect the DisplayPort Cable
One of the first things to try when there is no DisplayPort signal is to simply unplug the DP cable from both the monitor and PC, wait a few seconds, and then reconnect it properly. This resets the connection and establishes a fresh link between the video source and the display.

Make sure both ends of the cable are inserted completely into the DP ports on the monitor and graphics card. A loose connection can cause signal issues. While reconnecting, also check the cable for any wear, cuts, or bends that may be interrupting the transmission. If there’s damage to the cable, swap it out for a fresh replacement.
2. Restart Your Devices
Restarting the monitor and the connected Windows PC/laptop can help resolve temporary glitches that may be interfering with DisplayPort’s operation.
Power off both devices completely, unplug the power cables and wait 30 seconds before reconnecting. Then, switch them back on and check if the DP signal is now transmitting properly. Running through a reboot helps reset any software or hardware errors that may be causing the problem.
Follow these steps to correctly restart the devices:
- Save any open files and close all programs on the PC before restarting.
- Use the Start Menu > Power options to shut down the computer.
- Disconnect the power and DP cables from both the monitor and PC.
- Wait for 30 seconds minimum to allow hardware discharge.
- Reconnect the power and DP cables properly at both ends.
- Switch on the monitor power and then boot up the PC.
- On monitor OSD, select DisplayPort as the video input source.
3. Use a Different DisplayPort Cable
Faulty cables are one of the most common reasons for DisplayPort connectivity issues. If restarting does not work, try replacing the existing DP cable with a different one known to be working properly. Make sure it is a certified DisplayPort cable. Also, test connecting the monitor to another PC/laptop if available to isolate the fault.
Things to check when using a different DisplayPort cable:
- Confirm both cable ends are DisplayPort, not HDMI or other ports.
- Inspect the cable thoroughly for cuts, fraying, or bent pins.
- Ensure a secure connection when inserting cable at both ends.
- Verify if the cable is DisplayPort certified for high resolutions and refresh rates.
- Test cable with different monitors and PCs to isolate any device faults.
- Check DisplayPort source settings if connecting a new external display device.
If the monitor now receives a DP signal from another cable or device, it indicates the problem lies with the previous cable or video source device. However, if the same No DP signal from your device Dell monitor error persists, then the monitor’s DP input port itself may be faulty.
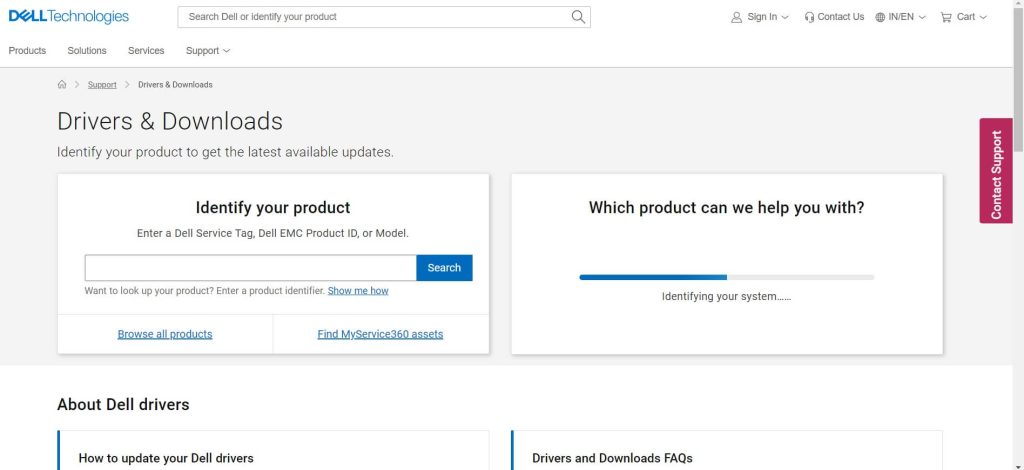
4. Update the Dell Monitor Drivers
Outdated monitor drivers can sometimes lead to various problems including display connectivity errors. Visit the Dell website and check if there is a newer driver available for your specific Dell monitor model. Download and install the latest driver version following the provided instructions. This will update the monitor firmware and ensure optimal performance.
Follow these best practices when updating monitor drivers:
- Note the current driver version before updating for reference.
- Only download drivers from the official Dell website for your monitor model.
- Read release notes for a new driver before installing.
- Disconnect all cables from the monitor before the driver updates.
- Have the monitor directly connected to the PC/laptop, not through a dock.
- Allow sufficient time for driver installation without interrupting.
- Restart monitor and PC after successful driver update.
Also, update the graphics card drivers on your computer to the latest release from Nvidia or AMD. Driver incompatibility issues between the monitor and GPU can affect DisplayPort signal detection.
5. Clear Display Cache
Clearing the display cache and data removes any corrupted files that may be interfering with the DisplayPort operation.
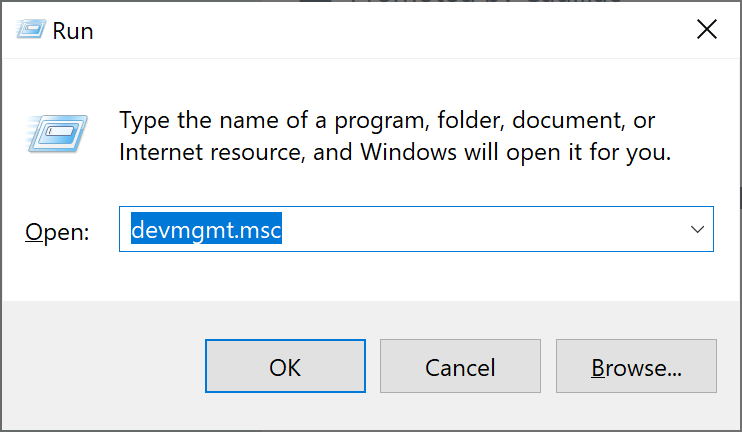
On Windows, open the Run dialog box (Windows + R) and enter “Devmgmt.msc”. In the Device Manager window, expand the Display Adapters section, right-click on your GPU, and select Uninstall device. Check the option to delete driver software as well. Reboot your PC and fresh display drivers will automatically reinstall, clearing up any inconsistencies.
Here are some additional steps to help clear the display driver cache:
- Use dedicated display driver uninstaller software to completely remove GPU drivers.
- In Safe Mode, run the DISM and sfc /scannow commands to repair system files.
- Update Windows to the latest version if pending updates are available.
- Reset Windows display settings to defaults.
- Remove duplicate display entries in Device Manager.
- Turn off Fast Startup and Hibernation to perform complete shutdowns.
6. Select the Correct Input Source
Modern monitors allow you to connect multiple input sources like HDMI, DVI, and DisplayPort at the same time. If you have connected devices using different ports, ensure that the monitor’s input source is set to the port you want to use.
Most Dell monitors feature an Input Select button to toggle between available video inputs. Press it to choose the correct DP input that your PC/laptop is connected to. The monitor OSD menu also has an Input Source option to switch between inputs.
7. Update Graphics Driver
The graphics card driver plays an important role in establishing proper communication and signal connectivity between the GPU and monitor. An outdated graphics driver can easily lead to loss of DP signal issues. Here are the steps to update graphics drivers on Windows:
- Right-click on the Windows button and select “Device Manager” from the menu that appears.
- In Device Manager, find and expand the “Display adapters” category. This will display your graphics card.
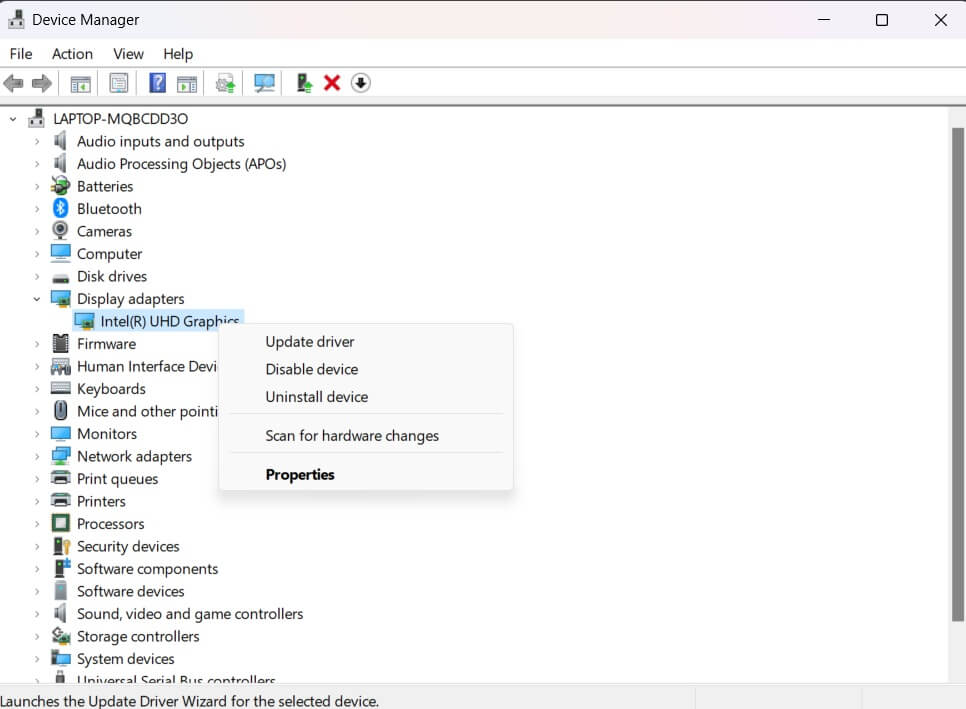
- Right-click on your graphics card and select “Update driver.
- Choose the option that allows Windows to search automatically for updated driver software. Windows will then search online for the latest driver software and install it if found.
After the driver update is complete, it’s a good idea to restart your computer to ensure the changes take effect.
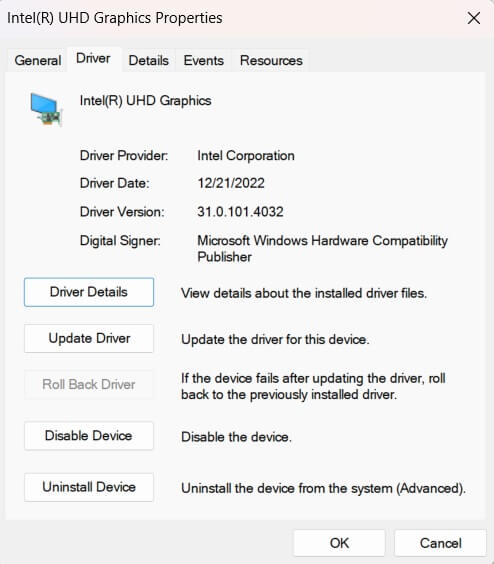
8. Roll Back Graphics Driver
If updating the graphic drivers did not help, the new driver itself may be causing problems. In such cases, rolling back to the previous graphics driver is worth a try.
On Windows, go to Device Manager > Display adapters, right-click on GPU, and select Properties > Driver tab. Click on Roll Back Driver to revert the driver and see if it solves your DisplayPort signal problem as a result.
Here are some additional tips for rolling back display drivers:
- First, use DDU to fully remove the latest display driver and install the older driver cleanly.
- In Device Manager, click on View > Show hidden devices to expose all adapters.
- If the Roll Back option is grayed out, uninstall the driver and Scan for hardware changes.
- You can also restore to a system restore point created before updating the driver.
9. Test with a Different Monitor
Connect a different monitor to your computer or connect your Dell monitor to another device. This helps determine if the issue is with the monitor or the device’s output.
Try connecting your Dell monitor to a different device, such as another computer, laptop, gaming console, or any compatible device. Ensure you use the same type of connection (DisplayPort) to test.
If your Dell monitor successfully displays content from the alternate device, it suggests that the monitor itself is functioning correctly.
10. Contact Dell Customer Service
At this point, if you still have not resolved the ‘No DP Signal from your device’ error, it is best to contact Dell support regarding the issue. Explain exactly when and how the problem started occurring, the troubleshooting steps attempted, and the laptop/PC/monitor models involved.

Dell support can provide specialized guidance, diagnose hardware faults if any, and arrange for replacement parts or repairs if needed. They can confirm if the issue lies with the monitor specifically and not your PC or cable. Direct support from the manufacturer will help address stubborn DP signal problems.
Here are some tips for contacting Dell customer support:
- Check the service and support section on the Dell website for contact options.
- Have your Dell monitor service tag number handy for reference.
- Clearly describe the issue and troubleshooting steps taken so far.
- Request remote assistance to share your screen and demonstrate the problem.
- If hardware diagnosis is required, discuss carry-in or on-site support.
- Request a replacement monitor if a hardware failure is confirmed.
Conclusion
The blank screen No DP Signal from your device Dell monitor error can certainly be frustrating. However, as seen above, there are various effective troubleshooting steps you can take to identify and resolve the underlying issue. Following proper cable connection protocols, updating drivers, trying different hardware combinations, and directly contacting Dell support will help get your DisplayPort working again on time.
FAQs:
Q1. Why am I suddenly getting no DisplayPort signal on my Dell monitor?
Some common reasons are loose DisplayPort cable connection, faulty or damaged DP cable, outdated graphics drivers, incorrect display settings, GPU or monitor hardware issues, and incompatibility between the video source and display unit.
Q2. Does DisplayPort support audio signal transfer?
Yes, DisplayPort carries both high-definition video and audio signals via the same cable. It can support multi-channel compressed or uncompressed audio transmission.
Q3. Which cable should I use for DisplayPort – HDMI or DP?
Always use a dedicated DisplayPort (DP) cable for connecting DisplayPort-equipped devices. HDMI cables are designed for HDMI ports only and will not work.
Q4. My Dell monitor shows power but no DisplayPort signal.
Try unplugging and reconnecting the DP cable properly at both ends, updating your graphics card drivers, using a different DP cable, directly connecting to your laptop/PC to rule out cable issues, and resetting BIOS settings to default.
Author Bio:
Dinesh Lakhwani 

Dinesh Lakhwani, the entrepreneurial brain behind “TechCommuters,” achieved big things in the tech world. He started the company to make smart and user-friendly tech solutions. Thanks to his sharp thinking, focus on quality and the motto of never giving up, TechCommuters became a top player in the industry. His commitment to excellence has propelled the company to a leading position in the industry.
Popular Post
Recent Post

Fortect Software Review: The Ultimate PC & Mobile Cleaning, Optimization & Security Tool
Slow computers are a common problem for almost every Windows user. Well, yes! Over time, your PC picks up junk files. These files sit quietly in the background. They take up space and slow things down. Programs open slower. Windows takes longer to boot. Even simple tasks like opening a folder can feel sluggish. There […]

CCleaner PC Optimizer Review: A Complete Guide for Windows Users
If your computer has started to feel slow, you are not alone. Most Windows PCs slow down over time. Junk files pile up. The registry gets messy. Too many apps open when you start your PC. All this adds up and makes even a good machine feel tired. This is where a PC cleaner tool […]

5 Best PC Cleaners for Windows 11 & 10 | Top PC Optimizers
Remember when your PC felt fast? Every click was quick. Every app opened in seconds. Now it feels like a different machine. Windows takes forever to boot. Programs freeze for no reason. Even opening a browser feels like a chore. You are not alone in this. Almost every PC slows down over time. Files pile […]

Auslogics Duplicate File Finder: Full Review and User Guide
A computer quietly gathers clutter over time. This includes duplicate photos, repeated downloads, and forgotten backups hiding in random folders. This buildup slowly eats away at storage and can make even a fast PC feel sluggish. Manually finding and deleting duplicates is tedious. It means checking every folder, comparing file names, and guessing which copies […]

CCleaner Duplicate File Finder: Key Features, Pricing, Step-by-Step Guide and More
Every computer collects junk over time. Right? Well, yes! Photos often get copied twice. Documents get saved in two folders by mistake. Old downloads pile up and never get deleted. This slowly eats up your storage space, and most people do not even notice until their drive is almost full. That is where a duplicate […]

Duplicate File Finder Pro: A Complete Review, Everything You Should Know
Computers collect thousands of files over time. Well, yes! Many of them end up being duplicates created by backups, downloads, or accidental copies. These extra files take up valuable storage space and make it harder to keep everything organized. Finding and removing them manually can take hours. Right? Duplicate File Finder Pro is a tool […]
Top 3 Duplicate File Finder for Windows 11 & Windows 10
If your PC storage keeps filling up even after you delete big files, duplicate files could be the real reason. Most of us save the same photo twice, download a document more than once, or copy a whole folder by mistake. Over months and years, these duplicate files pile up quietly. You do not even […]

Monitor Screen Calibration Guide: Everything You Should Know
Your monitor shows colors every single day. But are those colors actually correct? Most people never stop to check this. They just use the screen as it comes out of the box. This habit can lead to wrong colors in photos, videos, and work files. Colors may look too warm or too cold without you […]

How To Check Installed RAM and RAM Slots [Complete Guide]
RAM plays an important role in how smoothly a computer runs. Short for Random Access Memory, it stores the data and instructions that Windows and active applications need at any given moment. From opening multiple browser tabs to running games and productivity software, RAM helps keep everything responsive. A system with limited memory may experience […]

