How To Fix macOS Ventura Update Problems (9 Tips)
Are you excited to use the latest macOS Venture? But unfortunately, you are getting the error message every time you try to update your macOS.
In that case, there is no need to panic. You can easily fix macOS Venture update problems and move to the latest OS.
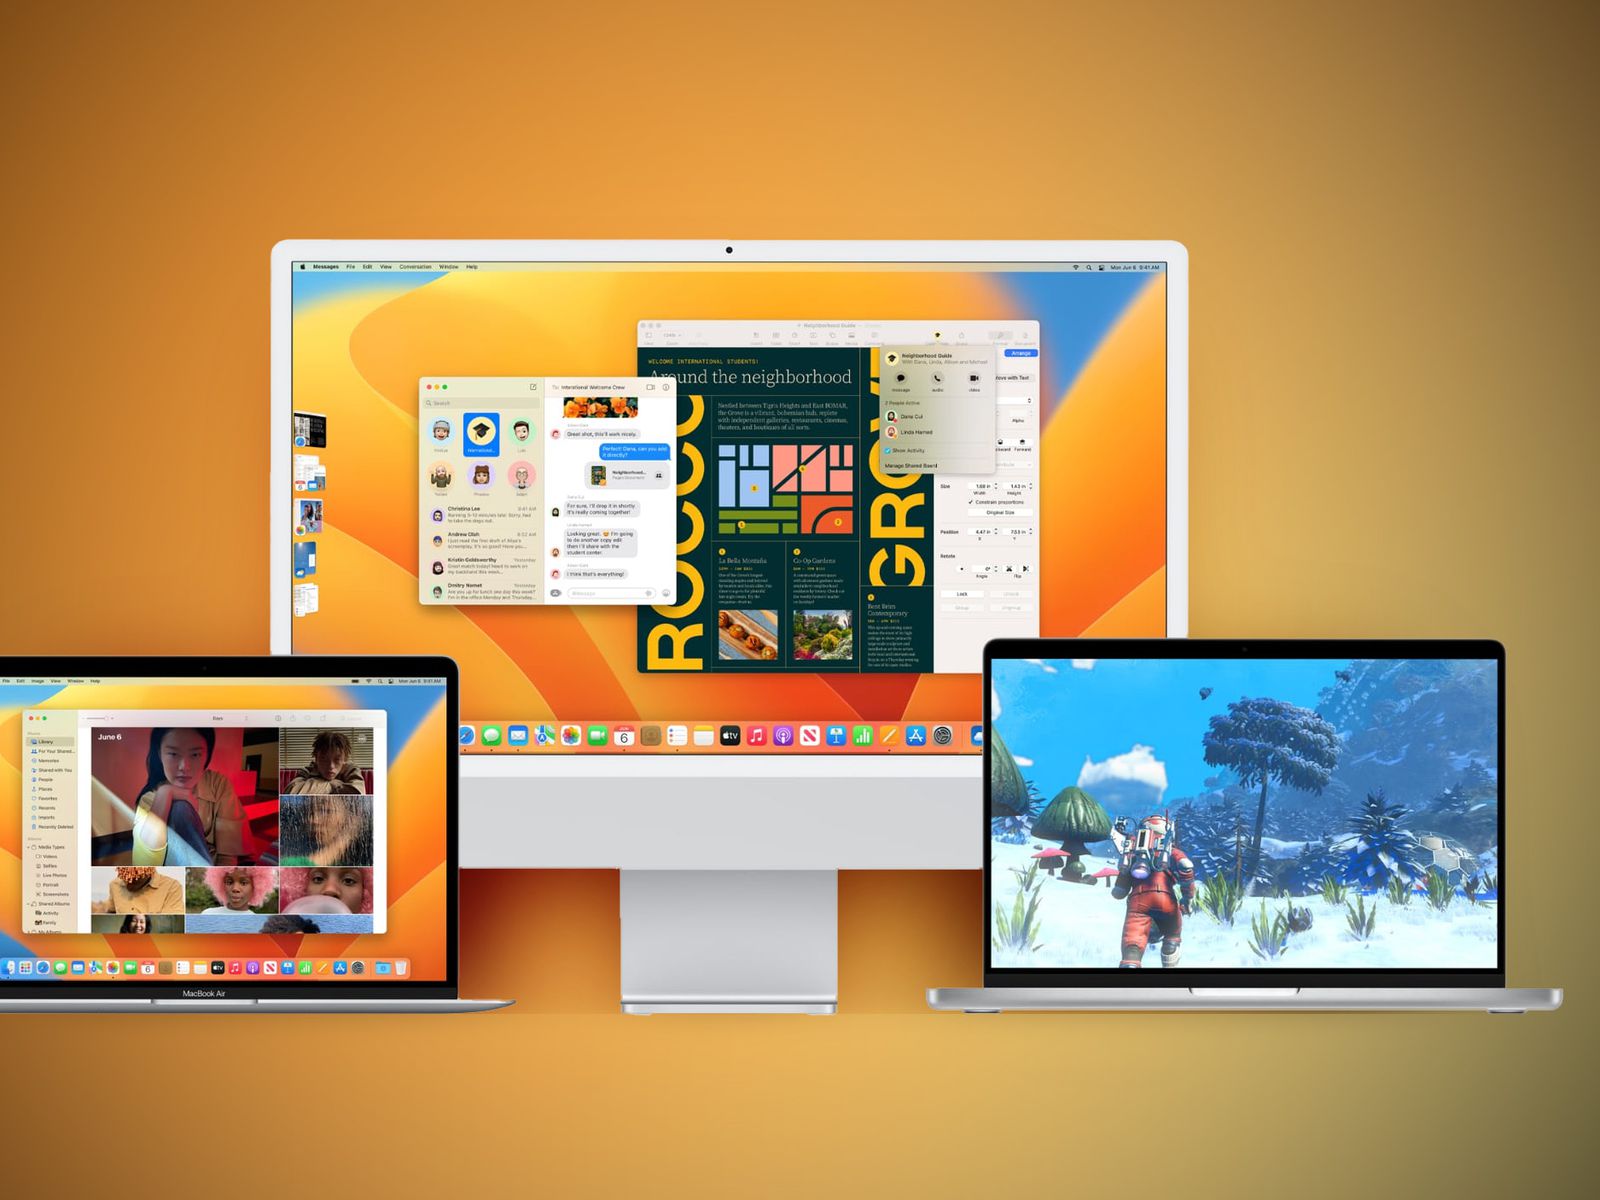
macOS Venture has many new features like Storage Manager, Spotlight, and more. Also, several bug fixes and system improvements are available to enhance the Mac user experience.
So, when you are stuck updating your Mac device, just follow the tips mentioned in this guide.
Why Is Your MacOS Venture Update Stuck?
A macOS Venture update could be stuck for a variety of reasons. They are as follows:
- The new macOS version does not support your Mac.
- Server issues with Apple.
- Insufficient free space on your boot disc.
- You’re having issues with your internet connection.
- Files on your Mac are causing the download and installation process to fail.
We’ll go over each of these possible causes in more detail below.
What Happens When Your MacOS Venture Update Stuck?
Typically, you’ll see an error message stating that the macOS Venture update failed due to a problem. One of the messages can state:
- The macOS installation was unable to be completed.
- An error occurred during the installation of the selected updates.
- Not enough free space is available on the volume to upgrade the operating system.
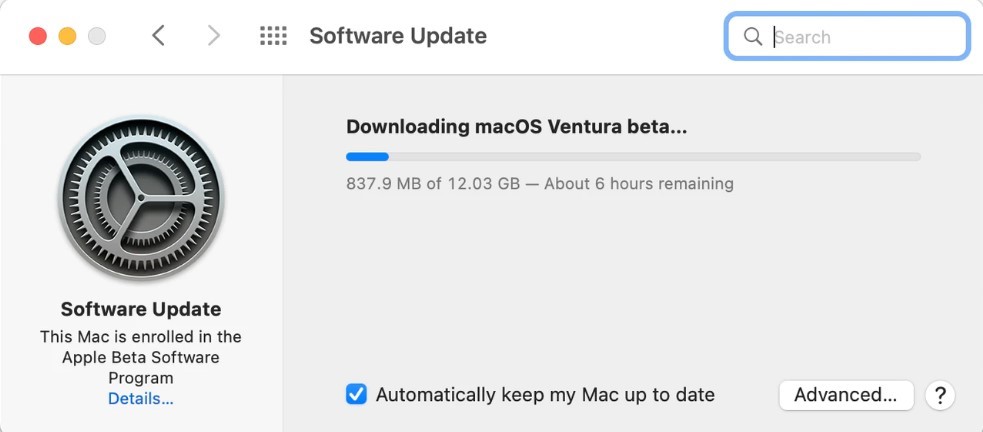
As you can see, some of those messages are more useful than others. You may also notice that while downloading the update, the download is working, but the progress bar never moves.
How to Fix MacOS Venture Update Problems Quickly?
Many times the macOS Venture update stuck is not serious. For example, a simple slow internet connection or low battery can disturb the macOS installation process. But sometimes, the update problems are serious and need a technical fix.
Considering both situations, we instantly created a list to fix macOS Venture update problems. So, follow these tips when macOS updates get stuck:
Tip #1. Ensure Your Mac Device Supports MacOS Venture
Before trying any other solutions, ensure your Mac device is compatible with the macOS Venture. There is a possibility that your Mac is not ready for the new operating software, leading to macOS update errors. So, the best way to fix macOS Venture update problems is to ensure your device is compatible with the new update.
These Mac devices are compatible with downloading the macOS Venture updates:
MacBook 2017 Edition or later
Mac Studio 2022 Edition
MacBook Pro 2017 Edition or later
MacMini 2018 Edition or later
MacBook Air 2018 Edition or later
iMac 2017 Edition or later
iMac Pro 2017 Edition or later
Tip #2. Restart Your Mac Device
People often dislike restarting their computers because they have too many open programs and apps. However, there is a software bug somewhere, and the system software is waiting for the system to restart or reboot. So, turn it off and on using the standard Mac procedure to fix the error:
Step 1. Click on the Apple Logo on your Mac.
Step 2. Then, from the menu, choose “Restart.”
Step 3. Restart your Mac, and wait for the right time to try again to install macOS Ventura.
If your Mac’s screen goes completely black, hold down the Power button for 7 to 10 seconds until you hear the startup sound.
Tip #3. Use the Stable Internet Connection
Installing a new operating system requires stable internet and WiFi access. If your internet connection has WiFi Dropping issues, try another connection.
When the internet WiFi status shows that it is connected but has no access, this is incorrect due to a failed installation. If you are struggling with your ISP (Internet Service Provider), use a friend’s internet service to update your device.
Tip #4. Check the Apple Services Status Page
If any of Apple’s services are experiencing problems, you can learn about them on a page on their website. If a download fails, it’s a good idea to check the Apple System Status page to ensure the problem isn’t with Apple’s servers.
To check the page, do the following:
Step 1. Visit the Apple System Status page on your web browser.
Step 2. Then, look for the macOS Update service.
Step 3. If there is a green color circle in front of the service, all is well. However, the service’s performance may be hampered if that circle is red, indicating a problem preventing the macOS Ventura update.
If the update server is down, you must wait for it to be repaired before trying again. Otherwise, your macOS Venture update will be stuck every time you try.
Tip #5. Update MacOS in the Safe Mode
Safe mode is helpful for troubleshooting startup issues. Only the Kernel extension is loaded when you start your Mac in safe mode. In addition, this mode resolves directory issues, clears the kernel cache, and deletes cache files. Here’s how to update macOS Ventura and start the Mac in safe mode:
Step 1. To begin, turn off Mac by pressing the Power button.
Step 2. To enter safe mode, press the “Power button” while holding down the “Shift key.”
Step 3. Safe Mode and Watermark text can now be found in the upper right-hand corner of the Mac login screen.
Step 4. To update the macOS, use the in-prompt commands.
You can exit safe mode when you restart your Mac after installing macOS successfully.
Tip #6. Reset the NVRAM
Is your macOS Ventura update stuck? Resetting the NVRAM is another option for Intel-powered Mac users in this situation:
Step 1. Turn off your Intel-based Mac.
Step 2. Hold down the “Command,” “Option,” “P,” and “R” keys at the same time.
Step 3. Turn on your Mac without releasing the keys.
Step 4. When you hear the starting chime or the Apple logo for the second time, let go of the keys.
Step 5. Try installing macOS Ventura again.
Tip #7. Free Up Space
After you’ve ruled out everything else, ensure you have enough free disc space to install macOS Ventura. While the installer is only about 12GB, installing it will take about twice that. As a result, ensure your boot drive has at least 25GB of free space. If you don’t, you’ll need to make some room.
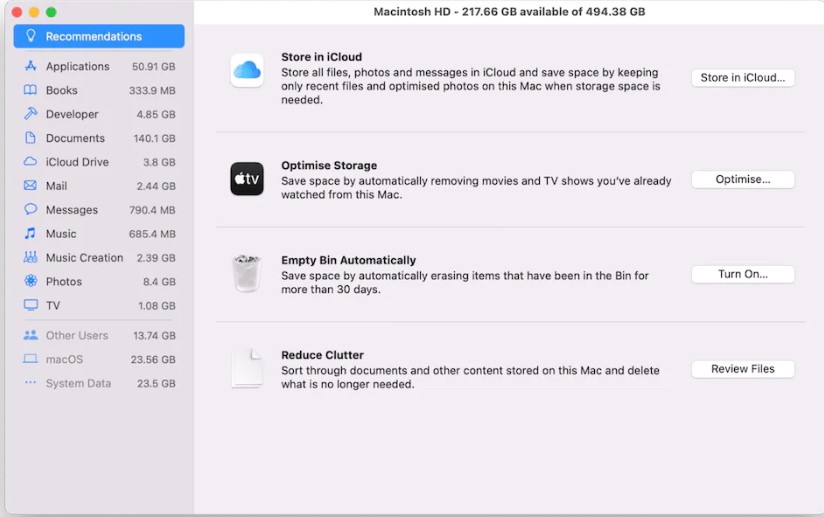
There are various ways to free space on Mac, including by using Apple’s excellent Manage Storage feature (Apple menu > About this Mac > Storage > Manage Storage). If you follow the right steps, you should be able to free up a lot of space.
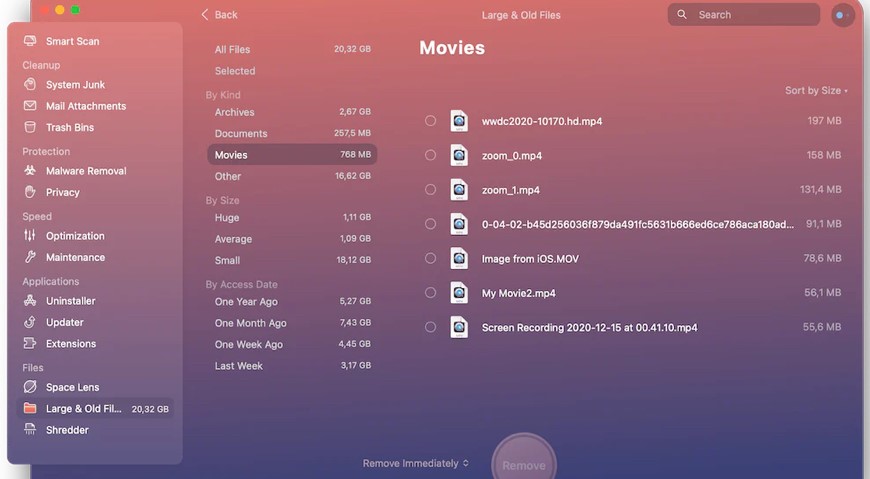
However, another quickest and most straightforward method is to identify the files that take up the most space on your Mac and those you never open and delete or copy to an external disc.
The simplest way to identify these large and old files is to use the CleanMyMac X app. CleanMyMac X has many options that can help you free up space on your Mac.
Tip #8. Use Combo Update
Another intriguing method for installing macOS Ventura on your computers is to use the combo update. But, before you start, back up all the data on your device using Time Machine, iCloud, or another storage device.
Mac users can use the combo update technique to update their Macs from a previous version of the same operating system. Beginning with the release of that major version, the combo update contains all of the necessary modifications and alterations.
For example, you can use the combo update to go directly from macOS 11.6.4 to macOS 11.6.7 without having to download the 11.6.5 version. Please keep in mind that you cannot upgrade from 11.5.x to 11.6.x.
Here’s how to fix the MacOS Venture update problem using the combo update:
Step 1. Go to Apple’s combo update website and download the correct combo update.
Step 2. The download may take a while because combo updates are typically larger than regular update files. The format of the downloaded combo update file will be “.dmg.”
Step 3. Finally, close all programs and apps that are currently running on your MacBook.
Step 4. If the downloaded file does not open automatically, double-click it with your mouse.
Step 5. Install the upgrade by following the instructions on the screen.
Tip #9. Remove External Devices
Suppose you have any external devices, such as a keyboard, mouse, headphones, hard discs, pen drives, and so on. Unplug them from your device because they may interfere with your system and cause errors.
Parting Remarks: Fix MacOS Venture Update Problems
When your macOS Venture update stucks, don’t panic. It is a common problem you can fix by restarting your Mac device or checking your internet connection.
If the simple solutions don’t work, some technical solutions are also available, as we have already mentioned in the article. So, let’s not wait anymore and upgrade your system to the latest MacOS Venture update. For more macOS news and guides, stay connected here.
Popular Post
Recent Post
Top 10 Bass Booster & Equalizer for Android in 2024
Overview If you want to enjoy high-fidelity music play with bass booster and music equalizer, then you should try best Android equalizer & bass booster apps. While a lot of these apps are available online, here we have tested and reviewed 5 best apps you should use. It will help you improve music, audio, and […]
10 Best Video Player for Windows 11/10/8/7 (Free & Paid) in 2024
The advanced video players for Windows are designed to support high quality videos while option to stream content on various sites. These powerful tools support most file formats with support to audio and video files. In this article, we have tested & reviewed some of the best videos player for Windows. 10 Best Videos Player […]
11 Best Call Recording Apps for Android in 2024
Whether you want to record an important business meeting or interview call, you can easily do that using a call recording app. Android users have multiple great options too. Due to Android’s better connectivity with third-party resources, it is easy to record and manage call recordings on an Android device. However it is always good […]
10 Best iPhone and iPad Cleaner Apps of 2024
Agree or not, our iPhones and iPads have seamlessly integrated into our lives as essential companions, safeguarding our precious memories, sensitive information, and crucial apps. However, with constant use, these devices can accumulate a substantial amount of clutter, leading to sluggish performance, dwindling storage space, and frustration. Fortunately, the app ecosystem has responded with a […]
10 Free Best Barcode Scanner for Android in 2024
In our digital world, scanning barcodes and QR codes has become second nature. Whether you’re tracking packages, accessing information, or making payments, these little codes have made our lives incredibly convenient. But with so many barcode scanner apps out there for Android, choosing the right one can be overwhelming. That’s where this guide comes in! […]
11 Best Duplicate Contacts Remover Apps for iPhone in 2024
Your search for the best duplicate contacts remover apps for iPhone ends here. Let’s review some advanced free and premium apps you should try in 2024.
How To Unsubscribe From Emails On Gmail In Bulk – Mass Unsubscribe Gmail
Need to clean up your cluttered Gmail inbox? This guide covers how to mass unsubscribe from emails in Gmail using simple built-in tools. Learn the best practices today!
7 Best Free Methods to Recover Data in Windows
Lost your data on Windows PC? Here are the 5 best methods to recover your data on a Windows Computer.
100 Mbps, 200 Mbps, 300Mbps? What Speed is Good for Gaming?
What internet speed is best for gaming without lag? This guide examines whether 100Mbps, 200Mbps, or 300Mbps is good for online multiplayer on PC, console, and mobile.
Top 10 Child-Friendly Browsers – Kids Friendly Web Browser
As parents, ensuring our children’s online safety and exposure to age-appropriate content is a top priority. With the vast expanse of the internet and its potential risks, finding a reliable and secure web browser for kids has become increasingly important. Fortunately, numerous developers have recognized this need and have created specialized Kid-friendly web browsers designed […]
