The best 5 ways to change the screen timeout on Windows 11
Do you always get frustrated when the laptop or PC screen gets blank after a few seconds of inactivity on Windows 11?
This is a common scenario that most people have to deal with. As a result, they always try to keep the screen active by moving the mouse or pressing any random key. Although it might sound normal, you will be restricted in front of the device.
So, the best solution is to change screen timeout on Windows 11. But the question is how! To guide you properly on this aspect, we have explained the best five ways to increase or decrease the Windows 11 operating system screen timeout in no time.
Method 1: Navigate to device Settings to change the screen timeout
One of the easiest ways to change the screen timeout is through the device Settings. Following are the steps you need to follow.
- Expand the Windows option and type Settings in the search bar, or you can directly open Settings by pressing Windows+I.
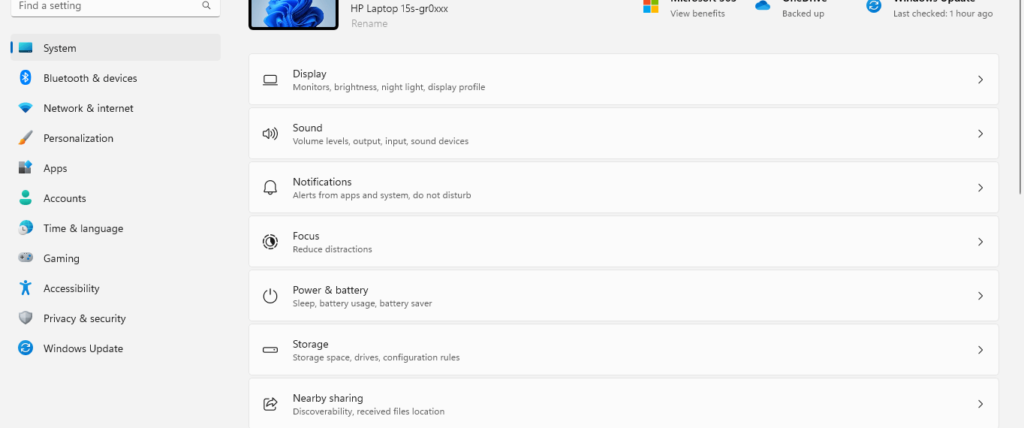
2. Navigate to System and then open Power & Battery.
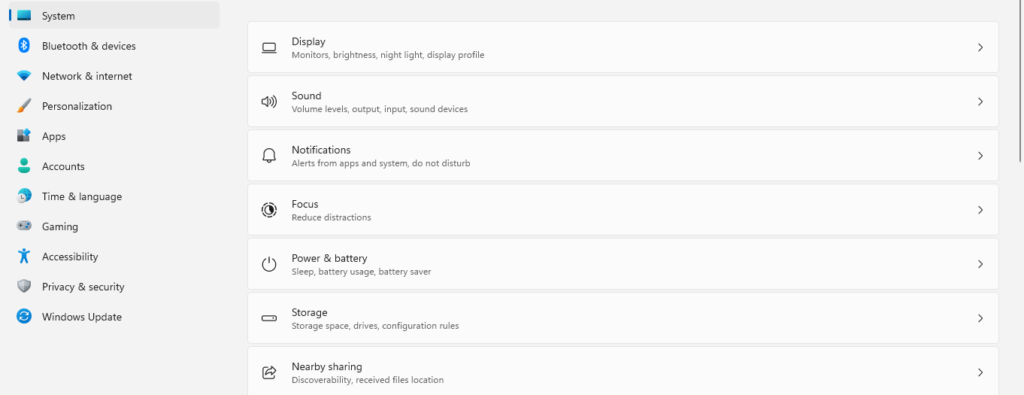
3. Scroll down, and you will see the option for Screen and Sleep.
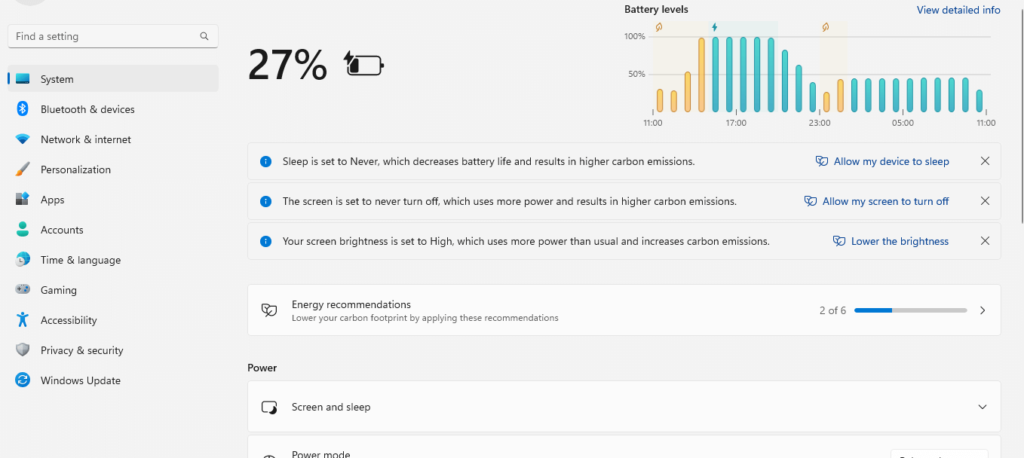
4. Click on it to expand the option, and there you will see different tabs.
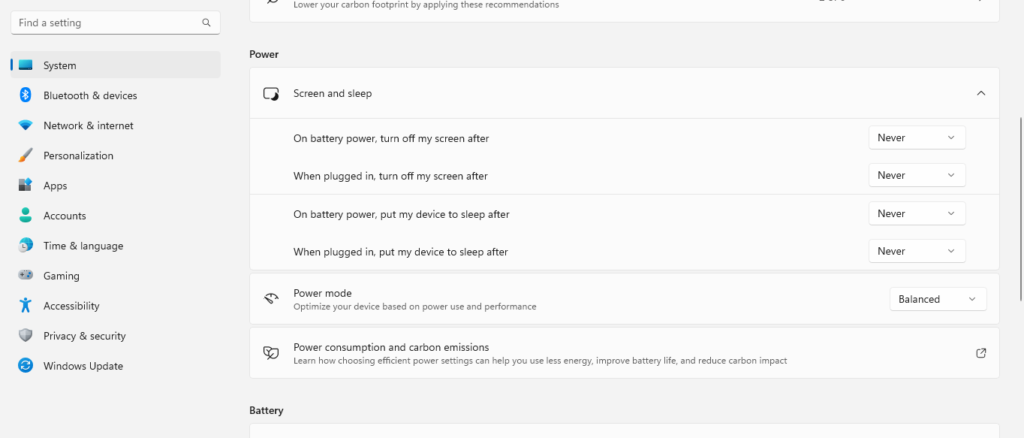
5. Set the time for each with the help of the dropdown option.
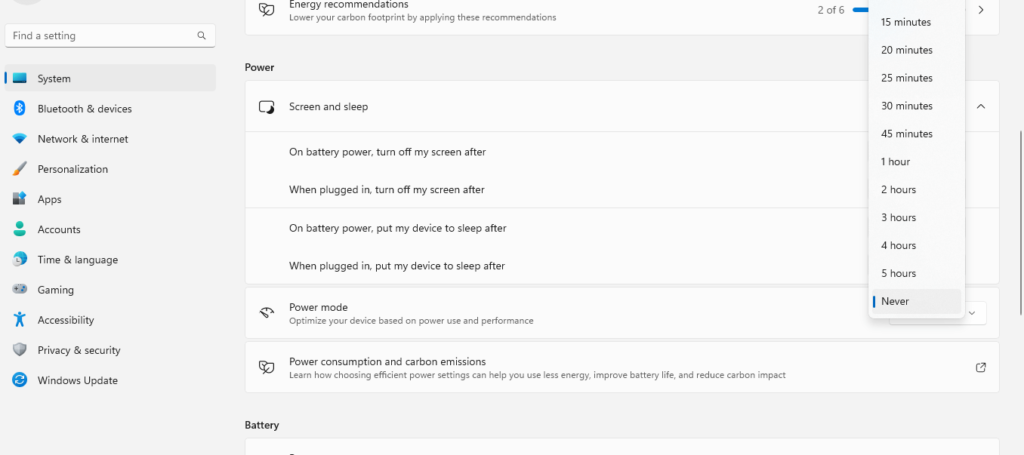
6. Once done, close the Settings window; the screen timeout will change accordingly.
Method 2: Use Control Panel on the device
Control Panel is another way to change screen timeout for Windows 11. If you haven’t tried this method yet, follow the steps below.
- Open the Control Panel from the search bar in Windows 11.
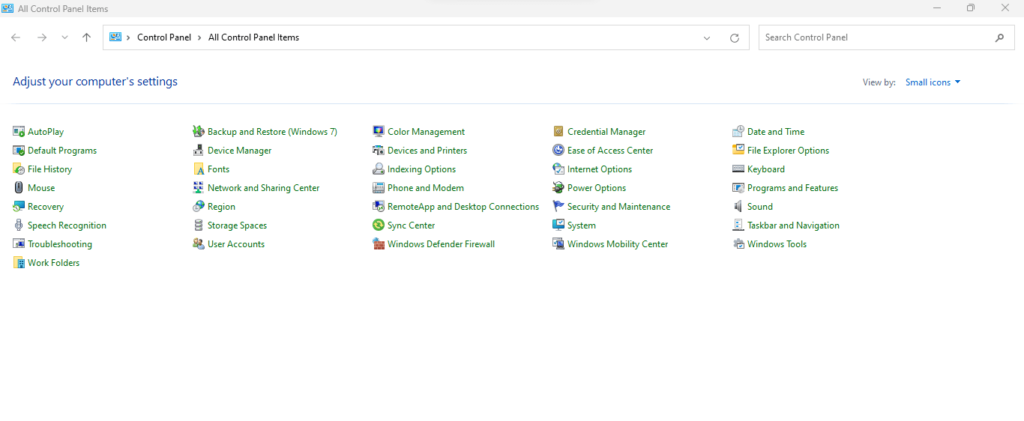
2. Now navigate to Power Options from the list.

3. Click on Change from the option list on the left-hand side when the computer sleeps.
4. From the dropdown, select the required time for all four options, like turning off the battery display or when the system is plugged in for charging.
5. Once you are certain about the sleep time changes, click Save Changes, and the time will be saved.
Method 3: Relying on Terminal Window
If you want to avoid going through these lengthy processes, use the Terminal window to change screen timeout on Windows 11.
- First, right-click on the Windows option. Once the menu expands, click on Terminal.
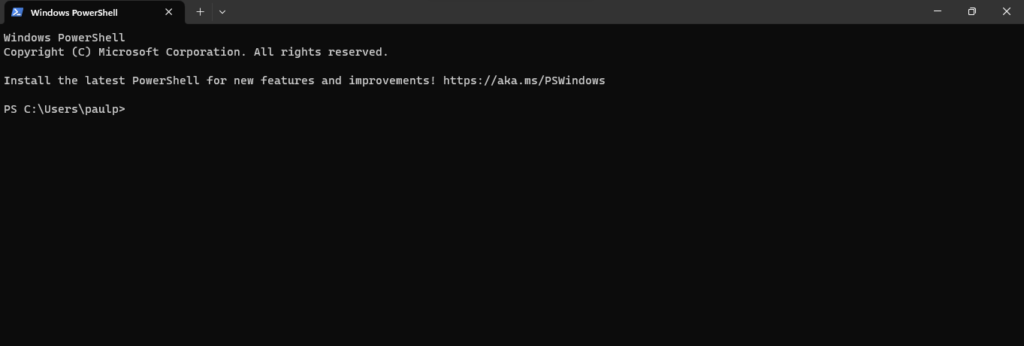
- A black screen of Windows PowerShell will open.
3. You need to type in the command as: powercfg-change-monitor-timeout-ac 40. You can replace the number 40 with any value in seconds.
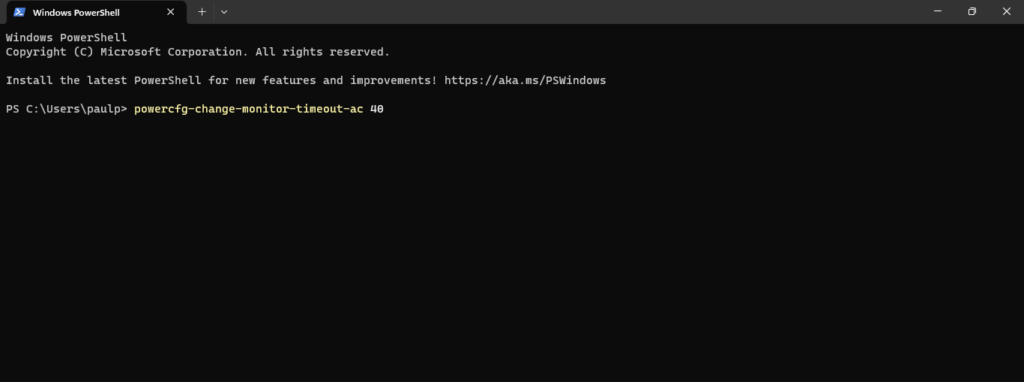
4. Once done, press Enter, and the timeout will change automatically.
Method 4: Navigate to Advanced Power Options on the device
- Press Windows+R to open the Run window.
- Once the dialog box opens, type in control.exe powercfg.cpl.
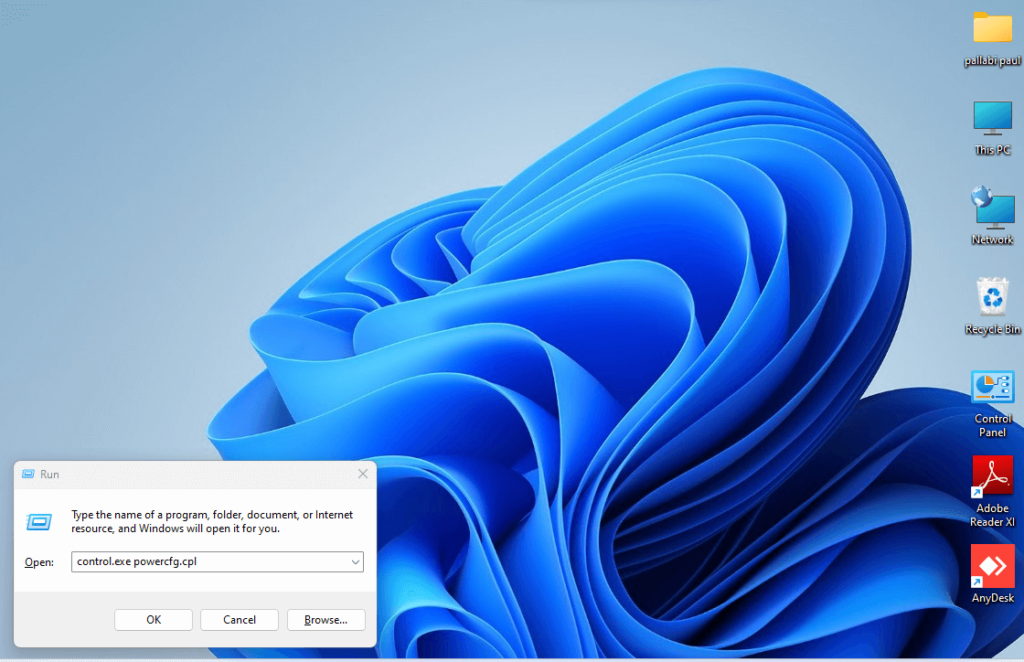
3. Press Ok and the Control Panel window will open.
4. Click on the option Choose when to turn off the display and select a certain time from the On Battery and Plugged In dropdown list.
5. Once done, click on Save Changes, and the time will be saved for display timeout.
Method 5: Modify the device’s Registry
The Registry is a hierarchical database for every operating system. You can easily alter the screen timeout for Windows 11 using this process. Following are the steps to be followed.
- Open the Run window by pressing Windows+R.
- Once the window opens, type regedit and click on Enter. This will open the Registry Editor on Windows 11.
- You need to navigate to the following location: Computer\HKEY_LOCAL_MACHINE\SYSTEM\CurrentControlSet\Control\Power\PowerSettings\7516b95f-f776-4464-8c53-06167f40cc99\8EC4B3A5-6868-48c2-BE75-4F3044BE88A7
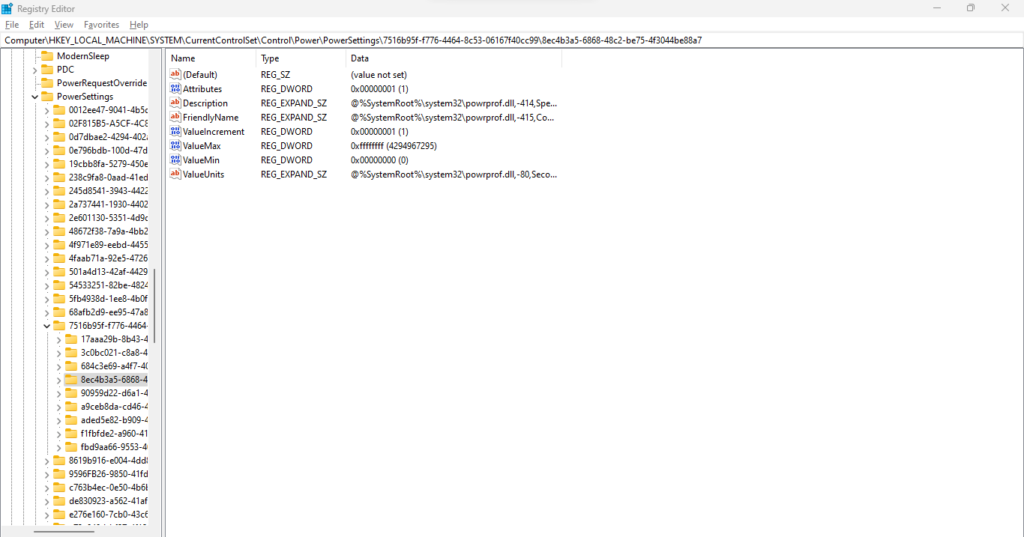
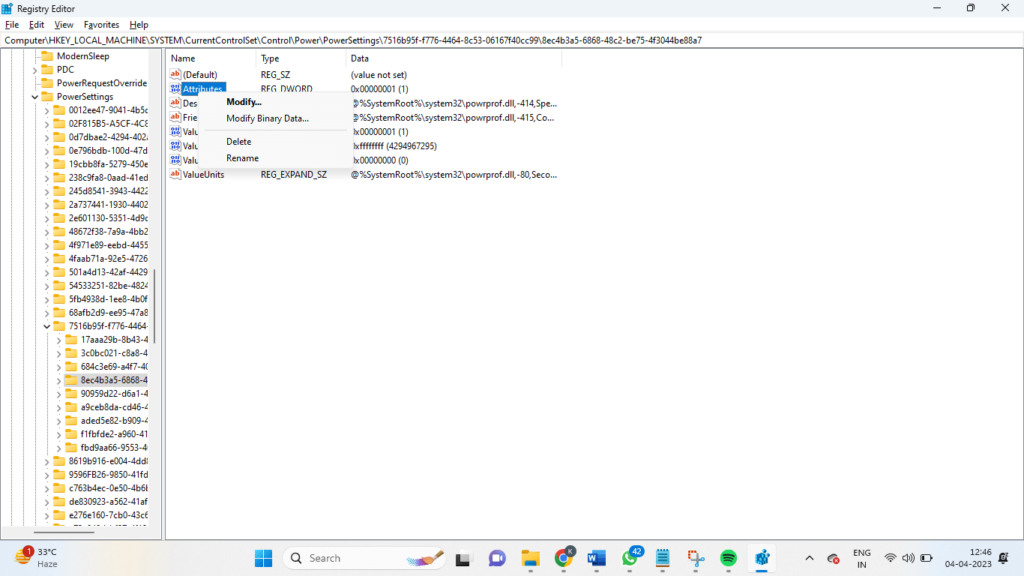
4. Right-click on the Attributes option and then press Modify.
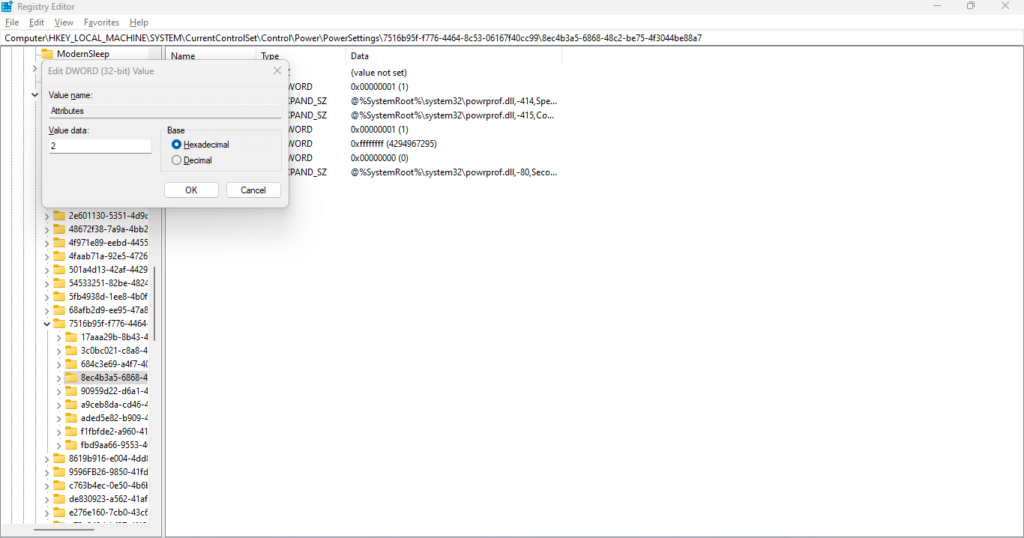
5. Once the dialog box opens, write 2 in the Value data and press Ok.
Conclusion
In this article, we have explained the best ways to change screen timeout on windows 11. If you are a beginner, use the Settings or Control Panel option since they are the easiest. On the contrary, if you want the process quicker or have advanced knowledge about the device and operating system, you can follow any of the three remaining processes we have explained, like the Registry window or Command Prompt window.
Popular Post
Recent Post
How to Troubleshoot Xbox Game Bar Windows 10: 8 Solutions
Learn how to troubleshoot and fix issues with the Xbox Game Bar not working on Windows 10. This comprehensive guide provides 8 proven solutions to resolve common problems.
How To Record A Game Clip On Your PC With Game Bar Site
Learn how to easily record smooth, high-quality game clips on Windows 11 using the built-in Xbox Game Bar. This comprehensive guide covers enabling, and recording Game Bar on PC.
Top 10 Bass Booster & Equalizer for Android in 2024
Overview If you want to enjoy high-fidelity music play with bass booster and music equalizer, then you should try best Android equalizer & bass booster apps. While a lot of these apps are available online, here we have tested and reviewed 5 best apps you should use. It will help you improve music, audio, and […]
10 Best Video Player for Windows 11/10/8/7 (Free & Paid) in 2024
The advanced video players for Windows are designed to support high quality videos while option to stream content on various sites. These powerful tools support most file formats with support to audio and video files. In this article, we have tested & reviewed some of the best videos player for Windows. 10 Best Videos Player […]
11 Best Call Recording Apps for Android in 2024
Whether you want to record an important business meeting or interview call, you can easily do that using a call recording app. Android users have multiple great options too. Due to Android’s better connectivity with third-party resources, it is easy to record and manage call recordings on an Android device. However it is always good […]
10 Best iPhone and iPad Cleaner Apps of 2024
Agree or not, our iPhones and iPads have seamlessly integrated into our lives as essential companions, safeguarding our precious memories, sensitive information, and crucial apps. However, with constant use, these devices can accumulate a substantial amount of clutter, leading to sluggish performance, dwindling storage space, and frustration. Fortunately, the app ecosystem has responded with a […]
10 Free Best Barcode Scanner for Android in 2024
In our digital world, scanning barcodes and QR codes has become second nature. Whether you’re tracking packages, accessing information, or making payments, these little codes have made our lives incredibly convenient. But with so many barcode scanner apps out there for Android, choosing the right one can be overwhelming. That’s where this guide comes in! […]
11 Best Duplicate Contacts Remover Apps for iPhone in 2024
Your search for the best duplicate contacts remover apps for iPhone ends here. Let’s review some advanced free and premium apps you should try in 2024.
How To Unsubscribe From Emails On Gmail In Bulk – Mass Unsubscribe Gmail
Need to clean up your cluttered Gmail inbox? This guide covers how to mass unsubscribe from emails in Gmail using simple built-in tools. Learn the best practices today!
7 Best Free Methods to Recover Data in Windows
Lost your data on Windows PC? Here are the 5 best methods to recover your data on a Windows Computer.
