How to Clean & Optimize Mac to Speed up Performance
If you are short on time:
Manually cleaning disk storage could be an option, but it consumes a lot of time & efforts. To save time and get accurate results, it is always suggested to use the best Mac cleaner software. These smart cleaning software helps you clean & optimize Mac to speed up performance. One such tool is CleanMyMac X that offers advanced cleaning modules to free up disk space on Mac. You can download this powerful Mac cleaner now:
Overview
If your Mac is running slow, then it is time to clean & optimize it for better performance. The primary reasons behind sluggish Mac performance could be over occupied disk space, software & hardware issues, malware issues, and device settings issues. Now that we know over occupied disk space is one possible reason behind slow system performance, you should consider cleaning & optimizing disk storage for seamless Mac performance.
What is the solution to clean disk space in Mac?
As we have discussed, using the best Mac cleaner software is the easiest & safest solution to boost Mac performance, next thing you should try is manual cleaning. In this article, we have discussed multiple ways to clean & optimize Mac following built-in features & utilities.
Ways to Disk Clean up & Optimize Mac
The primary steps to clean Mac includes cleaning up disk storage using built-in features, emptying Trash, uninstalling unnecessary apps & programs, managing login items, and cleaning cache files. Let’s discuss more methods here.
Step 1: Clean up Disk Storage
If you are on macOS Sierra or later versions, then you find a built-in feature to check and manage storage space effortlessly. It helps you check total occupied disk space and also helps you manage it. To free up disk space in Mac, select Apple Menu and go to About This Mac > Storage. Here, you can hover over these pointers to check space occupied by them.

Now to free up disk space in Mac, click on Manage button. Now you will find different recommendations to clean & optimize Mac for better performance. It also helps you move your files to iCloud and save space on the local storage driver.
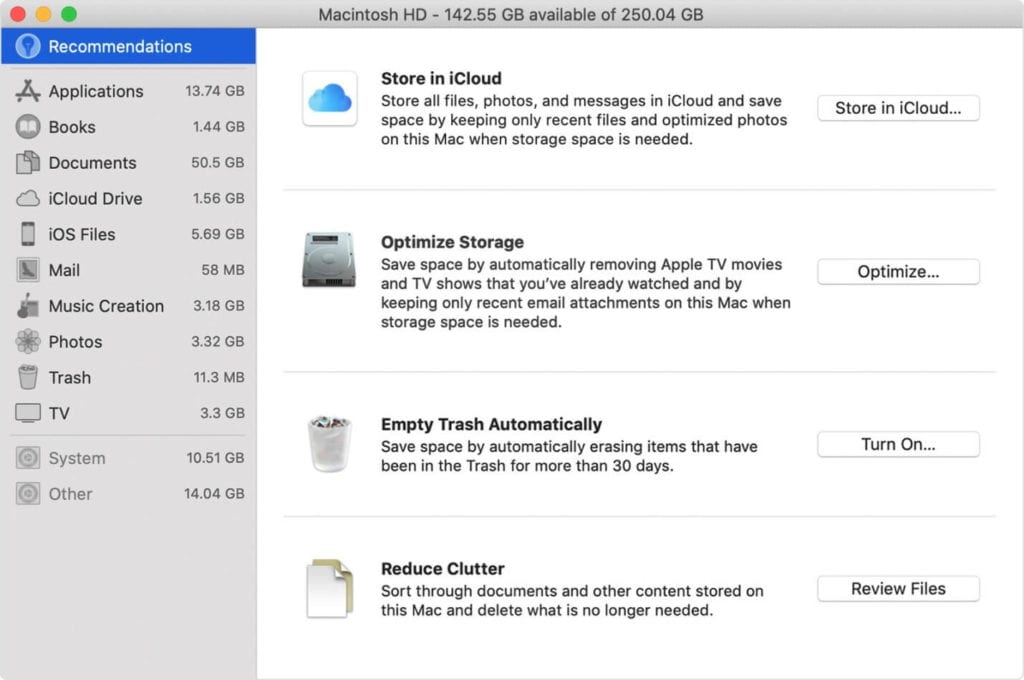
Here, you will find four options to optimize your storage. If you have already turned on some recommendations, then you will see fewer recommendations. These four recommendations include:
- Store in iCloud to move your data to iCloud
- Optimize Storage to remove unnecessary junk from Mac
- Empty Trash Automatically to remove Trash items automatically after 30 days
- Reduce Clutter to manage and delete data that is no longer needed.
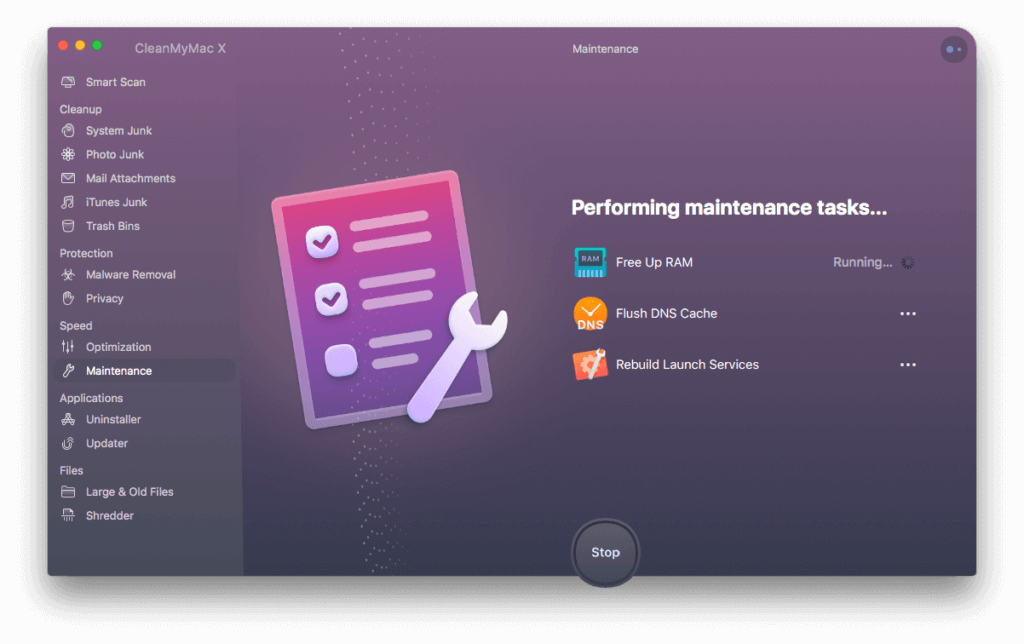
Now if you find manual cleaning tool complicated task, then we suggest using the best Mac cleaner tools. Working on advanced algorithms, CleanMyMac X helps you clean & optimize Mac to speed up performance. It is compatible to all Mac versions. If you are looking for a complete set of cleaning & optimization tools, then consider Setapp to boost your productivity.
Important features of CleanMyMac X
- It helps you remove unused apps.
- You can use CleanMyMac X to empty out the Trash.
- You can compress old files to free up disk space.
- It helps you clean system logs, temporary files, and old iOS backups.
- You can run disk utility to verify and repair Permissions.
- It helps you protect your Mac from malware threats.
Step 2: Empty the Trash
Whatever you delete on your Mac goes directly to the Trash folder. It remains here occupying valuable storage space, until you empty Trash folder or you have set it to clean automatically after specified time. To empty Trash, follow these steps:
- Click and hold on the Trash can icon in the Dock.
- Click Empty and then Empty Bin when prompted.

Step 3: Remove obsolete old Mail Attachments
If you have mistakenly downloaded mail attachments such as images, documents, etc. on your Mac, then it is time to get rid of it to free up valuable disk space. To do this, press Command + Space to make the search field appear. Here, you need to type Mail Downloads to check these obsolete downloads in the Mail Downloads folder. Now open the folder and find & delete all junk files.

Step 4: Uninstall Unnecessary Apps
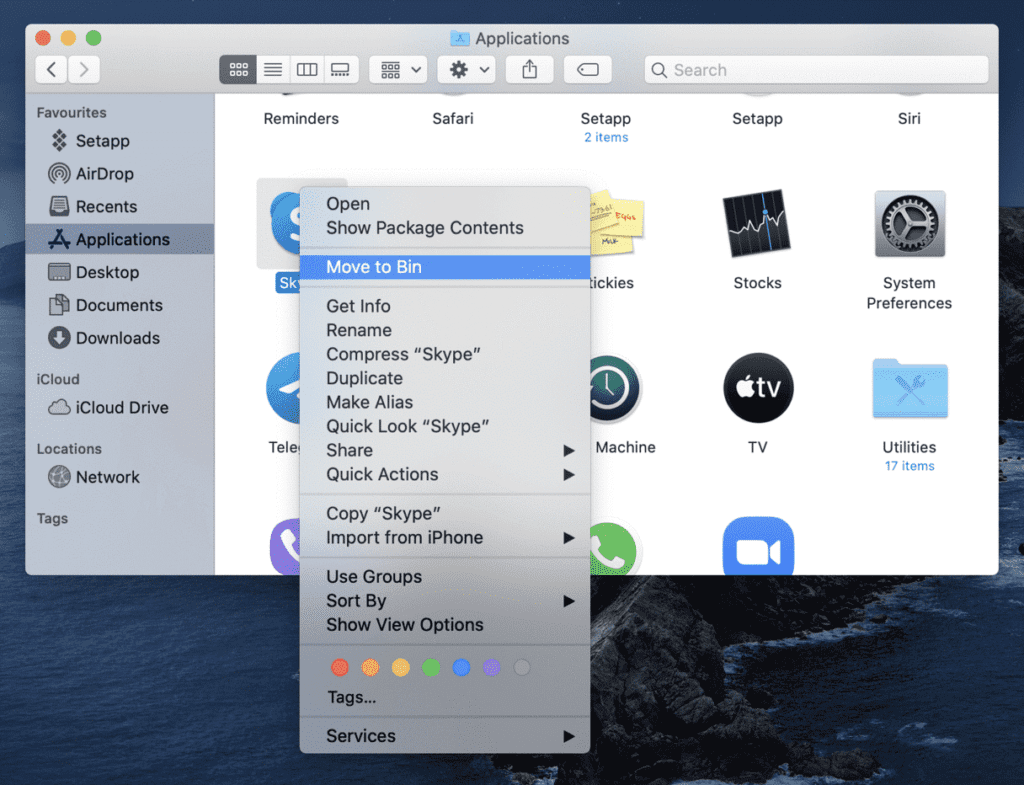
This is another effective step to clean and optimize Mac to speed up performance. You install a lot of apps over a period of time and stop using many of them after some time. To uninstall unnecessary apps on Mac, follow these steps:
- Open Finder and select Applications.
- Select the app that you want to delete.
- Once selected, press Command + Delete.
- Now open Trash and Empty it to remove the app completely.
Even though the app is uninstalled, still there remain certain associated files of the app on your system. It not only occupied valuable disk space, but it also affects your system performance negatively. To get rid of this digital junk, you can consider using CleanMyMac X for deep cleaning.
Step 5: Manage Login Items
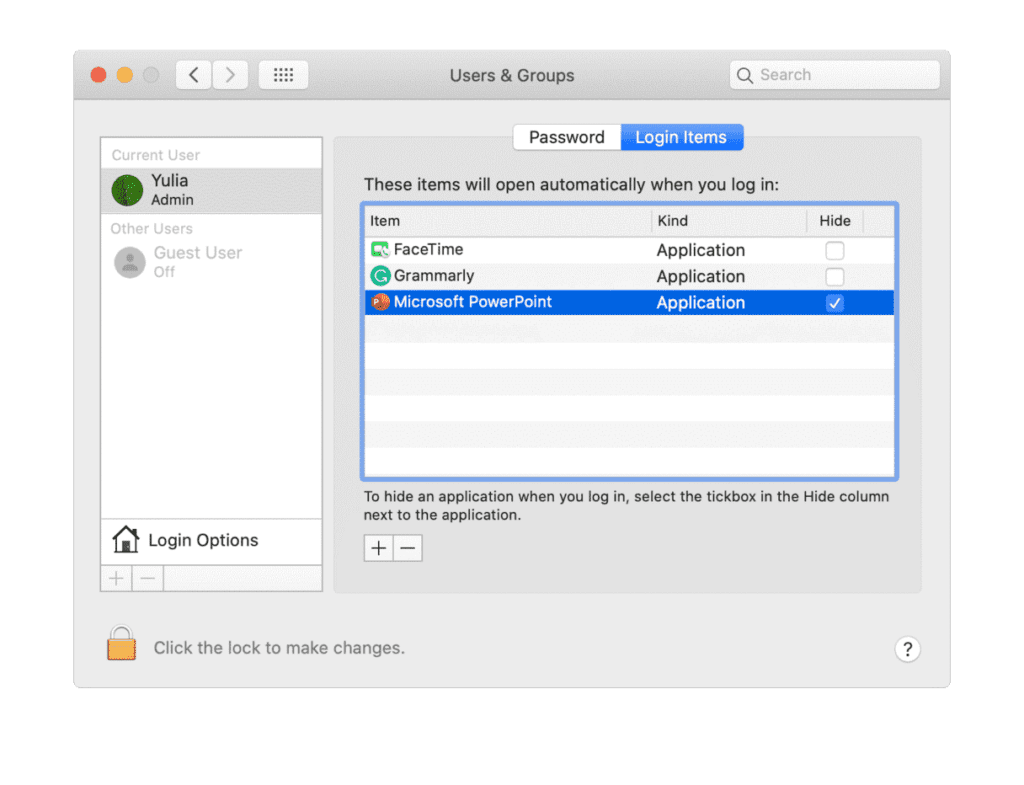
A lot of applications run during startup unnecessarily causing long boot time. You can remove these applications from login items to save system resources. To do this, follow these steps:
- Go to System Preferences > Users & Groups.
- Select your nickname on the right.
- Select Login Items tab.
- Select the program that you want to remove.
- Once selected press the “-“ sign below.
Step 6: Clear Cache
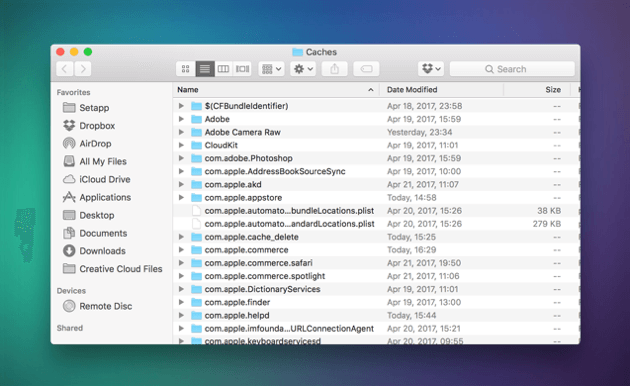
Cache files accumulate in tons on your system and occupy GBs of disk space. To delete user cache files on Mac, follow these steps:
- Select Go to Folder in the Go menu in Finder.
- Now type ~/Library/Caches and hit enter.
- Now copy all the content from here to different folder in case you need it later if something goes wrong.
- Next is to open each folder and clean out everything from it.
Note: Remember you need to clean content within the folders not the folders itself.
Next, you need to repeat the same steps above, by substituting:
~/Library/Caches with /Library/Caches
Once done empty the Trash and restart your Mac. Now your system will create fresh cache files.
Step 7: Delete old DMGs
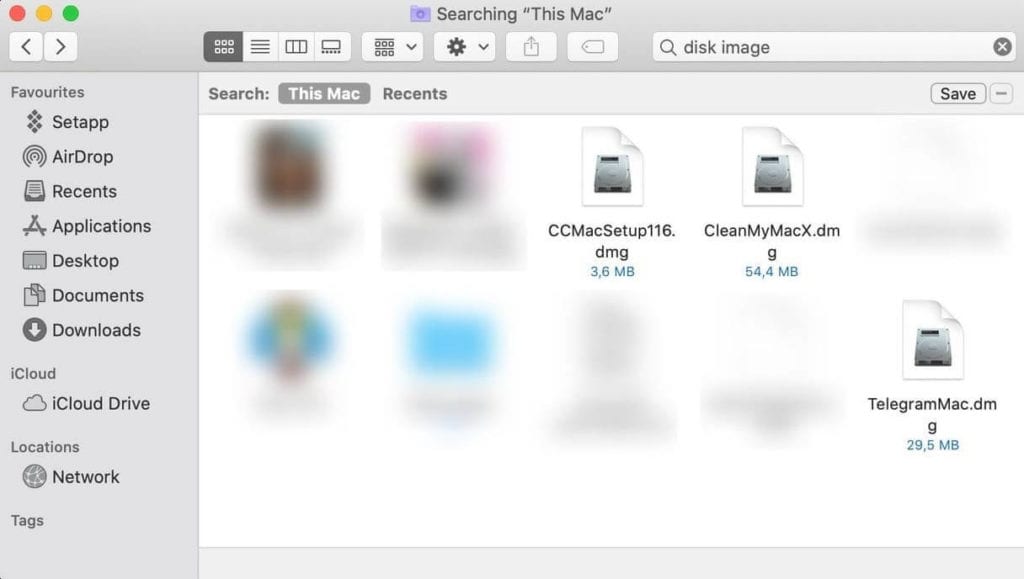
Disk Image files are next space hogs that occupy a lot of space. To clean these unnecessary junk files, open Finder, type disk image and press Enter. On the window that appears, you need to delete all files with .dmg extension. Once done, empty your Trash.
Step 8: Remove Duplicates and other Junk Files
The last step you should follow is to delete other junk files on your Mac. It may include duplicate files, old iOS backups, obsolete large files, old downloads, and more. To delete old iOS backups, go to Apple menu > About This Mac > Storage. Click the Manage button and select iOS files. Next is to select the old backup files that you wish to delete and click Delete.
If you are looking for instant results, you can use Gemini 2 that helps you find & delete all duplicate files automatically. You can use this app to recover disk space instantly.
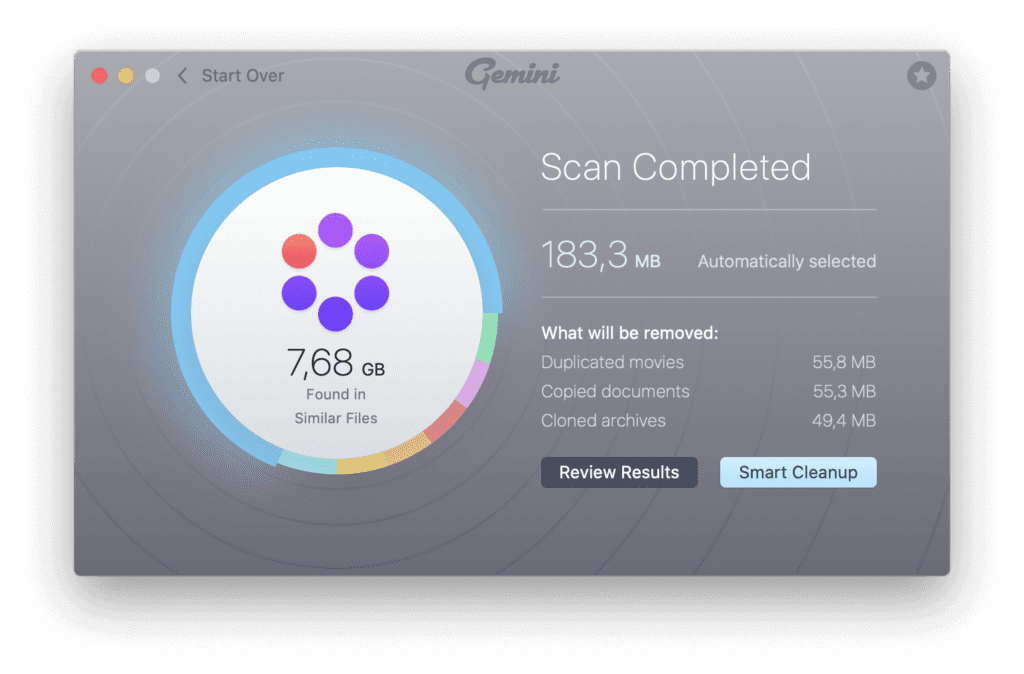
To delete other junk files, you can always use CleanMyMac X. If you are on Windows, you can try CleanMyPC that is also offered by MacPaw.
Conclusion
Now this was a quick discussion on how to clean & optimize Mac to speed up performance. Do try these steps and don’t forget to share your experience in the comments below.
Popular Post
Recent Post
How To Connect to Your PC Remotely Windows [Complete Guide]
Many people need to reach their computer from far away. Well, yes! It may be for work, study, or personal use. Remote access helps you open files, use your apps, and control your system even when you are not near the device. It gives you the comfort of using your computer anywhere through the internet. […]
How To Connect to a Wi Fi Using a QR Code: Latest Guide
Wi-Fi is now a basic part of our lives. We use it at home, in offices, schools, and public places. But typing long passwords every time you connect can be annoying. Sometimes you might even forget your Wi-Fi password. That is where QR codes come in handy. With QR codes, you can connect to any […]
How To Connect a Wireless Printer Easily to Windows 11/10 PC
Printing tasks are part of most home and office work today. Isn’t it? Well, yes! Using a wireless printer makes printing easier and faster because you don’t need cables. It allows you to print documents and images from any corner of your room as long as your device and printer are connected to the same […]
How To Connect Your Windows 11 PC to a Projector or Another PC
A bigger screen can help you share your work with others. When you connect your Windows 11 PC to a projector, your screen becomes easier to view in a meeting room, classroom, or home. You can show slides, videos, notes, or entertainment. Most people do this for work or study, but it is also helpful […]
How To Set Up Dual Monitors Easily Windows 11/10: Complete Guide
Working with one screen can feel limiting. You switch between apps constantly. Your workflow slows down. A dual monitor setup changes everything. It gives you more space to work. You can see multiple things at once. This guide shows you how to set up dual monitors easily on Windows systems support. Windows 11 and Windows […]
How to Set Your Preferred Default Printer On Windows 11/10: Complete Guide
Printing documents should be simple. But many users struggle with their printer settings. Windows often picks the wrong printer as the default. This creates delays and wastes paper. Setting up your preferred printer as the default saves time. It prevents printing errors. This guide shows you how to set your preferred default printer Windows systems […]
Ashampoo WinOptimizer Review: Can It Really Speed Up Your PC?
Is your computer running slowly? Do programs take forever to load? You’re not alone. Millions of PC users face this problem daily. Ashampoo WinOptimizer claims it can fix these issues. This software promises to clean junk files, boost speed, and make your computer run like new. But does it really work? Or is it just […]
Screen Mirroring | Screen Cast Phone to Laptop Windows 11
screencast phone to laptopScreen mirroring is a great way to show your phone’s screen on a laptop. Right? Whatever you see on your phone, videos, games, apps, it shows up on the bigger screen too. It’s great for watching with friends, sharing ideas, or just getting a better view. Lots of people think it’s hard […]
Avast Cleanup PC Cleaner and Optimizer: Everything You Need to Know
Your computer gets slower over time. This is normal but frustrating. Files pile up. Programs start automatically. Your PC takes forever to boot up. You need a solution that works. Something simple but effective. Avast Cleanup promises to fix these issues. But does it really work? This guide covers everything about Avast Cleanup. You’ll learn […]
How to Recover Permanently Deleted Files in Windows 10/8/7
Losing important files can feel like a disaster. Well, yes! Maybe you deleted something by accident. Maybe you emptied the Recycle Bin a little too quickly. Suddenly, that crucial document or cherished photo seems lost forever. But take a deep breath. Windows 10 (and even 8 or 7) offers powerful ways to recover permanently deleted […]

