


Computers collect thousands of files over time. Well, yes! Many of them end up being duplicates created by backups, downloads, or accidental copies. These extra files take up valuable storage space and make it harder to keep everything organized. Finding and removing them manually can take hours. Right? Duplicate File Finder Pro is a tool […]
What is DDU? Your Complete Guide to Use Display Driver Uninstaller
Have you ever experienced ongoing graphics issues, driver problems, or just want to start over with your GPU drivers? Your strong ally is Display Driver Uninstaller (DDU). This utility completely removes any traces of outdated drivers that might be causing instability, going above and beyond simple uninstallation. Well, using a solid tool for removing GPU drivers from Windows entirely is Display Driver Uninstaller (DDU).
It guarantees a conflict-free, clean installation of new drivers on your Windows 11/10/8/7 PC. DDU assists in removing leftover files, registry entries, and corrupted installations that may result in display problems, crashes, or subpar performance, regardless of whether you’re switching between NVIDIA, AMD, or Intel drivers.
When dealing with ongoing driver-related issues, black screens, or driver update failures, DDU tool come super helpful. Hence, learning DDU is essential whether you’re a gamer, video producer, or just looking for a seamless computing experience.
In this comprehensive guide, we’ll explore everything you need to know about DDU and how to use it safely.
Consider reading our previous guide on: 10+ Best Driver Updater for Windows PC (Free & Paid)
What is DDU or Display Driver Uninstaller?
It is a third-party tool developed by Wagnardsoft that fully deletes graphics card drivers and packages from Windows operating systems. Professionals, tech enthusiasts, and gamers use it extensively to fix driver-related problems. DDU removes all driver traces, including files, directories, and registry entries, in contrast to the conventional Windows uninstaller. This complete elimination is essential when:
1. Changing graphics card manufacturers (from NVIDIA to AMD, or the other way around).
2. Resolving driver conflicts that result in performance problems, crashes, or glitches.
3. Installing the latest driver version cleanly.
4. Fixing problems following an unsuccessful driver upgrade.
5. Eliminating show driver-related Event Log entries
6. Clearing the Windows Driver Store of the GPU driver
7. Disabling the GPU driver-related NVIDIA, AMD, and Intel services
The DDU tool is especially useful when:
- You’re dealing with conflicts or corrupt graphics drivers.
- You are switching from one brand of GPU to another (for example, AMD to NVIDIA).
- Because of stability problems, you have to revert to a previous driver version.
- Conventional uninstalling techniques have not worked or have caused issues.
- You’re diagnosing enigmatic system crashes or graphics-related performance problems.

Precautions Before Using DDU
Understanding the precautions is crucial before using DDU to guarantee a secure and efficient procedure.
Important Precautions:
1. Backup Vital Data: Prior to performing major system modifications, always make a backup of your most vital files.
2. Close Background Programs: To prevent conflicts, make sure all background programs are closed, particularly those pertaining to graphics.
3. Internet Connection: To avoid automatic driver updates during the procedure, it is best to unplug from the internet.
4. Safe Mode: To prevent any conflicts with active programs, it is advised to use DDU in Safe Mode.
5. Install the Most Recent Version of DDU: Make sure you only download DDU from reliable sources or the official website (Wagnardsoft).
6. Verify Enough Power: Make sure your laptop is plugged into a power source if you’re using one. System file corruption could result from a power outage during the DDU procedure.
How to Use Display Driver Uninstaller
Well, to effectively use Display Driver Uninstaller make sure you adhere to the following set of guidelines that ensures all the graphics drivers are removed correctly, without creating any system problems. Here is a thorough, step-by-step tutorial:
Step 1: Get DDU and get it ready
- Go to the Wagnardsoft forums or Guru3D’s official DDU download website.
- Get the most recent DDU version.
- Extract the ZIP file that has been downloaded to a convenient area, such your desktop.
- Make sure you’ve done all the safety measures outlined in the preceding section.
Step 2: Enter Safe Mode to boot up
When there are fewer drivers and services operating, DDU functions best in Safe Mode:
If you are using Windows 10/11, here’s what you need to do:
- To access Settings, press the Windows key + I.
- Go to Recovery → System.
- Click “Restart now” under “Advanced startup.”
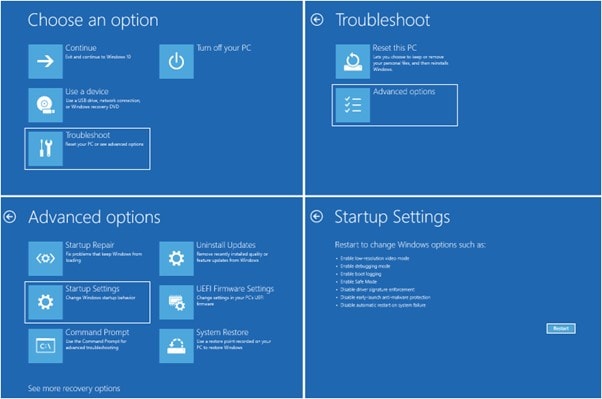
- When your PC restarts, simply hit the Troubleshoot button > Advanced options > Startup Settings.
- When your computer restarts again, press F4 to enter Safe Mode.
An alternate approach:
- Hold down the Shift key & select Restart from the Start menu.
- Now simply follow the path: Troubleshoot → Advanced options → Startup Settings → Restart
- From the list of options, choose Safe Mode.
Step 3: Execute DDU
- Go to the folder where DDU was extracted.
- Right-click on the “Display Driver Uninstaller.exe” and select the option “Run as administrator” from the context menu.
- If the User Account Control prompt shows up, accept it.
- At this point, you need to review the warning and recommendations that show up when you first start DDU.
- Choose the graphics card type (NVIDIA, AMD, or Intel) from the dropdown menu in the right corner.
Step 4: Set Up DDU Preferences
Before running DDU, you can adjust a number of its settings:
- Clean and restart: This method eliminates the driver and automatically restarts your computer (recommended).
- Don’t restart after cleaning: Removes the driver without causing your computer to restart.
- Clean & shutdown: Simply removes the driver and shuts down your computer (helpful if you’re intending to install a new GPU).
Other choices to think about:
- Remove C:\AMD or C:\NVIDIA folders: Removes manufacturer-specific directories and is enabled by default.
- Eliminate the AMD/NVIDIA audio bus: This eliminates the audio drivers included with the GPU drivers.
- Remove all TVs (DDC/EDID) and monitors, both current and non-existing: removes monitor data, which is useful for switching up display configurations.
- Stop Windows Update driver downloads while “Windows search for a driver” is turned off: stops Windows from automatically downloading new drivers.
Step 5: Carry Out the Uninstallation Process
Once your selections have been set up, click the appropriate option that best suits your needs:
- “Clean and restart” is the most popular option.
- “Clean and do NOT restart”
- “Clean and shutdown”
- Keep patience & let DDU to complete the uninstallation process.
- DDU will show a record of every action it takes.
- Depending on the option you choose, your computer will restart or shut down.

Step 6: Install New Drivers
After your computer restarts & boots back into normal mode, here’s what you need to do:
- If you previously disconnected, reconnect to the Internet.
- Install the graphics drivers that you previously obtained from the manufacturer’s official website.
- Observe the directions in the installation wizard.
- When requested to finish the driver installation procedure, restart your computer.
Step 7: Verify the Installation Process
Following the installation of the updated drivers, this is what you should consider doing:
- To access your graphics control panel (NVIDIA Control Panel, AMD Radeon Software, or Intel Graphics Command Center), right-click on your desktop.
- Make that your graphics card information appears, and the control panel opens correctly.
- Verify that the appropriate driver version is set up.
- To make sure everything is working as it should, test the graphics performance in a game or application.
Advanced Situations for Usage:
Switching Between GPU Brands:
When switching from one graphics card brand to another (for example, AMD to NVIDIA), take these extra precautions:
- Turn off your computer entirely.
- Unplug the power cord.
- Take out the outdated graphics card.
- Put the new graphics card in place.
- Turn the power back on and enter Safe Mode.
- To fully eliminate the drivers for the previous brand, use DDU.
- Restart in standard mode.
- Set up your new graphics card’s drivers.
Resolving Driver Conflicts:
If you’re having problems such as:
- BSoDs (blue screens of death) after driver installation
- Crashing graphics apps
- Screen artifacts or visual errors
- Problems with performance following driver updates

The best course of action is typically to use DDU’s “Clean and restart” option with all comprehensive cleaning options activated. Install an earlier, known-stable version of your drivers instead of the most recent one after restarting.
Author’s Advice:
Keep track of the driver versions that consistently function with your system settings while addressing chronic graphics problems. Although graphics drivers are regularly updated, the latest version may not necessarily be better for your particular system. To save installation packages for drivers that are known to function properly with your system, create a folder on an external drive. If a driver update causes issues, this procedure can save hours of debugging.
Along with updating graphics drivers, think about utilizing specialist monitoring software such as MSI Afterburner or HWiNFO to monitor GPU performance and temperatures. Hardware difficulties like insufficient cooling or power delivery can occasionally cause unexpected driver problems.
Conclusion
A crucial addition to any PC enthusiast’s toolkit, Display Driver Uninstaller provides a level of driver removal thoroughness that built-in uninstallers just cannot equal. A safe and efficient driver cleanup experience is guaranteed if you follow the safeguards and detailed directions in this tutorial, even though the procedure may appear complicated. The complexity of graphics hardware and drivers is increasing, making solutions like DDU more crucial for preserving system efficiency and stability. Whether you’re a content creation needing dependable stability, a gamer looking for peak performance, or just a PC user attempting to fix annoying display problems, DDU offers a dependable graphics driver control solution.
Keep in mind that although though DDU is a solid tool, it should only be used sparingly and carefully. Always backup critical data, establish system restore points, and adhere to the suggested protocols to guarantee a seamless experience. For years to come, Display Driver Uninstaller will remain a crucial tool for PC maintenance and troubleshooting because of these factors.
Commonly Asked Questions:
Q1. Is using DDU safe?
A1. DDU is safe as long as it is used properly. It is essential that you abide by the safety measures and step by step instructions shared in this guide.
Q2. Does DDU delete private data?
A2. No, just registry records and graphics driver files are deleted by DDU.
Q3. Is it possible to delete additional drivers using DDU?
A3. NVIDIA, AMD, and Intel graphics drivers are the main purpose of DDU. Although it might delete other driver files, that isn’t what it’s meant to do.
Q4. Does DDU have to be used each time my graphics driver is updated?
A4. No, DDU is usually used to replace graphics card suppliers or debug driver difficulties. The manufacturer’s software can be used to install driver updates on a regular basis.
Q5. What happens if I use DDU and my machine crashes?
A5. In the event of a computer crash, restore your system to the restore point you made prior to using DDU by booting into Safe Mode.
Q6. Can I use other drivers with DDU?
A6. DDU was created especially for graphics drivers. Use separate uninstallation tools for other drivers.
NEXT READ:
Author Bio:
Dinesh Lakhwani 

Dinesh Lakhwani, the entrepreneurial brain behind “TechCommuters,” achieved big things in the tech world. He started the company to make smart and user-friendly tech solutions. Thanks to his sharp thinking, focus on quality and the motto of never giving up, TechCommuters became a top player in the industry. His commitment to excellence has propelled the company to a leading position in the industry.
Popular Post
Recent Post
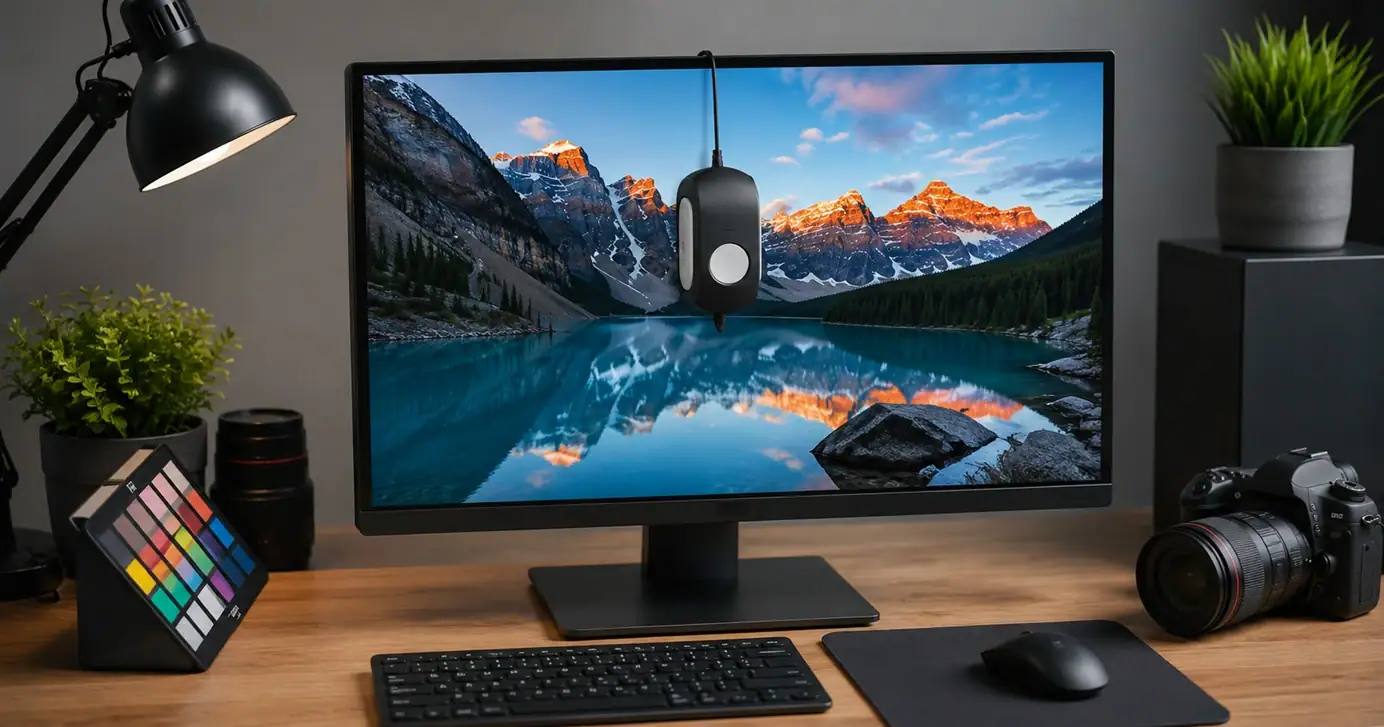
Monitor Screen Calibration Guide: Everything You Should Know
Your monitor shows colors every single day. But are those colors actually correct? Most people never stop to check this. They just use the screen as it comes out of the box. This habit can lead to wrong colors in photos, videos, and work files. Colors may look too warm or too cold without you […]
How To Check Installed RAM and RAM Slots [Complete Guide]
RAM plays an important role in how smoothly a computer runs. Short for Random Access Memory, it stores the data and instructions that Windows and active applications need at any given moment. From opening multiple browser tabs to running games and productivity software, RAM helps keep everything responsive. A system with limited memory may experience […]

What is Microsoft Autopilot Everything You Need To Know
Technology has changed the way companies manage computers. Well, yes! Employees now work from offices, homes, and remote locations. Setting up devices manually for every worker takes time and effort. It can also create mistakes that slow down productivity. This is where Microsoft Autopilot becomes useful. It helps businesses prepare and deploy Windows devices with […]
Enable Automatic Device Locking Feature Windows: Complete Guide
Introduction: Your computer stores important information such as emails, documents, passwords, and personal photos. Leaving it unlocked can put that data at risk. Thankfully, Windows includes built-in features that can automatically lock your device when you are away. Setting up automatic device locking is quick and does not require any extra software. In this guide, […]

How to Update Wireless Network Driver in Windows 11 and 10
Your Wi-Fi keeps dropping. Pages load slowly. The connection feels unstable? Well, you are not alone. Most of the time, the problem is not with your internet plan. It is with your wireless network driver. A driver is a small piece of software that helps your computer talk to its hardware. When it gets outdated, […]
Common Windows 11 Problems and Solutions (2026 Version)
Windows 11 has become more polished over the years, but it is still not completely free from problems. Even after regular updates from Microsoft, many users continue to face issues like lagging performance, failed updates, audio troubles, random crashes, and network errors. Some problems appear after installing new features, while others develop gradually as the […]
Fortect Driver Updater Review: Features, Steps, Pros, and Cons.
A new PC usually feels quick and responsive. Applications open instantly, games run smoothly, and everything works as expected. As time passes, however, you may notice slower performance, system crashes, hardware glitches, or devices that stop working properly. While many people assume malware or low storage space is to blame, outdated drivers are often the […]

New Features Coming in Windows 11 This Year [2026]
Microsoft is always working to make Windows better. This year is no exception. The company has announced and rolled out several exciting updates for its users. These updates touch almost every part of the operating system. From the Start menu to system settings, changes are arriving fast. If you use Windows daily, you will want […]

Top 14 Duplicate Photo Finder and Remover For Windows [2026]
Introduction: Photos pile up fast. Well, yes! You take ten shots of the same moment. You download the same image twice. You back up your folder and forget you already did it. Before you know it, your storage is packed with copies. A good duplicate photo finder helps you take back that space without losing […]

