


Every computer collects junk over time. Right? Well, yes! Photos often get copied twice. Documents get saved in two folders by mistake. Old downloads pile up and never get deleted. This slowly eats up your storage space, and most people do not even notice until their drive is almost full. That is where a duplicate […]
How to Create a Custom Map in Google Maps
Introduction
You may create Google custom maps that do not appear on anyone’s page by going to maps.google.com and using one of the many available choices. You do not need specialized software to make a unique map for you or someone else. All you require is Google Maps, which enables you to create a personalized map with your instructions, shapes, and pins.
You will need a Google Maps account on your desktop computer to achieve this. You must also erase your site information if Google Maps gives you an empty screen.
How to Customize a Map in Google Maps
You can only construct the Earth’s surface using a customized Google my maps. But you may add your places of interest, routes, and sites if you want to.
To add even more complexity to the current map, you may draw your personalized forms onto it. A custom map can only be made using the desktop internet-based version of Google Maps, even if you can see one via the Google my maps mobile application for Android and iOS.
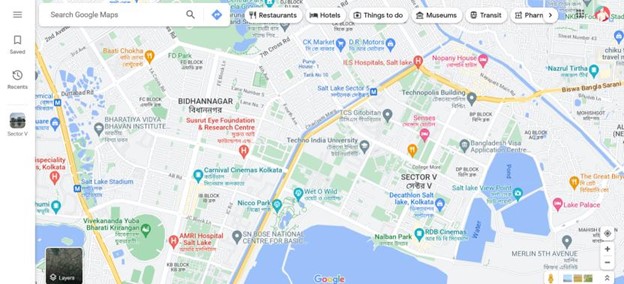
Step 1: Visit the Google Maps webpage and my maps login with your Google account. Click the Put symbol in the top-left corner once you have logged in.
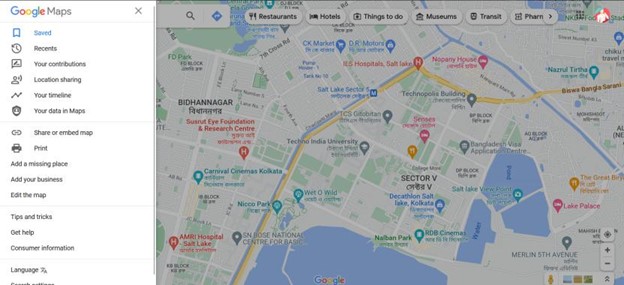
Step 2: Select “Saved” from the options menu.
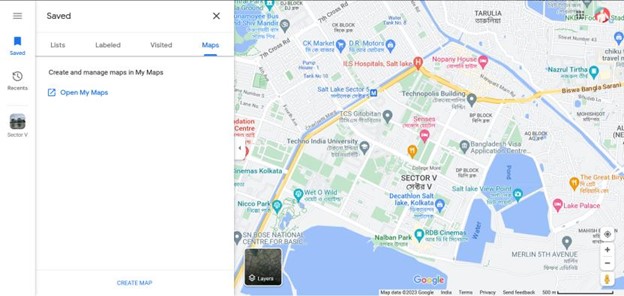
Step 3: Select the “Maps” tab from the “Your Places” option on the left. Choose the “Create Map” option from the menu’s bottom.
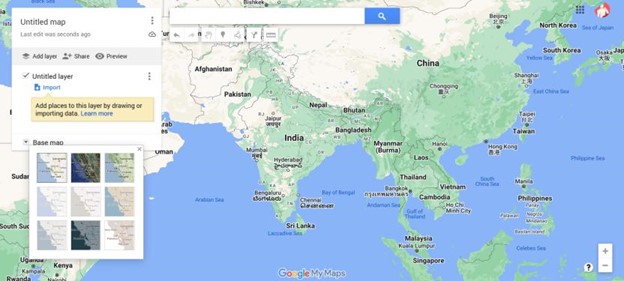
Step 4: A new browser tab will open with the map creation window. Select the “Untitled map” phrase at the top of the list of options on the left to give it a name.
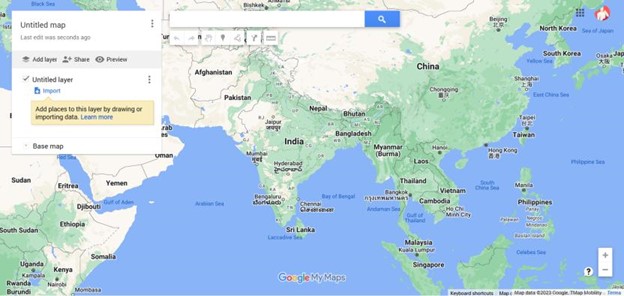
Step 5: Give your map an acronym and a brief description in the “Edit map title and descriptions” option, then click “Save” to store it.
Customized Map Layers
The “Base Map” layer, which is the default Google custom maps viewpoint, is the lowest layer of your customized map.
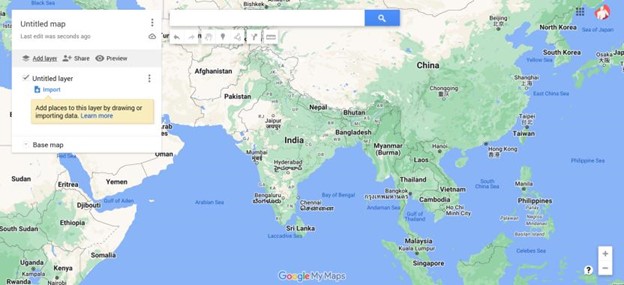
Step 1: Click the options icon next to “Base Map” and pick a new map theme to change the “Base Map” layer’s design.
Step 2: By standard, an “Untitled Layer” is included when you build a new customized map in Google Maps.
Step 3: Choose the “Add layer” option to add as many different layers as you would like to your map, allowing you to distinguish between its many elements.
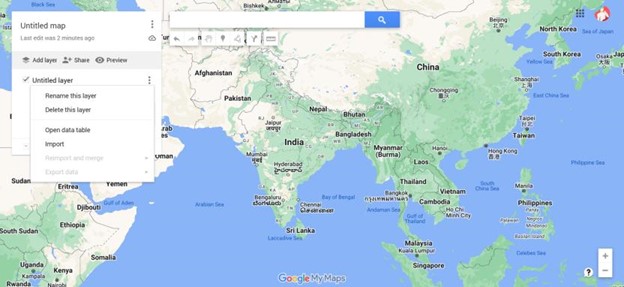
Step 4: To change the name of this layer, click “Rename Layer” in the drop-down selection after choosing the three-headed icon next to it.
Step 5: Choose “Delete Layer” in its place to remove it.
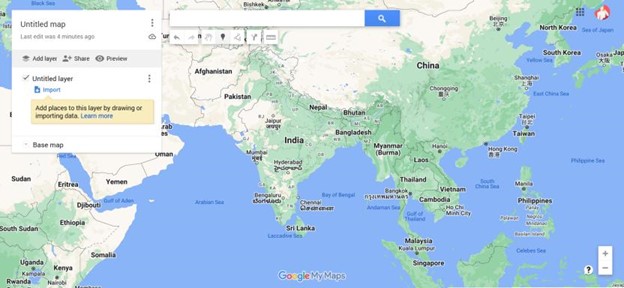
Google Maps: Adding Features to a Customized Map
Google Maps allows you to add various elements to a custom map. You may draw directions, marker stages, shapes, and lines straight into the map.
Start by visiting the Google Maps webpage and choosing the hamburger-style menu > Your Location > Maps > Create a map free to ensure you are in the customized map editor.
Combining a Marker Point
A pinpoint on the map is referred to as a custom marker point. This can give an area extra explanations and direct map viewers to a place or region not included in the “Base Map” layer.
Step 1: Ensure you have selected a suitable location on the “Base Map” layer before adding a marker point on the map itself. When ready, choose “Add Marker” from the menu below the search field in the customized map editor.
Step 2: Select a map region with your mouse or trackpad. This will open the marker editor; provide an appropriate designation and description before choosing “Save” to add it to the map you have created.
Incorporating Lines or Shapes
You may add unique contours and lines to your map to highlight particular places.
Step 1: To begin, choose “Add a line or shape” from the menu below the search bar after clicking the “Draw a Line” option.
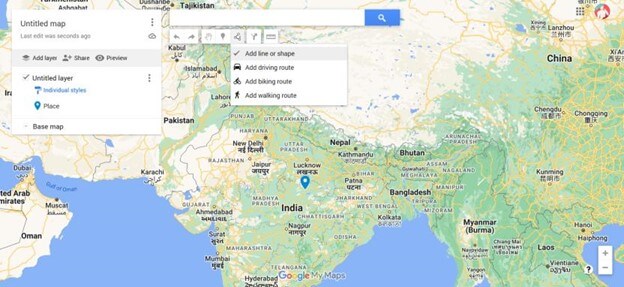
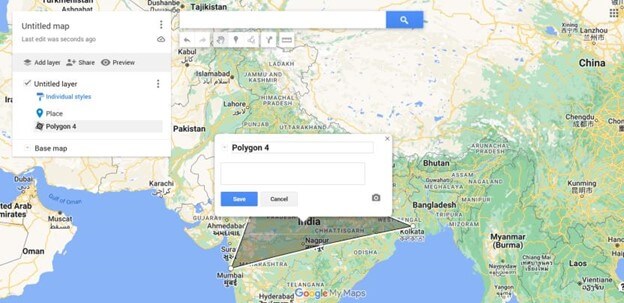
Step 2: Using your computer’s mouse or trackpad to draw a line at a suitable location on the map, connect many lines to form a joined-up shape. Entering characters submits lines.
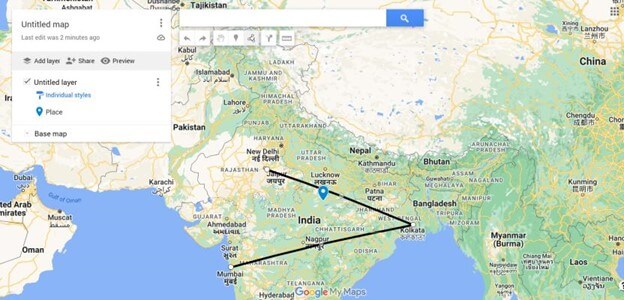
Step 3: In the pop-up menu, give your choice a unique name and explanation before clicking “Save” to finish.
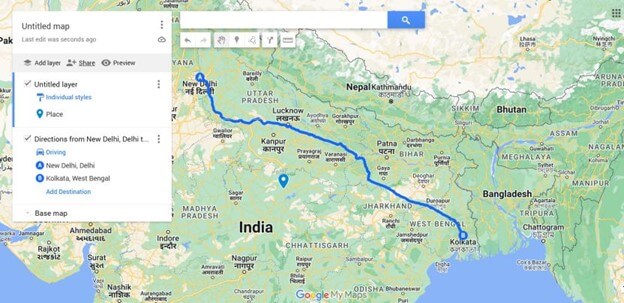
Making Customized Directions
Adding a directions layer to a custom map lets you easily publish directions from point A to point B.
Step 1: Select “Add Directions” from the menu below the search box to build this layer.
Step 2: The menu on the left will now show the instructions layer. Fill in the “A” text box with your place of departure point and the “B” text box with the destination point.
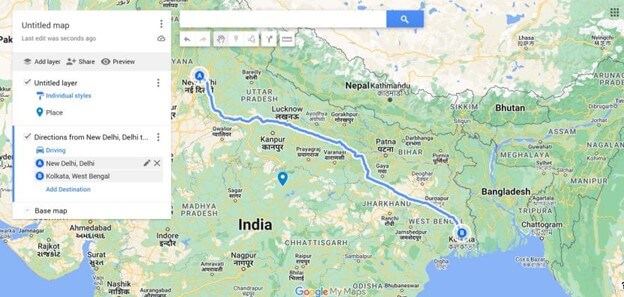
Step 3: The map will be modified to reflect the path between your designated places after both the “A” and “B” boxes have been filled in.
Share Google Maps Custom Map
Once you have made your map, you can view it anytime from either the Google Custom Maps webpage or the hamburger menu under Saved > Maps in Google My Maps.
Your personalized map is initially just visible to you, but you can share it. Navigate to the Google Custom Maps internet site, log in, and then choose the “Owned” page to get your personalized map.
Step 1: Select the “Share Map” option to distribute it to others. This will allow you to email, embed, or share your personalized map across multiple social media networks.
You may also get an individual hyperlink to your map, letting you send it straight to others.
Step 2: Choose the map you created to get back to the map designer on the Google Custom Maps website’s “Owned” tab, and finally, click the “Share” option in the menu on the left side.
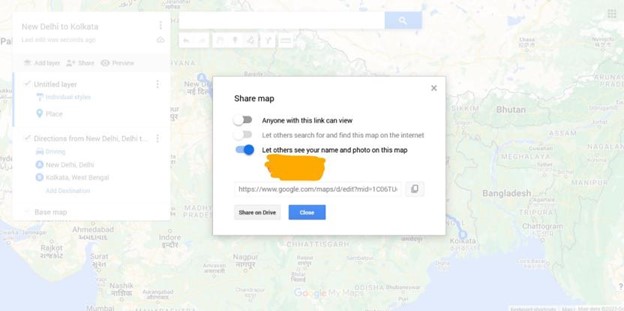
This will open the “Share Map” menu of choices. If you would like, you may make your map accessible online and open it for anybody with the URL to view.
It is incredible to have the ability to use Google My Maps’ capability for your unique maps. It is one of Google Maps’ fewer-popular options besides “Local Guides.” Remember that this cannot be the same as pointing out missing landmarks or routes on a public map.
Conclusion
It is simpler than you would think to make your personalized map. Utilizing the Google Custom Maps webpage or mobile app is the most widely used technique for producing custom maps, and this is where most users begin. This often works well for specific activities like creating a route or outlining a few places.
However, consider looking at greater-level mapping services if you want to carry out any more significant customizing, such as locating hundreds or thousands of sites at once or wishing to design more complicated routes.
Author Bio:
Dinesh Lakhwani 

Dinesh Lakhwani, the entrepreneurial brain behind “TechCommuters,” achieved big things in the tech world. He started the company to make smart and user-friendly tech solutions. Thanks to his sharp thinking, focus on quality and the motto of never giving up, TechCommuters became a top player in the industry. His commitment to excellence has propelled the company to a leading position in the industry.
Popular Post
Recent Post

Duplicate File Finder Pro: A Complete Review, Everything You Should Know
Computers collect thousands of files over time. Well, yes! Many of them end up being duplicates created by backups, downloads, or accidental copies. These extra files take up valuable storage space and make it harder to keep everything organized. Finding and removing them manually can take hours. Right? Duplicate File Finder Pro is a tool […]

Monitor Screen Calibration Guide: Everything You Should Know
Your monitor shows colors every single day. But are those colors actually correct? Most people never stop to check this. They just use the screen as it comes out of the box. This habit can lead to wrong colors in photos, videos, and work files. Colors may look too warm or too cold without you […]

How To Check Installed RAM and RAM Slots [Complete Guide]
RAM plays an important role in how smoothly a computer runs. Short for Random Access Memory, it stores the data and instructions that Windows and active applications need at any given moment. From opening multiple browser tabs to running games and productivity software, RAM helps keep everything responsive. A system with limited memory may experience […]

What is Microsoft Autopilot Everything You Need To Know
Technology has changed the way companies manage computers. Well, yes! Employees now work from offices, homes, and remote locations. Setting up devices manually for every worker takes time and effort. It can also create mistakes that slow down productivity. This is where Microsoft Autopilot becomes useful. It helps businesses prepare and deploy Windows devices with […]

Enable Automatic Device Locking Feature Windows: Complete Guide
Introduction: Your computer stores important information such as emails, documents, passwords, and personal photos. Leaving it unlocked can put that data at risk. Thankfully, Windows includes built-in features that can automatically lock your device when you are away. Setting up automatic device locking is quick and does not require any extra software. In this guide, […]

How to Update Wireless Network Driver in Windows 11 and 10
Your Wi-Fi keeps dropping. Pages load slowly. The connection feels unstable? Well, you are not alone. Most of the time, the problem is not with your internet plan. It is with your wireless network driver. A driver is a small piece of software that helps your computer talk to its hardware. When it gets outdated, […]

Common Windows 11 Problems and Solutions (2026 Version)
Windows 11 has become more polished over the years, but it is still not completely free from problems. Even after regular updates from Microsoft, many users continue to face issues like lagging performance, failed updates, audio troubles, random crashes, and network errors. Some problems appear after installing new features, while others develop gradually as the […]

Fortect Driver Updater Review: Features, Steps, Pros, and Cons.
A new PC usually feels quick and responsive. Applications open instantly, games run smoothly, and everything works as expected. As time passes, however, you may notice slower performance, system crashes, hardware glitches, or devices that stop working properly. While many people assume malware or low storage space is to blame, outdated drivers are often the […]

New Features Coming in Windows 11 This Year [2026]
Microsoft is always working to make Windows better. This year is no exception. The company has announced and rolled out several exciting updates for its users. These updates touch almost every part of the operating system. From the Start menu to system settings, changes are arriving fast. If you use Windows daily, you will want […]

