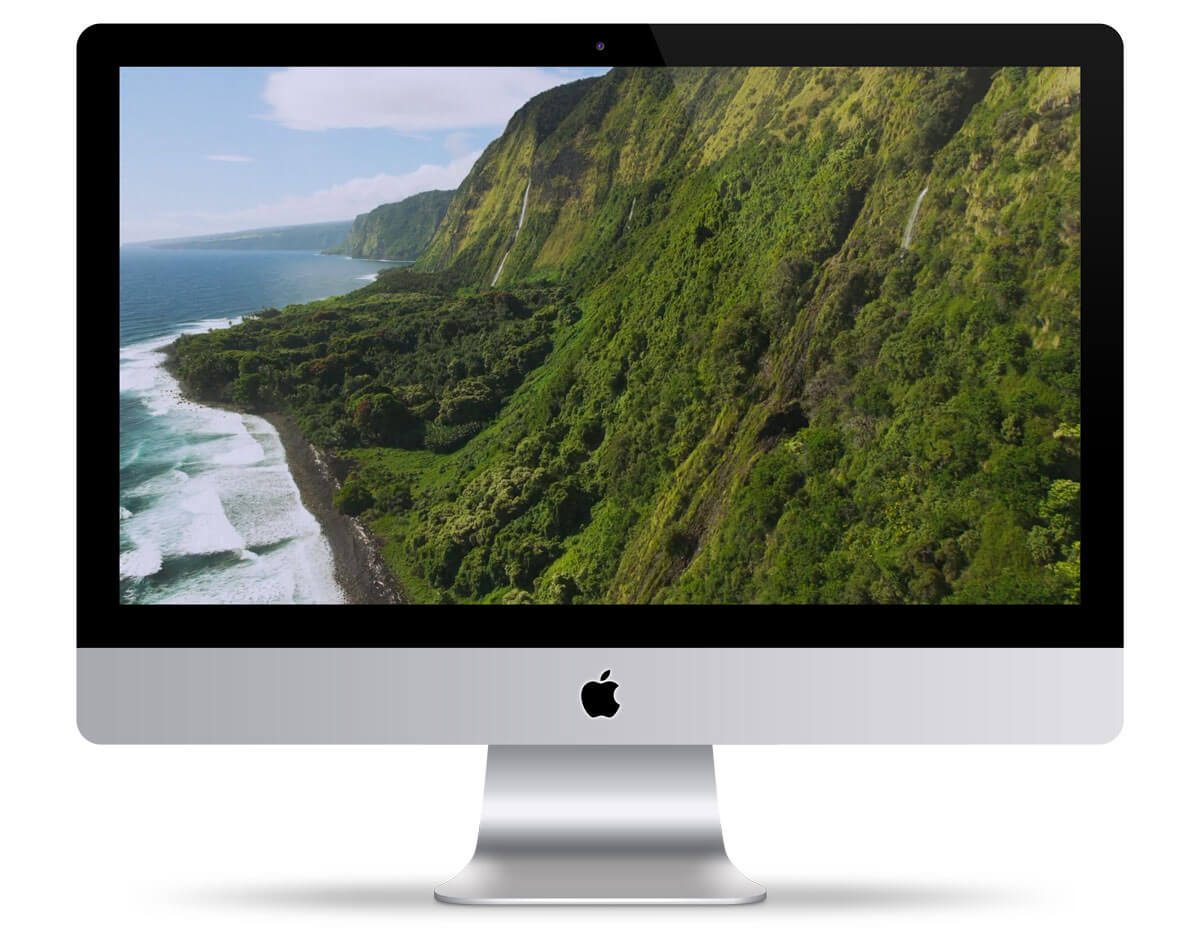
How to Change and Customize Screen Saver on Mac
Introduction
While operating on different systems, you can use various tactics to improve the overall user experience. Many users assume that activating the screen saver is not helpful on your Mac device. In reality, there are benefits to keeping it as a fun element on the screen when the computer is idle. Also, it works as a security measure if you activate the password protocol here.
Using the default screen saver on your system or keeping a custom screensaver Mac is possible. In this context, there are specific steps that you have to carry out. Know the step-by-step sequence and follow through with the process.
What is a Mac Screen Saver?
The screen saver on Mac computers are programs that create a blank display screen and includes moving patterns or images on a screen. It activates automatically on computers like Macbooks, etc., if you enable the function, and it occurs after a decided period of the idle screen.
The initial use of these programs was to safeguard the plasma/CRT-based computer screens from phosphor burn-in. Now, Mac users can use this program to keep the desktop closed off when they are away from the system for more privacy.
How to Change the Screen Saver on Mac?
The process users have to follow to change the screen saver on Mac is not complicated. There are also customization options available for keeping different patterns in the screen saver, changing images, adjusting time settings, and activating password protection. Here are the many methods you can handle on your device to customize this program to your liking.
Method 1: Go through System Settings on macOS Ventura Devices
In terms of how to change the screen saver function on Mac devices, it is essential to consider the version of macOS running on the computer first. For the latest Mac devices, the version is macOS Venture 13. The way to access and change screen savers here is through System Settings. Let’s proceed with the steps.
How to do this?
Step 1: On the Mac device, click on the Apple icon to open the menu.
Step 2: Next, tap on System Settings.
Step 3: Scroll down the left panel and choose Screen Saver.
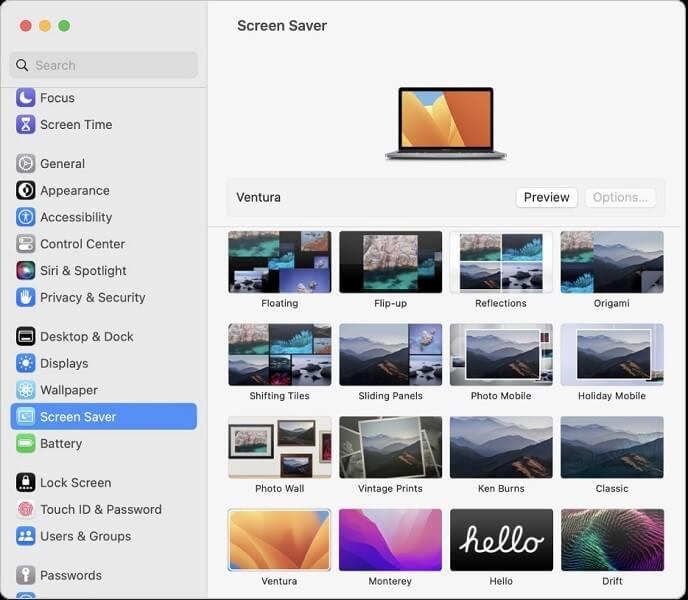
Step 4: Choose the thumbnail for the screen saver style you want to change to from the right section and press the Options icon above.
Step 5: Select your Options parameters next, like the speed, color, etc. In case you add a slideshow, choose “Shuffle slide order” for the device to adjust the pictures in random order.
Step 6: Under Source, tap the pop-up menu and choose the images present in this section or from a Photo Library folder on Mac.
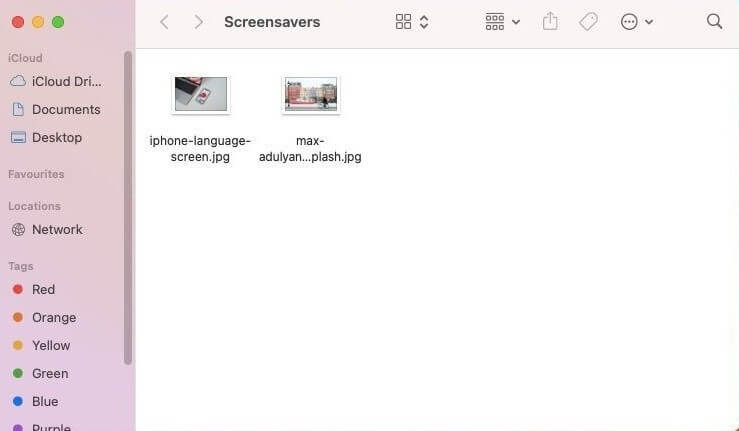
Step 7: See the top thumbnail for a minimized look of the final screen saver look, or click the Preview button to see it full-screen.
Step 8: Hit OK at the end if all the changes suit your taste.
Method 2: Go through the Desktop & Screen Saver Program on Mac
For Mac devices before macOS 13, the Desktop & Screen Saver program is the section to enter. There, it is possible to make different changes to the custom screensaver Mac users choose. Typically, the device versions that this relates to are macOS 10.14 (Mojave), macOS 11 (Big Sur), macOS 10.15 (Catalina), and macOS 12 (Monterey).
The steps here for adjusting screen saver settings are relatively simple of different than the macOS 13 Ventura version users will use. Still, the interface design of this app is slightly different, so know the specific steps for that.
How to do this?
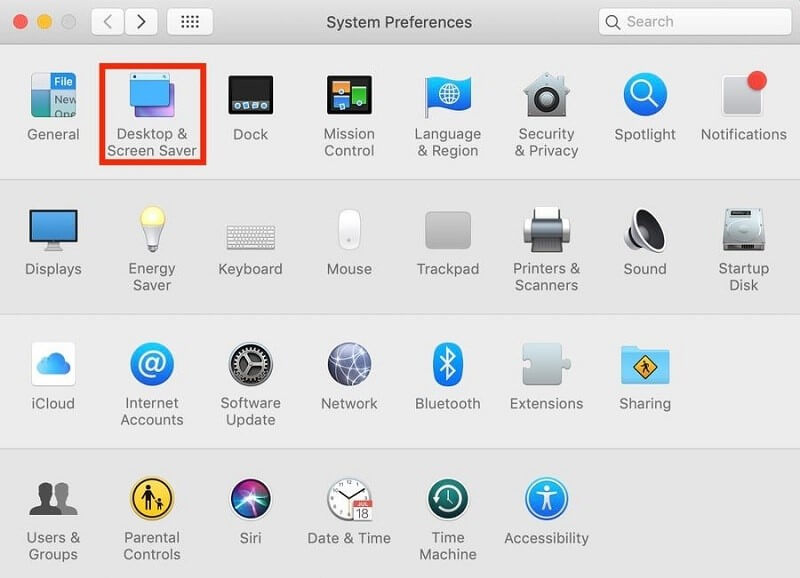
Step 1: On the Mac computer, click on System Preferences.
Step 2: From the options, choose Desktop & Screen Saver.
Step 3: In the next window, choose the Screen Saver tab on the upper part beside the Desktop option.
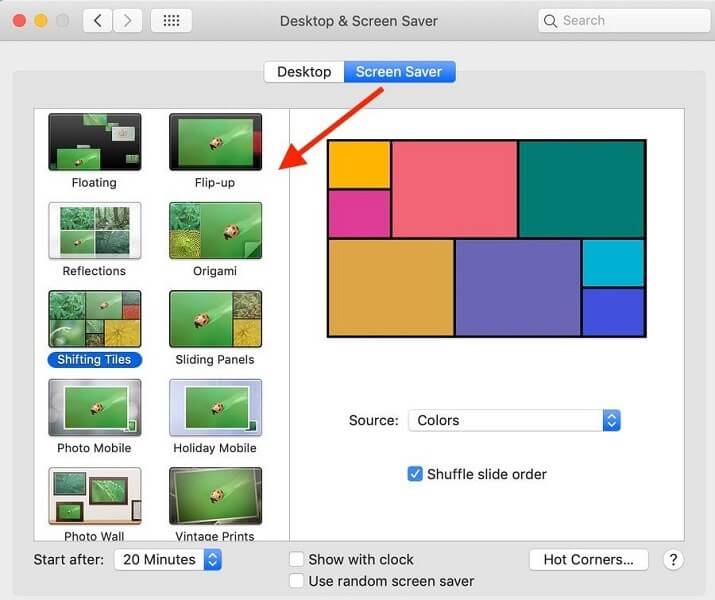
Step 4: Multiple screen saver styles will appear in the left section. Select the one you prefer- a miniature representation of that will appear on the right.
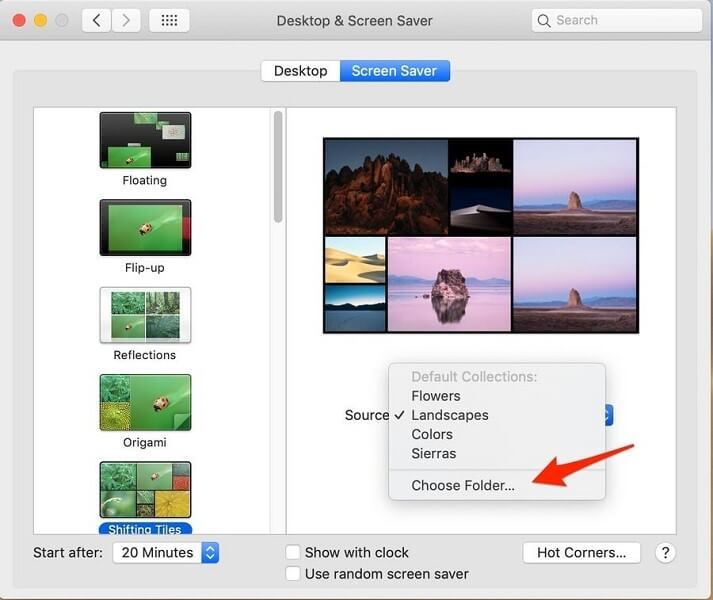
Step 5: Tap on the Source option and select a style like Landscapes. Then hit the “Choose Folder…” section to add your images from the device storage.
Step 6: Hover your mouse over the right-side screen-saver template you made and choose Preview.
Method 3: Password Protect the Mac Screen Saver
You can set a password when you change the screen saver on Mac. This will assure better security for your files when you are away from the screen so other people cannot access and view the screen in your absence. With a pre-saved password, only the device owner can reaccess the Mac device.
How to do this?
Step 1: On Mac, click on System Preferences.
Step 2: Next, choose Security & Privacy and open the General option.
Step 3: You can activate “Require Password” by clicking the checkmark beside it. Set the duration to Immediately.
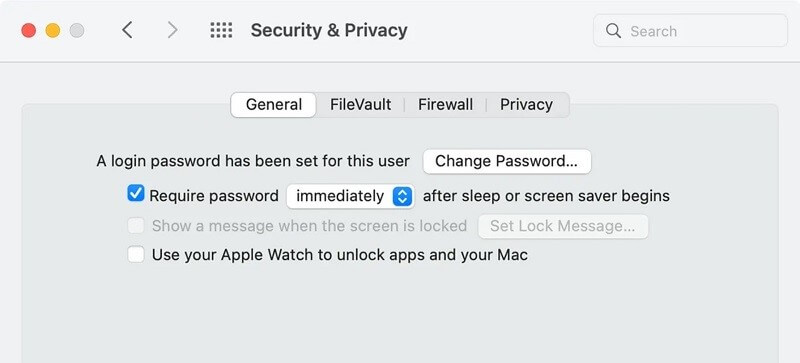
Step 4: When the screen goes idle, and the screen saver activates, the device screen will password lock automatically.
Method 4: Set up the Timer Function for the Screen Saver on Mac
It is possible to set up a screen saver timer if you want to device exactly when the screen saver activates. For example, if a person leaves the system unattended for 5 minutes occasionally, it is better to save the timer accordingly.
However, if one does it regularly, unlocking the screen each time, it locks will get stressful. So, set a customized timing for Screen Saver settings.
How to do this?
Step 1: On your Mac device, click on System Preferences > Desktop & Screen Saver. Then, tap on the Screen Saver tab. On the other hand, on the macOS 13 computer, click on the Apple menu > System Settings > Screen Saver.
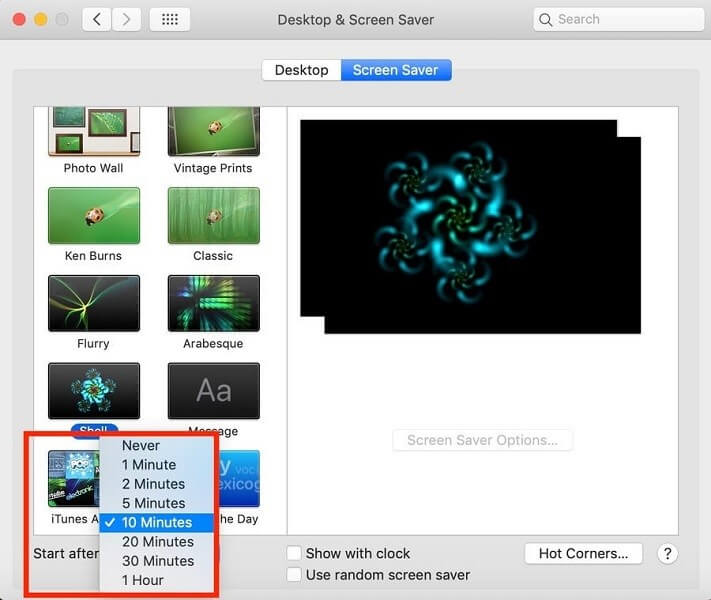
Step 2: Find the “Start After” drop-down menu and click on it.
Step 3: Choose your preferred duration for the screen to stay inactive, after which the screen saver will automatically enable, e.g., 10 minutes.
Conclusion
To sum up, the processes related to making changes to the Mac screen saver are relatively simple. At the same time, you should make sure to follow the steps for each feature adjustment, like adding a password function, feature images/patterns, or setting the timer correctly.
Alternatively, you can use a third-party screen saver program on your computer if you prefer. But these apps are not always safe, so you should use a tool like CleanMyMac X to keep track of your device’s performance, maintenance, and protection work.
Popular Post
Recent Post
How to Troubleshoot Xbox Game Bar Windows 10: 8 Solutions
Learn how to troubleshoot and fix issues with the Xbox Game Bar not working on Windows 10. This comprehensive guide provides 8 proven solutions to resolve common problems.
How To Record A Game Clip On Your PC With Game Bar Site
Learn how to easily record smooth, high-quality game clips on Windows 11 using the built-in Xbox Game Bar. This comprehensive guide covers enabling, and recording Game Bar on PC.
Top 10 Bass Booster & Equalizer for Android in 2024
Overview If you want to enjoy high-fidelity music play with bass booster and music equalizer, then you should try best Android equalizer & bass booster apps. While a lot of these apps are available online, here we have tested and reviewed 5 best apps you should use. It will help you improve music, audio, and […]
10 Best Video Player for Windows 11/10/8/7 (Free & Paid) in 2024
The advanced video players for Windows are designed to support high quality videos while option to stream content on various sites. These powerful tools support most file formats with support to audio and video files. In this article, we have tested & reviewed some of the best videos player for Windows. 10 Best Videos Player […]
11 Best Call Recording Apps for Android in 2024
Whether you want to record an important business meeting or interview call, you can easily do that using a call recording app. Android users have multiple great options too. Due to Android’s better connectivity with third-party resources, it is easy to record and manage call recordings on an Android device. However it is always good […]
10 Best iPhone and iPad Cleaner Apps of 2024
Agree or not, our iPhones and iPads have seamlessly integrated into our lives as essential companions, safeguarding our precious memories, sensitive information, and crucial apps. However, with constant use, these devices can accumulate a substantial amount of clutter, leading to sluggish performance, dwindling storage space, and frustration. Fortunately, the app ecosystem has responded with a […]
10 Free Best Barcode Scanner for Android in 2024
In our digital world, scanning barcodes and QR codes has become second nature. Whether you’re tracking packages, accessing information, or making payments, these little codes have made our lives incredibly convenient. But with so many barcode scanner apps out there for Android, choosing the right one can be overwhelming. That’s where this guide comes in! […]
11 Best Duplicate Contacts Remover Apps for iPhone in 2024
Your search for the best duplicate contacts remover apps for iPhone ends here. Let’s review some advanced free and premium apps you should try in 2024.
How To Unsubscribe From Emails On Gmail In Bulk – Mass Unsubscribe Gmail
Need to clean up your cluttered Gmail inbox? This guide covers how to mass unsubscribe from emails in Gmail using simple built-in tools. Learn the best practices today!
7 Best Free Methods to Recover Data in Windows
Lost your data on Windows PC? Here are the 5 best methods to recover your data on a Windows Computer.
