


A slow computer makes it hard to focus. Programs take too long to open. Free space keeps shrinking until the disk is almost full. This happens to most PC owners at some point. Even new machines can slow down after a while. That is the exact problem cleanup tools are built to solve. They comb […]
Ways to Completely Clear Search History on Your Mac
People use their Mac devices for various reasons, one of the most prominent ones being for browsing purposes. However, after visiting any website on the device, the browser version stores cache and other records of the query in the system. This affects the performance of the system as the excess records can lag the disk speed.
Plus, there is a concern over privacy as well since the browser automatically saves information for future login attempts.
Therefore, for better device performance, you should0 from each browser location. Are you wondering how? In this post, we cover various appropriate methods available to effectively clear out the search history on Mac. Read on to find out more.
Why Should You Keep Your Browser History on Mac Clean?
For different individuals, the reason to delete search history on their Mac device varies. The common ones include:
- Potential security threat- Hackers can use cookies remaining in your search history with account and password information. They can acquire personal data and enter one’s accounts easily.
- Space issue– The system records the searched page URLs and caches for easier re-downloading. Not deleting the browsing history accumulates a lot of cookies; this lags the hard drive storage and slows it down.
- Corrupted cookies– Some of the stored cookies can be outdated and corroded, causing system issues.
- Loss of privacy-Users use their personal information to access certain websites, like e-commerce stores. These are visible to potential hackers.
It is important to remove the browser search history to keep the device and system security.
Methods to Delete Search History on Mac
There are varying methods for removing search history on Mac, depending on the type of browser. You can use the tool of CleanMyMac X for a quick and simple cleaning process.
Method 1: Use CleanMyMac X
One of the most efficient manners of clearing out Mac history is using the comprehensive and user-friendly cleaner app, CleanMyMac X. It can remove unwanted apps, system junk, and malware after a quick scanning process.
The software can find massive and outdated files that are hidden and unused DMGs, detect and shield against malware/virus, and erase sensitive search history. The software is useful to find the apps and files that are wasting excess space and remove them directly.
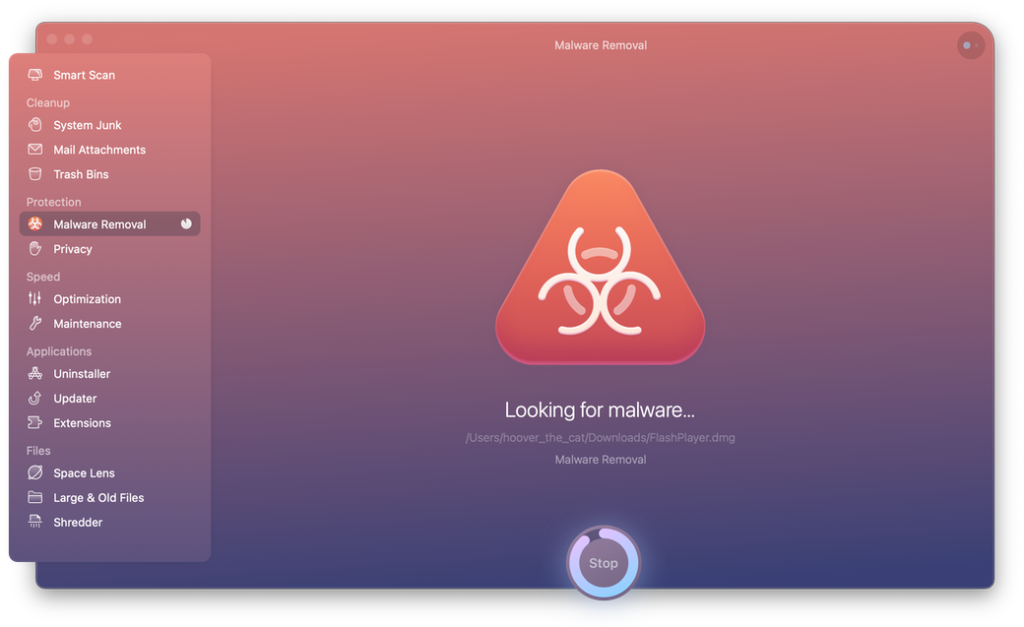
The application is an Apple-authorized software and includes a wide range of features besides the cleaning service. Here are the steps to use the CleanMyMac X for search history cleaning.
Step 1: Download & install CleanMyMac X.
Step 2: Access the Privacy module.
Step 3: Select the main browsers you operate regularly.
Step 4: Click on the “Browser History” option.

Step 5: Select Remove.
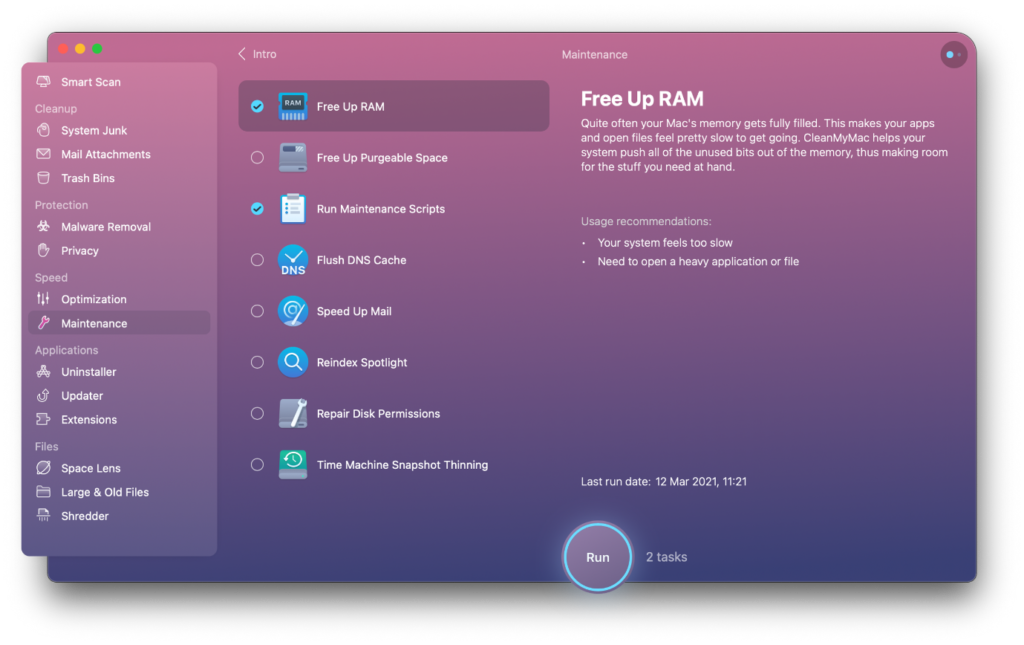
The application is useful for clearing out more than the browsing history site URLs and cookies. Other modules target different types of junk files in the device and internet-based components like old files, downloads, logs, and caches.
Besides using CleanMyMac X software, another tactic you can adopt is to target each browser and clean their records individually.
Method 2: Manually Delete Safari Browsing History in Mac
Users can directly remove all records from the Safari browser history for specific periods. The browser history information is removed from all devices that have Safari if they are connected to one iCloud, and the devices have the iCloud preferences turned on.
To note, the websites that you visit would still keep the browsing record even if you clean the local browsing history.
The type of data that Safari deletes after users clear the history include:
- The back-and-forth sequence of website URL access that is currently active
- Previous web pages that you visited
- Recent searches
- List of sites visited frequently
- Web page icons
- Snapshots of open webpages
- Website URLs under Quick Website Search
- Links of downloaded items (this does not remove the downloaded file)
- Websites with notifications switched on
- Websites with location settings on
Main Steps to Clear Search History from Safari
Step 1: Access Safari through iMac or MacBook Air/Pro device.
Step 2: Choose History > Clear History.
Step 3: Choose the particular dates you want to delete the browsing history of. Alternately, select “Full History” if you want to remove the full search history from Safari.
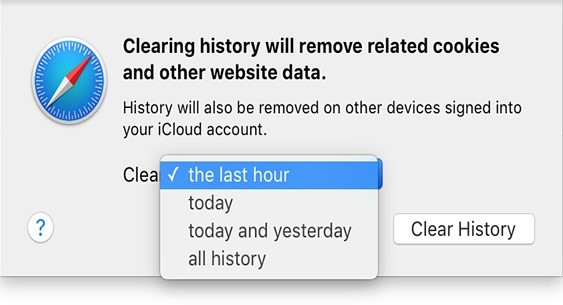
Step 4: Press on “Clear History”.
You can directly use the Safari feature for cleaning out Recent Searches for a quick removal process. Through the Recent Search List feature, users can normally check the past search items and reach the site without much browsing.
Main Steps to Remove Safari Recent Search List on Mac
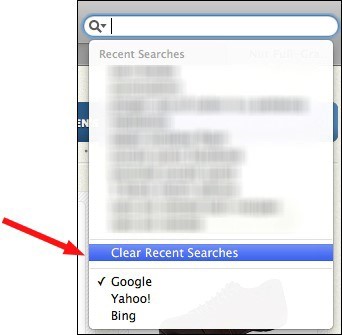
Step 1: Access the Safari browser on your Mac device.
Step 2: Select the URL bar. It would show all recently searched URLs in a list format.
Step 3: Scroll to the bottom of the list and click on “Clear Recent Searches”.
Additionally, you can browse through the Private Browsing Mode on your Mac through the Safari browser. This does not record any search details.
Method 3: Manually Delete Firefox Browsing History in Mac
Another popular browser of choice for Mac users is Firefox. The steps for removing search history cookies on this browser are as follows:
Step 1: Launch the Firefox browser via Mac.
Step 2: Select the “Clear Recent History” option.
Step 3: Choose download history, browsing history, search/form history, cookies, caches, and other preferences. Click on “Clear Now”.
Main Steps to Remove Specific Firefox Pages from Search History
Step 1: You would see a menu icon with a hamburger shape on the browser. Choose that.
Step 2: Access History and then select “Manage History”.

Step 3: Use the control button and select all pages you wish to remove one by one.
Step 4: Clear the page. You can delete all related data for a page as well through the “Forget About This Site” option.
Main Steps to Privately Browse Firefox on Mac
Step 1: Select the File option from the menu on top of the screen.

Step 2: Click on “New Private Window”. Then, begin private browsing.
Method 4: Manually Delete Chrome Browsing History in Mac
You can clear the browsing history while using the Google Chrome browser through the following steps on Mac.
Step 1: Access the Google Chrome browser.
Step 2: Select “Clear Browsing Data” after clicking on the Chrome icon.
Step 3: A pop-up window would appear. Select all of the items you wish to delete. Select “Clear Browsing Data” to permanently remove Google records.
Main Steps to Remove Specific Chrome Pages from Search History
Step 1: You would notice a three-dot icon at the top of the screen after opening Chrome browse. Press on that and then choose History.
Step 2: After the list “History” opens, select specific pages that you want to delete.
Step 3: Click on the “Delete” button.
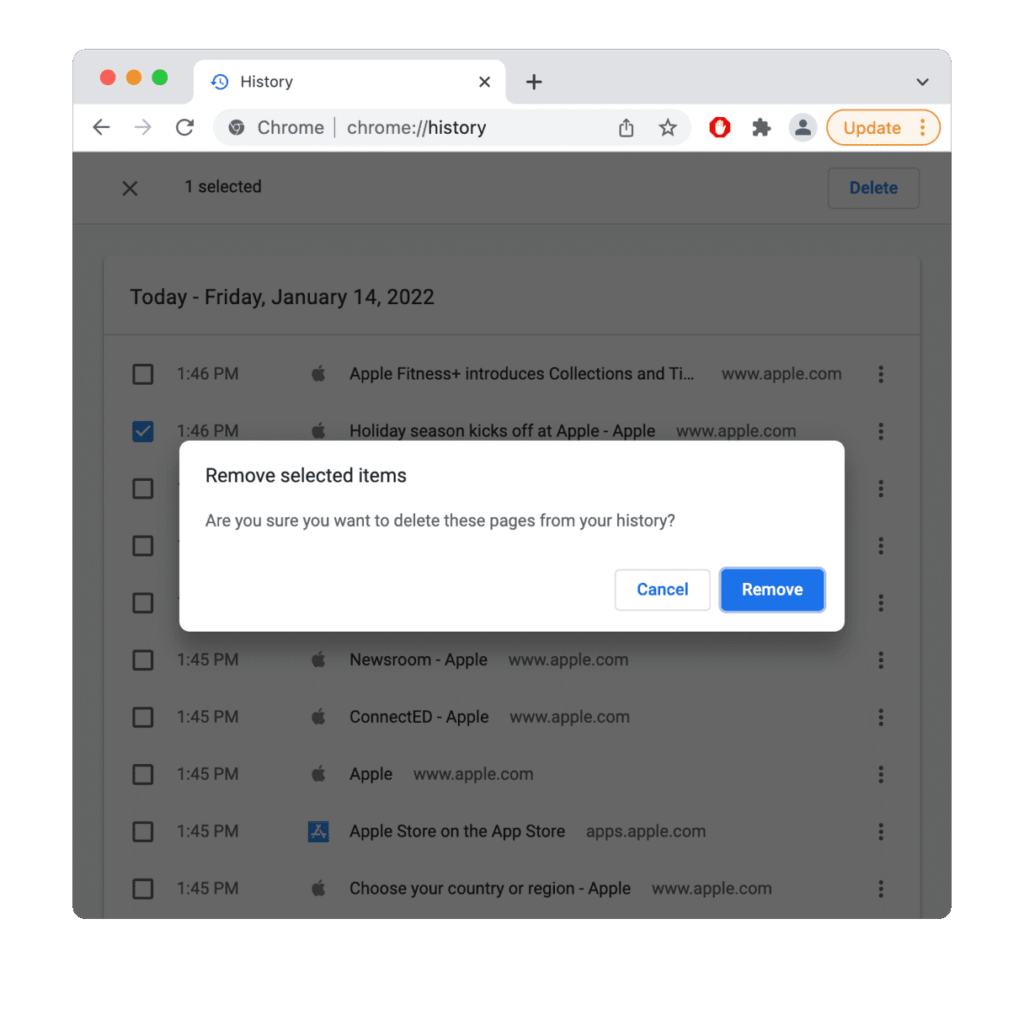
Step 4: Press “Remove” for the final confirmation.
Main Steps to Privately Browse Chrome on Mac
Step 1: Access the Chrome browser and open the three-dot icon (menu).
Step 2: Choose the “New Incognito Window” option.
Method 5: Manually Delete Opera Browsing History in Mac
The following are the steps to manually remove all search history from Opera on Mac.
Step 1: Launch the Opera browser on your device.
Step 2: Select History from the top screen menu and choose “Show All History”.
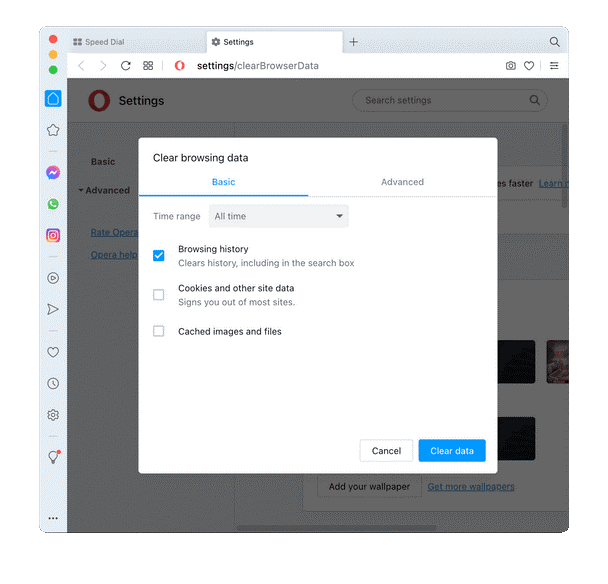
Step 3: Select the “Clear Browsing Data” option.

Step 4: Under the time range selection, opt for the “All Time” choice.
Step 5: Click Browsing History > Clear Data.
Main Steps to Remove Specific Opera Pages from Search History
Step 1: Open the History menu through the top-most bar on Opera.
Step 2: Select “Open Full History View”.
Step 3: Choose the pages you want to delete.
Step 4: Click your cursor on the “X” sign icon.
Main Steps to Privately Browse Opera on Mac
Step 1: Open the File Menu under this browser.
Step 2: Then, open “New Private Window”.
Conclusion
It is important for you to delete all data history from your browsers to keep your Mac device safe and fast. Either manually clear all browsing history or use the one-in-all application of ClearMyMac X. You should read through all of the processes we have listed to make up your mind.
Author Bio:
Dinesh Lakhwani 

Dinesh Lakhwani, the entrepreneurial brain behind “TechCommuters,” achieved big things in the tech world. He started the company to make smart and user-friendly tech solutions. Thanks to his sharp thinking, focus on quality and the motto of never giving up, TechCommuters became a top player in the industry. His commitment to excellence has propelled the company to a leading position in the industry.
Popular Post
Recent Post

Fortect Software Review: The Ultimate PC & Mobile Cleaning, Optimization & Security Tool
Slow computers are a common problem for almost every Windows user. Well, yes! Over time, your PC picks up junk files. These files sit quietly in the background. They take up space and slow things down. Programs open slower. Windows takes longer to boot. Even simple tasks like opening a folder can feel sluggish. There […]

CCleaner PC Optimizer Review: A Complete Guide for Windows Users
If your computer has started to feel slow, you are not alone. Most Windows PCs slow down over time. Junk files pile up. The registry gets messy. Too many apps open when you start your PC. All this adds up and makes even a good machine feel tired. This is where a PC cleaner tool […]

Auslogics Duplicate File Finder: Full Review and User Guide
A computer quietly gathers clutter over time. This includes duplicate photos, repeated downloads, and forgotten backups hiding in random folders. This buildup slowly eats away at storage and can make even a fast PC feel sluggish. Manually finding and deleting duplicates is tedious. It means checking every folder, comparing file names, and guessing which copies […]

CCleaner Duplicate File Finder: Key Features, Pricing, Step-by-Step Guide and More
Every computer collects junk over time. Right? Well, yes! Photos often get copied twice. Documents get saved in two folders by mistake. Old downloads pile up and never get deleted. This slowly eats up your storage space, and most people do not even notice until their drive is almost full. That is where a duplicate […]

Duplicate File Finder Pro: A Complete Review, Everything You Should Know
Computers collect thousands of files over time. Well, yes! Many of them end up being duplicates created by backups, downloads, or accidental copies. These extra files take up valuable storage space and make it harder to keep everything organized. Finding and removing them manually can take hours. Right? Duplicate File Finder Pro is a tool […]
Top 3 Duplicate File Finder for Windows 11 & Windows 10
If your PC storage keeps filling up even after you delete big files, duplicate files could be the real reason. Most of us save the same photo twice, download a document more than once, or copy a whole folder by mistake. Over months and years, these duplicate files pile up quietly. You do not even […]

Monitor Screen Calibration Guide: Everything You Should Know
Your monitor shows colors every single day. But are those colors actually correct? Most people never stop to check this. They just use the screen as it comes out of the box. This habit can lead to wrong colors in photos, videos, and work files. Colors may look too warm or too cold without you […]

How To Check Installed RAM and RAM Slots [Complete Guide]
RAM plays an important role in how smoothly a computer runs. Short for Random Access Memory, it stores the data and instructions that Windows and active applications need at any given moment. From opening multiple browser tabs to running games and productivity software, RAM helps keep everything responsive. A system with limited memory may experience […]

What is Microsoft Autopilot Everything You Need To Know
Technology has changed the way companies manage computers. Well, yes! Employees now work from offices, homes, and remote locations. Setting up devices manually for every worker takes time and effort. It can also create mistakes that slow down productivity. This is where Microsoft Autopilot becomes useful. It helps businesses prepare and deploy Windows devices with […]

