How to Mount ISO Files in Windows 10/11?
Installing new programs on the Windows 10/11 system are easy when you have an ISO file. It is the disc image of all the installation files required for a single program. Windows operating system 8.1 and higher allows mounting this file and quickly installing the software. So, are you looking for the detailed steps to mount ISO file?
Let us dive into details related to the ISO file in this section. We’ll start with an overview of the ISO file, the need to mount it, and the step-by-step guide to mount ISO on Windows 10 and 11 systems. You can go for any of the four methods mentioned below. Starting with a quick know-how of ISO files.
What is an ISO file?
An ISO file is a specific copy of the complete optical disk like Blu-ray, DVD, or CD archived into a single file. ISO file is also called ISO image. It is necessary to open and assemble the ISO file viewing its contents. ISO file is popularly used to back up optical disks or store data conveniently. Further, it can transfer the program from one system to another.
Why mount ISO files in Windows?
After having a quick look at the overview of the ISO file, you may think of the need to mount it. While viewing the contents of the ISO file is necessary, it can be completed by extracting or mounting the ISO file. MountingISO files are the perfect solution as it offers quick access to the files and helps save the file data. There is no need to spend hours extracting the ISO images when mounting can do it precisely.
During the ISO file mounting, it is easy to get access to the operating systems and other boot drives. These can be tested for proper functioning before starting to use the system. Hence, mounting ISO has benefits over extracting it.
Methods to mount ISO files in Windows 11
With a detailed understanding of the ISO file and the need to mount ISO file, it is easy to go through the different methods to mount it in Windows 11 system. So, below are the top four methods for the same:
- Using right-click menu
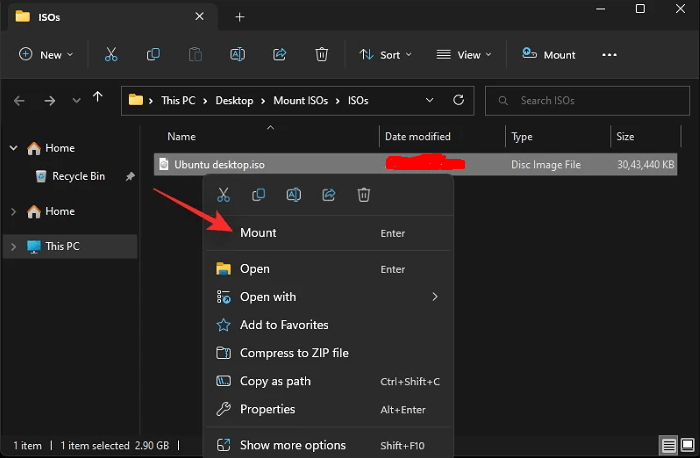
The right-click context menu can help mount ISO in Windows. The quick steps for using this method include:
- Go to the local storage to locate the ISO file and right-click on it.
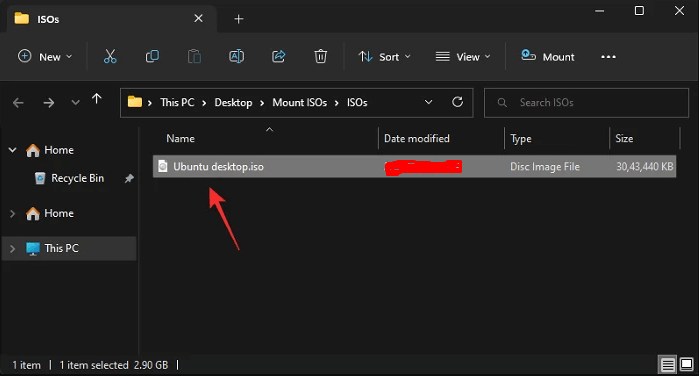
- Go through the different options and select the “Mount” option.
- Using double-click
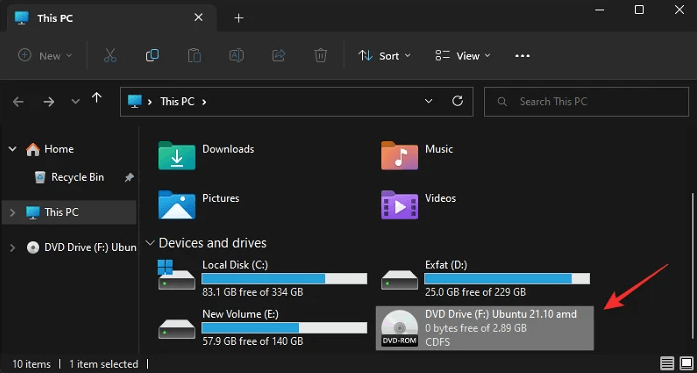
It is easy to mount an ISO file on Windows 11 by double-clicking on it. It is due to the full support offered by the Windows File Explorer to ISO images. The quick steps are:
- Double-click on the ISO file to mount it on the virtual disk on the system.
- Once mounted, the file is available in the “This PC” section of Windows 11 system in the file explorer.
- Using PowerShell
PowerShell can be used to mount ISO files on Windows 11 in the following ways:
- Go to Windows 11 File Explorer and select the required ISO file. Right-click on the file.
- Select on “Copy as Path” option.
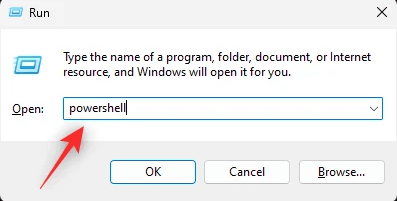
- Now, press “Windows + R” to launch the Run option on the system.
- Next, type “powershell” and then press “Ctrl + Shift + Enter.”
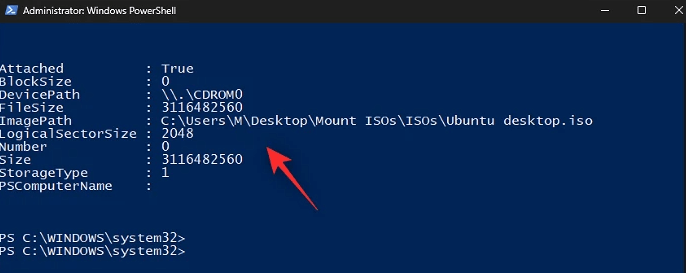
- Type the command “Mount-DiskImage –ImagePath “PATH” “ to mount ISO on Windows. All you need to do is replace the “PATH” with the ISO path copied earlier.
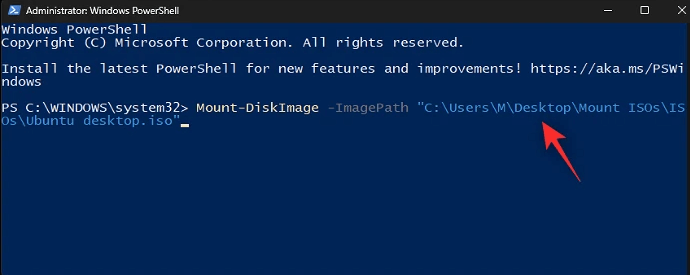
- Click “Enter” once done. The selected ISO file is successfully mounted.
- Using the toolbar
Windows 11 File Explorer offers quick access to the users for frequently used options in its Ribbon menu. It can be used to mount ISO files in the following ways:
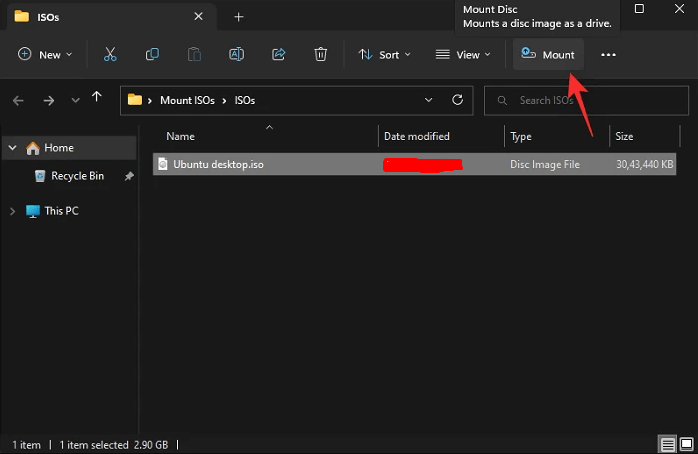
- Go to Windows 11 File Explorer and select the required ISO file.
- Select the “Mount” option available in the ribbon option.
Wrapping up
Hope everything is clear to our readers about the different methods to mount ISO files in Windows 11. It becomes easy to access the content of ISO files and use it on your Windows operating system. The options of different methods to mount ISO in Windows ensures that users can go for any of the method mentioned above without any issues.
Popular Post
Recent Post
How to Troubleshoot Xbox Game Bar Windows 10: 8 Solutions
Learn how to troubleshoot and fix issues with the Xbox Game Bar not working on Windows 10. This comprehensive guide provides 8 proven solutions to resolve common problems.
How To Record A Game Clip On Your PC With Game Bar Site
Learn how to easily record smooth, high-quality game clips on Windows 11 using the built-in Xbox Game Bar. This comprehensive guide covers enabling, and recording Game Bar on PC.
Top 10 Bass Booster & Equalizer for Android in 2024
Overview If you want to enjoy high-fidelity music play with bass booster and music equalizer, then you should try best Android equalizer & bass booster apps. While a lot of these apps are available online, here we have tested and reviewed 5 best apps you should use. It will help you improve music, audio, and […]
10 Best Video Player for Windows 11/10/8/7 (Free & Paid) in 2024
The advanced video players for Windows are designed to support high quality videos while option to stream content on various sites. These powerful tools support most file formats with support to audio and video files. In this article, we have tested & reviewed some of the best videos player for Windows. 10 Best Videos Player […]
11 Best Call Recording Apps for Android in 2024
Whether you want to record an important business meeting or interview call, you can easily do that using a call recording app. Android users have multiple great options too. Due to Android’s better connectivity with third-party resources, it is easy to record and manage call recordings on an Android device. However it is always good […]
10 Best iPhone and iPad Cleaner Apps of 2024
Agree or not, our iPhones and iPads have seamlessly integrated into our lives as essential companions, safeguarding our precious memories, sensitive information, and crucial apps. However, with constant use, these devices can accumulate a substantial amount of clutter, leading to sluggish performance, dwindling storage space, and frustration. Fortunately, the app ecosystem has responded with a […]
10 Free Best Barcode Scanner for Android in 2024
In our digital world, scanning barcodes and QR codes has become second nature. Whether you’re tracking packages, accessing information, or making payments, these little codes have made our lives incredibly convenient. But with so many barcode scanner apps out there for Android, choosing the right one can be overwhelming. That’s where this guide comes in! […]
11 Best Duplicate Contacts Remover Apps for iPhone in 2024
Your search for the best duplicate contacts remover apps for iPhone ends here. Let’s review some advanced free and premium apps you should try in 2024.
How To Unsubscribe From Emails On Gmail In Bulk – Mass Unsubscribe Gmail
Need to clean up your cluttered Gmail inbox? This guide covers how to mass unsubscribe from emails in Gmail using simple built-in tools. Learn the best practices today!
7 Best Free Methods to Recover Data in Windows
Lost your data on Windows PC? Here are the 5 best methods to recover your data on a Windows Computer.
