How to Import and Export Phone Contacts On Android & iPhone
Switching between smartphones is a status symbol these days and keeping all your contacts at one place is a bit tricky exercise. In this article, you are going to explore how to import contacts from Google Contacts to phone memory of an iPhone or an Android device or vice versa. Here we have collated ways to Import, Export, Backup / Recover deleted contacts and transfer contacts from SIM to Phone or Google Account.
Using these tips and tricks to import and export phone contacts on Android / iOS devices, you also can keep all your contacts safe and device independent. No matter if you use your iPhone or an Android device, all you need to do is sign in with your Google account, go to contacts and then import and export all your saved contacts on any device.
When you use multiple Android or iOS devices at the same time, or you plan to go for a new smartphone, you need to be certain that all your contacts are saved on Google contacts to make them available on all your devices associated with the same Google account.
In situations where you have contacts left over the phone’s local storage or SIM card, those contacts won’t be available for you on other devices. To solve this problem, here we present an easy and step-by-step process to import and export phone contacts on Android / iOS device, Google account and keep them synced on all your devices at the same time.
How to Export Device Contacts to Google Account
Here is a step-by-step guide to import and export phone contacts on Android /iOS device assuming that you have Google account configured on your device and you are signed IN.
Android Device
Export from SIM to Google Account
If you have leftover contacts on your device and you want to export contacts from your SIM to your Google account, it is quite an easy and quick process which will save you a lot of time and frustration in the future. That means when you plan to use a new smartphone, all you need to do is to log in to your Google account and all your personal and professional contacts will be ready to use on a new device.
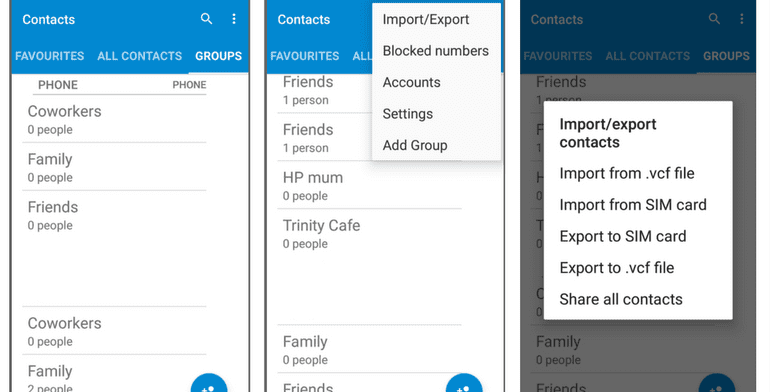
Step 1. Open Contacts App on your smartphone device Tap the three dots icon at the top right-hand corner to open the contacts menu options select ‘Import/Export’ OR ‘Import/Export Contacts’ as per your version of Android.
Step 2. Select ‘Export from SIM card’, which will export Names and Numbers saved on your smartphone’s SIM card in (.CSV or .VCF) File format in your selected location. Give a file name as (name.csv) and tap on Save / Export. Generally, it gets exported to device storage.
Export from Phone Storage to Google Account
Import the exported file from device storage to Google account
Step 3. Open ‘Contact list’ on your device Tap three dots on the top right-hand corner to open the contacts menu tap on ‘Import/Export’ OR ‘Import/Export Contacts’.
Step 4. Tap on ‘Import vCard File’ and locate and tap the vCard file to be imported from the device storage and let the import process complete.
Import Contacts on a PC / Laptop
If you have the Google account open on a Laptop / PC, you may also follow the following steps.
From your smartphone, send that exported (.CSV / .VCF) file on your email and download it on your PC.
Import Contacts in Google Account
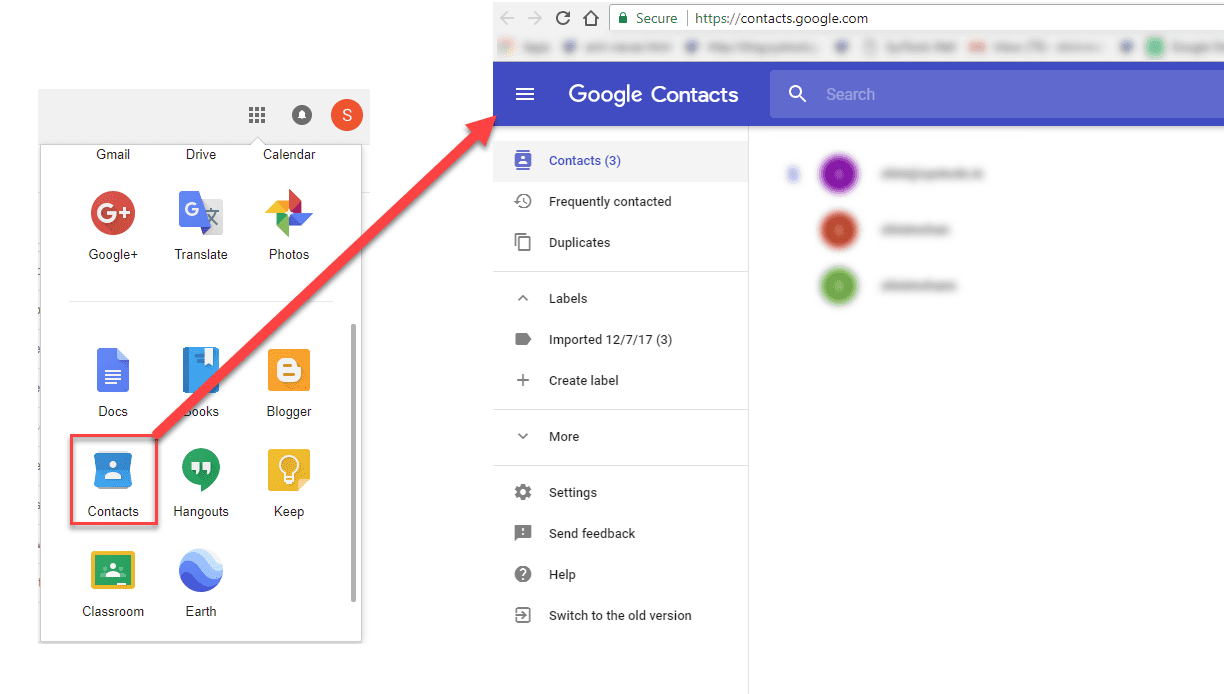
Step 1. Open contacts page in your Google account by clicking on the ‘Google Apps’ option (9 dots on the top right of the screen) and click on ‘Contacts’.
Step 2. Once you have the page open, you need to click on the ‘Import’ option on the left-hand-side panel. It will ask you to select a file (.CSV / .VCF) to import contacts. Select the downloaded file and click on the ‘Import’ button to initiate the process.
Also Read: Best iPhone and iPad Cleaner Apps
Import and export phone contacts on iPhone Device
Export from SIM to iPhone / Google Account
When you switched to a new SIM and want to import and export phone contacts on iPhone from your old SIM, you may follow these steps to get contacts from old SIM to your iPhone or Google contacts.
Step 1. Remove your new SIM card from iPhone and insert your old SIM card.
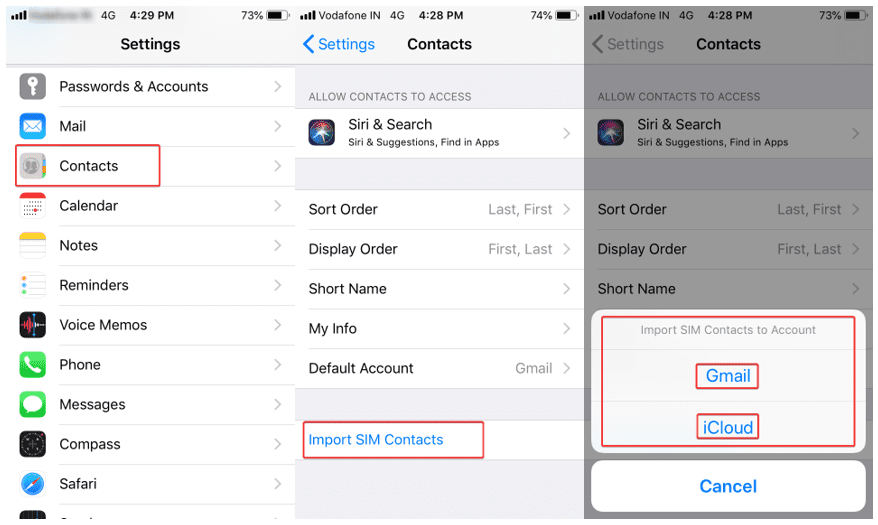
Step 2. Open ‘Settings’ on your device go to ‘Contacts’ and Tap on ‘Import SIM Contacts’.
Step 3. Select the account to be imported and let the import process be completed.
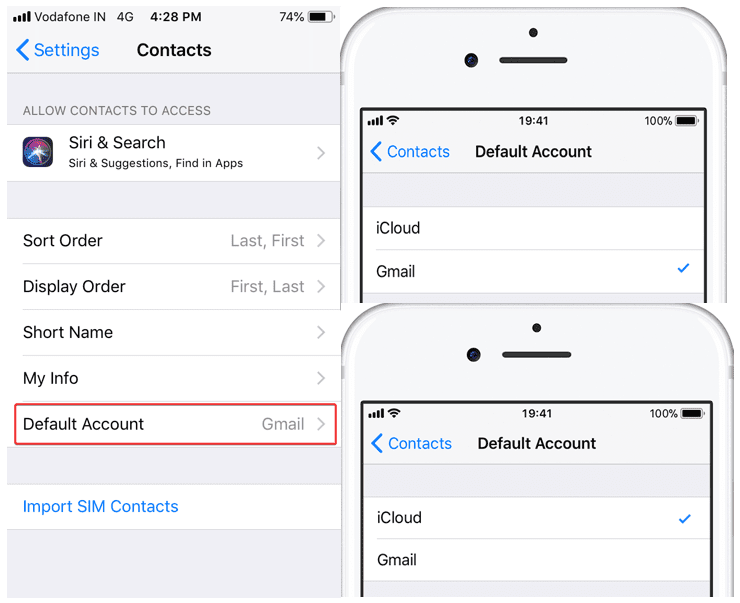
Step 4. Now you may remove old SIM and insert the new one back in your iPhone and check for the updated contacts. Imported contacts should be available in your default account (Gmail / iCloud). You may switch between accounts from below options.
Open ‘Settings’ on the device Navigate to ‘Contacts’ Tap on ‘Default Account’ and choose your default account between Gmail or iCloud.
Also Read: How to Conveniently Hide or Show WhatsApp Status from Specific Contacts
iCloud & Google Account Sharing
To export contacts from iCloud to a Google account, you can follow these steps.
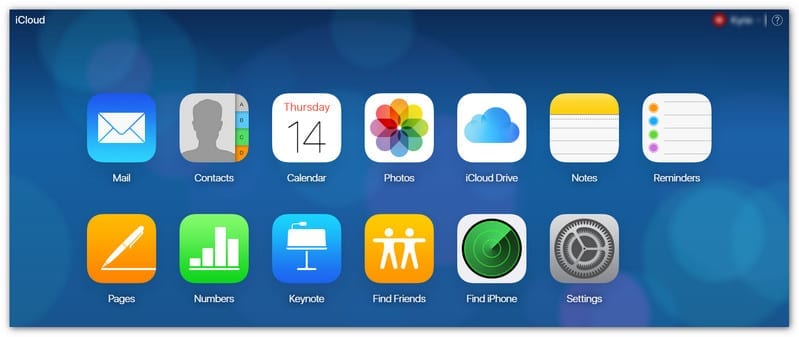
Step 1. Log in to your iCloud account on a Laptop or a PC.
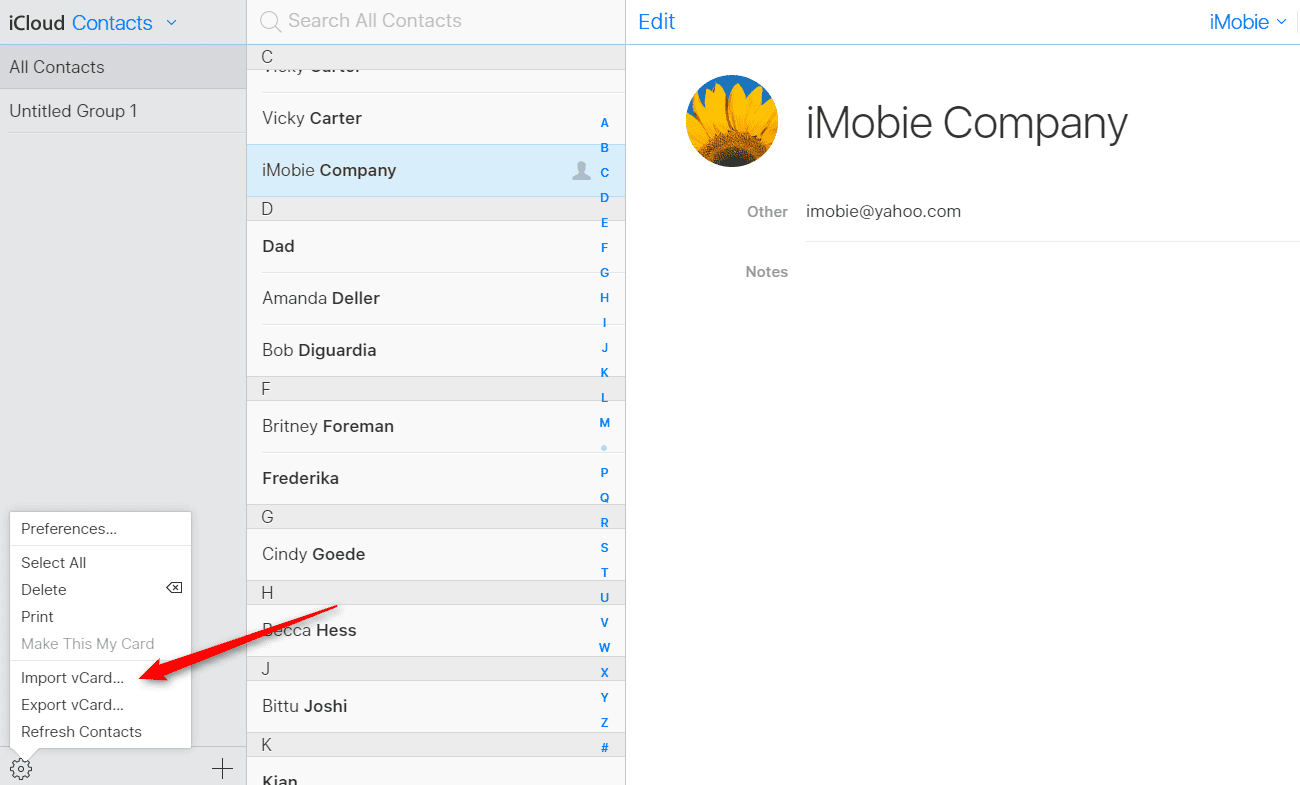
Step 2. Go to ‘Contacts’ and click on the ‘Settings’ icon on the bottom left corner.
Step 3. Click on Import vCard if you wish to get your Google account contacts to be imported on iCloud. Click on Export vCard if you wish to get your iCloud contacts to be imported on Google account. Both the options will ask you to browse the .VCF file and act accordingly.
Conclusion
Technology is so advance and we can’t afford to lose any of our precious contacts. We have covered how to import and export phone contacts on Android / iPhone, from device to Google account & export contacts from SIM to sync contacts at one place. Now you can stay rest assured and shouldn’t worry about deleted contacts as you know the options to backup contacts on Google account.
You can anytime recover deleted contacts or get your contacts from a lost phone as you already have a backup of contacts on your Google Contacts account. Just ensure the account is linked and contacts are properly synced with your account.
Popular Post
Recent Post
How To Record A Game Clip On Your PC With Game Bar Site
Learn how to easily record smooth, high-quality game clips on Windows 11 using the built-in Xbox Game Bar. This comprehensive guide covers enabling, and recording Game Bar on PC.
Top 10 Bass Booster & Equalizer for Android in 2024
Overview If you want to enjoy high-fidelity music play with bass booster and music equalizer, then you should try best Android equalizer & bass booster apps. While a lot of these apps are available online, here we have tested and reviewed 5 best apps you should use. It will help you improve music, audio, and […]
10 Best Video Player for Windows 11/10/8/7 (Free & Paid) in 2024
The advanced video players for Windows are designed to support high quality videos while option to stream content on various sites. These powerful tools support most file formats with support to audio and video files. In this article, we have tested & reviewed some of the best videos player for Windows. 10 Best Videos Player […]
11 Best Call Recording Apps for Android in 2024
Whether you want to record an important business meeting or interview call, you can easily do that using a call recording app. Android users have multiple great options too. Due to Android’s better connectivity with third-party resources, it is easy to record and manage call recordings on an Android device. However it is always good […]
10 Best iPhone and iPad Cleaner Apps of 2024
Agree or not, our iPhones and iPads have seamlessly integrated into our lives as essential companions, safeguarding our precious memories, sensitive information, and crucial apps. However, with constant use, these devices can accumulate a substantial amount of clutter, leading to sluggish performance, dwindling storage space, and frustration. Fortunately, the app ecosystem has responded with a […]
10 Free Best Barcode Scanner for Android in 2024
In our digital world, scanning barcodes and QR codes has become second nature. Whether you’re tracking packages, accessing information, or making payments, these little codes have made our lives incredibly convenient. But with so many barcode scanner apps out there for Android, choosing the right one can be overwhelming. That’s where this guide comes in! […]
11 Best Duplicate Contacts Remover Apps for iPhone in 2024
Your search for the best duplicate contacts remover apps for iPhone ends here. Let’s review some advanced free and premium apps you should try in 2024.
How To Unsubscribe From Emails On Gmail In Bulk – Mass Unsubscribe Gmail
Need to clean up your cluttered Gmail inbox? This guide covers how to mass unsubscribe from emails in Gmail using simple built-in tools. Learn the best practices today!
7 Best Free Methods to Recover Data in Windows
Lost your data on Windows PC? Here are the 5 best methods to recover your data on a Windows Computer.
100 Mbps, 200 Mbps, 300Mbps? What Speed is Good for Gaming?
What internet speed is best for gaming without lag? This guide examines whether 100Mbps, 200Mbps, or 300Mbps is good for online multiplayer on PC, console, and mobile.

