9 Ways To Fix Valorant VAN9003 Error On Windows 11 & 10
Last updated on June 21st, 2024 at 11:39 am
Introduction:
Encountering the VAN9003 error in Valorant can be a frustrating roadblock for any player eager to dive into the tactical action. This elusive error often signals connection issues between your system and Valorant’s servers, disrupting your gameplay and causing undue frustration. Fortunately, there are effective strategies to tackle this error head-on.
By exploring nine reliable methods, you can navigate around the Valorant VAN9003 error and get back into the game with minimal hassle, ensuring smoother and uninterrupted gameplay sessions.
What is the Valorant VAN9003 Error on Windows 11/10?
The Valorant VAN9003 error is a common issue encountered by players, often disrupting their gameplay experience. This error typically signifies a problem with the connection between the player’s system and Valorant’s servers. It can manifest due to various reasons, including server maintenance or issues, internet connectivity problems on the player’s end (such as unstable or weak connections, router or modem issues, or ISP-related issues), firewall or antivirus interference blocking Valorant’s access to the internet, or even corrupted game files.
When this error occurs, players may find themselves unable to connect to the game servers, resulting in being unable to join matches or experiencing sudden disconnections during ongoing games.
Resolving the VAN9003 error often involves troubleshooting steps like checking for server status, ensuring a stable internet connection, adjusting firewall or antivirus settings, and verifying the integrity of game files to rectify any potential issues causing the disruption.
What triggers the VAN9003 error in Valorant?
There are various potential reasons behind the van9003 error in Valorant. Some of the most frequent causes include:
- Server problems: If Valorant’s servers are down or facing issues, the van9003 error might appear. Typically beyond user control, the best course of action is to wait for the servers to return to normal or for the problem to be fixed.
- Internet connection issues: An unstable or weak internet connection can lead to the van9003 error. It could stem from router or modem problems, interference from other devices, or a poor link to your internet service provider (ISP).
- Firewall or antivirus interference: If your firewall or antivirus software blocks Valorant’s internet connection, the van9003 error might arise due to incorrect settings or software conflicts.
- Game file corruption: Sometimes, corrupted game files cause the van9003 error. This can occur during installation or if files are altered in some manner.
How to Fix the VAN9003 Error in Valorant [Windows 11 and Windows 10]
Method 1: Restart the Router or Mode

Resetting your router or modem can often alleviate connectivity issues causing the VAN9003 error in Valorant. Simply power off the device, wait for a few minutes, then turn it back on. This refreshes the connection, potentially resolving any temporary glitches affecting your gameplay experience.
Method 2: Check the Internet Connection
If rebooting your router and modem doesn’t resolve the issue, proceed by inspecting your internet connectivity. Confirm a robust and consistent connection by conducting a speed test to ascertain if you’re receiving the anticipated speeds. Should your connection prove weak or erratic, consider relocating your router or modem to an alternative spot.
Alternatively, seek assistance from your Internet Service Provider (ISP) to troubleshoot and improve your connection stability.
Method 3: Verify the Valorant Server Status
Before you move towards complete troubleshooting methods to tweak the settings, here is something you can try.
Begin by verifying the current status of Valorant servers to identify any reported issues or disruptions. Access the Valorant website or review social media platforms for official updates. In case of server downtime, your options are limited, and the most viable course of action is to patiently await their restoration.
Method 4: Validate the Game Files
If the van9003 error on Windows 11 stems from corrupted game files, it’s crucial to ensure the integrity of these files. To execute this in Valorant, adhere to these steps:
Step 1: Open the Valorant client and locate the gear icon positioned in the top right corner.
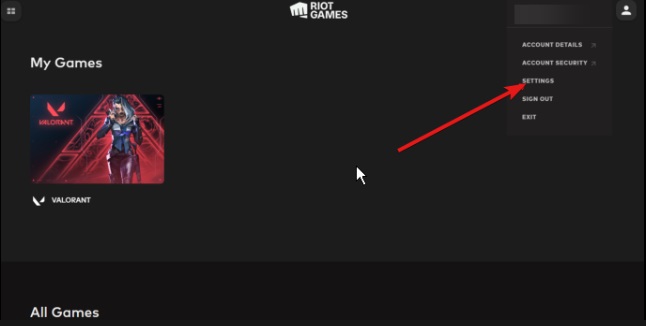
Step 2: Choose “Verify” from the menu options.
Step 3: Allow the process to finalize, which might take several minutes.
Step 4: Any identified corrupt files will be automatically re-downloaded and replaced to restore proper functionality.
Method 5: Review Firewall and Antivirus Configurations
If your firewall or antivirus software blocks Valorant’s internet access, it’s necessary to modify the settings to allow the game connection. Refer to the documentation provided with your firewall or antivirus software for instructions.
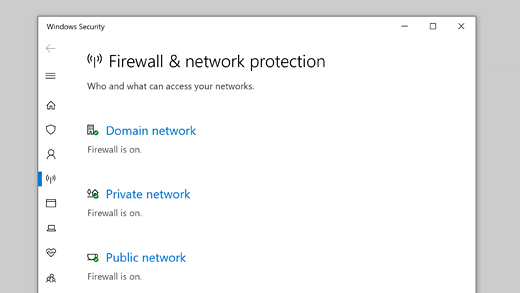
Additionally, consider adding Valorant to the list of permitted programs for uninterrupted connectivity.
Method 6: Check if TPM is Enabled
To access the TPM settings on Windows, follow these steps:
Step 1: Press the Windows key + R to open the Run window.
Step 2: In the Run window, type “TPM.MSC” and press Enter to launch the TPM window.
Upon execution of the command:
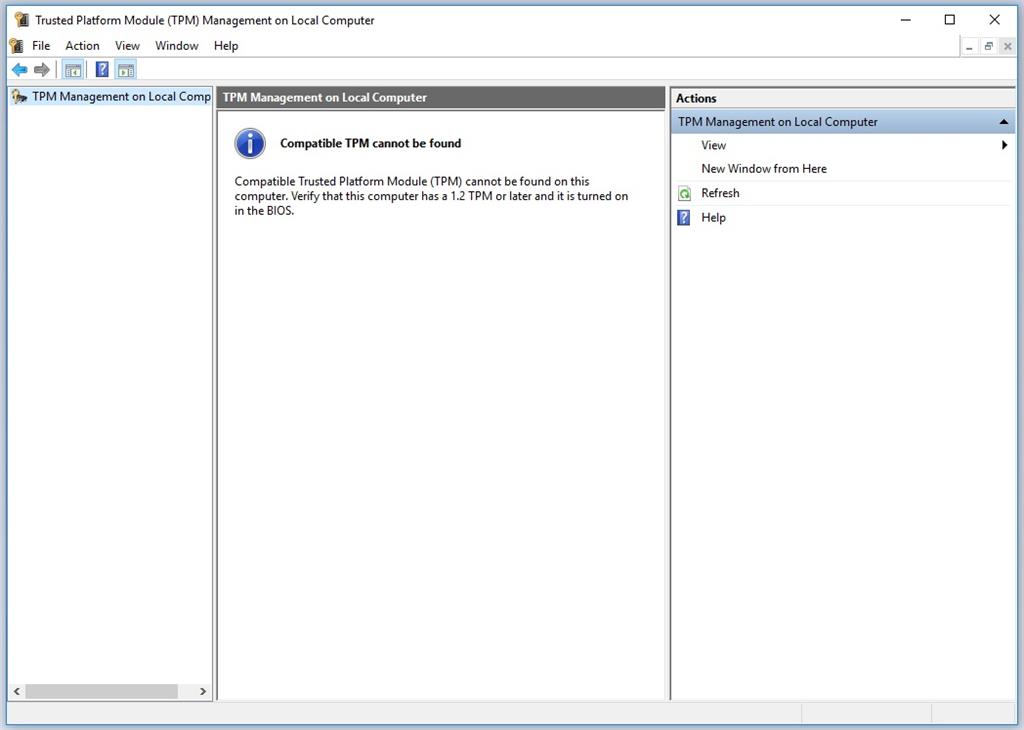
If the TPM module isn’t present, an error message stating “Compatible TPM cannot be found” will appear. In case the TPM module exists and is activated, the TPM settings window will display, indicating “The TPM is ready for use” in the Status section.
Method 7: Enable Secure Boot
Enhancing your system’s security through Secure Boot can address potential compatibility issues, such as the VAN9003 error in Valorant. Follow these steps:
Step 1: Access your computer’s BIOS/UEFI settings by restarting and pressing the designated key (F2, F10, Del, Esc, etc.) during startup.
Step 2: Navigate to the Security or Boot options within the BIOS/UEFI interface.
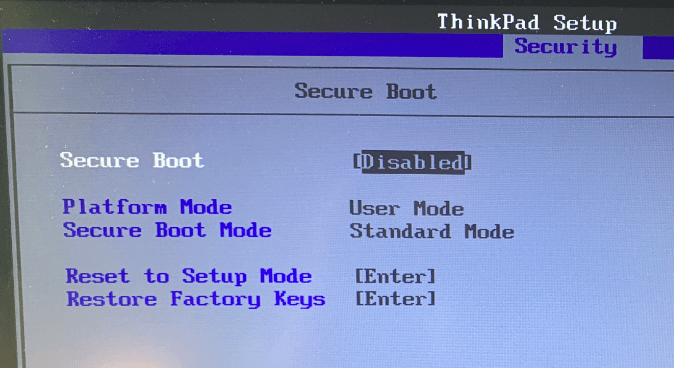
Step 3: Locate and enable the Secure Boot feature, ensuring only verified components are initiated during system startup.
Step 4: Save changes and exit the BIOS/UEFI settings, allowing your computer to restart and implement the alterations.
Method 8: Run Valorant in Compatibility Mode
Enhance Valorant’s compatibility by utilizing Compatibility Mode in Windows 11 and Windows 10. Follow these steps:
Step 1: Locate the Valorant executable file within its installation folder.
Step 2: Right-click on the Valorant executable and select “Properties”.
Step 3: Access the “Compatibility” tab within the Properties window.
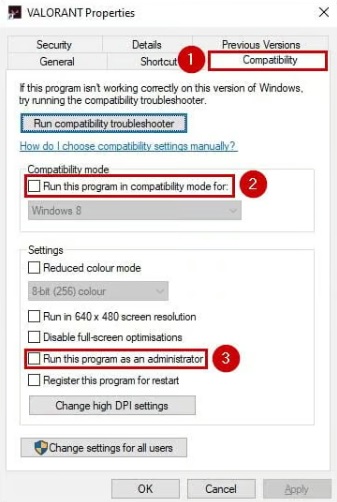
Step 4: Check “Run this program in compatibility mode for:” and choose an earlier Windows version from the dropdown menu.
Step 5: Optionally, enable “Run this program as an administrator” in the same Compatibility tab.
Step 6: Apply the changes and exit the Properties window.
Running Valorant in Compatibility Mode may rectify compatibility conflicts that trigger errors such as VAN9003 during gameplay.
Method 9: Uninstall and Reinstall Valorant
If persistent issues like the VAN9003 error persist on your Windows 11/10, consider reinstalling Valorant. Follow these steps:
Step 1: Open the “Control Panel” or access “Settings” in Windows 10/11. Navigate to “Programs” or “Apps.”
Step 2: Locate “Valorant” among the installed programs or apps.
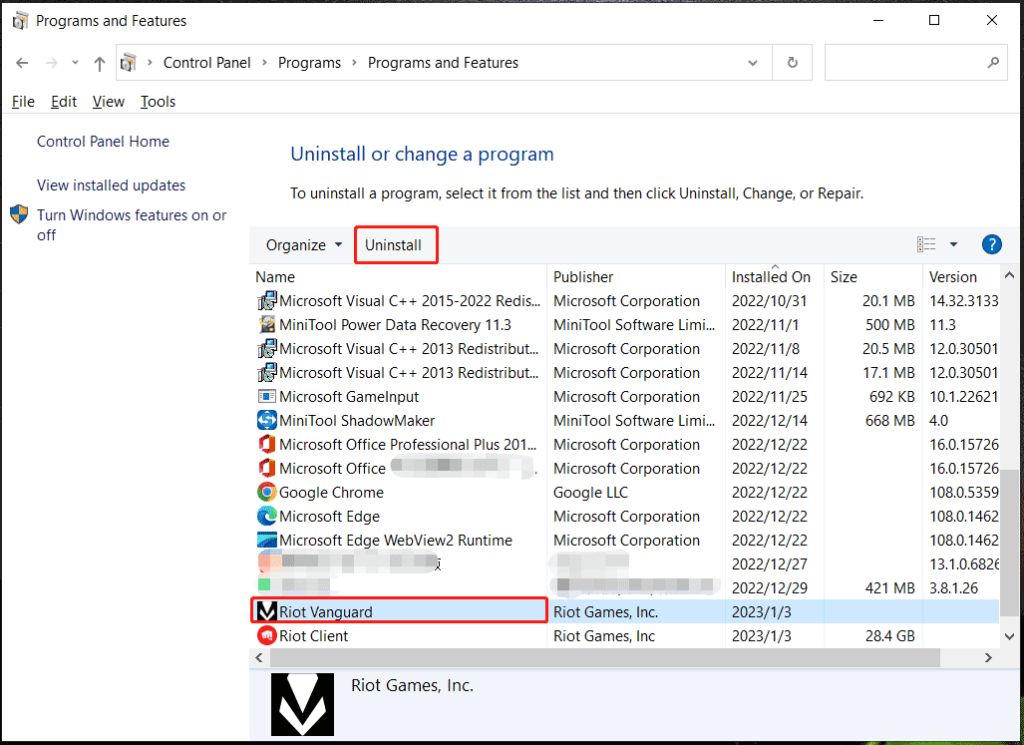
Step 3: Select “Uninstall” for Valorant and proceed with the uninstallation prompts to remove it completely from your system.
Step 4: After uninstallation, visit the official Valorant website and download the game installer.
Step 5: Run the installer and follow the instructions to reinstall Valorant from scratch.
Reinstalling Valorant ensures a clean and updated installation, often resolving persistent errors like VAN9003 that may stem from corrupted files or configurations.
Conclusion
Encountering the VAN9003 error in Valorant can be a frustrating hurdle for players seeking seamless gaming experiences. However, armed with these nine effective methods, you can troubleshoot and resolve this issue swiftly. From checking connectivity and verifying game files to adjusting system settings and performing a clean reinstall, these steps offer comprehensive solutions to tackle the VAN9003 error in Windows 11 and Windows 10.
Implementing these troubleshooting techniques empowers you to get back into the game and enjoy Valorant without interruptions.
FAQs:
Q1: Why does the VAN9003 error occur in Valorant?
The VAN9003 error in Valorant can arise due to various factors, including server issues, internet connection problems, firewall/antivirus conflicts, corrupted game files, or system compatibility issues.
Q2: Can server downtime cause the VAN9003 error?
Yes, if Valorant servers are down or experiencing issues, it can trigger the VAN9003 error, preventing players from connecting to the game.
Q3: How can I check Valorant server status?
You can check Valorant server status by visiting the official Valorant website or monitoring their social media channels for updates on server status and maintenance.
Q4: Is reinstalling Valorant the ultimate solution for the VAN9003 error?
Reinstalling Valorant can often resolve persistent issues like VAN9003 by providing a fresh installation, but it’s recommended to try other troubleshooting steps first, as they might solve the problem without the need for a full reinstallation.
Author Bio:
Dinesh Lakhwani 

Dinesh Lakhwani, the entrepreneurial brain behind “TechCommuters,” achieved big things in the tech world. He started the company to make smart and user-friendly tech solutions. Thanks to his sharp thinking, focus on quality and the motto of never giving up, TechCommuters became a top player in the industry. His commitment to excellence has propelled the company to a leading position in the industry.
Popular Post


Recent Post

How to Switch Windows 10 to a Local Account: Complete Guide
Windows 10 allows users to sign in with either a Microsoft account or a local account. When you set up a new computer, the system often suggests using a Microsoft account. This account connects your device to Microsoft services such as Outlook, OneDrive, and the Microsoft Store. It also syncs settings, themes, and passwords across […]

How To Change Default Apps For File Types In Windows
Windows is designed to make using your computer easy. One way it does this is by assigning default apps to different file types. This means when you open a file, Windows automatically opens it with a specific program. For example, photos may open with Photos, music with Groove Music, and PDFs with Edge. These default […]

How To Adjust The Mouse Pointer Speed: Complete Guide
Using a computer every day means you use the mouse a lot. The mouse pointer moves on the screen and helps you click, scroll, and select items. Many people never think about the speed of the mouse pointer. They have used the default setting for years. This can cause small problems over time. A slow […]

How to Change Mouse Scrolling Settings In Windows
A mouse is one of the most used computer tools. People use it every day. They scroll through emails. They scroll through documents. They scroll through websites and images. The movement becomes automatic. Most users do not notice it. That is why problems often go unnoticed. Scrolling problems show up slowly. At first, it feels […]

Keyboard Light Settings: Keyboard Lighting Control [Complete Guide]
Keyboards are no longer simple typing tools. Well, yes! Over time, they have evolved to include features that improve comfort, visibility, and overall experience. One of the most useful features today is keyboard lighting. It helps users work comfortably in low-light conditions. It also reduces strain when typing for long hours. Many users first notice […]

Customizing Pointer Appearance: Complete Guide
The way your mouse pointer looks on your computer may seem like a small detail. But customizing pointer appearance can make using your PC more comfortable and visually appealing. Many users do not realize that they can change the pointer size, color, and style to fit their needs. Whether you want a bigger pointer for […]

How To Choose a Computer Monitor: Monitor Buying Guide
Buying a monitor looks easy. Many people think all screens are the same. That belief causes regret later. A monitor is not just a display. It is a daily tool. You read on it. You work on it. You relax with it. Small problems become big over time. Poor brightness hurts eyes. Bad size causes […]

How To Get Help With File Explorer in Windows 11 [Complete Guide]
File Explorer is one of the most important tools in Windows 11. It is used to open folders, view files, and manage stored data. Almost every action on a Windows computer depends on it in some way. When users open documents, save downloads, or organize photos, File Explorer is always involved. Because it is used […]

How To Fix A Frozen Computer: Complete Guide [Windows 11/10]
A frozen computer is one of the most common problems Windows users face. The screen stops responding. The mouse pointer does not move. Keyboard inputs do nothing. You may hear the fan running loudly. Sometimes the system looks alive, but nothing works. This situation often happens when you are busy or working on something important. […]

How to Upgrade Computer RAM: Complete Guide
Upgrading RAM is one of the simplest ways to improve a computer. It helps the system feel faster and smoother. Apps open quicker. Browsers handle more tabs. Games and tools run with less delay. Many users search for how to upgrade computer RAM because it gives real results without high cost. You do not need […]

