


A slow computer makes it hard to focus. Programs take too long to open. Free space keeps shrinking until the disk is almost full. This happens to most PC owners at some point. Even new machines can slow down after a while. That is the exact problem cleanup tools are built to solve. They comb […]
Disable Microsoft Defender in Windows 11: Step-by-Step Guide
Introduction
Since its introduction in 2006, Microsoft Defender has been integral to all Windows operating systems, offering free and thorough antivirus protection. It is capable of finding and containing malware and providing ongoing security. On the downside, it’s a resource-consuming and will only stop running in the background if permanently deactivated.
Why Do Users Turn Off Microsoft Defender?
Some users prefer more control over their system security. While Microsoft Defender offers built-in protection, it may not suit every setup. In certain cases, users disable it to avoid conflicts or improve performance. Understanding these reasons helps you decide if turning it off is right for you.
- Use of Third-Party Antivirus Software
Many users install other antivirus tools. Running two security programs together can cause conflicts and slowdowns. - System Performance Concerns
On low-end systems, Defender may use noticeable resources. Disabling it can slightly improve speed and responsiveness. - Software Compatibility Issues
Some applications may not run properly with Defender active. It can block files or processes by mistake. - Frequent False Positives
Defender may flag safe files as threats. This can interrupt normal work and create confusion. - Advanced User Control
Some users prefer manual security management. They may want full control over scans and protection settings. - Testing and Development Needs
Developers often disable antivirus tools during testing. It helps avoid interruptions while running scripts or programs. - Restricted Network Environments
In some setups, security is managed by external systems. Defender may not be needed in such cases. - Reduced Background Activity
Disabling Defender can reduce background scans and notifications. This may create a cleaner working environment.
What Are the Disadvantages of Turning Off Microsoft Defender?
Turning off Defender removes an important layer of protection. While it may solve certain issues, it also increases risk. It is important to understand the drawbacks before making this decision.
- Increased Security Risk
Without Defender, your system becomes more exposed to threats. This includes viruses, spyware, and ransomware. - No Real-Time Protection
Defender actively scans files in real time. Disabling it removes this ongoing protection. - Higher Chance of Malware Attacks
Without built-in security, harmful programs can enter more easily. This can damage files or steal data. - Unsafe Browsing Experience
Defender helps block malicious websites and downloads. Turning it off removes this safety layer. - System Vulnerability to Unknown Threats
New and evolving threats may go undetected. This increases the risk of system compromise. - No Automatic Threat Removal
Defender removes threats automatically. Without it, manual action is required, which many users may miss. - Data Privacy Risks
Malware can track user activity or access sensitive information. This becomes more likely without protection. - Dependency on Other Tools
You must rely fully on other antivirus software. If that tool fails, your system remains unprotected.
Important Precautions Before Disabling Microsoft Defender
Before turning off Defender, it is important to take safety measures. A few simple precautions can reduce risk. These steps help keep your system secure even without built-in protection.
- Install a Reliable Antivirus Program
Always have another trusted security tool active. This ensures continuous protection. - Keep Your System Updated
Regular updates fix security gaps. This reduces the chances of attacks. - Avoid Suspicious Downloads
Only download files from trusted sources. Unknown files may contain hidden threats. - Use a Secure Internet Connection
Avoid public or unsecured networks. They can expose your system to risks. - Enable Firewall Protection
Keep the Windows Firewall turned on. It adds an extra layer of defense. - Perform Regular System Scans
Use your antivirus tool to scan your system often. This helps detect threats early. - Backup Important Data
Keep copies of important files in a safe location. This protects you from data loss. - Limit Admin Access
Avoid using administrator privileges for daily tasks. This reduces the impact of potential threats.
Methods to Permanently Turn Off Microsoft Defender in Windows 11
Here are the three effective methods to permanently disable Windows Defender if you no longer require its services. Learn how to deactivate this software.
Method 1: Permanently Turn Off Microsoft Defender in Windows 11 through Group Policy.
Using the Group Policy security tool, you can disable Defender. Follow these instructions:
Step 1: Navigate to Settings from the Start menu.

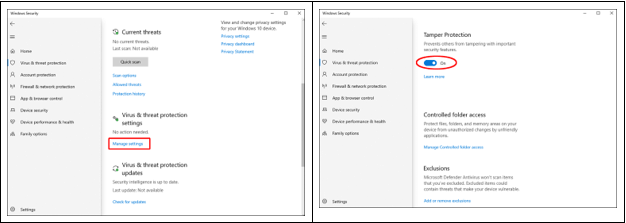
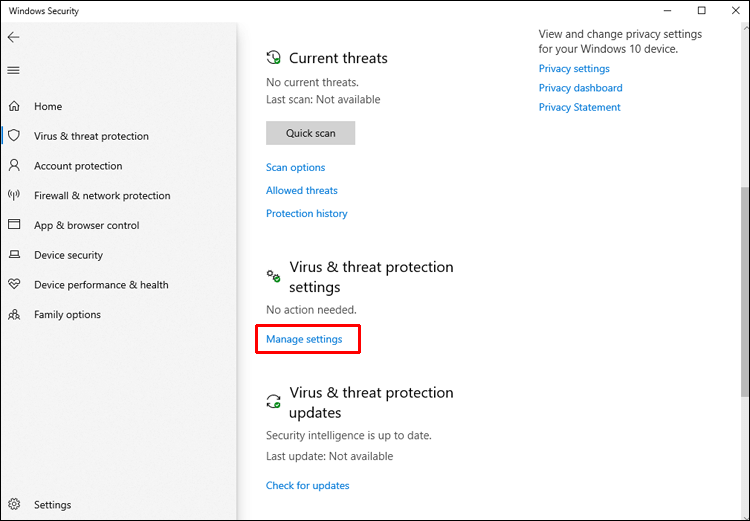
Step 2: Select Privacy & Security, then Windows Security and Virus & threat protection.
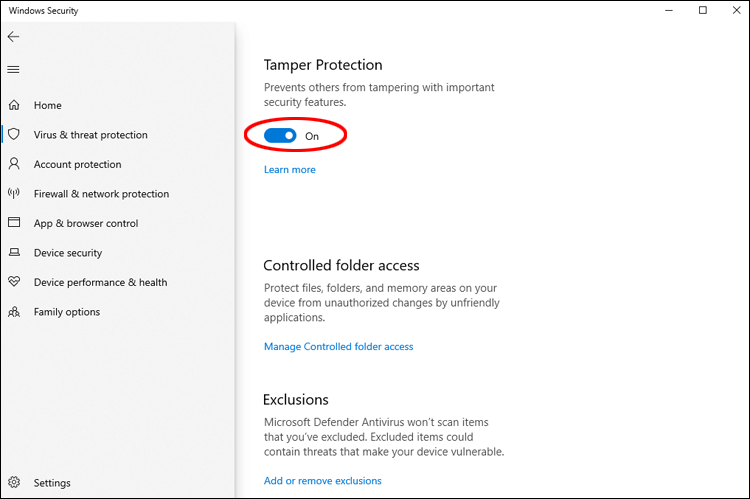
Step 3: Check Manage settings in the Virus & threat protection section, then turn off Tamper Protection by toggling the slider.
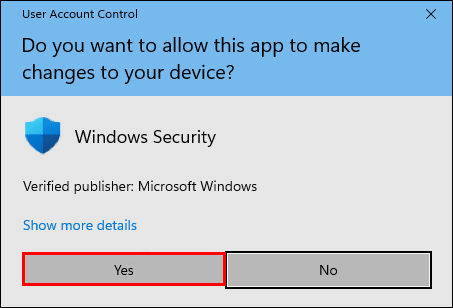
Step 4: To confirm making device changes, click Yes when prompted.
Step 5: A message will be shown in the Tamper Protection section affirming that your device might not be secure; close this window using the x in the top right corner.
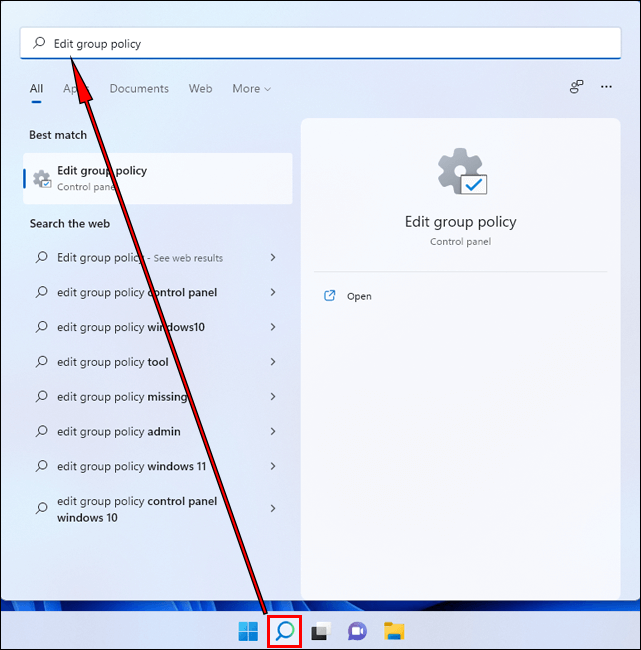
Step 6: Press the search icon on the taskbar to access the Microsoft Defender Antivirus settings.
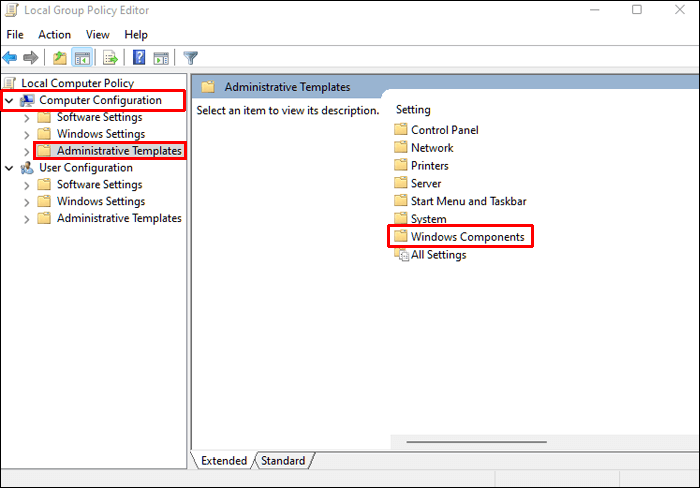
Step 7: Type ‘Edit Group Policy’ and click the result to launch the app. Open, select Computer Configuration from the left pane, followed by Administrative Templates and then Windows Components.
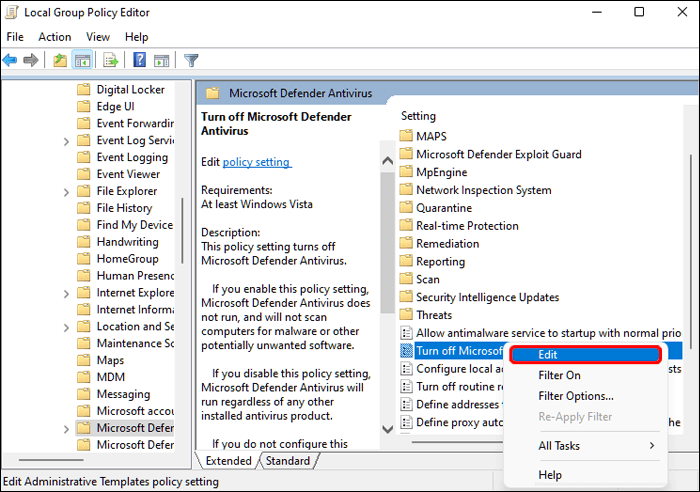
Step 8: Scroll down until you land on Microsoft Defender Antivirus, where several settings will be visible on the right pane.
Step 10: Right-click on ‘Turn off Microsoft Defender Antivirus’ and hit Edit to check the Enabled box before clicking Apply and OK.
Step 11: Then do the same for ‘Allow antimalware service to remain running always’, but instead choose Disabled this time round.
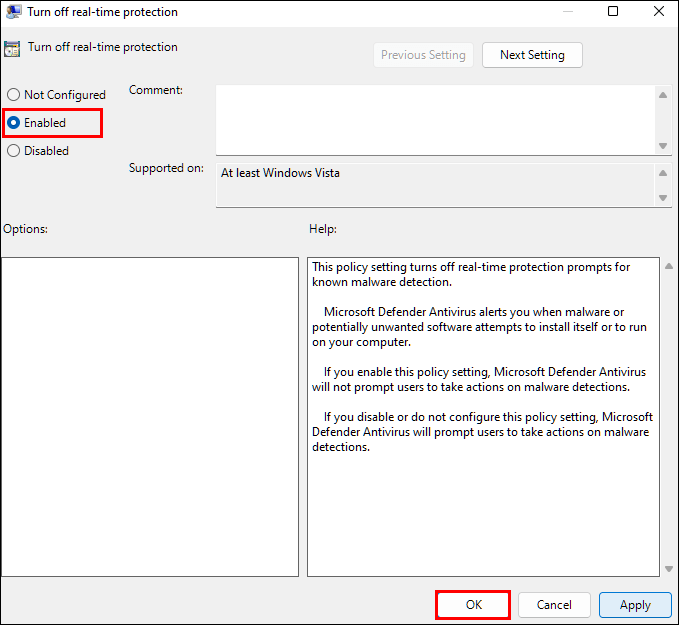
Step 12: Finally, enter the Real-time Protection folder and right-click ‘Turn off real-time protection’, editing it again to check Enabled.
Method 2: Permanently Turn Off Microsoft Defender by Modifying Registry
Similarly to Group Policy, you can deactivate Defender protection by modifying the registry. This method requires disabling the “Tamper Protection” setting to prevent Defender settings from being altered.
Step 1: The first step is to click Start, then Settings.
Step 2: Select Privacy & Security, Windows Security, then Virus & threat protection.
Step 3: Under Virus & threat protection settings, click Manage settings.
Step 4: Switch the slider to Off for the Tamper Protection option.
Step 5: To allow the changes, select Yes.
Step 6: To close the window, click the x in the top right corner.
Step 7: From the Windows Defender branch in the Registry Editor.
Step 8: Create three DWORD (32-bit) values. To do so, right-click any white space in the right pane, select New, then DWORD (32-bit) Value.
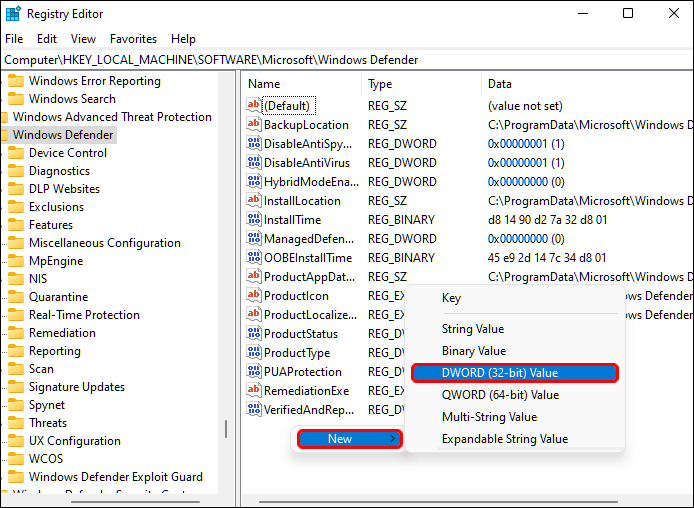
Here are the new values:
- Disable anti-virus software
- Turn off AntiSpyware
- StartStates of Services
Step 9: Change the Value data field to 1 by right-clicking each value and selecting Modify.
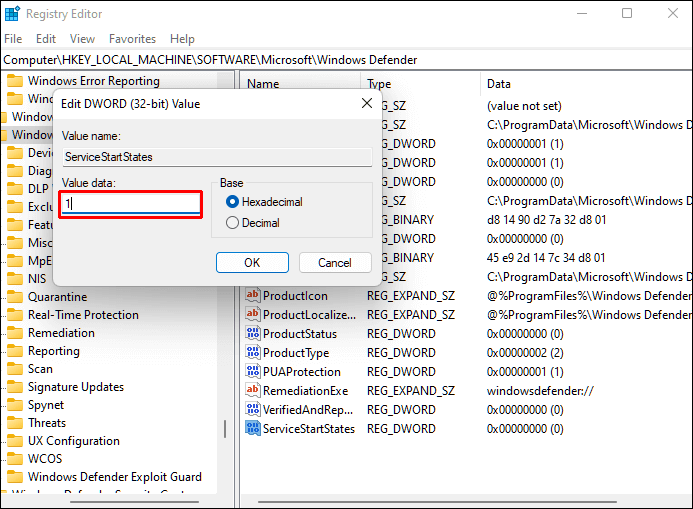
Step 10: Close the Registry Editor and restart your computer.
Step 11: Windows Defender will be disabled once your computer restarts.
Method 3: Permanently Turn Off Microsoft Defender by using Autoruns
The Autoruns for Windows utility tool can also permanently disable Windows Defender.
Step 1: Install the updated version of Autoruns for your Windows.
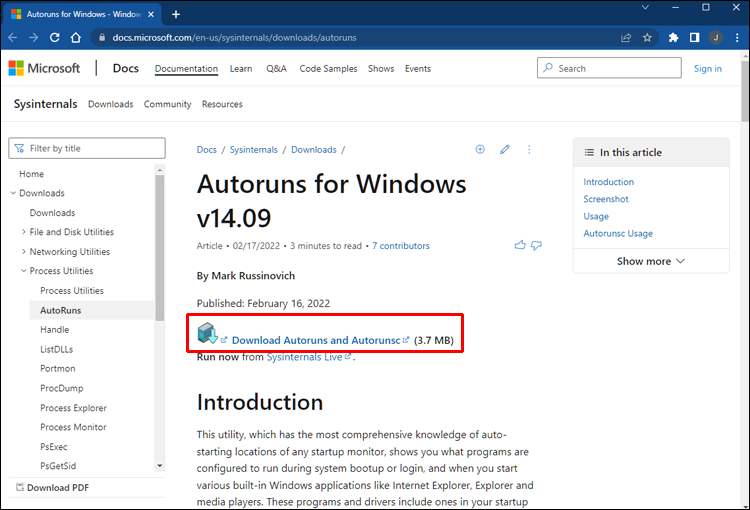
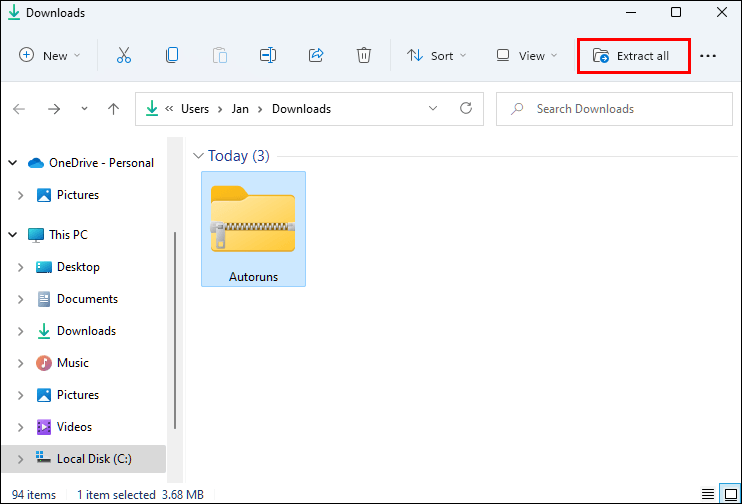
Step 2: Right-click the Autoruns folder in the downloaded file and select Extract All. Consider moving the folder to your desktop for easy access.
Now, you need to disable permanent protection and boot in safe mode.
Step 1: From the taskbar, select the Windows icon, then Settings.
Step 2: Then select Privacy & Security, Windows Security, and Virus & Threat Protection.
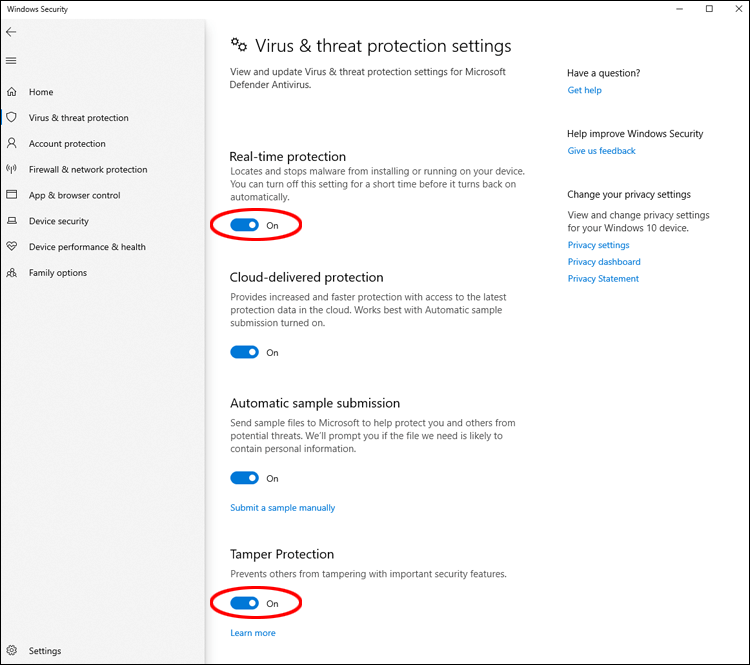
Step 3: Select Manage settings under Virus & threat protection.
Step 4: To deactivate Real-time Protection and Tamper Protection, press the sliders.
Step 5: To put your computer in Safe Mode, locate the System Configuration app using a search engine and open it.
Step 6: Select the Boot tab in System Configuration.

Step 7: The Minimal option will be automatically selected when the Safe Boot box is checked under Boot options.
Step 8: Restart the computer after clicking Apply, OK, and Restart.
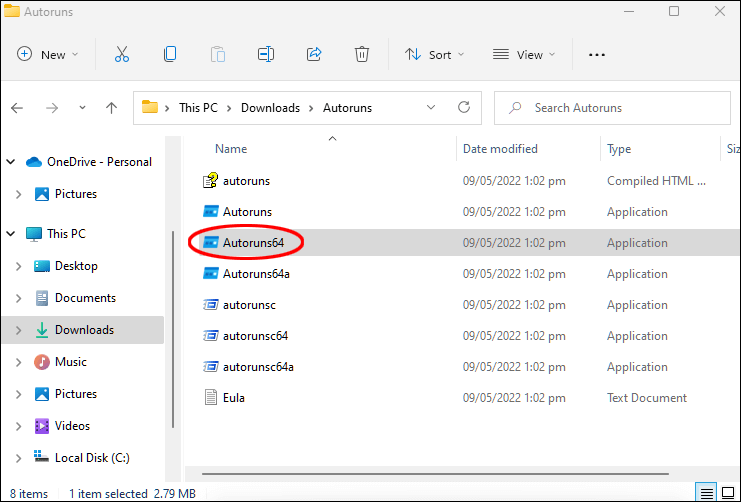
Step 9: To start it, open the Autoruns folder on your desktop, click the Autoruns64.ex file, and then click Run.
Step 10: The Autoruns License Agreement window will appear. Click the ” Agree ” button if you agree with the terms.
Step 11: Select the Services tab in the Autoruns window.
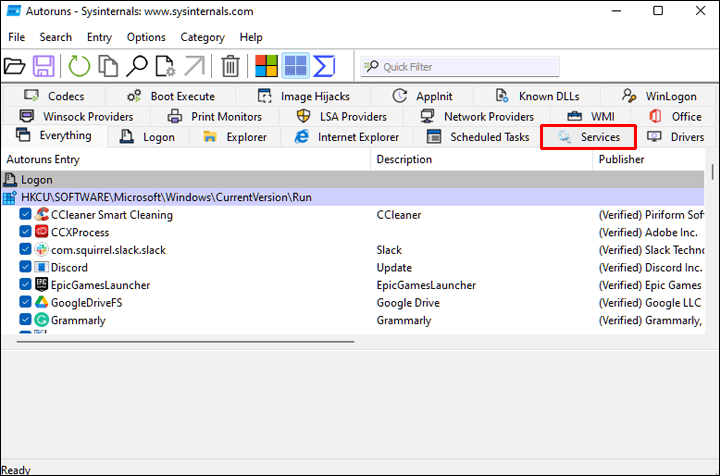
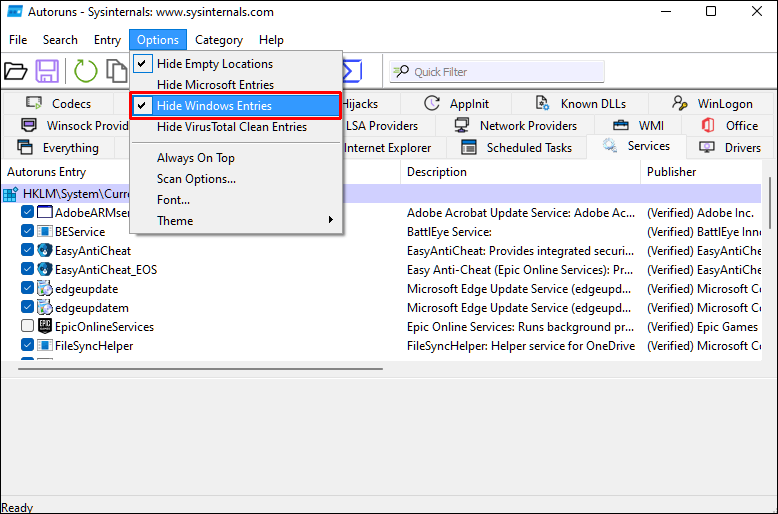
Step 12: Windows services are hidden by default. To make them visible, click on Options from the main menu, then uncheck Hide Windows Entries.
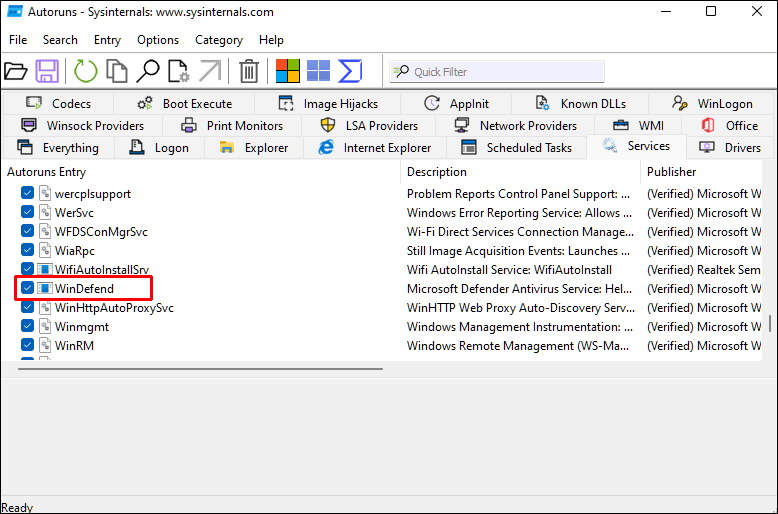
Step 13: If you uncheck the WinDefend box in the list of services for Windows Defender, Windows Defender will not be automatically launched each time the computer reboots.
Reboot your computer into normal mode after closing Autoruns as follows:
Step 1: Select System Configuration from the Search icon on the taskbar.
Step 2: Select the Normal startup option.
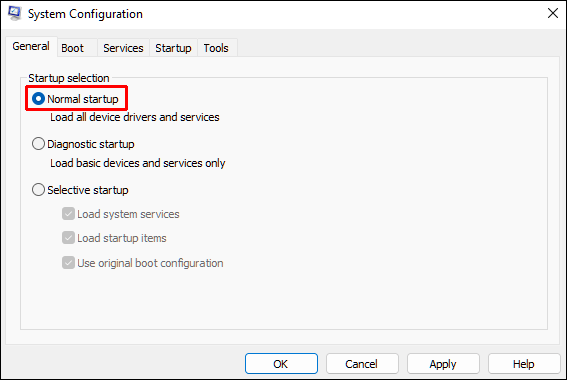
Step 3: Restart the computer after clicking Apply, OK, and Restart.
Start Task Manager and check if Windows Defender is running after your computer has rebooted:
Step 1: Go to Privacy & security, Windows Security, Virus & threat protection, then Home to see the Virus & threat protection status.
Step 2: Make sure that the Virus & Threat Protection status is set to Unknown.
Method 4: Permanently Turn Off Microsoft Defender through Commond Prompt
To disable Microsoft Defender, you must paste a registry change instruction into the Command Prompt app. Here’s how:
Step 1: Press Win + R to open the Run command box.
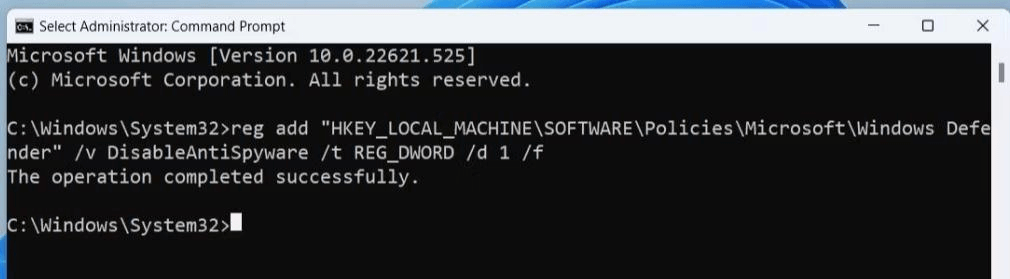
Step 2: Click Ctrl + Shift + Enter to open Command Prompt with administrator permissions.
Step 3: Next, type the following instructions:
reg add “HKEY_LOCAL_MACHINE\SOFTWARE\Policies\Microsoft\Microsoft Defender” /v DisableAntiSpyware /t REG_DWORD /d 1 /f
Step 4: Upon successfully executing the before command, a notice will appear stating “The operation was successful.”.
Step 5: Type exit to dismiss the Command Prompt window.
Step 6: The sixth step is to reboot your computer.
Author’s Tip
Disabling Microsoft Defender should not be your first step. It is better to understand why you want to turn it off. In many cases, small adjustments can solve the issue without removing protection. For example, you can exclude certain files or folders instead of disabling the entire tool. This keeps your system safe while avoiding interruptions.
If you still choose to disable it, make sure your system is not left unprotected. Install a trusted antivirus and keep it updated. Do not ignore basic safety habits. Avoid risky downloads and unknown websites. A balanced approach helps you maintain both performance and security without unnecessary risks.
Conclusion
By default, Windows Defender – a free antivirus software – is set to stay enabled even if it’s been turned off in Virus & threat protection. It may be hard to disable on your computer as Microsoft has installed fail-safe mechanisms.
Before you decide to deactivate it, turn off Tamper Protection. If you don’t want to use Defender, using another antivirus program is an excellent way to protect your PC from malware. To ensure that the Defender disabling is permanent, you can update the policy, modify the registry, or disable it with the “Autoruns for Windows” utility tool. These three methods will ensure that Windows Defender remains deactivated.
FAQs
1. Is it safe to turn off Microsoft Defender in Windows 11?
It can be safe only if you have another reliable antivirus installed. Without any protection, your system becomes vulnerable to threats. Always ensure there is an active security tool before disabling Defender.
2. Will Microsoft Defender turn on again automatically?
Yes, in some cases, it may turn on automatically. This happens if no other antivirus is detected or after certain system updates. Windows does this to keep your device protected.
3. Can I disable Microsoft Defender permanently?
Yes, but it usually requires advanced steps like using Group Policy or Registry settings. However, it is not recommended unless you fully understand the risks and have proper security measures in place.
Author Bio:
Dinesh Lakhwani 

Dinesh Lakhwani, the entrepreneurial brain behind “TechCommuters,” achieved big things in the tech world. He started the company to make smart and user-friendly tech solutions. Thanks to his sharp thinking, focus on quality and the motto of never giving up, TechCommuters became a top player in the industry. His commitment to excellence has propelled the company to a leading position in the industry.
Popular Post
Recent Post

Fortect Software Review: The Ultimate PC & Mobile Cleaning, Optimization & Security Tool
Slow computers are a common problem for almost every Windows user. Well, yes! Over time, your PC picks up junk files. These files sit quietly in the background. They take up space and slow things down. Programs open slower. Windows takes longer to boot. Even simple tasks like opening a folder can feel sluggish. There […]

CCleaner PC Optimizer Review: A Complete Guide for Windows Users
If your computer has started to feel slow, you are not alone. Most Windows PCs slow down over time. Junk files pile up. The registry gets messy. Too many apps open when you start your PC. All this adds up and makes even a good machine feel tired. This is where a PC cleaner tool […]

Auslogics Duplicate File Finder: Full Review and User Guide
A computer quietly gathers clutter over time. This includes duplicate photos, repeated downloads, and forgotten backups hiding in random folders. This buildup slowly eats away at storage and can make even a fast PC feel sluggish. Manually finding and deleting duplicates is tedious. It means checking every folder, comparing file names, and guessing which copies […]

CCleaner Duplicate File Finder: Key Features, Pricing, Step-by-Step Guide and More
Every computer collects junk over time. Right? Well, yes! Photos often get copied twice. Documents get saved in two folders by mistake. Old downloads pile up and never get deleted. This slowly eats up your storage space, and most people do not even notice until their drive is almost full. That is where a duplicate […]

Duplicate File Finder Pro: A Complete Review, Everything You Should Know
Computers collect thousands of files over time. Well, yes! Many of them end up being duplicates created by backups, downloads, or accidental copies. These extra files take up valuable storage space and make it harder to keep everything organized. Finding and removing them manually can take hours. Right? Duplicate File Finder Pro is a tool […]
Top 3 Duplicate File Finder for Windows 11 & Windows 10
If your PC storage keeps filling up even after you delete big files, duplicate files could be the real reason. Most of us save the same photo twice, download a document more than once, or copy a whole folder by mistake. Over months and years, these duplicate files pile up quietly. You do not even […]

Monitor Screen Calibration Guide: Everything You Should Know
Your monitor shows colors every single day. But are those colors actually correct? Most people never stop to check this. They just use the screen as it comes out of the box. This habit can lead to wrong colors in photos, videos, and work files. Colors may look too warm or too cold without you […]

How To Check Installed RAM and RAM Slots [Complete Guide]
RAM plays an important role in how smoothly a computer runs. Short for Random Access Memory, it stores the data and instructions that Windows and active applications need at any given moment. From opening multiple browser tabs to running games and productivity software, RAM helps keep everything responsive. A system with limited memory may experience […]

What is Microsoft Autopilot Everything You Need To Know
Technology has changed the way companies manage computers. Well, yes! Employees now work from offices, homes, and remote locations. Setting up devices manually for every worker takes time and effort. It can also create mistakes that slow down productivity. This is where Microsoft Autopilot becomes useful. It helps businesses prepare and deploy Windows devices with […]

