How to Upgrade RAM on a Laptop?
Whether running on Windows, Linux, or macOS, most laptop models have a lot of storage and space. However, the laptop gets sluggish in its performance with more programs, services, and apps a user adds. Older laptops especially bog down faster with more tabs open or freeze up.
You can download apps like CCleaner to optimize the system, detect background running apps/services, and remove unnecessary files. Another necessary solution is to Upgrade the RAM on a laptop. In this post, that is we cover it in more detail.
Considerations Before Upgrading RAM on a Laptop
Before you can work on how to increase RAM in a laptop, you should check the maximum capacity of RAM in the device you are using. The amount of available RAM in a PC determines how many programs can operate on the system simultaneously. It influences the command response time of the system.
So, to understand the right RAM to upgrade, know the set parameters for the hardware and the OS by the device manufacturer.
Operating System
First, check the operating system of your laptop, like macOS or Windows.
- Mac– For the Mac devices, the 2006-2009 iMac models have 4 GB RAM, 2010-2012 (late) iMac models hold 16 GB RAM, and iMac 2013 (late) models have 32 GB of RAM. You cannot install the RAM if it does suit the PC model.
- Windows– For Windows laptops, check the type of processor first- 32-bit/64-bit. Choose RAM with the capacity indicated by the manufacturer. The limits are 2 TB of RAM on Windows Pro, Education, and Enterprise models with 64-bit processors, 128 GB of RAM on Windows Home models with 64-bit processors, and 3 GB of RAM in Windows laptops with 32-bit processors.
Hardware
Check the RAM space of the operating system in your laptop to know how to increase RAM in the laptop with said OS. If it is not compatible with the hardware, the upgrade cannot work. Checking the following points is important.
- Search about access to product documentation online
- Find motherboard documentation
- Operate a system cleaner software, like CCleaner for Windows or CleanMyMac X for macOS devices.
Methods to Upgrade RAM on a laptop
The steps on how to increase RAM in laptop devices are not complex, especially time-consuming, or extremely costly. However, users need to follow the process carefully to avoid system defects, damage, or inconsistent performance. For your better experience, we present the right methods to carry out RAM upgradation.
Method 1: Check the Occupied Space on Laptop
Before one can Upgrade RAM on a laptop, it is important to check the available RAM on the device. This is important to understand the type of RAM with the necessary capacity you need to install into the system.
How to do this for Mac laptops?
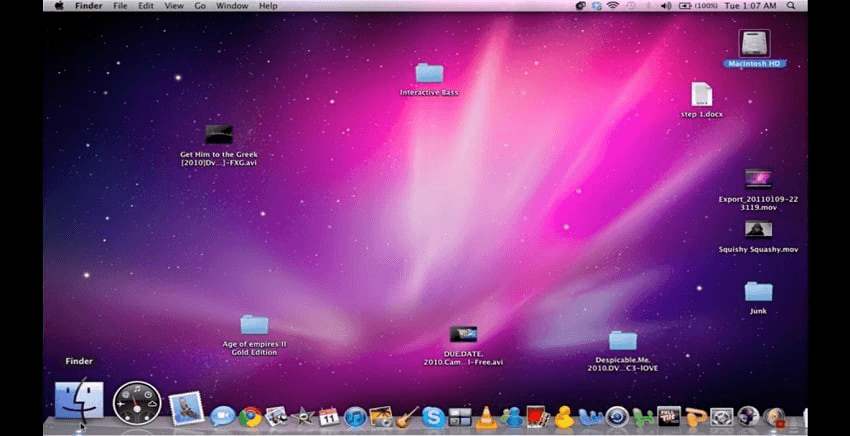
Step 1: On the Mac home screen, click on the Finder option to open the window.
Step 2: Among the options that come up, choose the “Utilities” tab and click on it.
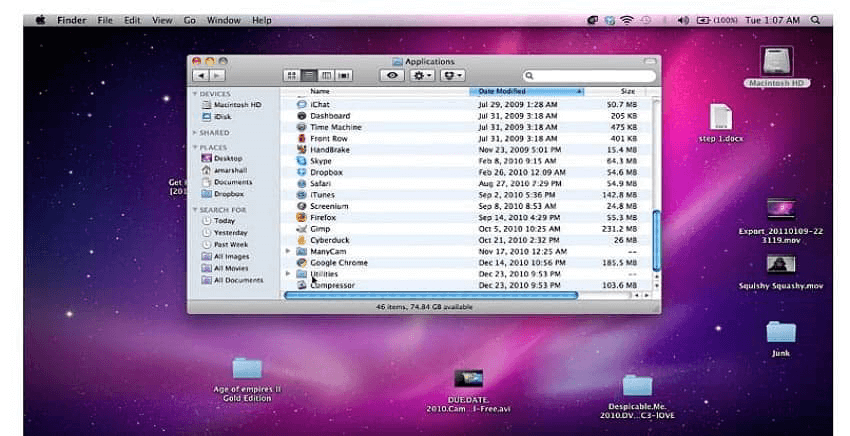
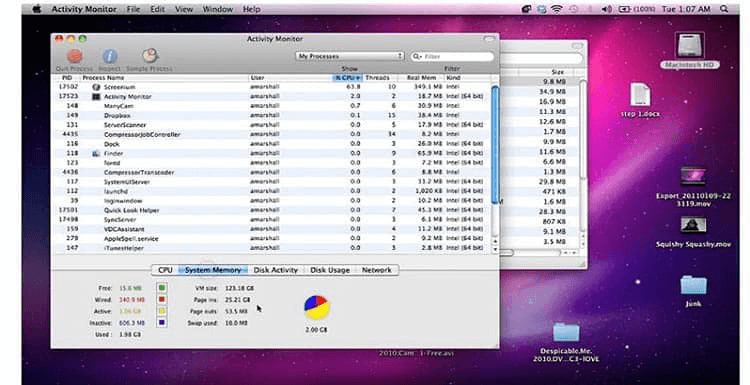
Step 3: Double-click your cursor on the “Activity Monitor” option to open the next window.
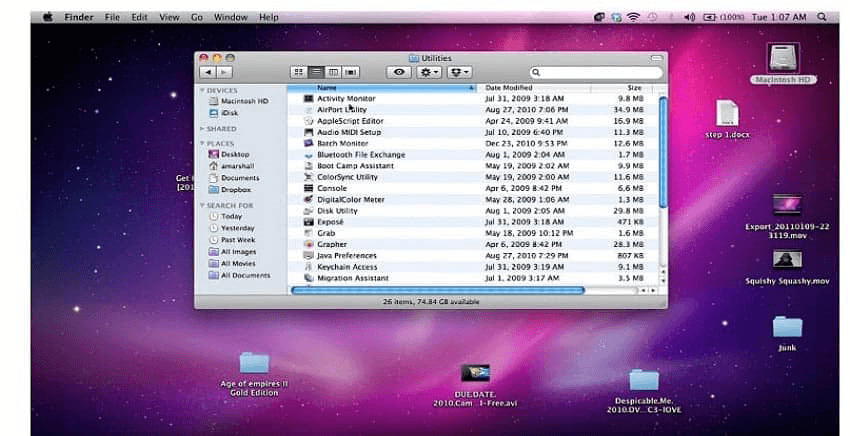
Step 4: Choose the “System Memory” tab. That would display the overall space that is in use within the device.
How to do this for Windows laptops?
Step 1: Click on the Start icon on your Windows home screen taskbar at the bottom.
Step 2: Type the term “Task Manager” into the search text field.
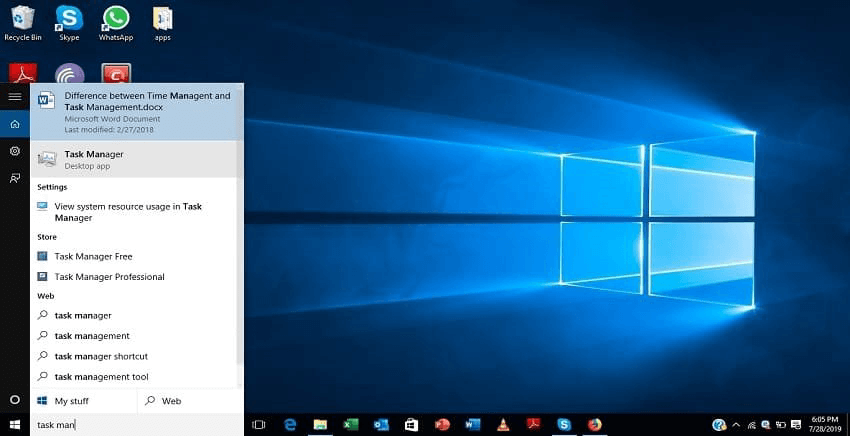
Step 3: Then, click on top of the Task Manager app option that comes up and opens. It would open the Task Manager menu.
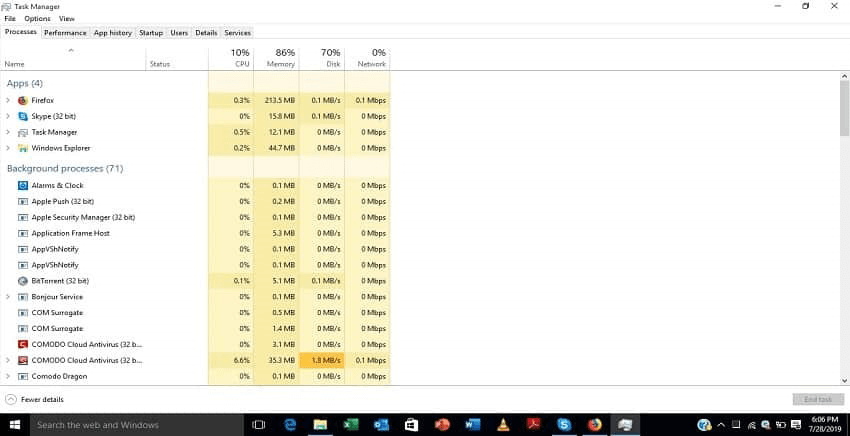
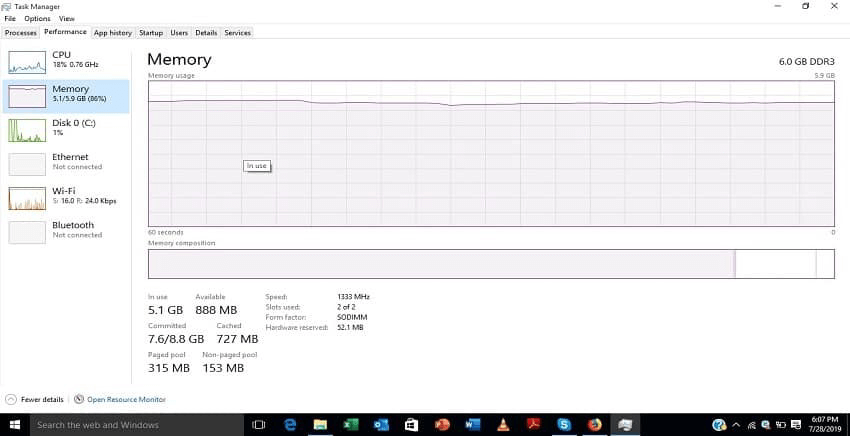
Step 4: Choose the “Performance Tab” option.
Step 5: Click on the “Memory” option. The details about the current space status are visible.
Method 2: Replace RAM Hardware Part in the Device
After checking the amount of RAM space left and choosing the RAM type, you have to open the device back portion to Upgrade RAM on a laptop. You can take steps to replace RAM in the laptop device safely. Here, we discuss the right sequence to follow. Do these steps carefully.
How to do this?
Step 1: Use a screwdriver to remove all of the screws holding the laptop backplate in place.
In some laptops, a strip of rubber feet covers the screws. Cautiously peel it off.
Step 2: Take a small tool and slowly pry open the backplate of the laptop to see the device’s internal part. Start putting it off from a looser point that you pry up with the tool.
Step 3: If there is a metal plate that is protecting the RAM, gently pull away part of its tape or unscrew the metal part.
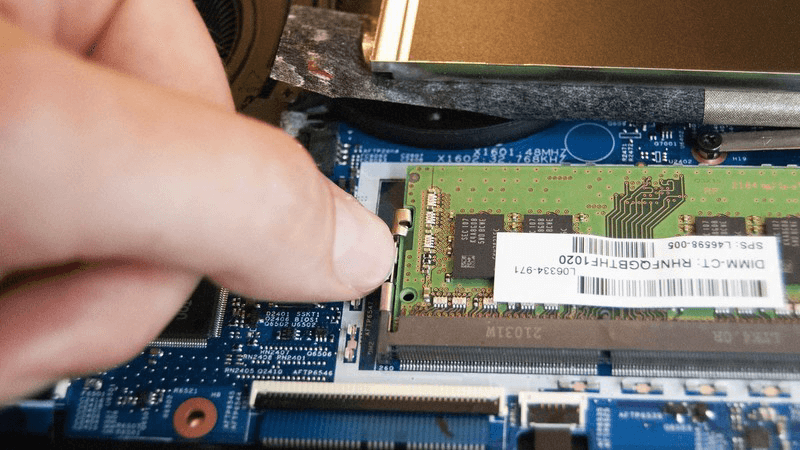
If metallic arms or clamps at the side hold the RAM in place, unfasten them or push them away cautiously. The RAM is free to take off. In some devices, the RAM pops out partially at this point.
Step 4: Pull this RAM gently from the slot space. Make sure to do this step at an angle to avoid damaging the laptop or RAM.
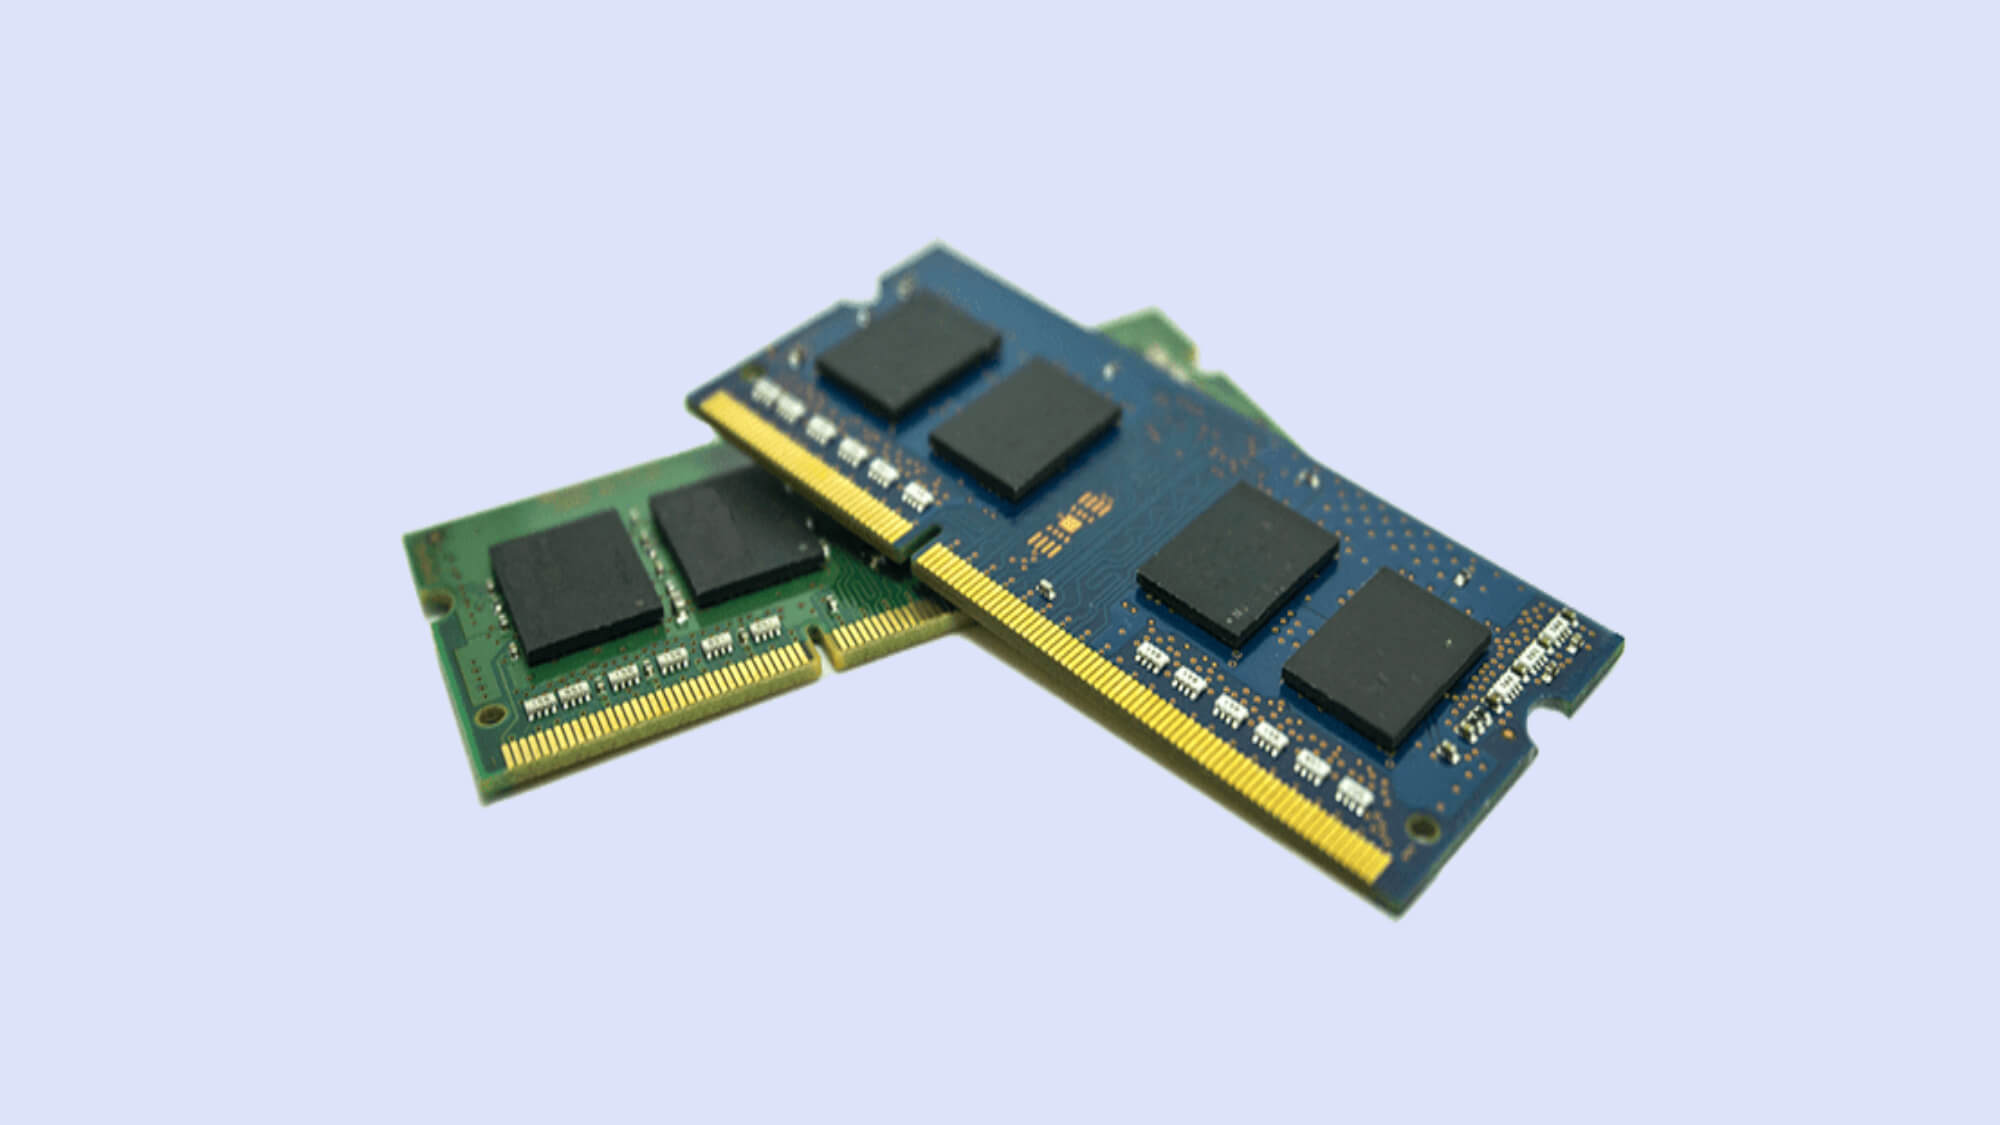
Step 5: Then, push the new RAM into the spot gently. When you hear a noticeable click sound, that indicates that the RAM is placed into the slot perfectly.
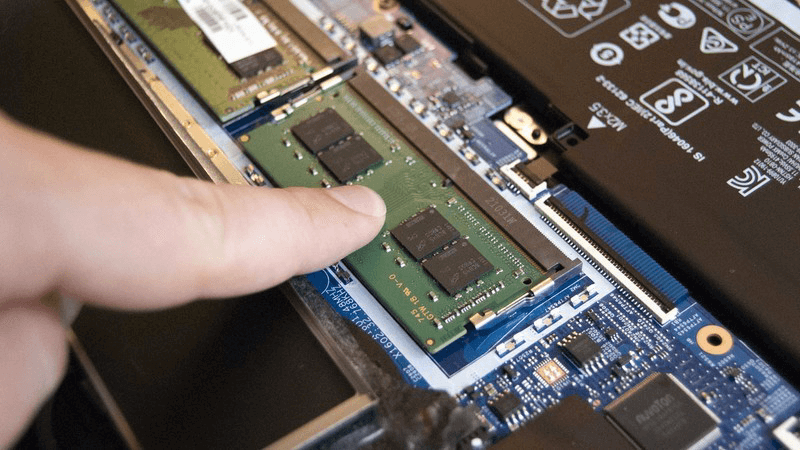
Repeat these steps for the other available RAM module as well, if necessary.
Step 6: Tape the piece back in the correct place for laptops with a RAM shield.
Step 7: Place the backplate of the laptop into place and then apply a little bit of pressure to put it perfectly. If you hear an audible clicking sound, it means that the backplate is attached well.
Step 8: Use a screwdriver to put all the screws in place. If there were rubber feet that you removed in Step 1, fix it in the right area at the end.
Method 3: Check the RAM Upgrade
After completing the hardware changing stage of how to increase RAM in the laptop process, you should check to see if it worked. Switch on your device after some minutes for the system to reorient properly. Take around 5 minutes.
How to do this?
Step 1: Power the PC back on.
Step 2: Click on the Start button on your device, like on Windows 10 laptops. You can then click on the System option that comes up.
Step 3: For Windows 11 devices or even 10 devices, type the term Task Manager into the search field after clicking on the Search icon on the home screen taskbar.
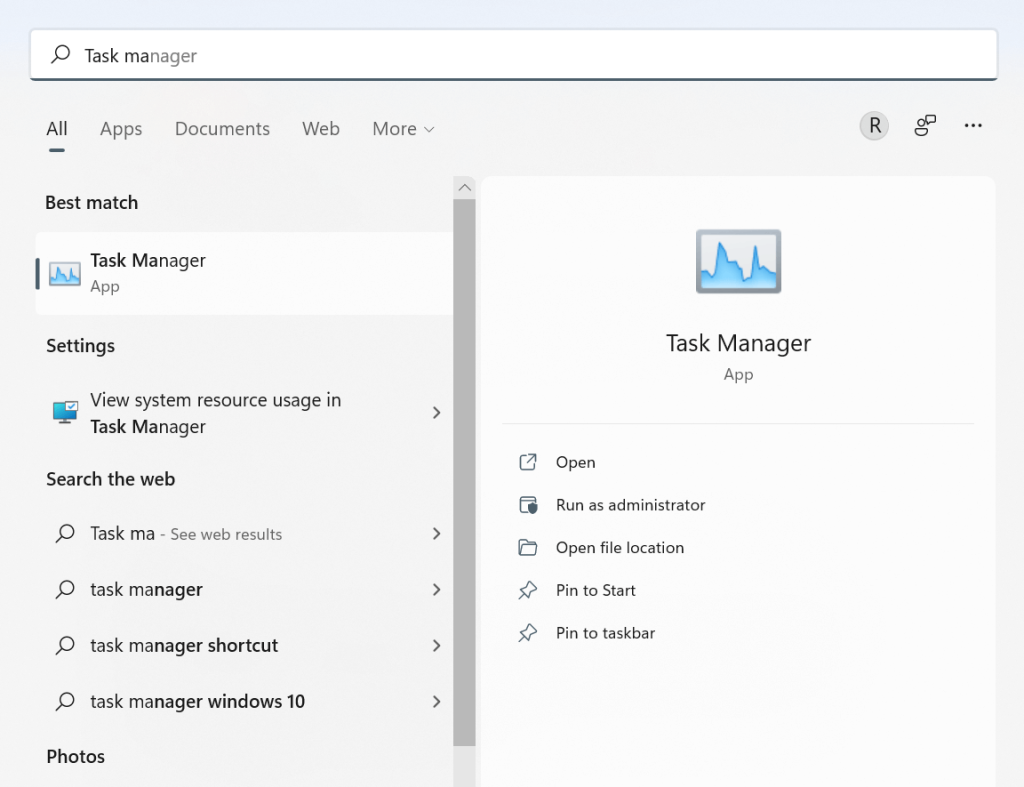
Step 4: Choose the Task Manager option
Step 5: Check the Memory option from the list. You can view the available RAM space.
Conclusion
Before starting the upgrading process for the laptop RAM, users need to check the available memory on the device. Also, make sure that you are using compatible software/hardware for your laptop device model. Follow the given sequence of steps and handle the hardware checking portion carefully. Take professional help, if necessary.
Found this post helpful? Please check out other posts on diverse software-related matters and get back to us with your thoughts.
Popular Post
Recent Post
How To Find Password Saved on This Computer: Complete Guide
Many people forget their login details at some point. It happens often. We create many accounts every year. Each one needs a username and a password. Over time, it becomes hard to remember all of them. That is why computers offer ways to store login details. These saved details help users sign in faster. They […]
How To Open/Access Computer Management & Advanced Tips
Every Windows computer has many hidden tools. Most users never see them. They only use basic settings. They change wallpapers. They install apps. They adjust sound and display. That is enough for daily work. But problems still happen. The system slows down. Storage fills up. Errors appear without warning. At this stage, normal settings do […]
How To Transfer Photos From Android Phone To PC/Laptop [2026]
Moving photos from a phone to a computer is something most people need to do often. Phones fill up fast. Photos also matter more than apps. You may want a safe backup. You may want to edit images on a bigger screen. This guide explains how to transfer photos from Android to PC without stress. […]
Top 9 Browsers With Built-In VPN – VPN Browser
Online browsing is no longer private by default. Every website collects data in some form. This includes location details, device information, and browsing habits. Over time, this data builds a clear picture of user behavior. Many people are now uncomfortable with this level of tracking. A VPN browser helps reduce this exposure. It adds a […]
AI In Cyber Security: Who is Winning, Hackers or Security Companies
Cybersecurity once followed clear rules. Companies built firewalls. Users created passwords. Antivirus tools scanned files and removed known threats. When an attack happened, security teams studied it and added new rules. This method worked for many years. It created a sense of control and stability. That sense is gone today. Artificial intelligence has changed how […]
The Biggest AI-Run Cyber Attacks Of All Time
Artificial intelligence is now part of everyday technology. It helps people search faster. It improves medical research. It supports businesses in making better choices. But AI is not used only for good purposes. Cyber criminals have also learned how to use it. This has changed the nature of cyber attacks across the world. In the […]
Switch To a Dark Background Theme on Windows: Enable Dark Mode
People often like a screen that feels gentle on the eyes. A darker style softens bright areas and makes long computer sessions easier to handle. It also gives the desktop a cleaner and more modern feel. When you switch to a dark background theme in Windows, the colors shift to deeper shades that reduce glare […]
Complete Guide on Managing Audio Input Devices [Latest In 2026]
People use microphones for meetings, games, classes, recordings, and voice chats, so any problem with the device can interrupt their work. Even a small system error can make the voice weak or stop it fully. This is why knowing the basics of managing audio input devices is helpful for new and experienced users. Windows includes […]
Resetting Audio Settings on Windows 11: Complete Guide
Sound problems can disrupt work, study, or entertainment. Many users face issues where the audio becomes too low, too loud, unclear, or does not play at all. A common way to solve these problems is by resetting audio settings to their original state. This helps Windows rebuild its sound setup from the beginning. Windows 11 […]
Troubleshooting Headphone Detection: Headphones Not Detected/Working
A lot of users run into sound problems at some point. A common one is when the computer does not pick up the headphones. You plug them in, but the speakers keep playing. This can break your focus during work, movies, music, or calls. It also causes confusion because the reason is not always clear […]









![Complete Guide on Managing Audio Input Devices [Latest In 2026]](https://www.techcommuters.com/wp-content/uploads/2025/12/Complete-Guide-on-Managing-Audio-Input-Devices.webp)
