


A slow computer makes it hard to focus. Programs take too long to open. Free space keeps shrinking until the disk is almost full. This happens to most PC owners at some point. Even new machines can slow down after a while. That is the exact problem cleanup tools are built to solve. They comb […]
How to Turn off Notifications in Windows 10/11
Notifications are highly important for users as they inform them about updates, information, and messages they get on their desktops. Additionally, on Windows 10 and 11, notifications about the functions of the installed services and apps come up occasionally.
However, most of these contain vital information, and the steady stream of multiple alerts can get distracting. At this point, you should disable notifications on Windows 11 or 10. This post will discuss the right ways to turn off automatic system notifications safely. Read on to know more.
Methods to Turn off Notifications in Windows 10 and 11
Certain steps are available for users to manage their system and app notifications. We went through each route and tried them out to find the best possible approaches. Here, we present the top ways to turn off notifications in Windows 10 and 11.
Method 1: Turn off All Notifications on Windows 11/10
Steps are available to properly shut off notifications for Windows 10 and 11 devices in one sequence. Specific methods are available for Windows 10 and Windows 11 devices.
How to do this on Windows 10?
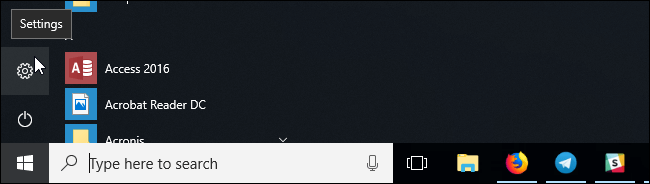
Step 1: Access the Start menu on the home screen taskbar.
Step 2: Click on the Settings icon (gear-shaped button) on the home screen. Or, press the “Windows” and “I” keys on the keyboard.
Step 3: Open the System menu from the Settings tab and choose the “Notifications & Actions” option.
Step 4: Turn the toggle off beside the “Get Notifications from apps and other senders” option.
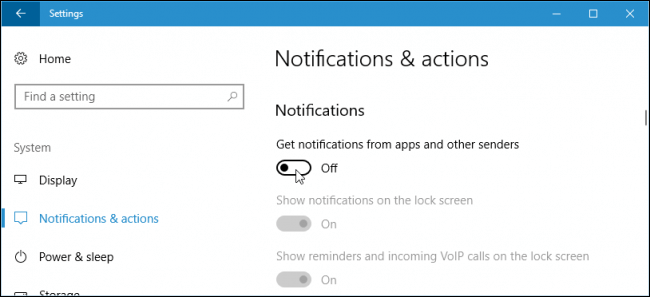
This action is available on both the system desktop apps and Store apps.
How to do this on Windows 11?
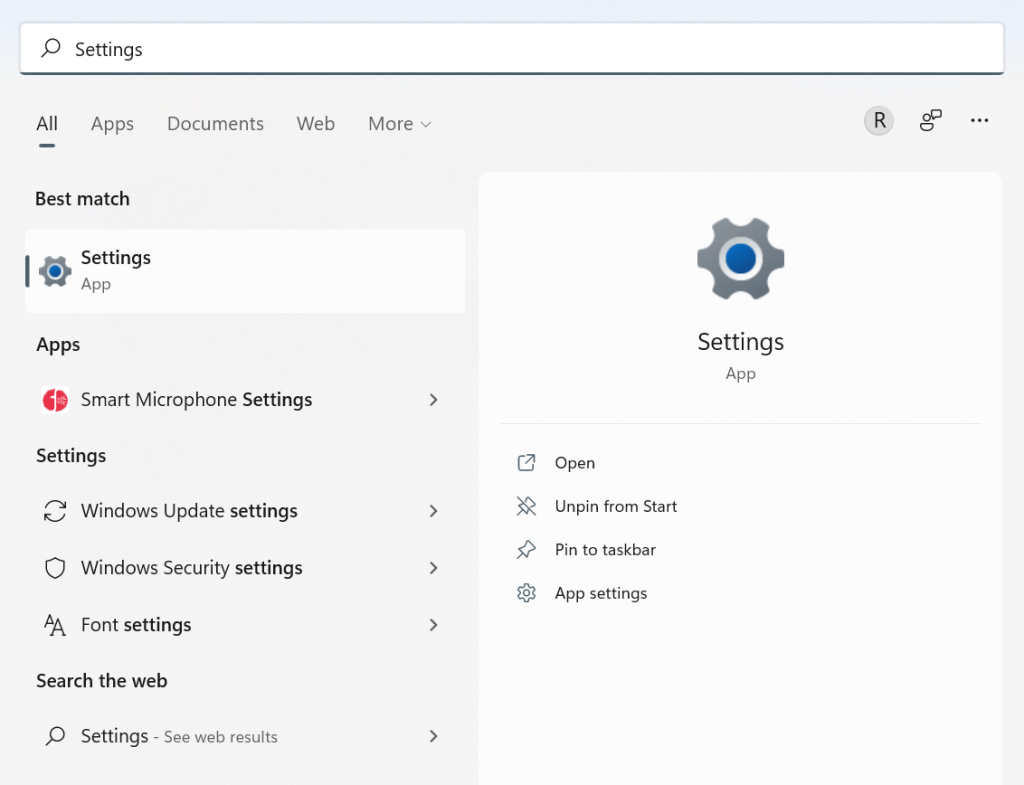
Step 1: Press on the Win + I keys on the keyboard to access the “Settings” option.
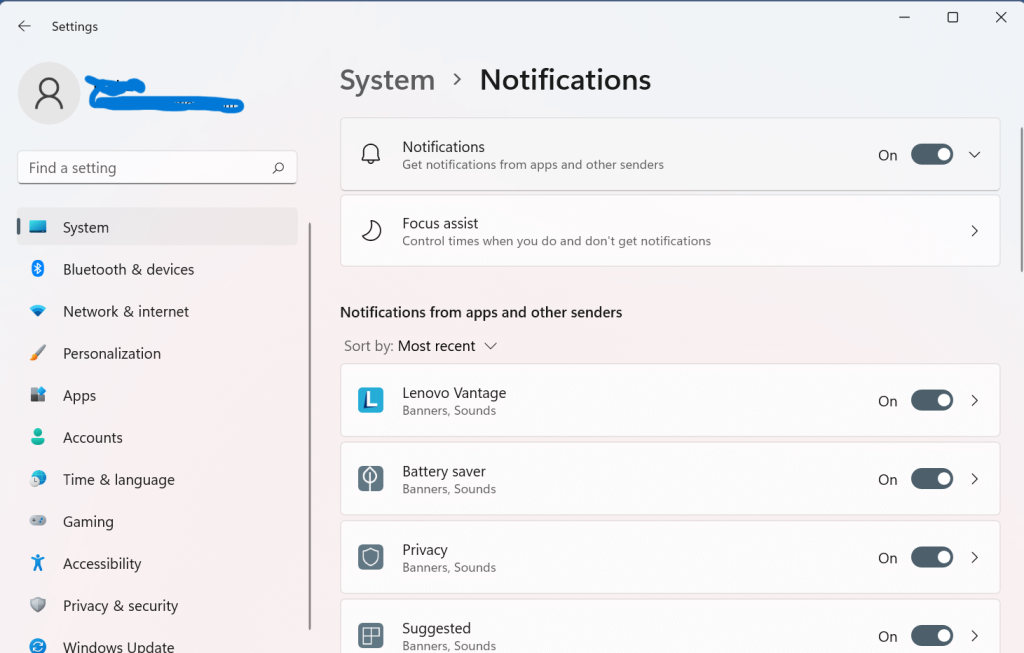
Step 2: On the next window that appears, choose the Notifications option and turn the toggle beside it to OFF. This would automatically turn off notifications in Windows 10 for all apps/senders.
Step 3: To choose particular apps for getting their notifications later, you should click on the drop-down menu of Notifications. Select the checkboxes beside the apps/senders you want to activate the alerts.
Method 2: Turn off Suggested Notifications in Windows 11
Specific notifications come up when users carry out any activity on their computers. These can appear each time the system detects new action and gives suggestions on what to do instead. There are steps to turn them off on Windows 11 devices.
How to do this?
Step 1: Open the Settings tab from the home screen Start menu, Search section, or press Win + I.
Step 2: Open the System tab> Notifications.
Step 3: Scroll your cursor down to “Get tips and suggestions when I use Windows” or “Offer suggestions on how I can set up my device” options. Uncheck both.
Method 3: Disable Notifications of Specific Apps on Windows 11/10
Sometimes, users do not want to get rid of all notifications since many are important to them, e.g., email notifications. Then, they disable notifications in Windows 11 and 10. The steps are slightly similar for Windows 10 and Windows 11 users.
How to do this on Windows 10?
Step 1: Open the Settings tab from the Start menu or Win + I keys on the keyboard.
Step 2: Open the “Notifications & Actions” option from the next menu that appears.
Step 3: Scroll your cursor down to the “Get notifications from these senders” section.
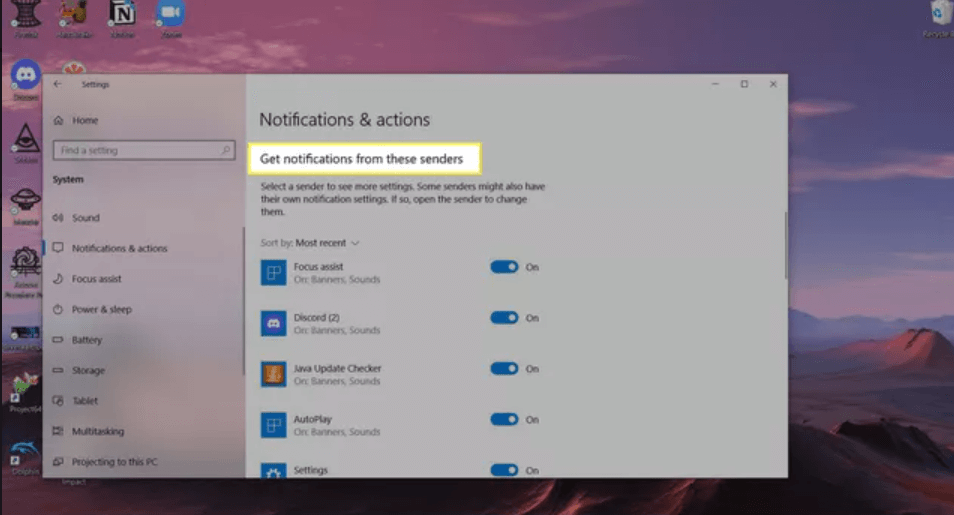
Step 4: Sort the apps by clicking on the “Sort by” option, and search by “Name” or “Most Activity” for easier navigation.
Step 5: Go through all the active apps that are sending notifications on the device. Turn the switch beside the apps you want to stop getting alerts from to the “OFF” side.
How to do this on Windows 11?
Step 1: Open the Settings menu and choose the System option from the left-hand panel. Select Notifications from the list that comes up. Make sure that the toggle beside “Notifications” is switched on.
Step 2: Scroll down to the “Notifications from apps and other senders” option. Choose the main apps you want to switch off the alerts of by changing their toggle settings to OFF.
Step 3: To turn off the notification banner of particular senders or apps, click the checkmarks for “Shows notifications in Notification Center” and “Show Notification Banners”.
Method 4: Disable Notifications from Notification Center
Users can disable notifications in Windows 11, and you can access the Notification Center on your device. However, the Action Center is not available on the home screen of Windows 11. Users can access it through the Date and Time tray icon on the screen.
How to do this?
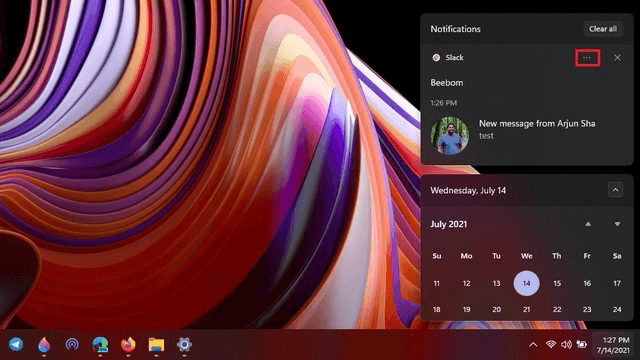
Step 1: Click on the Time and Date icon on the lower right side of the screen.
Step 2: Access the Notification Center. An icon as horizontal three-dots would appear beside the app that is active. Click on it.
Step 3: Select the “Turn off all notifications for <app name>” option from the options that appear.
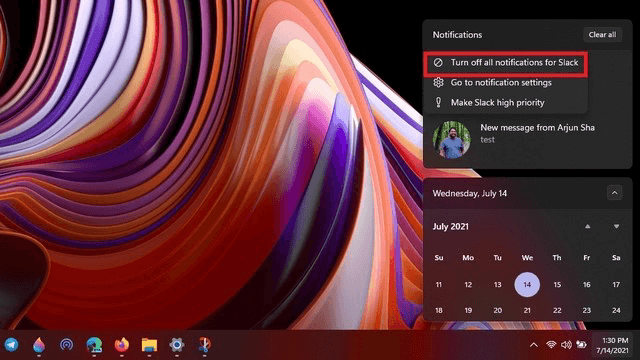
If you want to disable all notifications, click on the next option.
Method 5: Disable Notifications via the Registry Editor
It is possible to disable notifications in Windows 11 through the Registry Editor. Follow the steps and add the path carefully to avoid multiple clicks.
How to do this?
Step 1: Press the Windows + R keys on the keyboard. This would open the Registry Editor tab.
Step 2: In the text field, add the following path and access it:
HKEY_CURRENT_USER\Software\Microsoft\Windows\CurrentVersion\PushNotifications
Step 3: On the right panel of the next window, the “ToastEnabled” value would appear.
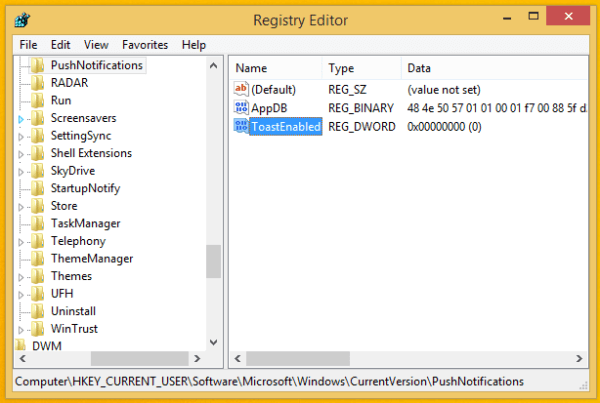
Suppose the value does not appear automatically; right-click on the window screen at any location. Then, choose New >Dword Value (32-bit) and rename it as “ToastEnabled”.
Step 4: Double click your cursor on top of the value and set it to 0.
Step 5: Sign out from the account. This would activate the change. Sign back again.
Method 6: Shut off Notification Pop-ups on Windows 11 via Focus Assist
It is possible to disable notifications in Windows 11 that appear as pop-ups constantly through the Focus Assist. This feature is an in-built program on the device and is set to automatic activation by default for specific events.
How to do this?
Step 1: From the Start menu, choose the System option from the Settings menu. Then, click on Focus Assist.
Step 2: Choose the programs that you want notifications from. Choose one option such as “Alarms only”. Therefore, you would only get alarm notifications, no other alerts.
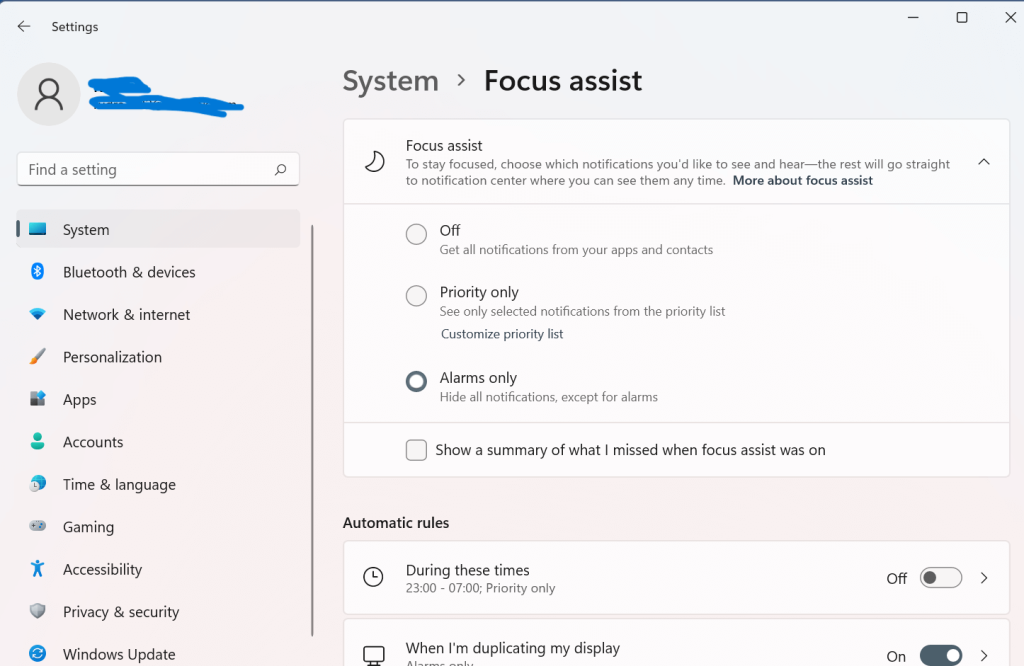
If you choose the Priority Only option, that would only allow notifications from apps/senders on the priority list. Click on the “Customize priority list” option to control which apps you want to set as priority.

Method 7: Shut off or Mute Notifications on Windows 10 Temporarily
There is the Focus Assist feature under Windows 10 models as well, originally known as the “Quiet Hours” option. This functions as a “Do not disturb” feature on the devices. When you switch it on, it temporarily hides the notifications on the system. The first Quiet Hours version of the feature had a set period when it stays enabled, i.e., 12 AM to 6 AM. Users can customize the hours for the Focus Assist feature version.
How to do this?
Step 1: Press the “Windows” and “A” keys on the system keyboard to access the Windows Action Center. Or, click your cursor on top of the Action Center icon available at the bottom right side of the taskbar.
Step 2: Choose the Focus Assist or Quiet Hours tile option based on your device model.
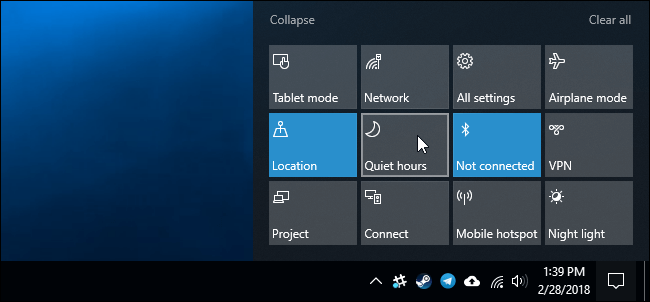
Step 3: Toggle the settings to OFF to turn off notifications in Windows 10 temporarily.
Method 8: Turn off the Notifications Directly from the Apps
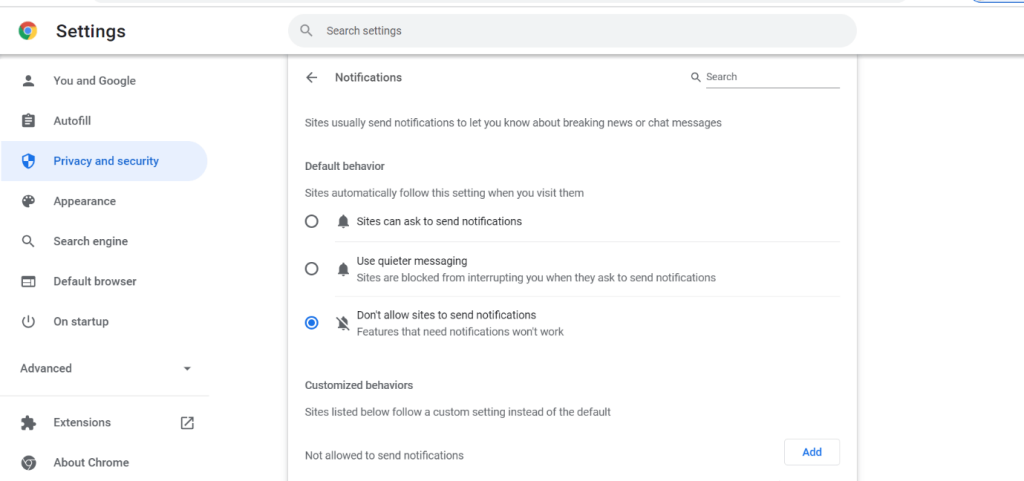
In some cases, specific can still supply their alerts on the system. To turn them off, directly visit the specific app and then change the settings for app notifications through the app. For this, you have to access the private Settings section of the apps. Here are the steps for turning off specific app settings through the application Settings using Google Chrome as an example.
How to do this?
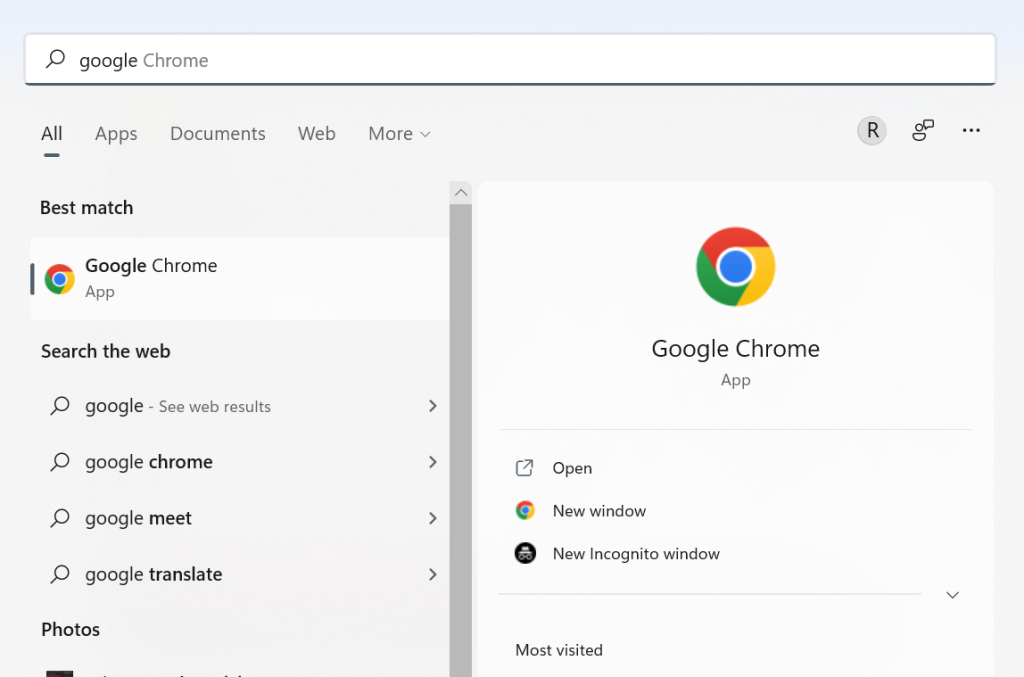
Step 1: Open the Google Chrome application by double-clicking on top of the app icon on the home screen. Or, search for the app through the Search option on the home screen taskbar.
Step 2: Open the Menu section by clicking on the three dots icon.
Step 3: Access the Settings option and choose the “Privacy and Security” option from the choices. Then, choose Site Settings.
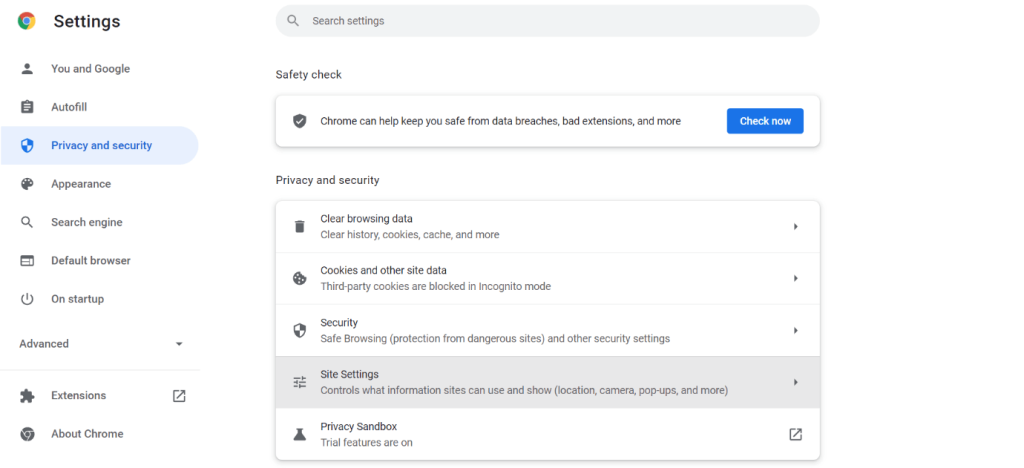
Step 4: Scroll down to the Permissions section and choose Notifications.
Step 5: Block or allow site notifications as required.
Conclusion
Carry out the steps for disabling notifications on Windows 10 and 11 systems carefully, as mentioned in this post. Try out different tactics best suited for turning off all app/service notifications or specific alerts.
If this post was useful for you, please go through our other such posts.
Author Bio:
Dinesh Lakhwani 

Dinesh Lakhwani, the entrepreneurial brain behind “TechCommuters,” achieved big things in the tech world. He started the company to make smart and user-friendly tech solutions. Thanks to his sharp thinking, focus on quality and the motto of never giving up, TechCommuters became a top player in the industry. His commitment to excellence has propelled the company to a leading position in the industry.
Popular Post
Recent Post

Fortect Software Review: The Ultimate PC & Mobile Cleaning, Optimization & Security Tool
Slow computers are a common problem for almost every Windows user. Well, yes! Over time, your PC picks up junk files. These files sit quietly in the background. They take up space and slow things down. Programs open slower. Windows takes longer to boot. Even simple tasks like opening a folder can feel sluggish. There […]

CCleaner PC Optimizer Review: A Complete Guide for Windows Users
If your computer has started to feel slow, you are not alone. Most Windows PCs slow down over time. Junk files pile up. The registry gets messy. Too many apps open when you start your PC. All this adds up and makes even a good machine feel tired. This is where a PC cleaner tool […]

Auslogics Duplicate File Finder: Full Review and User Guide
A computer quietly gathers clutter over time. This includes duplicate photos, repeated downloads, and forgotten backups hiding in random folders. This buildup slowly eats away at storage and can make even a fast PC feel sluggish. Manually finding and deleting duplicates is tedious. It means checking every folder, comparing file names, and guessing which copies […]

CCleaner Duplicate File Finder: Key Features, Pricing, Step-by-Step Guide and More
Every computer collects junk over time. Right? Well, yes! Photos often get copied twice. Documents get saved in two folders by mistake. Old downloads pile up and never get deleted. This slowly eats up your storage space, and most people do not even notice until their drive is almost full. That is where a duplicate […]

Duplicate File Finder Pro: A Complete Review, Everything You Should Know
Computers collect thousands of files over time. Well, yes! Many of them end up being duplicates created by backups, downloads, or accidental copies. These extra files take up valuable storage space and make it harder to keep everything organized. Finding and removing them manually can take hours. Right? Duplicate File Finder Pro is a tool […]
Top 3 Duplicate File Finder for Windows 11 & Windows 10
If your PC storage keeps filling up even after you delete big files, duplicate files could be the real reason. Most of us save the same photo twice, download a document more than once, or copy a whole folder by mistake. Over months and years, these duplicate files pile up quietly. You do not even […]

Monitor Screen Calibration Guide: Everything You Should Know
Your monitor shows colors every single day. But are those colors actually correct? Most people never stop to check this. They just use the screen as it comes out of the box. This habit can lead to wrong colors in photos, videos, and work files. Colors may look too warm or too cold without you […]

How To Check Installed RAM and RAM Slots [Complete Guide]
RAM plays an important role in how smoothly a computer runs. Short for Random Access Memory, it stores the data and instructions that Windows and active applications need at any given moment. From opening multiple browser tabs to running games and productivity software, RAM helps keep everything responsive. A system with limited memory may experience […]

What is Microsoft Autopilot Everything You Need To Know
Technology has changed the way companies manage computers. Well, yes! Employees now work from offices, homes, and remote locations. Setting up devices manually for every worker takes time and effort. It can also create mistakes that slow down productivity. This is where Microsoft Autopilot becomes useful. It helps businesses prepare and deploy Windows devices with […]

