Ways to Completely Clear Search History on Your Mac

Last updated on February 25th, 2025 at 10:17 am
People use their Mac devices for various reasons, one of the most prominent ones being for browsing purposes. However, after visiting any website on the device, the browser version stores cache and other records of the query in the system. This affects the performance of the system as the excess records can lag the disk speed.
Plus, there is a concern over privacy as well since the browser automatically saves information for future login attempts.
Therefore, for better device performance, you should0 from each browser location. Are you wondering how? In this post, we cover various appropriate methods available to effectively clear out the search history on Mac. Read on to find out more.
Why Should You Keep Your Browser History on Mac Clean?
For different individuals, the reason to delete search history on their Mac device varies. The common ones include:
- Potential security threat- Hackers can use cookies remaining in your search history with account and password information. They can acquire personal data and enter one’s accounts easily.
- Space issue– The system records the searched page URLs and caches for easier re-downloading. Not deleting the browsing history accumulates a lot of cookies; this lags the hard drive storage and slows it down.
- Corrupted cookies– Some of the stored cookies can be outdated and corroded, causing system issues.
- Loss of privacy-Users use their personal information to access certain websites, like e-commerce stores. These are visible to potential hackers.
It is important to remove the browser search history to keep the device and system security.
Methods to Delete Search History on Mac
There are varying methods for removing search history on Mac, depending on the type of browser. You can use the tool of CleanMyMac X for a quick and simple cleaning process.
Method 1: Use CleanMyMac X
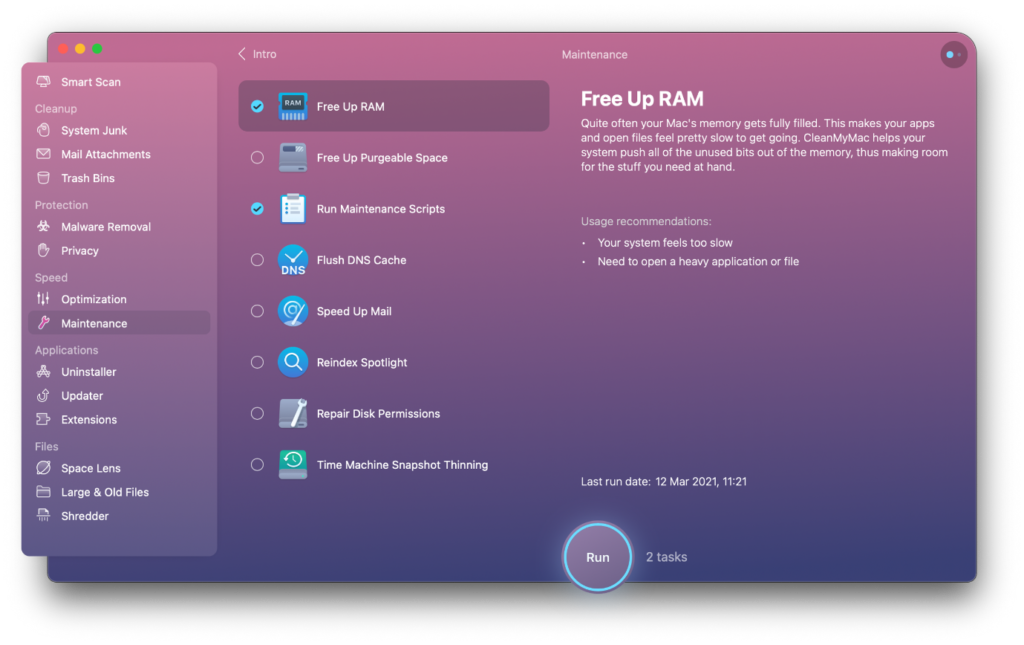
One of the most efficient manners of clearing out Mac history is using the comprehensive and user-friendly cleaner app, CleanMyMac X. It can remove unwanted apps, system junk, and malware after a quick scanning process.
The software can find massive and outdated files that are hidden and unused DMGs, detect and shield against malware/virus, and erase sensitive search history. The software is useful to find the apps and files that are wasting excess space and remove them directly.
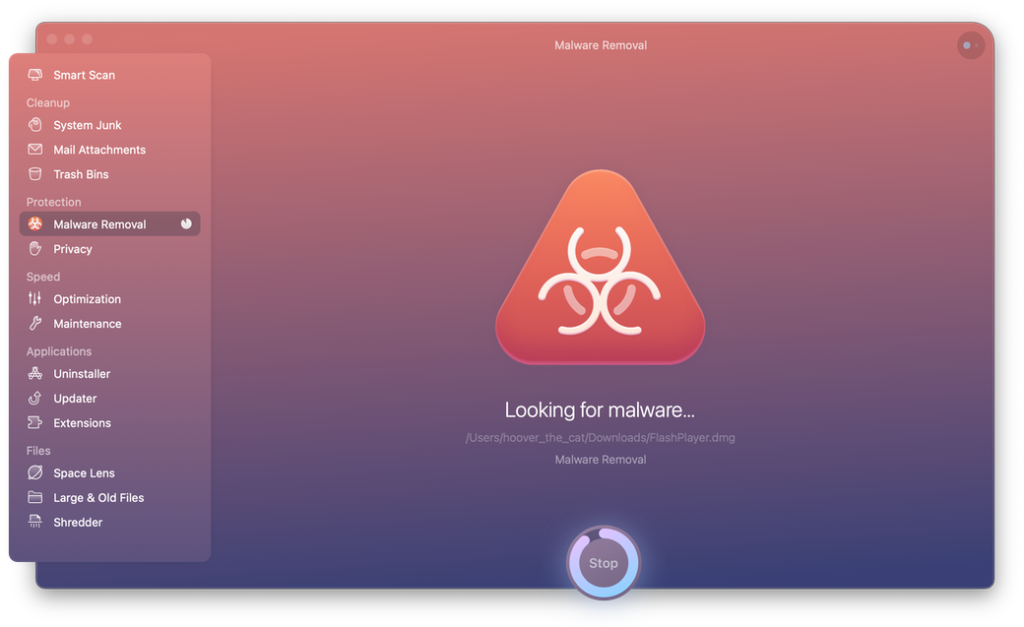
The application is an Apple-authorized software and includes a wide range of features besides the cleaning service. Here are the steps to use the CleanMyMac X for search history cleaning.
Step 1: Download & install CleanMyMac X.
Step 2: Access the Privacy module.
Step 3: Select the main browsers you operate regularly.
Step 4: Click on the “Browser History” option.

Step 5: Select Remove.
The application is useful for clearing out more than the browsing history site URLs and cookies. Other modules target different types of junk files in the device and internet-based components like old files, downloads, logs, and caches.
Besides using CleanMyMac X software, another tactic you can adopt is to target each browser and clean their records individually.
Method 2: Manually Delete Safari Browsing History in Mac
Users can directly remove all records from the Safari browser history for specific periods. The browser history information is removed from all devices that have Safari if they are connected to one iCloud, and the devices have the iCloud preferences turned on.
To note, the websites that you visit would still keep the browsing record even if you clean the local browsing history.
The type of data that Safari deletes after users clear the history include:
- The back-and-forth sequence of website URL access that is currently active
- Previous web pages that you visited
- Recent searches
- List of sites visited frequently
- Web page icons
- Snapshots of open webpages
- Website URLs under Quick Website Search
- Links of downloaded items (this does not remove the downloaded file)
- Websites with notifications switched on
- Websites with location settings on
Main Steps to Clear Search History from Safari
Step 1: Access Safari through iMac or MacBook Air/Pro device.
Step 2: Choose History > Clear History.
Step 3: Choose the particular dates you want to delete the browsing history of. Alternately, select “Full History” if you want to remove the full search history from Safari.
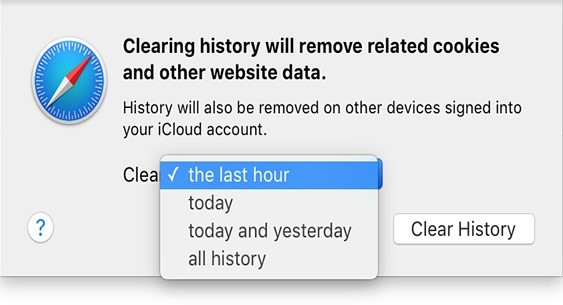
Step 4: Press on “Clear History”.
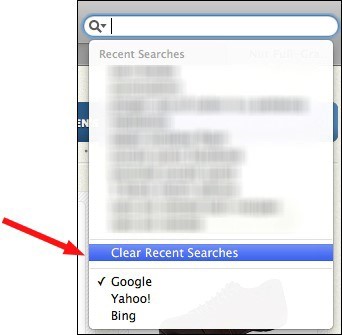
You can directly use the Safari feature for cleaning out Recent Searches for a quick removal process. Through the Recent Search List feature, users can normally check the past search items and reach the site without much browsing.
Main Steps to Remove Safari Recent Search List on Mac
Step 1: Access the Safari browser on your Mac device.
Step 2: Select the URL bar. It would show all recently searched URLs in a list format.
Step 3: Scroll to the bottom of the list and click on “Clear Recent Searches”.
Additionally, you can browse through the Private Browsing Mode on your Mac through the Safari browser. This does not record any search details.
Method 3: Manually Delete Firefox Browsing History in Mac
Another popular browser of choice for Mac users is Firefox. The steps for removing search history cookies on this browser are as follows:
Step 1: Launch the Firefox browser via Mac.
Step 2: Select the “Clear Recent History” option.
Step 3: Choose download history, browsing history, search/form history, cookies, caches, and other preferences. Click on “Clear Now”.
Main Steps to Remove Specific Firefox Pages from Search History
Step 1: You would see a menu icon with a hamburger shape on the browser. Choose that.
Step 2: Access History and then select “Manage History”.

Step 3: Use the control button and select all pages you wish to remove one by one.
Step 4: Clear the page. You can delete all related data for a page as well through the “Forget About This Site” option.
Main Steps to Privately Browse Firefox on Mac
Step 1: Select the File option from the menu on top of the screen.

Step 2: Click on “New Private Window”. Then, begin private browsing.
Method 4: Manually Delete Chrome Browsing History in Mac
You can clear the browsing history while using the Google Chrome browser through the following steps on Mac.
Step 1: Access the Google Chrome browser.
Step 2: Select “Clear Browsing Data” after clicking on the Chrome icon.
Step 3: A pop-up window would appear. Select all of the items you wish to delete. Select “Clear Browsing Data” to permanently remove Google records.
Main Steps to Remove Specific Chrome Pages from Search History
Step 1: You would notice a three-dot icon at the top of the screen after opening Chrome browse. Press on that and then choose History.
Step 2: After the list “History” opens, select specific pages that you want to delete.
Step 3: Click on the “Delete” button.
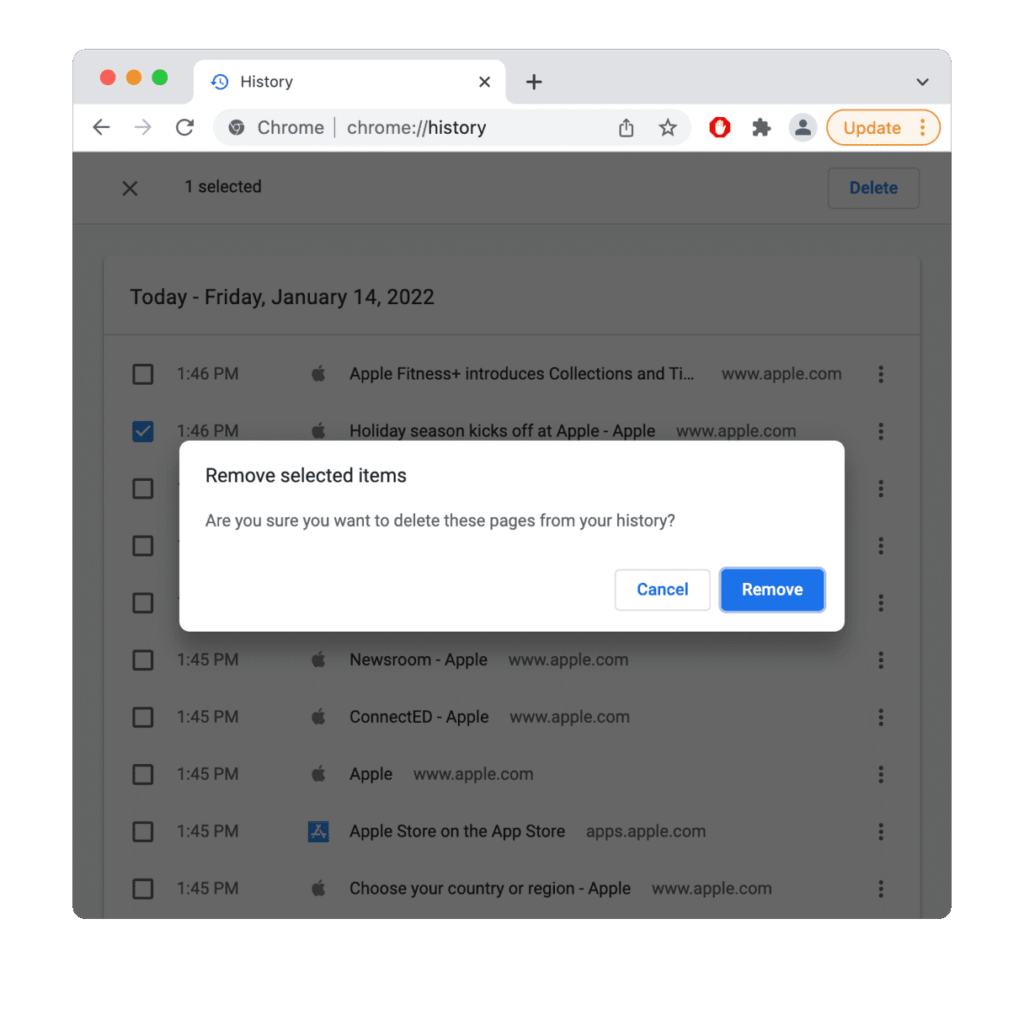
Step 4: Press “Remove” for the final confirmation.
Main Steps to Privately Browse Chrome on Mac
Step 1: Access the Chrome browser and open the three-dot icon (menu).
Step 2: Choose the “New Incognito Window” option.
Method 5: Manually Delete Opera Browsing History in Mac
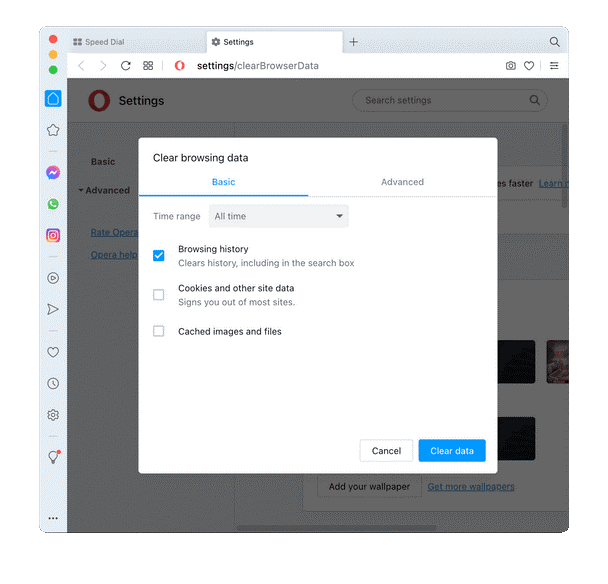
The following are the steps to manually remove all search history from Opera on Mac.
Step 1: Launch the Opera browser on your device.
Step 2: Select History from the top screen menu and choose “Show All History”.
Step 3: Select the “Clear Browsing Data” option.

Step 4: Under the time range selection, opt for the “All Time” choice.
Step 5: Click Browsing History > Clear Data.
Main Steps to Remove Specific Opera Pages from Search History
Step 1: Open the History menu through the top-most bar on Opera.
Step 2: Select “Open Full History View”.
Step 3: Choose the pages you want to delete.
Step 4: Click your cursor on the “X” sign icon.
Main Steps to Privately Browse Opera on Mac
Step 1: Open the File Menu under this browser.
Step 2: Then, open “New Private Window”.
Conclusion
It is important for you to delete all data history from your browsers to keep your Mac device safe and fast. Either manually clear all browsing history or use the one-in-all application of ClearMyMac X. You should read through all of the processes we have listed to make up your mind.
Author Bio:
Dinesh Lakhwani 

Dinesh Lakhwani, the entrepreneurial brain behind “TechCommuters,” achieved big things in the tech world. He started the company to make smart and user-friendly tech solutions. Thanks to his sharp thinking, focus on quality and the motto of never giving up, TechCommuters became a top player in the industry. His commitment to excellence has propelled the company to a leading position in the industry.
Popular Post


Recent Post

How to Switch From Local To Microsoft Account On Windows
Many users begin with a local account when they set up a new Windows computer. A local account works only on that single device. It stores settings, files, and preferences locally. It does not connect to online Microsoft services. For basic offline use, it works well. However, as digital needs grow, many users want better […]

How to Switch Windows 10 to a Local Account: Complete Guide
Windows 10 allows users to sign in with either a Microsoft account or a local account. When you set up a new computer, the system often suggests using a Microsoft account. This account connects your device to Microsoft services such as Outlook, OneDrive, and the Microsoft Store. It also syncs settings, themes, and passwords across […]

How To Change Default Apps For File Types In Windows
Windows is designed to make using your computer easy. One way it does this is by assigning default apps to different file types. This means when you open a file, Windows automatically opens it with a specific program. For example, photos may open with Photos, music with Groove Music, and PDFs with Edge. These default […]

How To Adjust The Mouse Pointer Speed: Complete Guide
Using a computer every day means you use the mouse a lot. The mouse pointer moves on the screen and helps you click, scroll, and select items. Many people never think about the speed of the mouse pointer. They have used the default setting for years. This can cause small problems over time. A slow […]

How to Change Mouse Scrolling Settings In Windows
A mouse is one of the most used computer tools. People use it every day. They scroll through emails. They scroll through documents. They scroll through websites and images. The movement becomes automatic. Most users do not notice it. That is why problems often go unnoticed. Scrolling problems show up slowly. At first, it feels […]

Keyboard Light Settings: Keyboard Lighting Control [Complete Guide]
Keyboards are no longer simple typing tools. Well, yes! Over time, they have evolved to include features that improve comfort, visibility, and overall experience. One of the most useful features today is keyboard lighting. It helps users work comfortably in low-light conditions. It also reduces strain when typing for long hours. Many users first notice […]

Customizing Pointer Appearance: Complete Guide
The way your mouse pointer looks on your computer may seem like a small detail. But customizing pointer appearance can make using your PC more comfortable and visually appealing. Many users do not realize that they can change the pointer size, color, and style to fit their needs. Whether you want a bigger pointer for […]

How To Choose a Computer Monitor: Monitor Buying Guide
Buying a monitor looks easy. Many people think all screens are the same. That belief causes regret later. A monitor is not just a display. It is a daily tool. You read on it. You work on it. You relax with it. Small problems become big over time. Poor brightness hurts eyes. Bad size causes […]

How To Get Help With File Explorer in Windows 11 [Complete Guide]
File Explorer is one of the most important tools in Windows 11. It is used to open folders, view files, and manage stored data. Almost every action on a Windows computer depends on it in some way. When users open documents, save downloads, or organize photos, File Explorer is always involved. Because it is used […]

How To Fix A Frozen Computer: Complete Guide [Windows 11/10]
A frozen computer is one of the most common problems Windows users face. The screen stops responding. The mouse pointer does not move. Keyboard inputs do nothing. You may hear the fan running loudly. Sometimes the system looks alive, but nothing works. This situation often happens when you are busy or working on something important. […]

