How to Update Display Driver on Windows 11/10 [Easiest Ways]
![How to Update Display Driver on Windows 1110 [Easiest Ways]](https://sp-ao.shortpixel.ai/client/to_webp,q_glossy,ret_img,w_1280,h_853/https://www.techcommuters.com/wp-content/uploads/2025/04/How-to-Update-Display-Driver-on-Windows.jpg)
Last updated on December 29th, 2025 at 4:29 am
You might already be aware that between your graphics card and Windows OS, your display driver serves as an essential channel for communication. A driver that is out of date or corrupt can cause several annoying problems, ranging from slow performance and visual abnormalities to complete system instability.
Maintaining the most recent versions of your graphics drivers is crucial for gaming, system stability, and peak performance. You’ve arrived to the ideal location if you’re asking how to update the display drivers on Windows 11/10. This tutorial will show you how to make sure your system is using the newest and best display drivers in the simplest and most efficient ways possible.
What Are Display Drivers?
Well, Display Drivers are dedicated software which enable seamless communication between your operating system and graphics hardware. The graphics card or integrated GPU (Graphics Processing Unit) and Windows OS communicate with one other through these intermediaries. Your operating system instructs the display driver, which in turn instructs your graphics hardware on what to render on your screen while you play a game or watch a film. These drivers include essential code that enhances performance, resolves issues, and makes your graphics card capable of new functions.
To increase stability, performance, and compatibility, major graphics card makers like NVIDIA, AMD, and Intel frequently release driver upgrades. Your computer wouldn’t be able to take advantage of your graphics hardware’s full potential without the right display drivers.
When You Need to Update Display Drivers?
Understanding when to update your display driver can help you avoid annoying visual problems. The following significant circumstances usually call for updating your drivers:
- If you observe crashes, stuttering, or frame drops in graphics-intensive apps.
- For complete compatibility, new OS versions occasionally call for updated drivers.
- Manufacturers frequently use driver updates to introduce new features.
- If your system unexpectedly loses the ability to recognize monitors or keep the right resolutions.
- If your graphics driver is mentioned in any error messages that you receive.
- The optimizations found in the most recent drivers are frequently advantageous for new games.
- If you frequently see coloured dots, lines, or odd patterns that appear on your screen.
- Always upgrade to the most recent drivers when installing new hardware & after installing a new graphics card.
Updating your display driver on a regular basis guarantee that your graphics hardware is operating at peak efficiency and stability. Most manufacturers advise looking for upgrades every one to three months.
When You Should Avoid Updating Display Drivers On Your Windows 11/10 PC?
Well, updating your display drivers is generally a good practice, but there are certain times when performing a video driver update is not suggested.
- When your OS is running well: You might adhere to the “if it’s not broken, don’t fix it” philosophy if your system is reliable and operating efficiently.
- Just before crucial work: There’s always a chance of issues, so don’t update drivers right before significant deadlines or presentations.
- Beta Drivers: Avoid installing Beta or experimental drivers on production systems unless you’re debugging a specific problem.
- Very old hardware: Performance may be lowered if newer drivers eliminate optimizations for outdated hardware.
- Custom configuration systems: If you have unique configurations that function well with the drivers that are currently in use, or if you have customized multi-GPU setups.
- Without a contingency plan: Never update drivers without understanding how to undo the changes in case something goes wrong.
At last, always research for the specific update and consider its relevance to your system before proceeding.
Precautions Before Updating Display Drivers
Before you consider updating your display drivers on your Windows 11/10 PC, make sure you adhere to the following important precautions to ensure a smooth process:
- Perform System Restore: In the event that something goes wrong, you can restore your system by creating a restore point. For this, all you have to do is, simply go to the Search bar and look for “Create a restore point” option. Once found, click on the “Create” button on the same window and adhere to the instructions.

- Make a backup of your crucial files: Although they are uncommon, driver updates can occasionally result in unstable systems.
- Ensure stable power: To guarantee consistent power, plug laptops in and think about buying a UPS for desktop computers.
- Shut down every application: Make sure that no applications are active while the update is being performed.
- Note your current driver version: If you need to roll back, it will be easier if you take note of your current driver version. To do so, just hit the shortcut keys – WIN + X altogether and click on the “Device Manager”.
On the Device Manager window, simply locate “Display adapters” and expand the same. After this, just right-click your graphics card and choose “Properties” option from the right-click context menu. To see the most recent version, select the “Driver” tab.

- Verify the model of your hardware: To obtain the appropriate drivers, be sure to identify the specific graphics card you own.
- Temporarily turn off your antivirus program: Since some security programs can prevent drivers from installing, consider disabling it for some time.
- Download only from authorized sources: Drivers should always be downloaded via Windows Update or the manufacturer’s website.
- Check the release notes: Recognize any known problems and the modifications the new driver introduces.
- Be prepared for downtime: Because some driver upgrades require the requirement to let machine restarts.
By following these steps prior to updating your display driver, you may help avoid issues and make sure your system stays stable during the process.
How to Update Display Drivers on Windows 11/10?
These are some of the easiest methods to perform video driver updates:
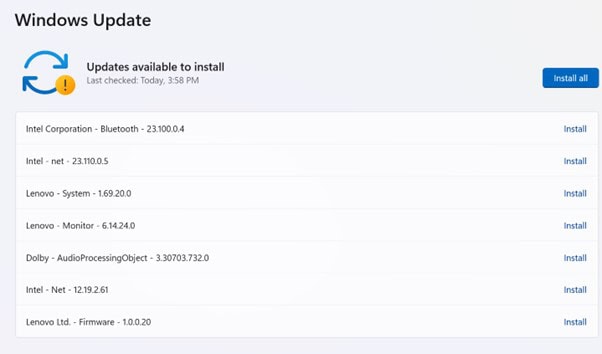
Method 1: Using Windows Update
Although it might not always offer the most recent versions, Windows Update is the most straightforward method of updating display drivers.
STEP 1. Launch Windows Settings
For accessing this, simply click on the WIN + I key altogether.
STEP 2. On your operating system:
In Windows 11, select Windows Update from the panel on the left.
Click on Update & Security in Windows 10.
STEP 3. Click “Check for updates”
That’s it! At this point, Windows will automatically begin downloading and installing any relevant drivers that are available to install. Simply click on the Restart button to implement the changes with latest driver updates.
| Writer’s Tip: Windows Update usually offers more conservative, well-tested driver versions instead of the most recent releases, despite its convenience. |
Method 2: Using Device Manager
Device Manager provides a direct way to update drivers through Windows:
STEP 1. Launch Device Manager
After pressing Windows + X, choose Device Manager.
STEP 2. Extend the category of display adapters.
Expand the respective category of Display adapters by double clicking on the same.

STEP 3. Update your Display driver
To update your graphics card’s driver, right-click on it and choose Update from the context menu.
STEP 4. Follow the on-screen Instructions
Select “Search automatically for drivers” to allow Windows to locate the most recent version on the Internet.To finish the installation, adhere to the on-screen directions.
| Writer’s Tip: Device Manager may not always locate the most recent drivers, so if Windows is unable to locate them, try the manufacturer’s website as outlined in Method 3. |
Method 3: Directly from Manufacturer Websites
Get the most recent display driver update straight from the manufacturer of your graphics card:
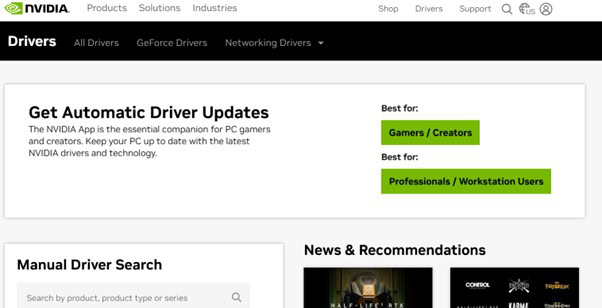
On Your NVIDIA GPUs:
1. Go to the driver download website for NVIDIA.
2. Choose your product’s specifications (model, series, kind, etc.).
3. Select Search.
4. Download the operating system’s suggested driver.
5. Launch the installer that was downloaded and adhere to the prompts displayed on the screen.
6. Just restart your PC to implement the necessary changes once the updates are installed.
On Your AMD GPUs:
1. Go to the AMD driver download website.
2. From the drop-down choices, choose your product.
3. Press the Submit button.
4. Download the operating system’s suggested driver.
5. Launch the installer that was downloaded and adhere to the prompts displayed on the screen.
6. Just restart your PC to implement the necessary changes once the updates are installed.

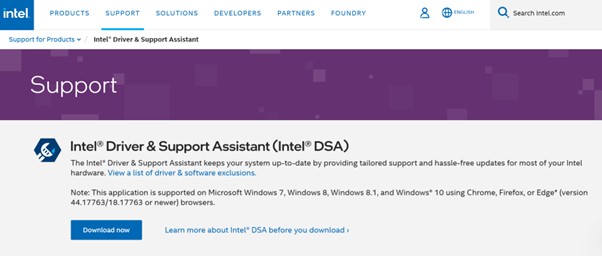
On Your Intel Graphics:
1. Go to the Intel driver download page.
2. Determine which Intel graphics product you have.
3. Get the relevant driver.
4. Launch the installer that was downloaded & adhere to the prompts displayed on the screen.
5. After the installation is finished, restart your computer.
| Writer’s Tip: Make a folder just for driver downloads so you can quickly locate earlier iterations in case you need to roll back. |
Method 4: Using Manufacturer’s Software
Manufacturers of graphics cards provide exclusive software that can find and install driver updates automatically:
Experience with NVIDIA GeForce:
1. Install GeForce Experience after downloading it.
2. Open the app and log in using your NVIDIA credentials.
3. Select the “Check for updates” button under the Drivers tab.
4. Select Express Installation or Custom Installation after clicking Download, if it is available.
5. Observe the directions displayed on the screen.
6. When prompted, restart your computer.
Experience with AMD Radeon Software:
1. Install the AMD Radeon software after downloading it.
2. Open the program
3. Select the System tab
4. Click the Settings icon (gear).
5. Select “Check for Updates.”
6. If it’s accessible, download and install it by following the instructions.
7. When prompted, restart your computer.
Experience with Intel Support Assistant & Driver:
1. Install Intel DSA after downloading it.
2. Open the software
3. It will check your computer for out-of-date drivers automatically.
4. Download and install any available updates by following the instructions.
5. When prompted, restart your computer.
| Writer’s Tip: In addition to driver upgrades, these proprietary tools frequently come with extra settings and game optimization capabilities that can improve your gaming experience. |
Method 5: Use a Specialized Driver Updater Software
Multiple drivers can be updated and your system scanned by third-party tools:
1. Install and start the application after downloading a reliable driver updater (such as Driver Booster, Driver Easy, or Snappy Driver Installer).
2. To look for out-of-date drivers, run a scan.
3. From the list of available updates, pick your display driver.
4. To download and install, adhere to the instructions.
5. After the procedure is finished, restart your computer.

| Writer’s Tip: Use third-party tools with caution. Reputable solutions should be used instead than ones that demand money for fundamental features. In general, the official tools from the manufacturer are safer choices. |
How to Roll Back Display Drivers in case of Mishap?
Here’s how to reverse a display driver update if it’s giving you issues:
1. Press Windows + X keys altogether & choose Device Manager from the pop-up menu.
2. Extend the category of display adapters
3. Choose Properties by performing a right-click on your graphics card.
4. Select the Driver tab.
5. If the Roll Back Driver is available, click it.
6. Restart your computer and adhere to the on-screen directions.
Bottom Line
For Windows 11/10, keeping your display drivers up to date is crucial to preserving system stability and optimum graphics performance. Regular display driver updates guarantee you’re getting the most out of your hardware, whether you decide to upgrade via Windows’ built-in tools or straight from vendor websites.
Before updating, don’t forget to take the right measures, like making a system restore point and being aware of how to roll back if needed. While gamers and creative professionals may benefit from more frequent upgrades, most users find that checking for display driver updates every one to three months is adequate.
You can guarantee that your system always has the most up-to-date display drivers loaded by using the techniques described in this guide. This will increase performance, reduce graphics problems, and enhance your computer experience in general.
Frequently Asked Questions
Q1: How frequently should my display driver be updated?
A1: Unless the manufacturer recommends it, update only as required, such as to correct bugs or improve performance.
Q2: Will my gaming performance be enhanced by changing my drivers?
A2: Yes, frequently in a big way. Optimizations for the newest games are often included in new drivers, which results in improved frame rates and more fluid gameplay.
Q3: Can I have issues after updating my drivers?
A3: Although it is uncommon, a new driver may cause problems. For this reason, it’s a good idea to take safeguards like backing up your previous drivers, if at all possible. You may typically revert to the previous version if you experience issues after an upgrade.
Q4: Where can I locate the most recent drivers for my display?
A4: The official website of your graphics card manufacturer (NVIDIA, AMD, or Intel) is the most trustworthy source for the most recent drivers.
Q5: Why does installing a driver cause my screen to go black?
A5: This is certainly normal. The display service may repeatedly restart during a display driver upgrade, resulting in brief black screens.
Q6: Is it possible to prevent Windows from updating my display drivers automatically?
A6: Yes, you can use the Advanced Options in the Windows Update settings to set up Windows Update to give you control over when driver updates are installed.
Q7: After updating my display driver, what should I do if my computer still won’t boot up?
A7: Press F8 to enter Safe Mode at startup (or via recovery options), and then use Device Manager to remove or roll back the faulty driver.
NEXT READ:
- What is DDU? Full Guide to Use Display Driver Uninstaller
- Best Ways To Handle Windows 11 Driver Updates Issues: Complete Guide
- How To Update Drivers On Windows 11 Automatically & Manually
- Download Epson L3110 Driver for Windows 11/10/7 [Top 3 Ways]
- Install, Uninstall & Reinstall Bluetooth Drivers Windows 11/10
- How to Download/Update Canon G3010 Printer Driver
- Step-by-Step: How to Download and Update Lenovo G550 Drivers on Windows 10
- How to Download and Update Intel HD Graphics 5500 Driver
Author Bio:
Dinesh Lakhwani 

Dinesh Lakhwani, the entrepreneurial brain behind “TechCommuters,” achieved big things in the tech world. He started the company to make smart and user-friendly tech solutions. Thanks to his sharp thinking, focus on quality and the motto of never giving up, TechCommuters became a top player in the industry. His commitment to excellence has propelled the company to a leading position in the industry.
Popular Post


Recent Post

How To Check If Your PC Is Infected? [Complete Guide]
Computers now sit at the center of almost everything we do. Well, yes! From sending emails to watching videos, we depend on them without much thought. Because of this, even a small issue can disrupt daily tasks. One common problem is hidden malware. It does not always show clear signs at first. It can enter […]

Repair Apps And Programs: Repair Apps That Aren’t Working
Computers have become an essential part of everyday life, supporting work, study, communication, and entertainment. Most of these activities rely on apps and programs, so when one stops functioning, even simple tasks can be disrupted. Common problems include error messages, frozen screens, or apps that fail to open. On Windows systems, such issues often arise […]

Troubleshooting Microphone Privacy Settings: Complete Guide
Sound is a basic part of how we use computers today. People attend meetings, record audio, speak to others, and use voice tools almost every day. A working microphone makes all these tasks easy. When the microphone fails, even simple work becomes difficult. Many users first think the device is broken. In reality, the issue […]
Windows Sound Settings – Sound Control Panel: Complete Guide
Sound plays an important role in how we use a computer every day. It supports both work and leisure. You need it for meetings, videos, music, and alerts. When audio fails, even simple tasks become difficult. Many users feel stuck when sound issues appear. This usually happens because they are not familiar with Windows Sound […]
Run a Troubleshooter For PC Issues Windows: Complete Guide
A computer plays an important role in everyday life. People use it for work, study, communication, and entertainment. When a problem appears, it can interrupt everything. Even a small issue can waste time and create frustration. Many users feel unsure about how to fix such problems. They often think they need expert help. In reality, […]
![Adjusting Audio Output Settings Complete Guide [2026]](https://sp-ao.shortpixel.ai/client/to_webp,q_glossy,ret_img,w_1228,h_819/https://www.techcommuters.com/wp-content/uploads/2026/03/Adjusting-Audio-Output-Settings-Complete-Guide.webp)
Adjusting Audio Output Settings: Complete Guide [2026]
Sound is part of almost everything we do on a computer. It lets you watch videos, join calls, play music, and hear alerts. When the audio stops working the right way, it can interrupt both work and daily use. That is why adjusting audio output settings matters for every user. Many people get unsure when […]

Artificial Intelligence Explained: Concepts, Terminology, Benefits, and Future Trends
Artificial Intelligence, or AI, is basically computers doing things that usually need a human brain. We’re talking about stuff like learning from experience, figuring out problems, understanding language, and making decisions. It’s not magic, just a lot of data, pattern-spotting, and math behind the scenes. Now, AI doesn’t actually think or feel like we do. […]

Resolving Microphone Detection Problems: Latest Guide [2026]
Microphones are important tools in daily life. People use them for office meetings, online classes, interviews, gaming, customer support, and content creation. When a system fails to detect a microphone, communication stops at once. This situation can cause stress and confusion. Many users believe the microphone is damaged. In reality, most problems are simple and […]
How To Switch To A Dark Background Theme In Windows [2026]
Most people spend many hours each day in front of a computer screen. Office work, online classes, editing, browsing, and streaming all require long screen time. A bright white background may look clean at first. However, over time, it can feel sharp and tiring. The strong contrast between white backgrounds and black text may cause […]

How to Switch From Local To Microsoft Account On Windows
Many users begin with a local account when they set up a new Windows computer. A local account works only on that single device. It stores settings, files, and preferences locally. It does not connect to online Microsoft services. For basic offline use, it works well. However, as digital needs grow, many users want better […]

