How to Manage Your Fonts in Windows
In most devices and OS types, applications and programs are available with personalized font variations. Some font types are pre-installed into the system from the beginning, while others download font-based apps. However, often, this variety of accumulated fonts can lag the computer or cause functional issues in the system.
Here, we discuss the best methods you can use to manage fonts on Windows properly.
Best Methods to Manage Fonts on Windows
You can follow particular steps to install and then manage all fonts on your Windows device. We went through several approaches on different Windows versions to check the quality of the method on all devices. The following are the right steps to manage fonts on Windows.
Method 1: View All Installed Fonts
Before removing or updating the font library, you should know which fonts are installed on the system. Some apps that are specifically for fonts are generally visible on the desktop. However, some programs install additional fonts, which are harder to locate through the File Manager without knowing the right location. You can find that information through the Control Panel.
How to Do This?
Step 1: On your Windows 10/11 device, open the search bar from the homepage taskbar.
Step 2: Type in the term “Control Panel” in the text field. Out of the results that come up, choose the first one.

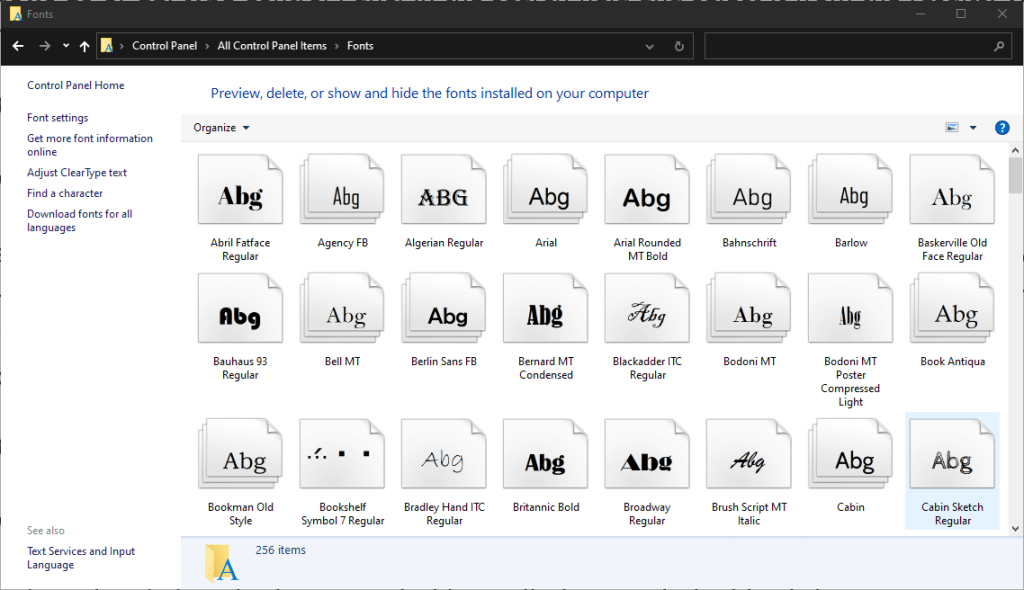
Step 3: Opening the Icon View option, find and choose the Fonts icon from the menu.
Step 4: All the installed fonts will appear in the list.
Method 2: Preview the Available Fonts
With the right step, you can view a preview of the installed fonts in the system through font settings in Windows 10 or other devices. Here are the main steps for the process.
How to Do This?
Step 1: Choose the specific font type of the text you want to preview on a single page that you are using.
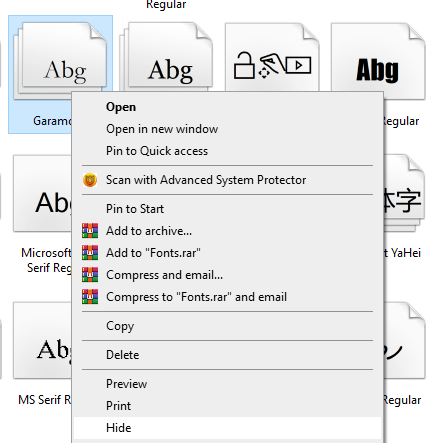
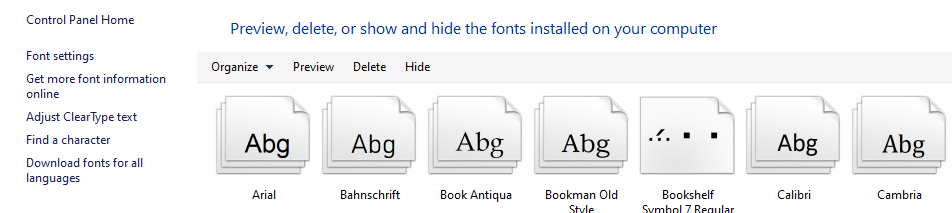
Step 2: Double-click on the font or click on the Preview option. Another alternative is to right-click your cursor on top of the font and then choose “Preview” from the options.
Step 3: Next, the Font Viewer will display each look of the font of your choice in different sizes.

Step 4: For a hard copy version, you can print out the content that appears on the window of the font viewer.
Method 3: Preview the Font Groups/Families
Fonts that are showcased on multiple pages are regardless in total as font families. You can see a preview of that when you try to manage fonts on Windows effectively.
How to Do This?
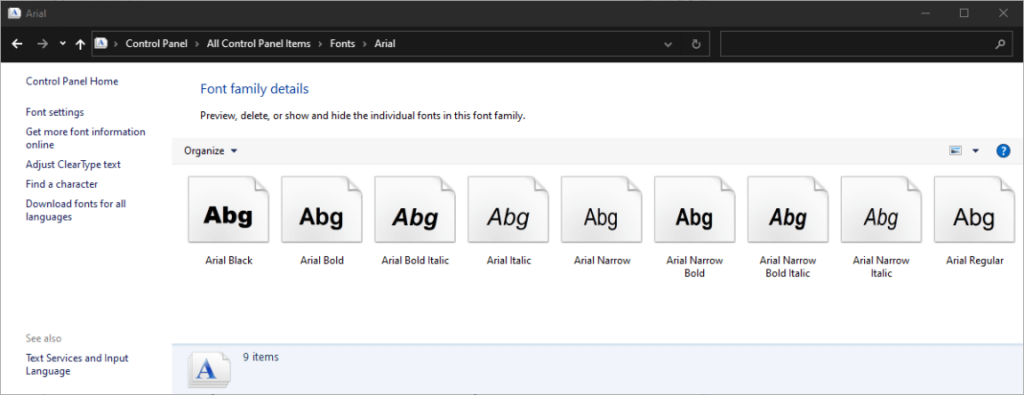
Step 1: Double-clicking on the font would showcase all members in a specific font family. Follow the steps for viewing each font as mentioned in Method 2.
Step 2: Choose the “Preview” option for the whole font family from the next menu. Many viewers would open for each font as you select and displace their different styles, like bold italics, italics, bold, and regular.
Step 3: If the font families hold many options, the font settings on Windows 10 or 11 will showcase the prompt for opening all.
Step 4: You must click close on them all individually.
Method 4: Hide All Fonts
While using the different programs on your device, you can choose to hide particular font types that you are not using or do not want to see. However, the steps for this are not universal for all programs. In software types like Notepad or WordPad, you can find any font that can become invisible to users.
On the other hand, other applications like the installed Microsoft Office contain pre-set software-specific font menus. You cannot hide these fonts through the system’s Control Panel.
How to Do This?
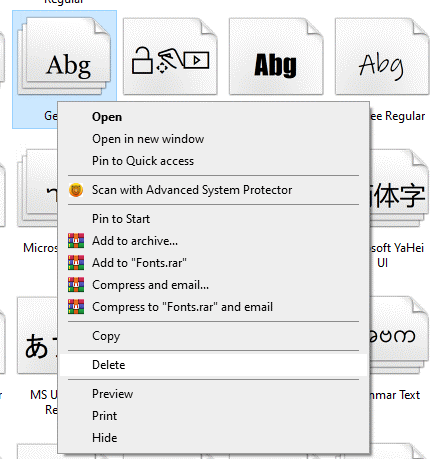
Step 1: Right-click your cursor on top of one of the fonts.
Step 2: Choose the ” Hide ” option from the pop-up menu that comes up, choose the “Hide” option.
Step 3: You can choose to hide all fonts from the font settings on Windows 10 or 11 that are not suitable for your selected language. This can occur automatically if you configure the right settings.
Access the left sidebar and then choose the Font Settings tab after following the steps for viewing them through the Control Panel.
Step 4: You will find the option for hiding fonts as per the settings of the current language.
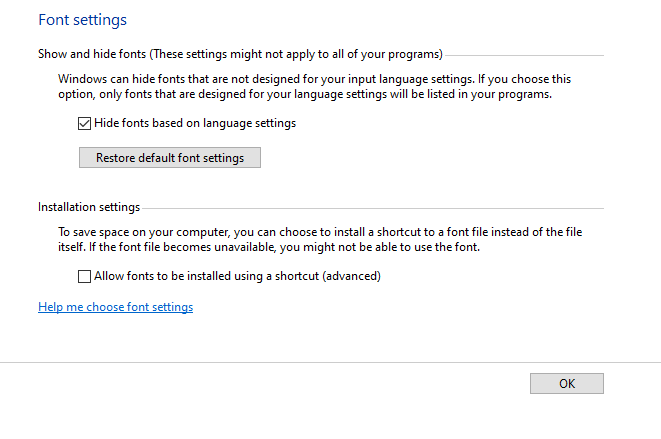
Step 5: Click on the “OK” button to confirm.
Method 5: Keep Fonts As Backup
To note, when you manage fonts on Windows and delete a font type, that would permanently remove it. So, before doing that step, you should save them as a backup in case you need them in the future. You should prepare a backup folder for it.
How to Do This?
Step 1: Through the font settings on Windows 10 or 11 that you access through Control Panel, right-click on the font or the font family of your choice. Then, choose the “Copy” option.

Step 2: After copying the font, save the option into the backup folder you set on your device.
Step 3: After the font is removed, you can check the font library again to verify if it is permanently deleted. Follow the same steps for viewing a font, if necessary.
Then, move the copied folder or font file to another system and delete the font you want to remove.
Method 6: Permanently Delete the Fonts
Some fonts can cause the system to lag unnecessarily, especially if users do not work with them regularly. If there are particular font types that you do not use regularly, you can uninstall the font type. When you manage fonts on Windows, know that erasing all Windows font types is not easy as they are protected. You can delete those that are unprotected, like Adobe Creative Suite-based fonts.
How to Do This?
Step 1: Right-click your cursor on top of an unprotected font type.
Step 2: From the next Context menu, choose the “Delete” option to erase it.
Step 3: The system would provide a prompt for you to confirm the removal. Press the “Yes” button on the prompt box.
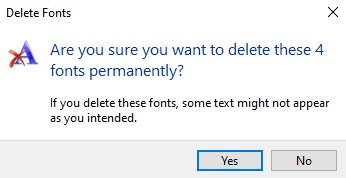
If you remove a font family, all of the fonts under that family are also deleted automatically.
Conclusion
Managing fonts in Windows is more than just aesthetics—it’s about control, clarity, and creativity. Whether you’re a designer, writer, or casual user, knowing how to install, preview, and organize fonts can elevate your workflow. Windows offers built-in tools that make font management simple and intuitive. You don’t need third-party software to stay organized.
By learning to uninstall unused fonts and use font settings wisely, you keep your system fast and clutter-free. Customizing fonts can also improve accessibility and readability. With just a few clicks, you can personalize your workspace and make it truly yours.
FAQs:
Q1: How do I install new fonts in Windows?
Download the font file (usually .ttf or .otf). Right-click and choose “Install.” You can also drag it into the Fonts folder in Settings.
Q2: Can I delete fonts I don’t use?
Yes, but be careful. Go to Settings > Personalization > Fonts. Select the font and click “Uninstall.” Avoid removing system fonts.
Q3: Where can I preview all my fonts?
Open Settings > Personalization > Fonts. You’ll see a list with previews. You can also click each font to view details and the supported languages of posts.
Author Bio:
Dinesh Lakhwani 

Dinesh Lakhwani, the entrepreneurial brain behind “TechCommuters,” achieved big things in the tech world. He started the company to make smart and user-friendly tech solutions. Thanks to his sharp thinking, focus on quality and the motto of never giving up, TechCommuters became a top player in the industry. His commitment to excellence has propelled the company to a leading position in the industry.
Popular Post


Recent Post

Common Windows 11 Problems and Solutions (2026 Version)
Windows 11 has become more polished over the years, but it is still not completely free from problems. Even after regular updates from Microsoft, many users continue to face issues like lagging performance, failed updates, audio troubles, random crashes, and network errors. Some problems appear after installing new features, while others develop gradually as the […]

Fortect Driver Updater Review: Features, Steps, Pros, and Cons.
A new PC usually feels quick and responsive. Applications open instantly, games run smoothly, and everything works as expected. As time passes, however, you may notice slower performance, system crashes, hardware glitches, or devices that stop working properly. While many people assume malware or low storage space is to blame, outdated drivers are often the […]

New Features Coming in Windows 11 This Year [2026]
Microsoft is always working to make Windows better. This year is no exception. The company has announced and rolled out several exciting updates for its users. These updates touch almost every part of the operating system. From the Start menu to system settings, changes are arriving fast. If you use Windows daily, you will want […]

Top 14 Duplicate Photo Finder and Remover For Windows [2026]
Introduction: Photos pile up fast. Well, yes! You take ten shots of the same moment. You download the same image twice. You back up your folder and forget you already did it. Before you know it, your storage is packed with copies. A good duplicate photo finder helps you take back that space without losing […]

Advanced System Settings on Windows 11: Complete Guide
Windows 11 is a powerful operating system. It comes with many features that most users never explore. One of the most useful areas is the System Properties panel. This is where you can control how your computer performs, starts up, and handles memory. Many users only change basic settings like wallpaper or display options. But […]

21 Advanced Windows Security Settings: Latest Updates
Introduction: Your computer holds a lot of important data. From personal photos to work files, everything sits on your Windows system. That is why protecting it properly matters more than ever. Windows security settings have come a long way. Microsoft keeps adding stronger layers of protection with every update. Most users never go beyond the […]

Security Upgrades of Microsoft Windows in This Decade [Complete Guide]
Introduction Microsoft has been working hard to make Windows safer every year. Cyberattacks are growing fast. Hackers are smarter now. They target millions of Windows users every single day. That is why Microsoft has added many powerful new security upgrades of Microsoft Windows since 2020. These upgrades protect your data, your identity, and your device […]

How To Link a Microsoft Account to a Digital License on Windows [2026]
Most people never think about Windows activation until it suddenly stops working. Something as simple as replacing hardware or reinstalling Windows can cause the system to lose its activated status. Linking your Microsoft account to your digital license beforehand helps prevent unnecessary trouble and makes activation recovery much easier later on. Many people using Windows […]

Monthly Round Up: All Big Incidents Happened for Windows Users in The Month of April 2026
Windows users had a turbulent April 2026. On April 14, Microsoft rolled out its scheduled Patch Tuesday security updates, a routine release meant to close vulnerabilities and resolve known issues. What followed was anything but routine. Rather than strengthening systems, the updates triggered a cascade of fresh problems across Windows 10, Windows 11, and Windows […]
How To Add Or Remove Programs On Windows 11: 4 Quick Methods to Try.
Introduction: Managing software on your computer is something every Windows user should know. Whether you want to install a useful new app or remove programs you no longer need, understanding how to add remove programs can help your PC stay clean, organized, and fast. It also helps free up storage space, reduce clutter, and improve […]

