How to Enable God Mode on Windows 11?
Last updated on January 28th, 2025 at 8:42 am
Introduction
Multiple features are available within Windows, shaped to make usability smoother for users. Among them, the God Mode Windows 11 is one rarely noticeable but powerful feature in Windows that improves productivity and user experience.
Since the initial launch of Windows Vista 2007, this feature has worked in Windows to categorize all Control Panel elements into one custom folder. The feature has improved over time, with the upgrades in the software like the latest Windows 11. Learn how to activate the feature on your computer in the section.
What is God Mode?
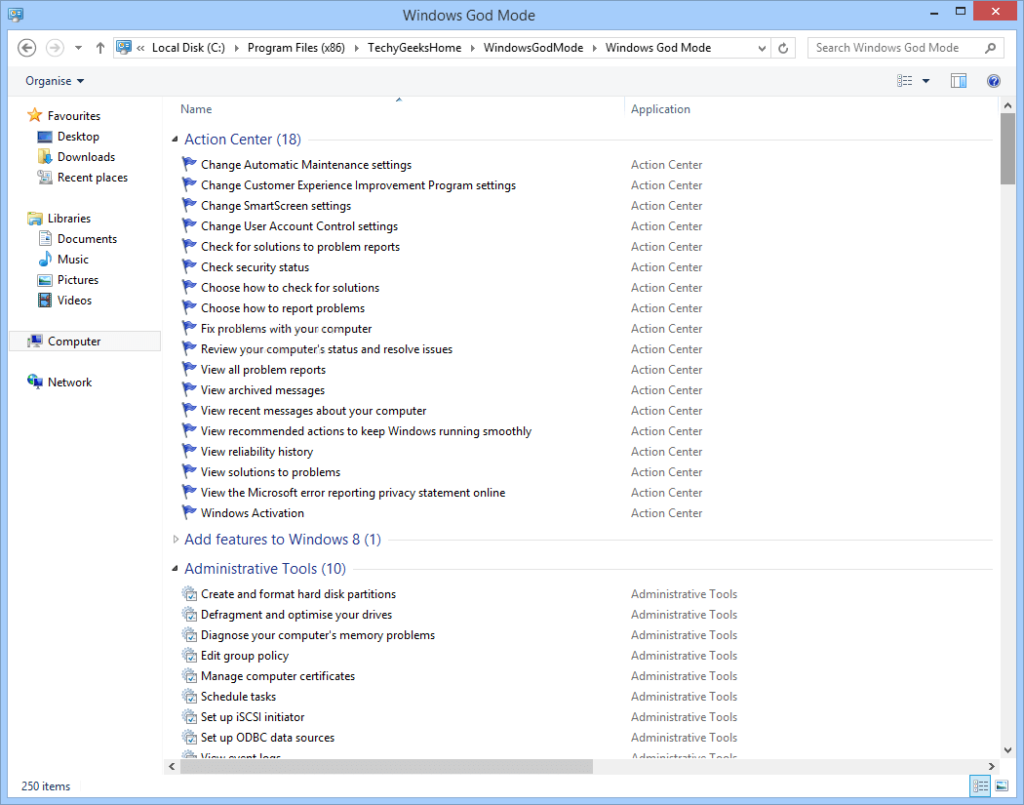
The God Mode is a customized folder in Windows that works as the comprehensive list of names related to Windows 11 functions, all in one place. Users can type what they want to access in the database through the Search bar in the Start menu.
In the God Mode, users can find the diversified Control Panel-related settings all compressed into a full database that is easily accessible. Examples of what users can find through the Windows 11 God Mode are functions like Data and Time, System Restore, Printer Settings, Mouse Settings, Camera Settings, and more.
Given that God Mode has shortcuts to every necessary action, users can avoid the complex steps related to navigating through Settings or Control Panel. Instead, everything is accessible through the God Mode folder.
How to enable God Mode on Windows 11?
Almost all Windows computers’ elements and functions are listed in the God Mode section. So, it is important to learn how to enable this database and navigate through it properly. Related to that, there are specific steps you have to take to activate the Windows 11 God Mode.
Solution 1: How to Activate the God Mode in Windows 11?
The process of activating the God Mode Windows 11 feature is not complex to handle for any Windows user. Accessing the advanced and primary system settings requires very few clicks altogether.
How to do this?
Step 1: Right-click your Windows 11 computer cursor on the Desktop option.
Step 2: Then, hover your cursor over the New choice and click on Folder. This will allow you to make a new folder under Desktop.

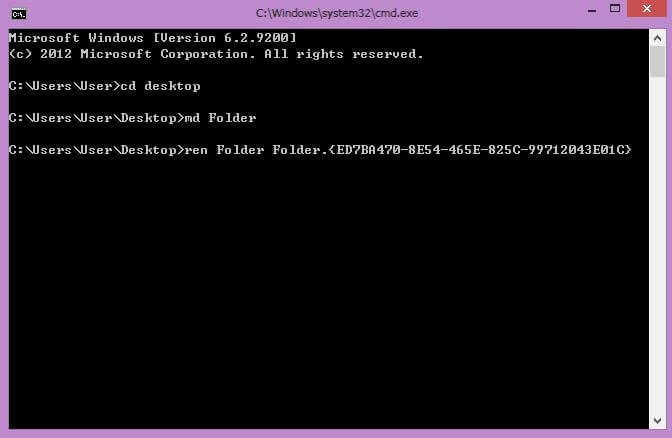
Step 3: Double-click on the newly-made folder to rename it as “GodMode.{ED7BA470-8E54-465E-825C-99712043E01C}”.
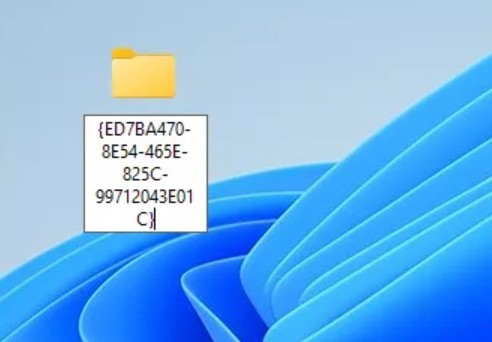
Step 4: Next, you must tap on any part of the Desktop to save all the changes. The original folder name will change immediately, and you may see the folder icon turn into the Control Panel icon.
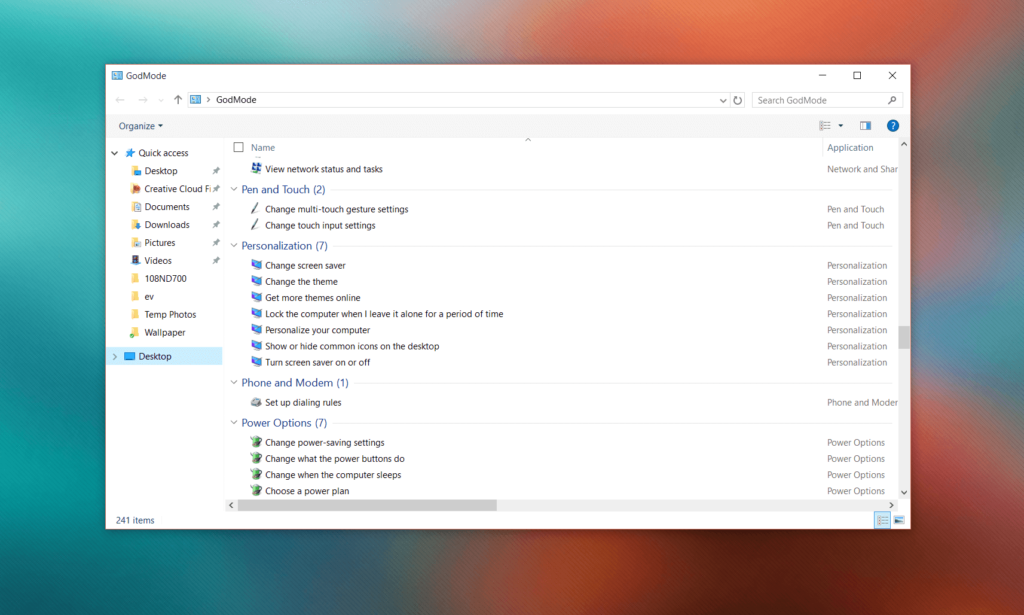
Step 5: Click on the folder to open it and view the list of all setting configurations that will work as a shortcut to that function.
Solution 2: Change the Sound Settings via God Mode
For the best user experience, it is important to configure the main display and sound settings properly. This is useful for different functions, like recording videos on the computer, watching movies, or even listening to songs.
Typically, if sound-related changes one has to make, they have to access the Settings app or Control Panel on the PC. All of this can get very complex to handle over time. But Windows 11 God Mode makes it easier to access and adjust sound settings instantly.
How to use it?
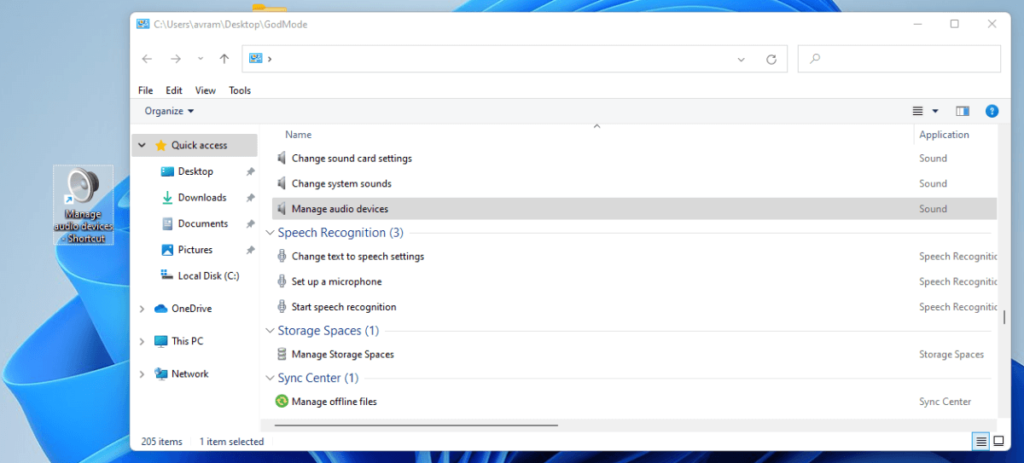
Step 1: Double-click on the God Mode folder to access it.
Step 2: Scroll down the list to find the Sound option.
Step 3: Next, make sound-related changes, like adjusting the default-set system sounds, changing the volume for multiple connected devices, and managing the PC-based sound card configurations.
Solution 3: Make Changes to System Settings via God Mode Windows 11
Users can access the System section and make settings changes related to system-based functions through the Settings menu. Some functions you can access and adjust through this section are allowing PC remote access, user profile management, etc. However, the organization of different functions is not perfectly available in this section.
Some features that can fall under two categories are only available under one tab. Therefore, users can find it hard to search these different options smoothly. But with Windows 11 God Mode, it is simpler to search and find these sections in one spot.
How to do this?
Step 1: Access the God Mode folder by double-clicking on it and then scrolling through the options.
Step 2: Click on the System option.
Step 3: Under this section, make adjustments like Windows PC personalization, system variable updating, virtual memory size adjustment processes, etc.
Step 4: Tap on specific parts like “Check processor speed” for quick information regarding the processor specs.
Solution 4: Use the God Mode section on Bug/Issue Troubleshooting in Windows 11
While operating on the Windows 11 system, some sudden issues or bugs can arise. Different issues can cause such issues, some serious while others are negligible.
You can use a top-notch third-party PC optimization and health management for PC health checks, etc. Or, you can use the in-built Troubleshooters to fix the issues.
Under the God Mode, all the different troubleshooting functions are available under one Troubleshooting section for diverse issues related to bluescreen, search, printing, network, and display-based issues.
How to do this?
Step 1: Double-click on God Mode to open the folder.
Step 2: Scroll through the options to find the Troubleshooting section.
Step 3: Choose the main thing you want to troubleshooter and run the function instantly for quick diagnosis and fixing.
Solution 5: Make Advanced Settings Configurations for Windows 11 via God Mode
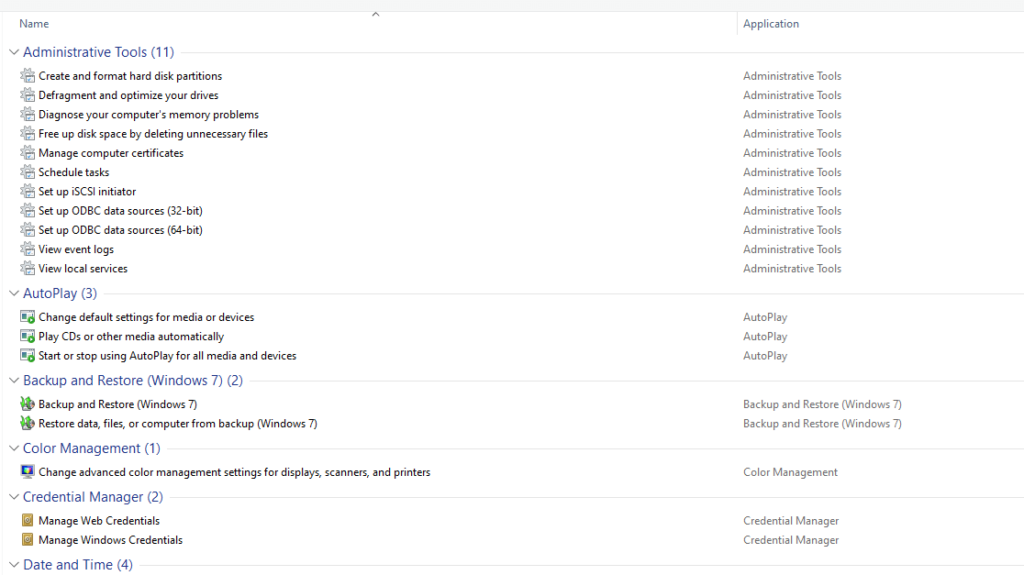
It is possible to access the advanced settings under Windows through the God Mode folder as well. These include the more technical functions, like disk partition formatting, derive defragmentation, Windows/Web credentials management, USB game controller configuration, etc.
It is possible to easily access these settings all in one place under God Mode and make the adjustments with simple clicks.
How to do this?
Step 1: Double-click on the top of the God Mode folder.
Step 2: In the next list, browse the options to find the advanced settings, like “Restore File History”. Click on it to make the changes.
Solution 6: How to Deactivate the God Mode
In some cases, users may need to remove the God Mode folder. Removing the folder is not complex, but avoid deleting the folder if it is in a folder with other data it in. Renaming the God Mode folder through Windows Explorer to the original name is impossible. You have to run specific steps on Command Prompt to handle it.
How to do this?
Step 1: Access the God Mode folder location on your PC.
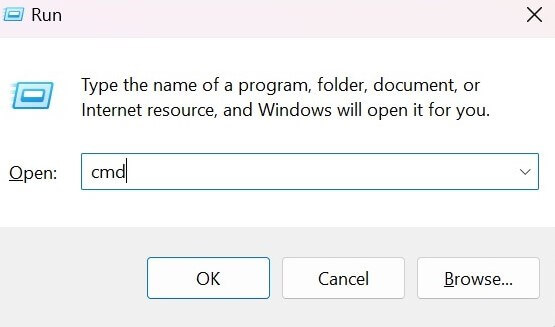
Step 2: Press the Win + R keys to open Run and then type cmd. Press the Enter key to open the Command Prompt window.
Step 3: Run the ren command on the Command Prompt window to rename the file to the older version, to return it automatically to that version. Here’s the command to run:
ren “God Mode.{ED7BA470-8E54-465E-825C-99712043E01C}”
Conclusion
Indeed, God Mode is a highly user-friendly feature available to Windows 11 users in terms of easy feature accessibility and usage. Enabling this feature is simple and allows users to utilize different shortcuts for efficient work.
Practice enabling, using, and navigating through this folder for easier and faster processes with different work processes you need to handle. Then, proceed with your activities in smoother steps.
Author Bio:
Dinesh Lakhwani 

Dinesh Lakhwani, the entrepreneurial brain behind “TechCommuters,” achieved big things in the tech world. He started the company to make smart and user-friendly tech solutions. Thanks to his sharp thinking, focus on quality and the motto of never giving up, TechCommuters became a top player in the industry. His commitment to excellence has propelled the company to a leading position in the industry.
Popular Post


Recent Post

Resolving Microphone Detection Problems: Latest Guide [2026]
Microphones are important tools in daily life. People use them for office meetings, online classes, interviews, gaming, customer support, and content creation. When a system fails to detect a microphone, communication stops at once. This situation can cause stress and confusion. Many users believe the microphone is damaged. In reality, most problems are simple and […]
How To Switch To A Dark Background Theme In Windows [2026]
Most people spend many hours each day in front of a computer screen. Office work, online classes, editing, browsing, and streaming all require long screen time. A bright white background may look clean at first. However, over time, it can feel sharp and tiring. The strong contrast between white backgrounds and black text may cause […]

How to Switch From Local To Microsoft Account On Windows
Many users begin with a local account when they set up a new Windows computer. A local account works only on that single device. It stores settings, files, and preferences locally. It does not connect to online Microsoft services. For basic offline use, it works well. However, as digital needs grow, many users want better […]

How to Switch Windows 10 to a Local Account: Complete Guide
Windows 10 allows users to sign in with either a Microsoft account or a local account. When you set up a new computer, the system often suggests using a Microsoft account. This account connects your device to Microsoft services such as Outlook, OneDrive, and the Microsoft Store. It also syncs settings, themes, and passwords across […]

How To Change Default Apps For File Types In Windows
Windows is designed to make using your computer easy. One way it does this is by assigning default apps to different file types. This means when you open a file, Windows automatically opens it with a specific program. For example, photos may open with Photos, music with Groove Music, and PDFs with Edge. These default […]

How To Adjust The Mouse Pointer Speed: Complete Guide
Using a computer every day means you use the mouse a lot. The mouse pointer moves on the screen and helps you click, scroll, and select items. Many people never think about the speed of the mouse pointer. They have used the default setting for years. This can cause small problems over time. A slow […]

How to Change Mouse Scrolling Settings In Windows
A mouse is one of the most used computer tools. People use it every day. They scroll through emails. They scroll through documents. They scroll through websites and images. The movement becomes automatic. Most users do not notice it. That is why problems often go unnoticed. Scrolling problems show up slowly. At first, it feels […]

Keyboard Light Settings: Keyboard Lighting Control [Complete Guide]
Keyboards are no longer simple typing tools. Well, yes! Over time, they have evolved to include features that improve comfort, visibility, and overall experience. One of the most useful features today is keyboard lighting. It helps users work comfortably in low-light conditions. It also reduces strain when typing for long hours. Many users first notice […]

Customizing Pointer Appearance: Complete Guide
The way your mouse pointer looks on your computer may seem like a small detail. But customizing pointer appearance can make using your PC more comfortable and visually appealing. Many users do not realize that they can change the pointer size, color, and style to fit their needs. Whether you want a bigger pointer for […]

How To Choose a Computer Monitor: Monitor Buying Guide
Buying a monitor looks easy. Many people think all screens are the same. That belief causes regret later. A monitor is not just a display. It is a daily tool. You read on it. You work on it. You relax with it. Small problems become big over time. Poor brightness hurts eyes. Bad size causes […]

