How to Burn DVD on a Mac [Easiest Methods]

Last updated on January 31st, 2025 at 6:26 am
Are you looking for a way to save movies on DVD, Blu-ray discs and share them with loved ones?
You are at the right place; we will share steps to burn DVDs on Mac.
Need of Burning Movies to DVD
In pursuit of moving users to iCloud, Apple, for some years now, has been moving away from the DVD and CD drive for some years now. All users do not welcome this strategy, and some still want to burn and play CDs and DVDs on their Mac.
Understanding this, in this post, we will explain how to burn movies to DVD.
Benefits of Burning Movies on a DVD
- Burning movies on your Mac is a good choice for sharing.
- Save disk space occupied by movies saved on Mac.
Now that you know the benefits, let us learn how to burn a movie to DVD on Mac.
- Method 1. The quick and most straightforward solution for burning movies to DVD on Mac
- Method 2. Free solution to burn movies to DVD on Mac
- Method 3. The direct method to burn movies to DVD with Finder
Method 1. Easiest Way for burning movies to DVD on Mac.
To burn a movie to DVD on Mac, we recommend using Wondershare UniConverter, powerful software that allows burning movies and other videos to DVD.
You can customize, edit, trim, crop, add subtitles and burn movies to DVD using free menu templates provided by Wondershare Uniconvertor.
Wondershare UniConverter
- Burn movies, HD videos, and more on DVD without compromising the quality.
- Burn ISO image file or DVD folder to Movies.
- Different static and dynamic free DVD menu templates.
- Customizable DVD settings.
- Real-time preview and 90X faster DVD burning speed.
- The built-in video editor.
- Batch DVD video conversion.
- Burn downloaded movies & recorded movies to DVD.
- Versatile toolbox
- Supported OS: Windows & Mac.
How to burn a movie to DVD?
Step 1
Download, install and launch Wondershare UniConverter. Click browse and add movies or drag and drop movies into the converter.
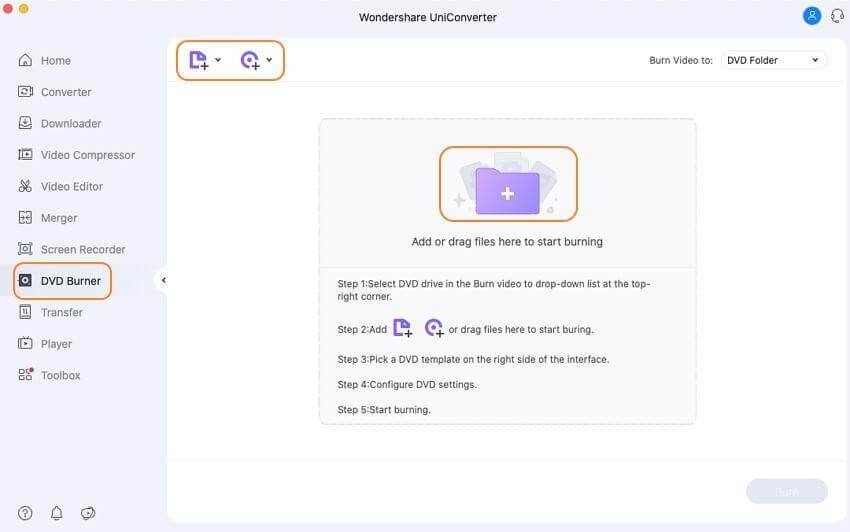
If you want to cut, crop, or trim a specific part of a movie before burning it to DVD, this is the step for you. To edit, click the desired editing icon under the thumbnail image.
However, if you don’t want to edit the movie, you can skip this step.
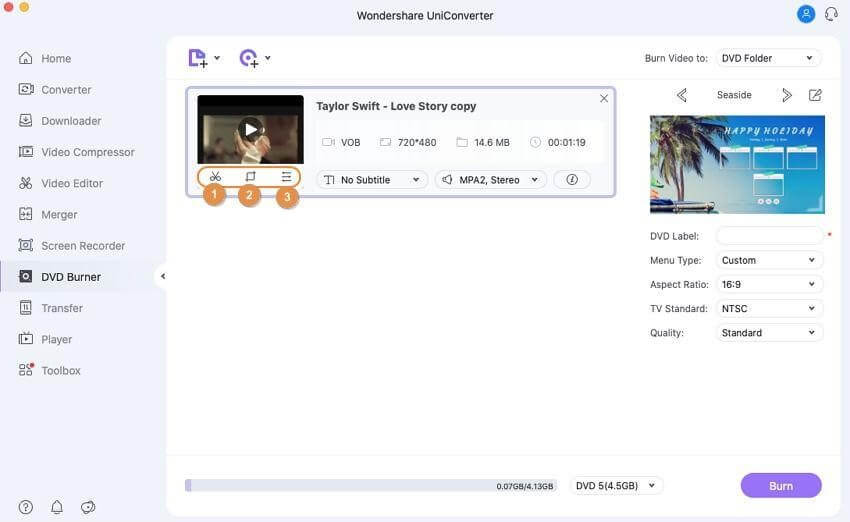
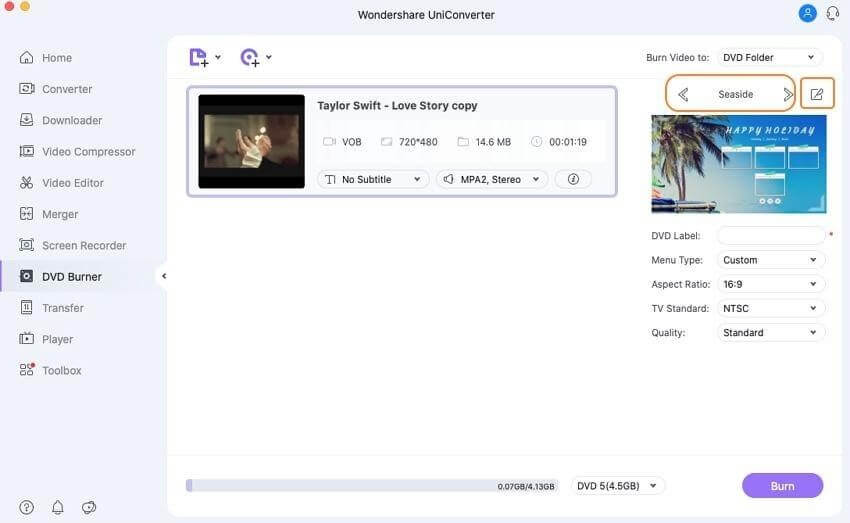
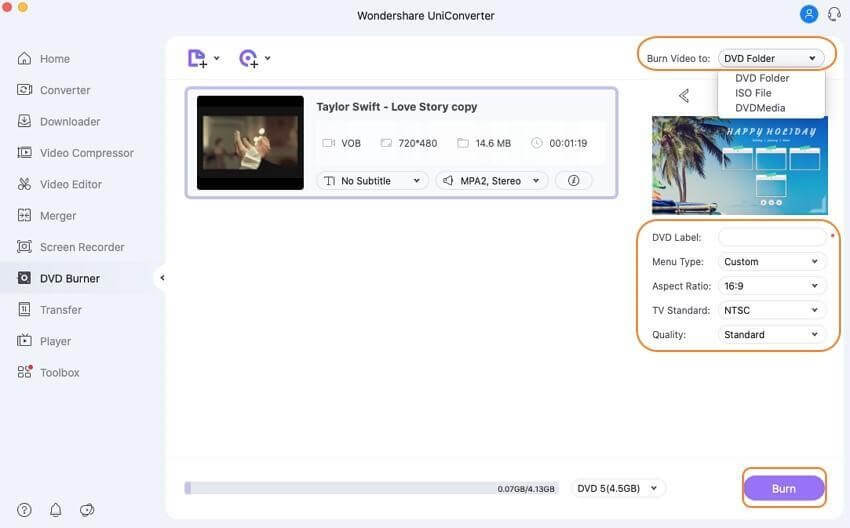
Select DVD template for movies from the right panel. Next, click the edit icon next to the template design name and open the Template window.
Step 4
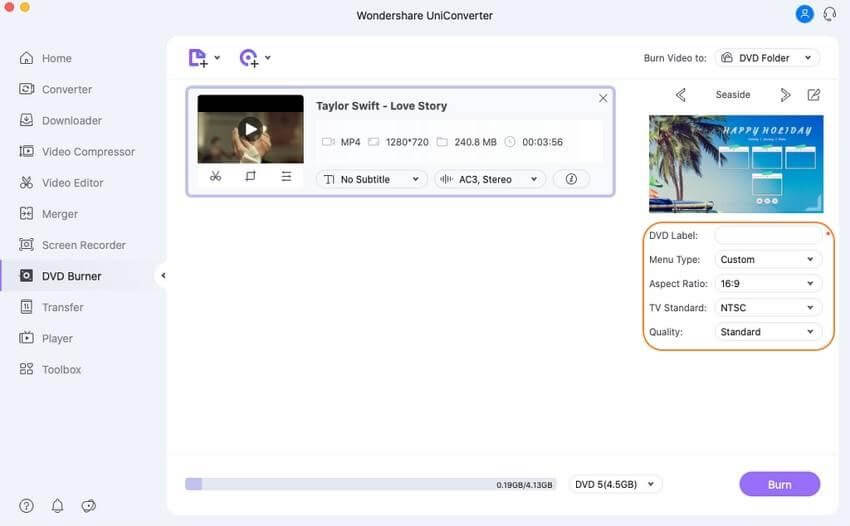
Give DVD a label and select related parameters like TV standard, quality, aspect ratio, and menu types.
Step 5
Next, click the top-right corner > Burn Video tab > select the location where you want to burn the movie files. Insert a blank disk and hit the Burn button.
Method 2. Burning a movie to DVD with Finder.
If you do not want to use a third-party software to burn DVD, Mac offers a direct method to burn a movie to DVD. To use this method, your Mac needs to have either a built-in optical drive or an option to connect an external drive.
Steps on how to burn a movie to DVD on Mac directly:
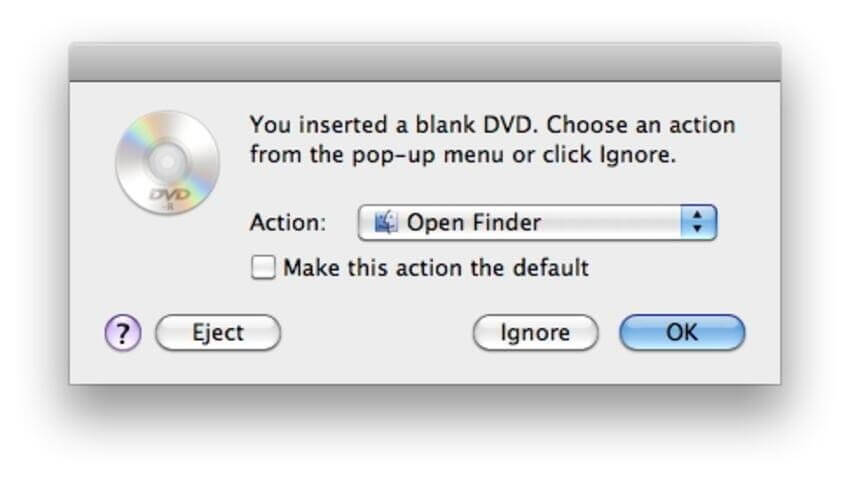
Step 1: Insert a blank disc into your Mac. Open Finder. This will show the disc on the Mac desktop.
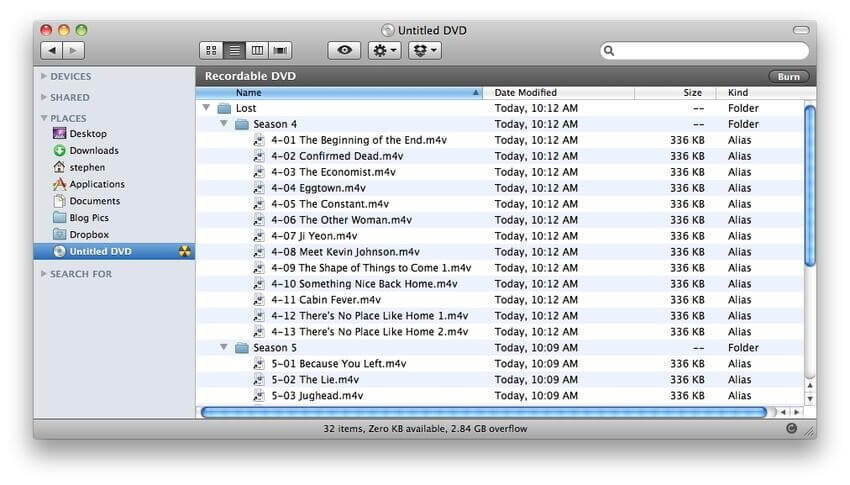
Step 2: Double-click on the disc; you will now see an entry with an Untitled DVD. Drag and drop the movies you want to burn. Arrange the files and rename them if required.
Step 3: Select the Disc Name tab, and name the DVD.
Step 4: Click Burn speed and select other options.
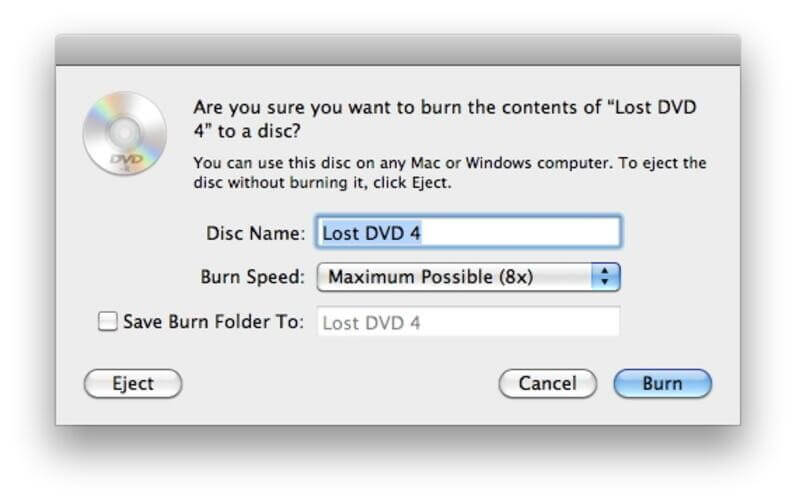
Step 5: Lastly, click Burn & start the burning process.
Part 2. Free solution to burn movies to DVD on Mac.
If you are looking for a free Mac burn DVD movie solution, Burn software is a decent choice. Using this program, you can burn movies, music, data, and other videos to a disc. The interface of the software is simple and intuitive that makes it easy for non-techy users as well.
Key features:
- Allows creating decent quality discs from movies on your Mac.
- Allows creating an audio CD in a few simple steps. Offers advanced options like MP3 tagging and CD-text.
- Allows creating interactive menus by selecting a theme or creating your own as needed.
- Copy one disc to another or use disk images to create a DVD.
- Convert video and audio files to disc compatible format.
Additional Method – Burning movies to DVD on Mac using Burn:
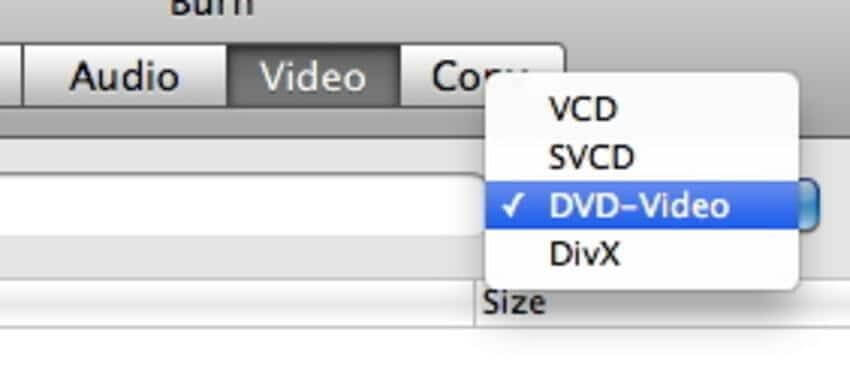
Step 1: Download, install and launch the Burn program. Click the Video tab, and select the DVD-Video option from the drop down menu.
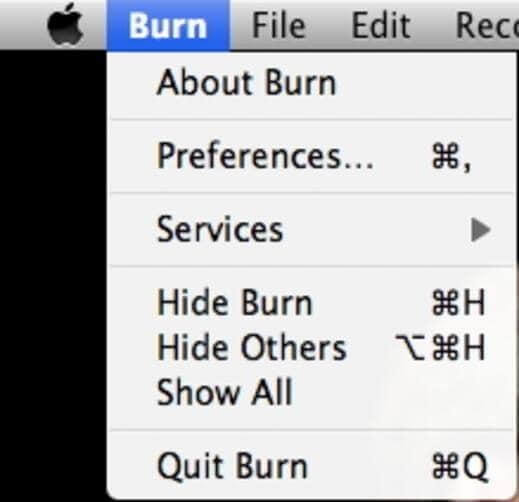
Step 2: Click the Burn menu to open Preferences. Click the Video tab > select NTSC or PAL from the Region settings.
If you want to preview the file click the Preview button present on the bottom of the preference window.
Step 3: To add the movie click + from the main window. To start the process click Convert > select the location to save the file.
Since Burn is a basic tool you will only get to use limited features. Also compared to UnivConvertor its speed is slower.
Conclusion
Using these simple steps and the amazing tool like Wondershare UniConvertor, you can quickly burn movies to DVD. If you want to burn CDs with themes and customize things use the Wondershare tool. However, you can go with the manual steps if you don’t want to spend on a DVD burning tool.
Do let us know which method you picked and your experience in the comments section.
Author Bio:
Dinesh Lakhwani 

Dinesh Lakhwani, the entrepreneurial brain behind “TechCommuters,” achieved big things in the tech world. He started the company to make smart and user-friendly tech solutions. Thanks to his sharp thinking, focus on quality and the motto of never giving up, TechCommuters became a top player in the industry. His commitment to excellence has propelled the company to a leading position in the industry.
Popular Post


Recent Post
Troubleshooting Microphone Privacy Settings: Complete Guide
Sound is a basic part of how we use computers today. People attend meetings, record audio, speak to others, and use voice tools almost every day. A working microphone makes all these tasks easy. When the microphone fails, even simple work becomes difficult. Many users first think the device is broken. In reality, the issue […]
Windows Sound Settings – Sound Control Panel: Complete Guide
Sound plays an important role in how we use a computer every day. It supports both work and leisure. You need it for meetings, videos, music, and alerts. When audio fails, even simple tasks become difficult. Many users feel stuck when sound issues appear. This usually happens because they are not familiar with Windows Sound […]

Run a Troubleshooter For PC Issues Windows: Complete Guide
A computer plays an important role in everyday life. People use it for work, study, communication, and entertainment. When a problem appears, it can interrupt everything. Even a small issue can waste time and create frustration. Many users feel unsure about how to fix such problems. They often think they need expert help. In reality, […]
![Adjusting Audio Output Settings Complete Guide [2026]](https://www.techcommuters.com/wp-content/uploads/2026/03/Adjusting-Audio-Output-Settings-Complete-Guide.webp)
Adjusting Audio Output Settings: Complete Guide [2026]
Sound is part of almost everything we do on a computer. It lets you watch videos, join calls, play music, and hear alerts. When the audio stops working the right way, it can interrupt both work and daily use. That is why adjusting audio output settings matters for every user. Many people get unsure when […]

Artificial Intelligence Explained: Concepts, Terminology, Benefits, and Future Trends
Artificial Intelligence, or AI, is basically computers doing things that usually need a human brain. We’re talking about stuff like learning from experience, figuring out problems, understanding language, and making decisions. It’s not magic, just a lot of data, pattern-spotting, and math behind the scenes. Now, AI doesn’t actually think or feel like we do. […]

Resolving Microphone Detection Problems: Latest Guide [2026]
Microphones are important tools in daily life. People use them for office meetings, online classes, interviews, gaming, customer support, and content creation. When a system fails to detect a microphone, communication stops at once. This situation can cause stress and confusion. Many users believe the microphone is damaged. In reality, most problems are simple and […]
How To Switch To A Dark Background Theme In Windows [2026]
Most people spend many hours each day in front of a computer screen. Office work, online classes, editing, browsing, and streaming all require long screen time. A bright white background may look clean at first. However, over time, it can feel sharp and tiring. The strong contrast between white backgrounds and black text may cause […]
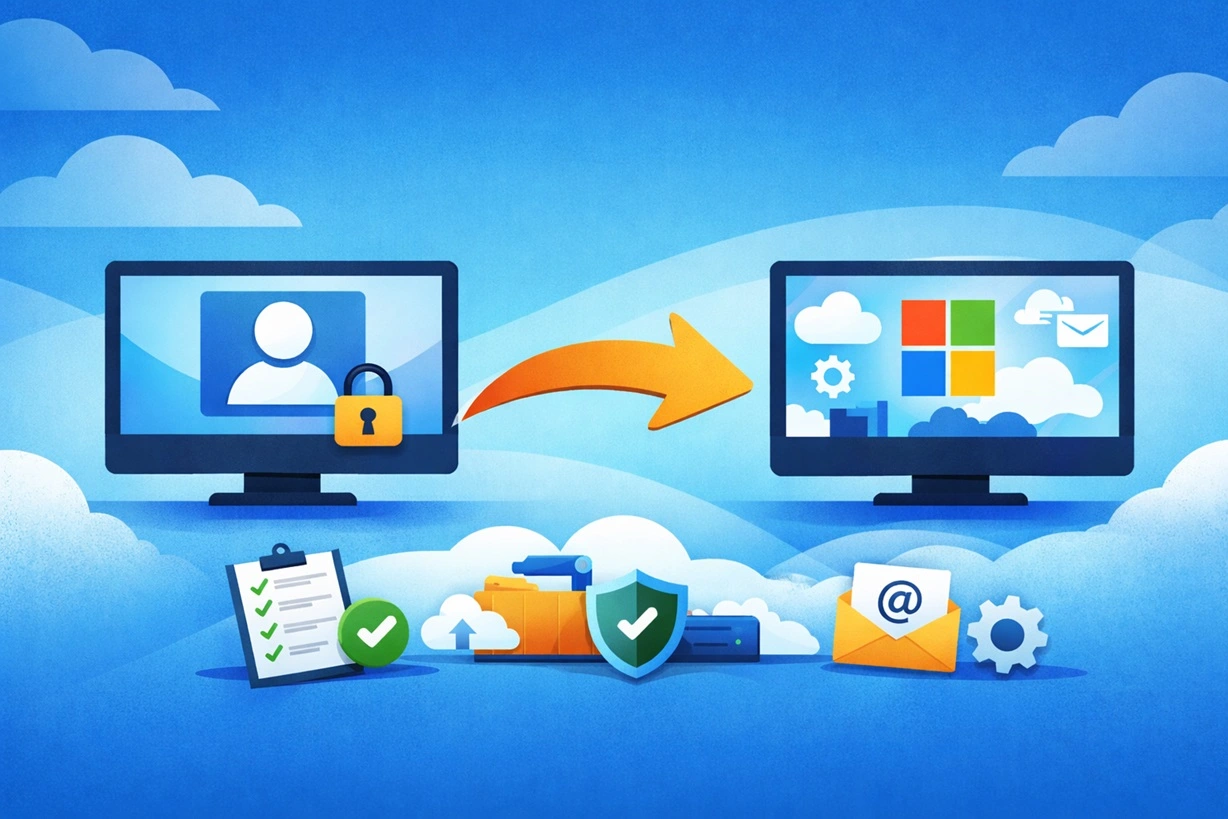
How to Switch From Local To Microsoft Account On Windows
Many users begin with a local account when they set up a new Windows computer. A local account works only on that single device. It stores settings, files, and preferences locally. It does not connect to online Microsoft services. For basic offline use, it works well. However, as digital needs grow, many users want better […]

How to Switch Windows 10 to a Local Account: Complete Guide
Windows 10 allows users to sign in with either a Microsoft account or a local account. When you set up a new computer, the system often suggests using a Microsoft account. This account connects your device to Microsoft services such as Outlook, OneDrive, and the Microsoft Store. It also syncs settings, themes, and passwords across […]

How To Change Default Apps For File Types In Windows
Windows is designed to make using your computer easy. One way it does this is by assigning default apps to different file types. This means when you open a file, Windows automatically opens it with a specific program. For example, photos may open with Photos, music with Groove Music, and PDFs with Edge. These default […]

