How to record screen on Windows 10/11
Have you often pondered how to display your desktop on whether you’re a Windows 11,10 user or recently updated towards the beta windows version 11? It is a question that almost all of us have asked.
Using a display capturing app is the most straightforward approach to record a screen. And TweakShot is one of the best applications that run on both windows.
Microsoft’s operating system includes another, entitled Snip & Sketch. Certain functionalities, however, are missing. As a result, if you’re searching for just a screenshot and a screen recorder program that captures and records the entire screen without leaving a watermark, give TweakShot a try.
In this article, we will discuss three ways in which we can record the screen on Windows 10/11.
Ways to discuss record screen on Windows 10/111
Method 1: OBS Studio
OBS Studio is one of the best screen recorder programs for PC available. OBS Studio is different from Xbox Bar as well as QuickTime Player. It operates across programs and can be sideloaded on Windows 10 and 11 computers to capture full screen-free. Aside from that, the program allows you to record speech using a microphone whilst recording screen material.
How to Capture a Screenshot in Windows 7?
- In the computer’s internet browser, navigate to https://obsproject.com/, then save the OBS Studio installation file for Windows on your computer.
- Typically, downloaded files would be saved under Downloads –> Go over to the folder, then double-click the OBS Studio installation file.
- This will cause the setup window to appear. When you launch OBS Studio for the first session, it will prompt if you would like to execute the Auto-Configuration Wizard. Select ‘Yes,’ and then follow the on-screen instructions.
- You may now record displays in Windows 10/11. Click the ‘Plus’ symbol –> ‘Display Capture’ –> ‘New’ –> Give your capture a name –> Click the ‘Ok’ button.
- The choices to start and stop recording would be in the lower-right corner of the OBS Studio screen.
- The full-screen movie would be stored on your computer’s hard drive. To view it, go over to the navigation bar and select ‘File’, then ‘Show Recordings’ from the drop-down option that appears.
Method 2: Xbox Game Bar:
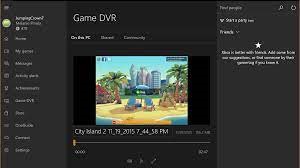
Windows 10 and 11 laptop/PC users may capture displays using the Xbox Game Bar application. The program was created to allow players to capture videos, stream their games online, and take screenshots. This is how it works:
- To launch Xbox Game Bar or press Windows key + G.
- To display the Game Bar, select the “Yes, this is a game” option.
- Launch the app for whom the display you want to capture.
- To capture the display, select the Begin Recording button or alternatively click Win +Alt+R.
- If you wish to record audio, activate the microphones first from the game bar.
- By pressing the red button, you can pause the recording. If you wish to record audio, activate the microphones within the game toolbar.
- By selecting mostly on the red button, you can pause the recording.
In Windows 10, the application will begin/stop/pause/ the screen recording, and it will be stored as an MP4 file on the device there under the Videos folder, in a subdirectory named Captures. You may even view the recording using the Xbox application’s Game DVR interface. It’s worth remembering that such a screen recorder for Windows 10/11 only supports a few apps. The Xbox Game Bar does not have the ability to record the complete desktop or apps, including File Manager.
Method 3: TweakShot
TweakShot allows you to capture and take screenshots without even a watermark. Furthermore, it provides many choices for capturing the screen. You may use it to capture a specific region, the entire screen, a current window, or perhaps a sliding window.
It additionally allows users to set up Hotkeys for overall convenience. Not only that, but it additionally has a photo editor. This means that when you’ve recorded the window, you may hide sensitive information, flag critical details, add step counts, notes, and more.
The Advantages of Using TweakShot Screenshot Tool
- There are several benefits of using TweakShot. Therefore, let us look at some of its benefits.
- Use the built-in image editor to alter the screenshot.
- Using a windows screen recorder, you may effortlessly record your screen.
- Capture the entire screen, an active window, or a scrolling screen, or a single window.
- TweakShot allows you to save snapshots to Google Drive, Cloud Storage, and OneDrive.
- Choose a colour first from the picture.
- Make a movie using your mouse pointer.
- The imprint of text over a recorded video
- Hot Keys enabling quick access
Steps that are used to record screen with TweakShot:
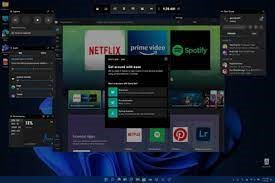
Tweak Shot has the ability to capture everything on your screen. Additionally, it allows you to do it with precision. Therefore, let us see what are the steps to use TweakShot for taking a screenshot, followed by recording the entire screen.
Steps to take a screenshot:
- Download the TweakShot windows application, and then follow all the installations instructions to properly install the application on your Windows 10/11.
- Once the application is installed, run the application.
- Now go to the webpage or the screen you want to capture or take the screenshot for.
- A TweakShot icon will appear on the screen. Right-click on the icon of TweakShot. A list of options will appear on the screen. Select the type of capture you want to make with the screen capture.
- After you have selected the option, you can additionally select the area that you want to capture. However, if you wish to capture the entire screen, select the option Capture Full-Screen. This will take a screenshot of your selected area.
- After you take the screenshot, the captured screen will automatically open in the TweakShot editor.
- You can edit the captured photo according to your requirements. Once the image has been edited, you can save the captured photo on the cloud, as well as on other platforms such as Google Photos, as well as Google Drive.
Steps to use TweakShot as a screen recorder:
- If you have already installed the TweakShot application, Launch the TweakShot application. If not, then install the application and then launch it.
- The TweakShot icon will appear on the system tray. Now right-click the icon, and then select the option, Capture Video.
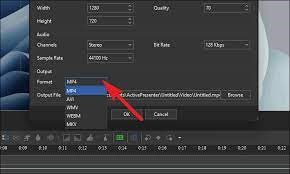
- An application window will appear that will show all the video saving options. This will contain the screen capture setting and the video configuration. Select the options according to your preference, and then click on the Record button.
- A three-second countdown will begin. However, you can disable the countdown option by selecting “Show countdown before starting the recording”.
- After the time has elapsed, the screen recording will begin. A red dot will appear on the screen, which indicates the screen recording has begun.
- If you wish to pause the screen recording, select the TweakShot icon, right-click it, and select Pause or Stop.
- Once you hit stop, the recorded video will be saved on the default location. You can go to the location and watch the captured video.
Conclusion
We trust you now understand the need for a screen capturing tool and why we recommend utilizing a third-party program. Applications like TweakShot provide advanced functions that make screen recording and capture simple. Both novice and experienced users may use it to capture and share screenshots of what people see from the screen.
Popular Post
Recent Post
How To Open/Access Computer Management & Advanced Tips
Every Windows computer has many hidden tools. Most users never see them. They only use basic settings. They change wallpapers. They install apps. They adjust sound and display. That is enough for daily work. But problems still happen. The system slows down. Storage fills up. Errors appear without warning. At this stage, normal settings do […]
How To Transfer Photos From Android Phone To PC/Laptop [2026]
Moving photos from a phone to a computer is something most people need to do often. Phones fill up fast. Photos also matter more than apps. You may want a safe backup. You may want to edit images on a bigger screen. This guide explains how to transfer photos from Android to PC without stress. […]
Top 9 Browsers With Built-In VPN – VPN Browser
Online browsing is no longer private by default. Every website collects data in some form. This includes location details, device information, and browsing habits. Over time, this data builds a clear picture of user behavior. Many people are now uncomfortable with this level of tracking. A VPN browser helps reduce this exposure. It adds a […]
AI In Cyber Security: Who is Winning, Hackers or Security Companies
Cybersecurity once followed clear rules. Companies built firewalls. Users created passwords. Antivirus tools scanned files and removed known threats. When an attack happened, security teams studied it and added new rules. This method worked for many years. It created a sense of control and stability. That sense is gone today. Artificial intelligence has changed how […]
The Biggest AI-Run Cyber Attacks Of All Time
Artificial intelligence is now part of everyday technology. It helps people search faster. It improves medical research. It supports businesses in making better choices. But AI is not used only for good purposes. Cyber criminals have also learned how to use it. This has changed the nature of cyber attacks across the world. In the […]
Switch To a Dark Background Theme on Windows: Enable Dark Mode
People often like a screen that feels gentle on the eyes. A darker style softens bright areas and makes long computer sessions easier to handle. It also gives the desktop a cleaner and more modern feel. When you switch to a dark background theme in Windows, the colors shift to deeper shades that reduce glare […]
Complete Guide on Managing Audio Input Devices [Latest In 2026]
People use microphones for meetings, games, classes, recordings, and voice chats, so any problem with the device can interrupt their work. Even a small system error can make the voice weak or stop it fully. This is why knowing the basics of managing audio input devices is helpful for new and experienced users. Windows includes […]
Resetting Audio Settings on Windows 11: Complete Guide
Sound problems can disrupt work, study, or entertainment. Many users face issues where the audio becomes too low, too loud, unclear, or does not play at all. A common way to solve these problems is by resetting audio settings to their original state. This helps Windows rebuild its sound setup from the beginning. Windows 11 […]
Troubleshooting Headphone Detection: Headphones Not Detected/Working
A lot of users run into sound problems at some point. A common one is when the computer does not pick up the headphones. You plug them in, but the speakers keep playing. This can break your focus during work, movies, music, or calls. It also causes confusion because the reason is not always clear […]
How To Re-Pair Bluetooth Earbuds For Stereo Sound on Windows
Wireless earbuds are often paired with computers for rich stereo sound, but things don’t always go smoothly. Sometimes, the system defaults to mono audio or fails to activate the correct playback mode. This can disrupt music, calls, or gaming, making the sound feel flat and lifeless. These glitches usually stem from improper setup. Windows might […]





![Complete Guide on Managing Audio Input Devices [Latest In 2026]](https://www.techcommuters.com/wp-content/uploads/2025/12/Complete-Guide-on-Managing-Audio-Input-Devices.webp)
