How to Install Docker on a Mac?
Introduction
In Mac and even Windows computers, the Docker Desktop is a native app from Docker for various purposes, like launching, debugging, building, and testing containerized apps.
A wide range of features are available within this app, made to simplify the setup and monitoring processes of the isolated environments where the projects are available. The software ensures that all available dependencies do not conflict with each other, either.
Overall, users can expect many functional benefits from installing Docker for Mac, and the process of that is simple. Let’s discuss how that occurs.
What is Docker Desktop?
The Docker Desktop is a desktop app for Mac and Windows computers that are useful for debugging, creating, and testing containerized apps. Various features are available within the utility for its functions, like fast edit-test cycles, built-in compatibility for enterprise networks, file change alerts, etc.
While some VPNs like Avast SecureLine VPN work well on their own, you can run other VPNs and proxies with the support of this software too. Under this program, users will find different options like Kubernetes, developer tools, the Docker app, and version synchronization.
What is Containerized Apps?
The Containerized applications are cleanly packaged small bundles of software. These apps include multiple software sections that can work together for specific functions, all of them available within these singular self-contained boxes.
These containerized apps work for different user types, like businesses get many apps within these applications, easily operable with one server. This will exert little stress on different hardware in the system. Alternately, app developers can program specific codework for app development, carry them in the containerized apps and later run them in other systems.
From the end users’ perspectives, these apps are useful for storing many files in one app instead of different sections of the hard drive.
System Requirements on Mac Devices for Docker
It is possible to download and install Docker on Mac on devices running with Apple silicon and Intel-based chipsets equally. However, specific system requirements are important to note:
Mac with Intel chipset
Specifications include:
- macOS version 10.15 or newer versions are compatible, like Catalina, Monterey, and Big Sur.
- At least 4 GB of RAM capacity is required.
If your device running with an Intel chip is of an older macOS version, upgrade the system to a recent macOS version before using Docker.
Mac with Apple Silicon chipset
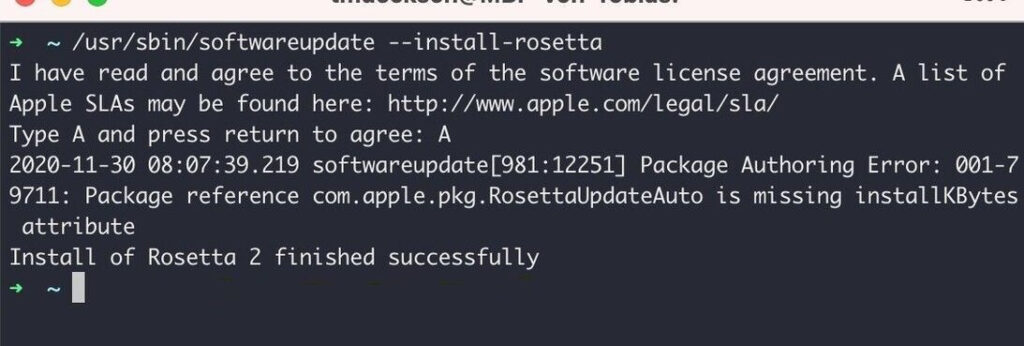
The previous requirement of installing and using Rosetta 2 is not a prerequisite anymore since the launch of Docker Desktop version 4.3.0 and above. However, the software does run some important tools for the optional command line. So, it is better to install Rosetta 2 with the following command:
- softwareupdate –install-rosetta
Ways to Successfully Install Docker on Mac?
In the context of how to install Docker on Mac, there is essentially one simple method to handle the process directly. But, to activate the software or install the new upgrade, users must learn more sequences. Here are the varying processes, discussed in detail.
Method 1: Install Docker Desktop through Mac
The first process of getting and installing Docker for Mac is straightforward and accessible through the Docker official website. Make sure to check for the latest version of the app and then follow the correct steps for downloading.
How to do this?
Step 1: Visit the official website of Docker.
Step 2: Tap the “Install Docker Desktop” option > Install on Mac. Choose the software for your specific chipset and download the latest version of the Docker Desktop app.
Step 3: Access the section in your Mac where files exist after downloading and double-click on the downloaded file.
Step 4: Drag and drop the “docker.dmg” file into the Applications folder.
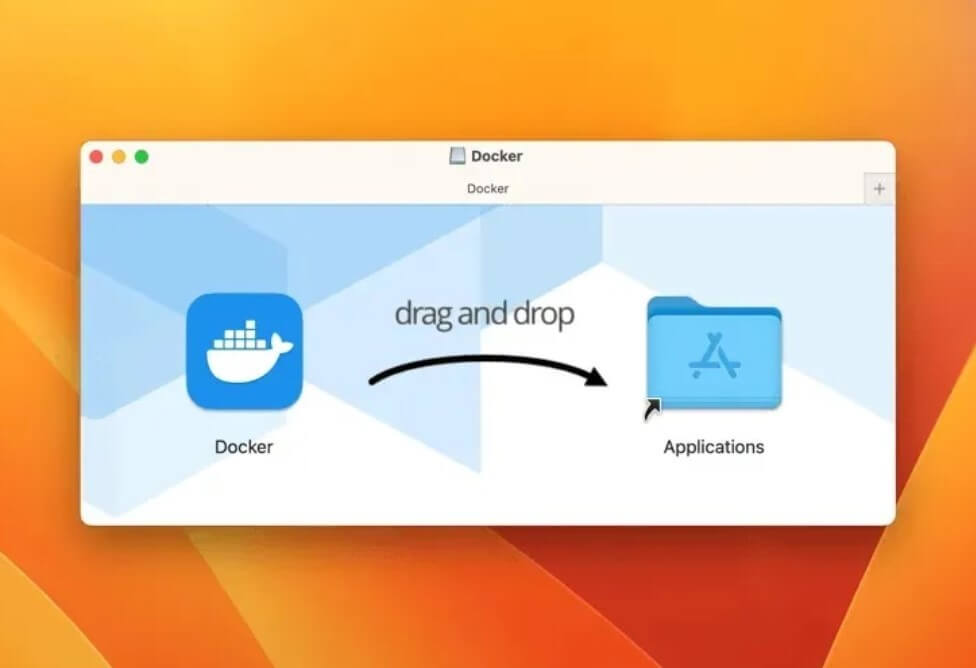
Step 5: Under the Applications folder, open Docker for Mac.
Step 6: When the pop-up prompt comes up, insert the device password to unlock the app.
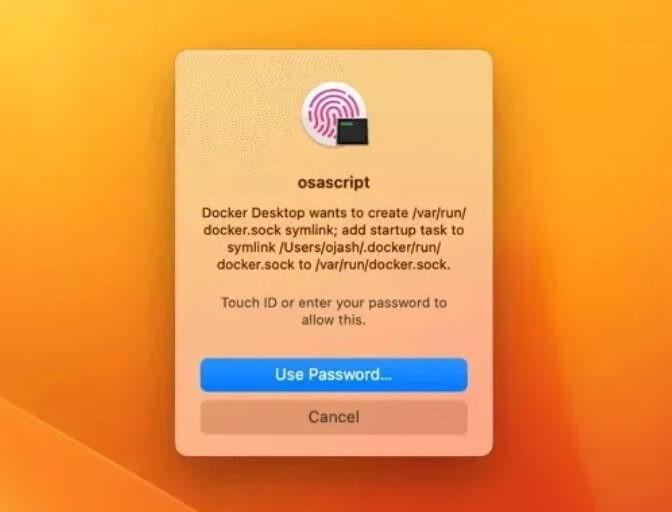
Step 7: The Docker Desktop app will start automatically configuring the device as needed.
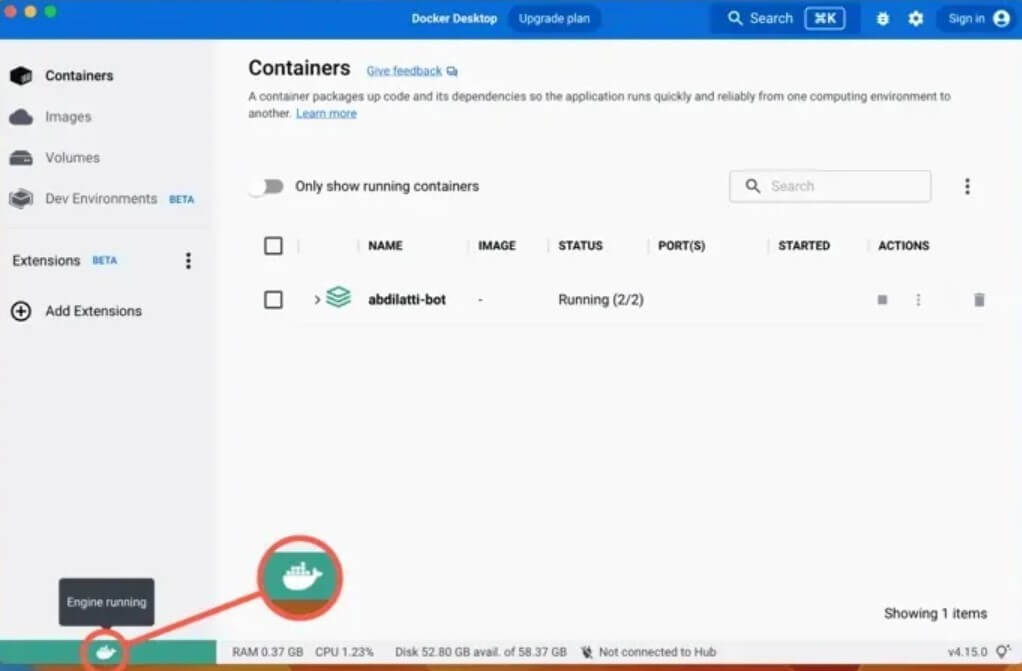
Step 8: Hover the cursor on top of the Docker logo at the bottom-left part of the window. If the “Engine Running” popup appears, it signifies the successful installation process.
Method 2: Verify Docker Desktop on Mac via Terminal
After you install Docker on Mac, it is better to check that the software is running as expected on your device. It is necessary to access the Terminal utility to complete the verification process securely on Mac.
How to do this?
Step 1: On your Mac device, tap the Finder icon and choose Applications > Utilities.
Step 2: Select the Terminal option from the list of apps and access the app.
Step 3: Add the following command and hit the Enter key:
sudo docker –version
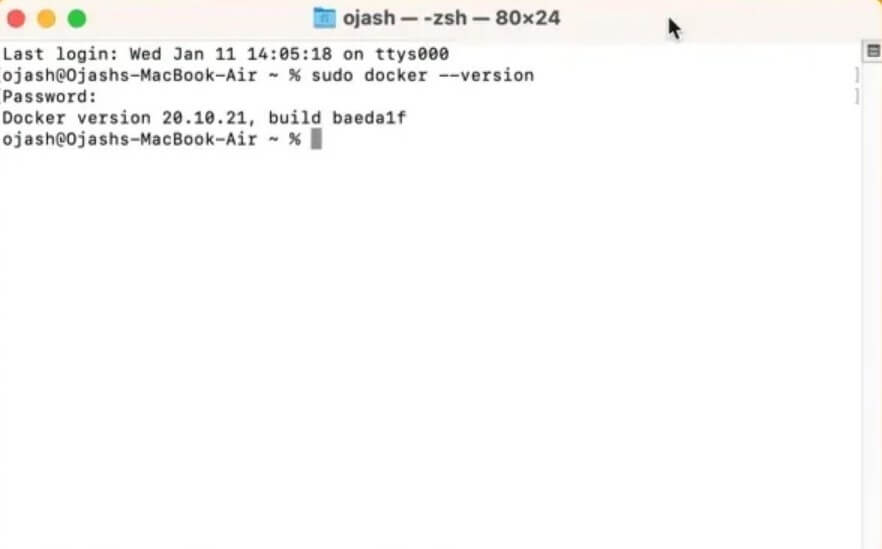
Step 4: Again, add the next command to verify the compose function > Enter:
sudo docker-compose –version
Step 5: Insert the following command for the installation machine version > Enter:
sudo docker-machine –version
Step 6: You can also check the installation status with the following command:
sudo docker run hello-world
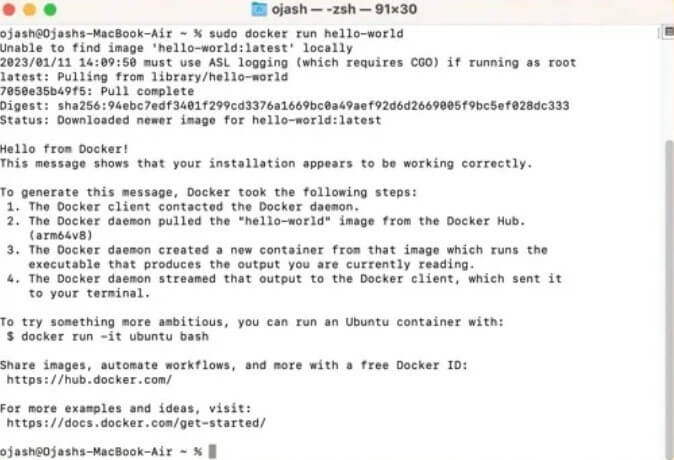
Step 7: If there are no errors, the installation is completed fully.
Method 3: Install via Command Line
It is possible to install Docker on Mac through the command line through the Terminal utility in the Applications folder. This occurs after you complete the Docker.dmg file. This version of accessing the Terminal and using commands to install the software is more complex to handle. So, it is best suited for developers will some technical expertise.
How to do this?
Step 1: Click on Finder > Applications > Utilities > Terminal.
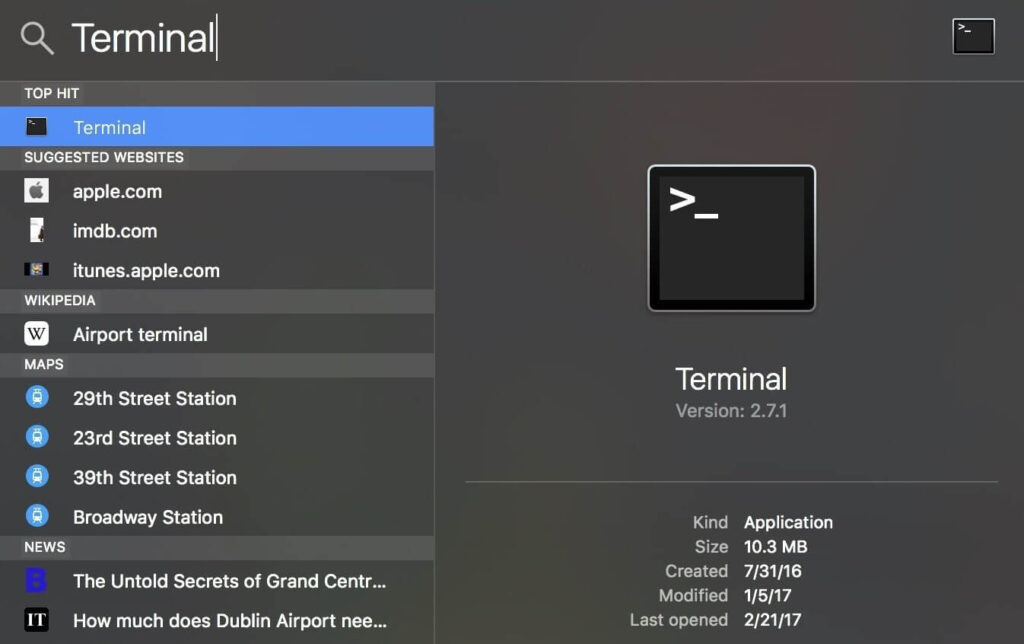
Step 2: Run the next commands one after another and press Enter:
sudo hdiutil attach Docker.dmg
sudo /Volumes/Docker/Docker.app/Contents/MacOS/install
sudo hdiutil detach /Volumes/Docker
Step 3: The macOS system carries out many security checks in the first use of an app. So, the “install” command would not show results instantly.
The “Install” command will accept different flags, like:
–accept-license
–allowed-org=<org name>
–user=<username>
Method 4: How to Install the Docker Desktop Updates on Mac
Docker Desktop does get new updates that users must download and install into their system. When there are newly available updates, the icon for it will appear in the Docker menu. You can access System Preferences > Software Updates to search for any new updates directly.
Adjust the setting to download the software update immediately. Or, tap the Release Notes choice to see the new changes in the updated software available. Users can disable the automatic update checking functionality through Docker Desktop since version 4.3.0.
How to do this?
Step 1: Click on the Docker menu > Download update
to install the latest updates.
Step 2: Click on the Update and Restart option in the next section. The upgrades will start downloading automatically, and the device will reboot after that.
Step 3: Under the Docker Subscription Service Agreement section, read the terms and conditions and tap on Accept.
Conclusion
Indeed, the Docker Desktop is very useful on Mac for building and testing containerized apps for different user types. So, following suitable steps to safely download and install the program is important. The methods mentioned here are detailed and allow for a fast installation process of the software and the new updates later.
Take the time to understand your system specifications and follow the relevant installation commands carefully. In case of complex technical steps, take professional help if needed. Practice all of these methods first.
Popular Post
Recent Post
How to Change Mouse Scrolling Settings In Windows
A mouse is one of the most used computer tools. People use it every day. They scroll through emails. They scroll through documents. They scroll through websites and images. The movement becomes automatic. Most users do not notice it. That is why problems often go unnoticed. Scrolling problems show up slowly. At first, it feels […]
Keyboard Light Settings: Keyboard Lighting Control [Complete Guide]
Keyboards are no longer simple typing tools. Well, yes! Over time, they have evolved to include features that improve comfort, visibility, and overall experience. One of the most useful features today is keyboard lighting. It helps users work comfortably in low-light conditions. It also reduces strain when typing for long hours. Many users first notice […]
Customizing Pointer Appearance: Complete Guide
The way your mouse pointer looks on your computer may seem like a small detail. But customizing pointer appearance can make using your PC more comfortable and visually appealing. Many users do not realize that they can change the pointer size, color, and style to fit their needs. Whether you want a bigger pointer for […]
How To Choose a Computer Monitor: Monitor Buying Guide
Buying a monitor looks easy. Many people think all screens are the same. That belief causes regret later. A monitor is not just a display. It is a daily tool. You read on it. You work on it. You relax with it. Small problems become big over time. Poor brightness hurts eyes. Bad size causes […]
How To Get Help With File Explorer in Windows 11 [Complete Guide]
File Explorer is one of the most important tools in Windows 11. It is used to open folders, view files, and manage stored data. Almost every action on a Windows computer depends on it in some way. When users open documents, save downloads, or organize photos, File Explorer is always involved. Because it is used […]
How To Fix A Frozen Computer: Complete Guide [Windows 11/10]
A frozen computer is one of the most common problems Windows users face. The screen stops responding. The mouse pointer does not move. Keyboard inputs do nothing. You may hear the fan running loudly. Sometimes the system looks alive, but nothing works. This situation often happens when you are busy or working on something important. […]
How to Upgrade Computer RAM: Complete Guide
Upgrading RAM is one of the simplest ways to improve a computer. It helps the system feel faster and smoother. Apps open quicker. Browsers handle more tabs. Games and tools run with less delay. Many users search for how to upgrade computer RAM because it gives real results without high cost. You do not need […]
How To Clean Your Computer Keyboard: Complete Guide
A computer keyboard is touched more than almost any other device you own. It is used during work, study, gaming, and casual browsing. Fingers carry natural oils, sweat, and dirt. Small food crumbs fall between keys without notice. Dust settles each day slowly. Over time, this creates a hidden layer of grime. Many users do […]
Computer Mouse Buying Guide for Beginners and Advanced Users
Buying a mouse looks easy at first. Many people think all mouse work the same way. Well, that idea often leads to regret later. A mouse affects comfort, speed, and daily work. It matters for office tasks, gaming, design, and study. The right choice reduces strain and improves control. The wrong one feels annoying every […]
How To Overclock a Computer: A Complete Guide
Overclocking is the process of making your computer run faster than its factory settings. It mainly affects the processor, graphics card, and sometimes memory. Many people choose this method to improve performance without buying new hardware. It is popular among gamers, video editors, and users who run heavy software. When done properly, overclocking can give […]


