How to Enable or Disable USB Port in Windows 7
There are numerous different easy methods available to enable or disable the USB port in your Windows-based laptop or computer. So, let’s protect your vital files and information by adopting any of the following methods.
Methods to Enable or Disable USB Ports in Windows 7
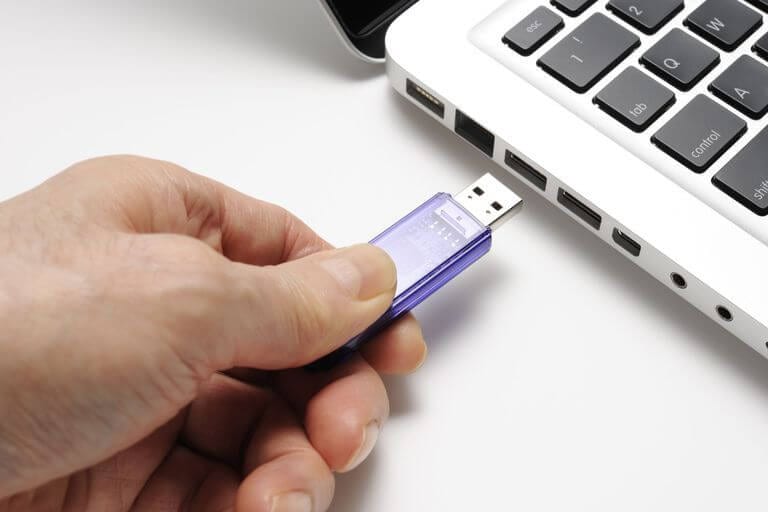
Enabling and disabling the USB port feature in your system means that nobody can insert a USB drive into your device and save data in it. This feature can be enabled and disabled pretty quickly.
Method 1: Use of Device Manager
Okay, so you can block or unblock USB port insertion from your Windows computer very smoothly with the assistance of Device Manager. You have to follow these steps to implement this method;
Step 1: Just right-click anywhere on your My Computer icon present on your desktop, then click on the Manage option.
Step 2: Then a new similar-looking pop-up menu will appear on your screen and now on the left side the option Device Manager should be selected.
Step 3: Here, you have to search for the Universal Serial Bus Controllers option.
Step 4: Under Universal Serial Bus Controllers, you should select all the devices and press right-click again to either disable or enable the feature. Test to check whether the feature is working or not.
Special Note – If the port feature isn’t working yet, then restart your system. You have to manually enable that Device later even if you reboot your computer still it won’t automatically enable USB ports.

Also Read: How to Recover Permanently Deleted Files in Windows 10/8/7
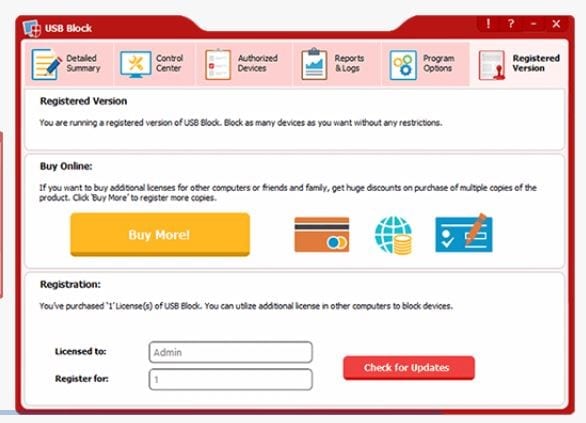
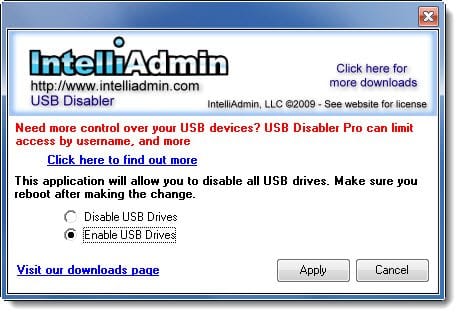
Method 2: Use Third-Party Software
If you want to disable the USB ports on your computer and you are not satisfied with the internal methods, then you can use the third-party software on your computer. The third-party software will easily block the USB port feature from your system with this downloaded software. The software can be downloaded from the different sources available online. This software will make your enabling and disabling process super simple.
Method 3: Use Mass Storage Drivers with the Registry
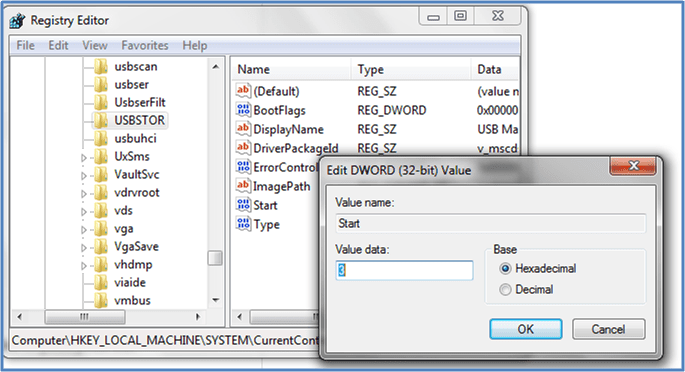
This method has been popularly used by Windows users as the process of enabling and disabling USB ports is very fast. It is an effective method as compared to the other methods. If you are a smart user, then the register setting will save up your lots of time for you. Follow the lead to start the process;
Step 1: You have to go to your desktop and press “Win Button + R”. There, you have to type the command “Regedit” and press the OK Button.
Step 2: Here, you have to prompt a Window, for this you have to follow this written command;
HIKEY_LOCAL_MACHINE -> SYSTEM -> CURRENT CONTROL SET -> SERVICES -> USBSTOR
Step 3: Now, you have to go to the START work area. In this section, to enable or disable the USB port, you just have to change the Value data with 4 Next Time if you want to enable the port, then change the Value to 3, but remember after every change the value will close your Registry Editor.
Method 4: Uninstall your USB Mass Storage Drive
In administrative organizations like schools or colleges, the best solution to disable the USB ports is to uninstall each and every USB driver installed in the system. This method is an extreme step that should be only taken by the user who never wants to transfer data via USB ports. So, use this step as your last resort. However, if you ever want to reinstall drivers, then Windows will automatically search for USB port drivers and you can again transfer data using USB.
Method 5: Use BuduLock
This is free software available online that can lock any defined folder and block unauthorized access to the USB ports. Basically, the software blocks USB ports and lock folders with alphanumeric passwords. It is a very useful tool that you can operate as;
Step 1: Obviously, first you have to download BuduLock on your Windows computer and install it properly.
Step 2: Now, you should insert a USB drive on your Windows computer.
Step 3: You need to click on the Flash Drive Lock that is located behind the Folder Lock Option.
Step 4: Here, by pressing on the Disable Flash Drive, you can block your USB ports. Similarly, if you want to enable the feature, then you have to press Enable Flash Drive and insert your password.
Method 6: Disable USB Ports
This is again an adverse solution as it’s not possible to disable all of your USB ports from the motherboard. But, you can easily remove the one port which is located on the front of your CPU. However, if you want to disconnect the USB port from the top and front of the computer, then you can plug out the cable from the USB header. You can effortlessly remove the USB header to protect your vital data from getting misused.
Method 7: Try Microsoft Support
If you are in real trouble and your USB ports aren’t working even after changing the previous settings as we have discussed above, then here you probably have one option – contact Windows Service Support which is Microsoft Fix it 50061. You just need to apply the setup, and it will fix your problems subsequently.
So, readers, these are some direct and indirect methods to enable or disable USB ports in your Windows 7 or above OS. We have explained every method in brief, but still, if you require any assistance, then just ask in the comments.
Popular Post
Recent Post
How To Open/Access Computer Management & Advanced Tips
Every Windows computer has many hidden tools. Most users never see them. They only use basic settings. They change wallpapers. They install apps. They adjust sound and display. That is enough for daily work. But problems still happen. The system slows down. Storage fills up. Errors appear without warning. At this stage, normal settings do […]
How To Transfer Photos From Android Phone To PC/Laptop [2026]
Moving photos from a phone to a computer is something most people need to do often. Phones fill up fast. Photos also matter more than apps. You may want a safe backup. You may want to edit images on a bigger screen. This guide explains how to transfer photos from Android to PC without stress. […]
Top 9 Browsers With Built-In VPN – VPN Browser
Online browsing is no longer private by default. Every website collects data in some form. This includes location details, device information, and browsing habits. Over time, this data builds a clear picture of user behavior. Many people are now uncomfortable with this level of tracking. A VPN browser helps reduce this exposure. It adds a […]
AI In Cyber Security: Who is Winning, Hackers or Security Companies
Cybersecurity once followed clear rules. Companies built firewalls. Users created passwords. Antivirus tools scanned files and removed known threats. When an attack happened, security teams studied it and added new rules. This method worked for many years. It created a sense of control and stability. That sense is gone today. Artificial intelligence has changed how […]
The Biggest AI-Run Cyber Attacks Of All Time
Artificial intelligence is now part of everyday technology. It helps people search faster. It improves medical research. It supports businesses in making better choices. But AI is not used only for good purposes. Cyber criminals have also learned how to use it. This has changed the nature of cyber attacks across the world. In the […]
Switch To a Dark Background Theme on Windows: Enable Dark Mode
People often like a screen that feels gentle on the eyes. A darker style softens bright areas and makes long computer sessions easier to handle. It also gives the desktop a cleaner and more modern feel. When you switch to a dark background theme in Windows, the colors shift to deeper shades that reduce glare […]
Complete Guide on Managing Audio Input Devices [Latest In 2026]
People use microphones for meetings, games, classes, recordings, and voice chats, so any problem with the device can interrupt their work. Even a small system error can make the voice weak or stop it fully. This is why knowing the basics of managing audio input devices is helpful for new and experienced users. Windows includes […]
Resetting Audio Settings on Windows 11: Complete Guide
Sound problems can disrupt work, study, or entertainment. Many users face issues where the audio becomes too low, too loud, unclear, or does not play at all. A common way to solve these problems is by resetting audio settings to their original state. This helps Windows rebuild its sound setup from the beginning. Windows 11 […]
Troubleshooting Headphone Detection: Headphones Not Detected/Working
A lot of users run into sound problems at some point. A common one is when the computer does not pick up the headphones. You plug them in, but the speakers keep playing. This can break your focus during work, movies, music, or calls. It also causes confusion because the reason is not always clear […]
How To Re-Pair Bluetooth Earbuds For Stereo Sound on Windows
Wireless earbuds are often paired with computers for rich stereo sound, but things don’t always go smoothly. Sometimes, the system defaults to mono audio or fails to activate the correct playback mode. This can disrupt music, calls, or gaming, making the sound feel flat and lifeless. These glitches usually stem from improper setup. Windows might […]







![Complete Guide on Managing Audio Input Devices [Latest In 2026]](https://www.techcommuters.com/wp-content/uploads/2025/12/Complete-Guide-on-Managing-Audio-Input-Devices.webp)
