How to Make All Images The Same Size: 7 Ways

Last updated on May 11th, 2025 at 11:12 am
Images are a beautiful way to capture memories. In this digital age, capturing and sharing images have become super simple. You can click photos with your phone camera and quickly share them with your friends via instant messaging apps or social media.
But there is a small problem — to make all images the same size. Every device and social sharing portal today supports different image sizes. For instance, the Instagram grid supports 1080 x 1080 pixels, and the Pinterest layout wants 1000 x 1500 pixels size images.
Thus, when you want to share the same photo on all your social media platforms or upload different size photos on your website, it is essential to make all images of the same size.
It is easy to make different sizes of images into the same size. You can use third-party software and native methods in Windows and Mac to do so. Below, we will discuss all the possible ways to make all images the same size.
How to Make All Images the Same Size? Top 7 Ways
There you can use default Web and Mac features or third-party tools and online solutions to make all your images the same size. Here we have explained all the methods in detail so you can select the perfect one.
Way 1: Resize Multiple Images in Windows
Windows users can resize multiple photos at once to make them the same size. There is no need to use additional tools with methods. Follow these steps to reduce photo size and file size on Windows:
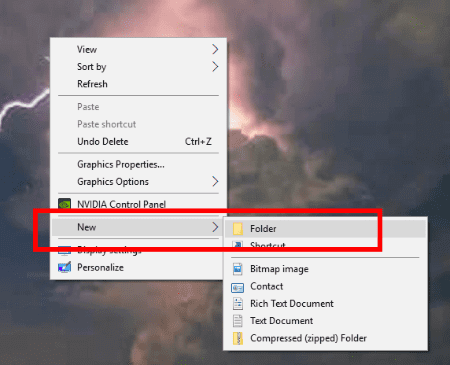
Step 1: Add all the photos you want to resize in a folder. To do so, right-click anywhere on your screen and go to New > Folder. After that, move the photos to the new folder.
Step 2: Now, open the folder containing all the images you wish to resize.
Step 3: Select all the photos by pressing the Ctrl and A keys together on your keyboard.
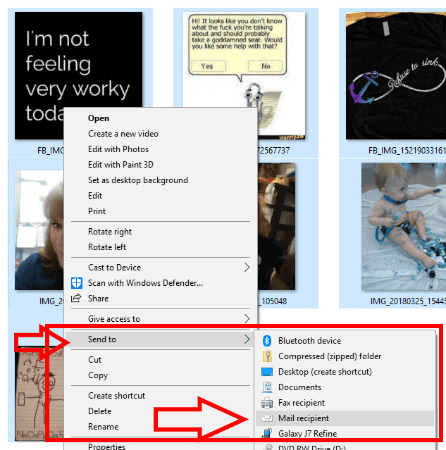
Step 4: Right-click on one photo and select Send To > Mail Recipient. Here you are not actually emailing these photos.
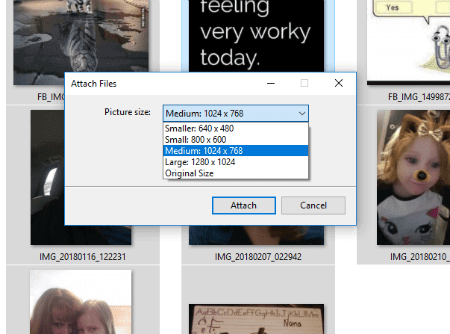
Step 5: Now, a small window will show up, letting you change the picture size. Finally, you can select the right picture size and click Attach.
Step 6: After that, your email program will initiate; ignore it. Simply go to your search box and type %temp%
Step 7: Once the Temporary folder launches, look for your attachment folder, and all your images will now be the same size.
Way 2: Resize Multiple Images on Mac
Mac users, there is no need to worry. You can also resize multiple images using default features. Here’s how to make all images the same size in the Mac operating system:
Step 1: Select all the images you want to make the same size.
Step 2: Right-click on one photo and select Open with Preview.
Step 3: On the Preview window, click on Edit > Select All.
Step 4: After that, go to Tools and select Adjust Size.
Step 5: Choose the Scale Proportionally box to ensure your image quality is not compromised.
Step 6: Enter the dimensions to which you want to resize images.
Step 7: Click on the Save button, and all your images are now resized.
Way 3: Make All Images the Same Size Using Image Resizer
Image Resizer is an amazing tool to crop, rotate, rename, flip, or format photos. It can change the dimensions of multiple images without losing their visual quality. If you want to edit and resize photos, you can use this software on your computer as follows:
Step 1: Download and install the Image Resizer application on your computer.
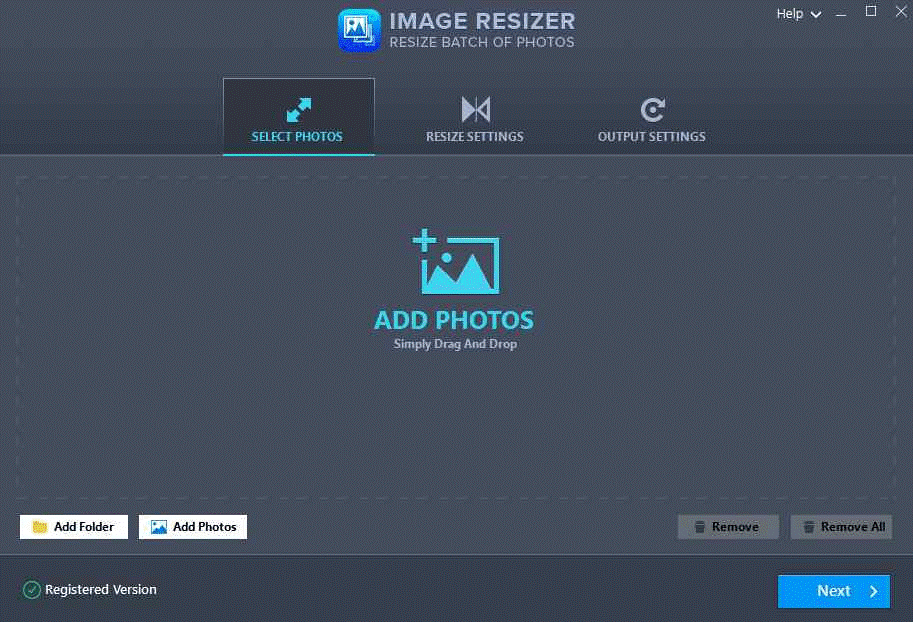
Step 2: Launch the program and click on Add Photos to upload all the photos you want to change.
Step 3: After selecting the images, click the Open button from the right corner.
Step 4: Click on the Next button.
Step 5: From the left pane, click on the Resize button. Select the Predefined Size Ratio option and enter the custom dimensions to resize your selected photos.

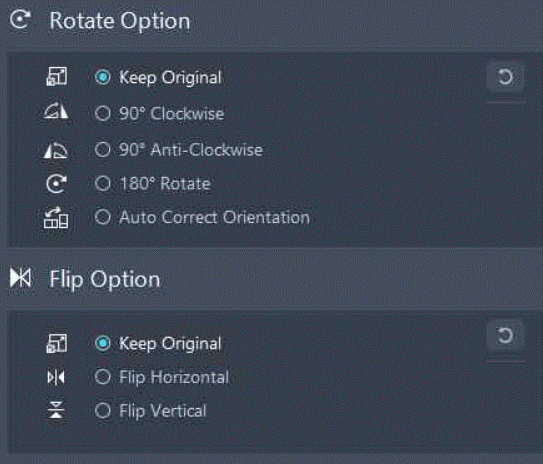
Step 6: Select the Rotate option to change the picture alignment. Next, select the degree of rotation and the Flip option. You can also mirror your photos on a Windows computer.
Step 7: From the right pane, select the Output folder. After that, click on the Process button.
Step 8: Wait for a few minutes to complete the process, and you will get all the same-size photos in no time.
Way 4: Make All Images the Same Size Using Microsoft Word
Yes, that’s right! You can align your photos to the same site using Microsoft Word. This software is not only good for editing text. There are several hidden features that you can use to edit photos in Microsoft Word.
Macros in Word can help you edit and resize your photos. This feature will automate certain tasks that otherwise would have required repeated actions. Here is how you can use Word to resize photos:
Step 1: Open the Word file where you want to align the photo size.
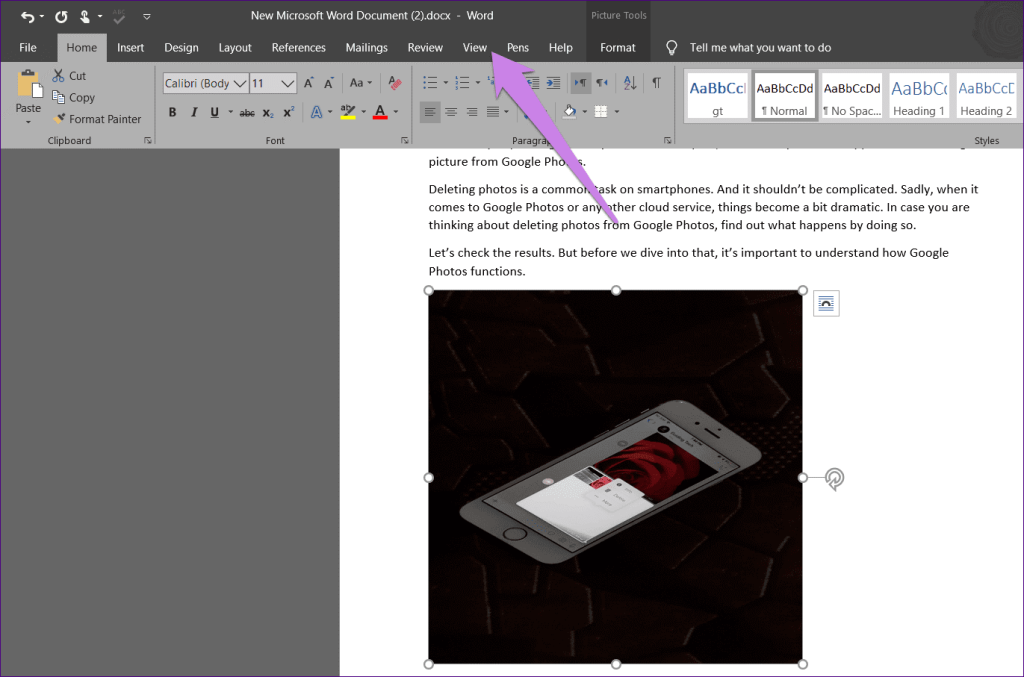
Step 2: Select a photo and click on the View tab from the top menu.
Step 3: Click on Macros.
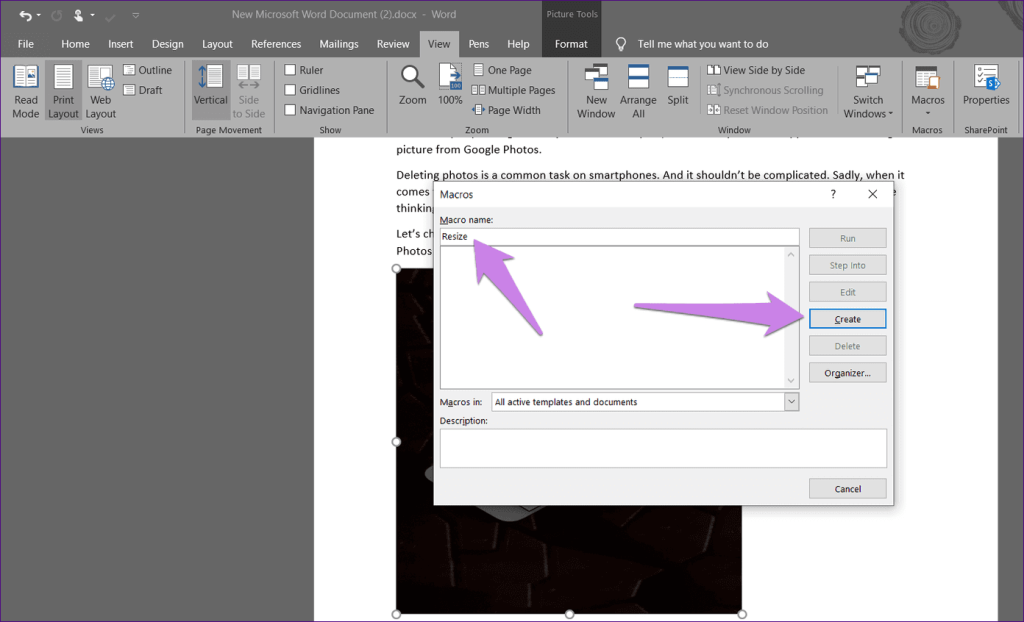
Step 4: A popup window will appear on your screen. Under the Macro name, type a name in the box. Then, click on Create.
Step 5: Now, the Microsoft Visual Basic for Applications window will open on your screen. Select and delete the existing code.
Step 6: If you want to change the height and width of your photos in pixels, you can copy and paste this code into the window:
Sub resize() Dim i As Long With ActiveDocument For i = 1 To .InlineShapes.Count With .InlineShapes(i) .Height = 500 .Width = 600 End With Next i End With End Sub
Use this code if you want to change the size by inches:
Sub resize() Dim i As Long With ActiveDocument For i = 1 To .InlineShapes.Count With .InlineShapes(i) .Height = InchesToPoints(2) .Width = InchesToPoints(2) End With Next i End With End Sub
If you want to scale your images, this code will help you:
Sub resize() Dim i As Long With ActiveDocument For i = 1 To .InlineShapes.Count With .InlineShapes(i) .ScaleHeight = 30 .ScaleWidth = 40 End With Next i End With End Sub
Step 7: Now, close the Microsoft Visual Basic window by clicking on the cross sign.
Step 8: While selecting the image, click on Macros under the View tab.
Step 9: Once the Macros window opens, click on the Run button while selecting the Macros. As soon as you press the button, you will see that all image sizes will change on your screen.
Apart from the Macros, you can also use the Magic Key in Word to change the image sizes. That key is the F4 on Windows and the Y on Mac. Here’s how you can use this method:
Step 1: Open the Word document containing your photos.
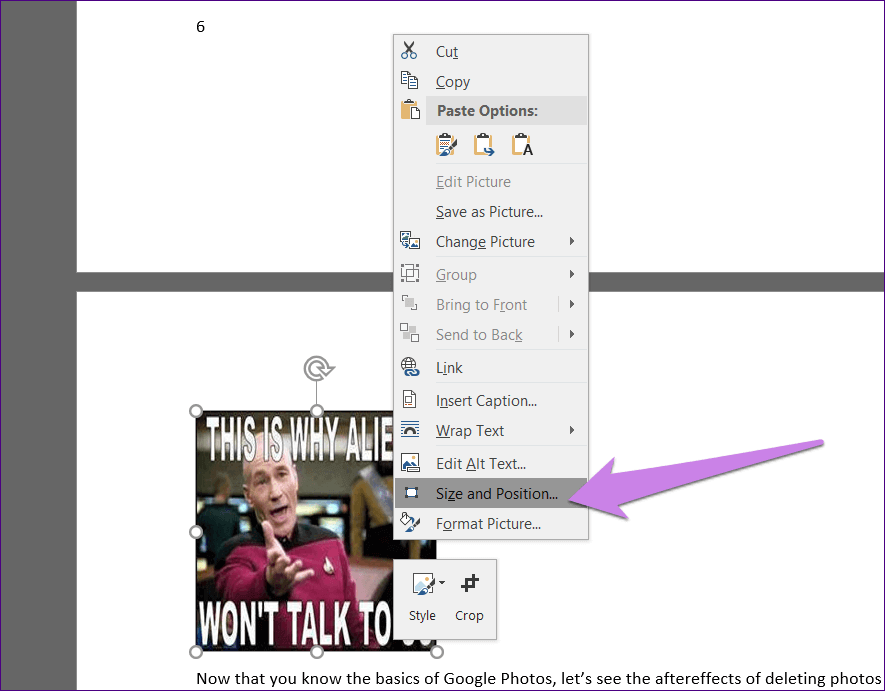
Step 2: Right-click on the image and select Size and Position.
Step 3: The Layout box will pop up, and click on the Size tab. Uncheck the box next to the Lock aspect ratio. Enter the custom height and width dimensions. Click on OK.
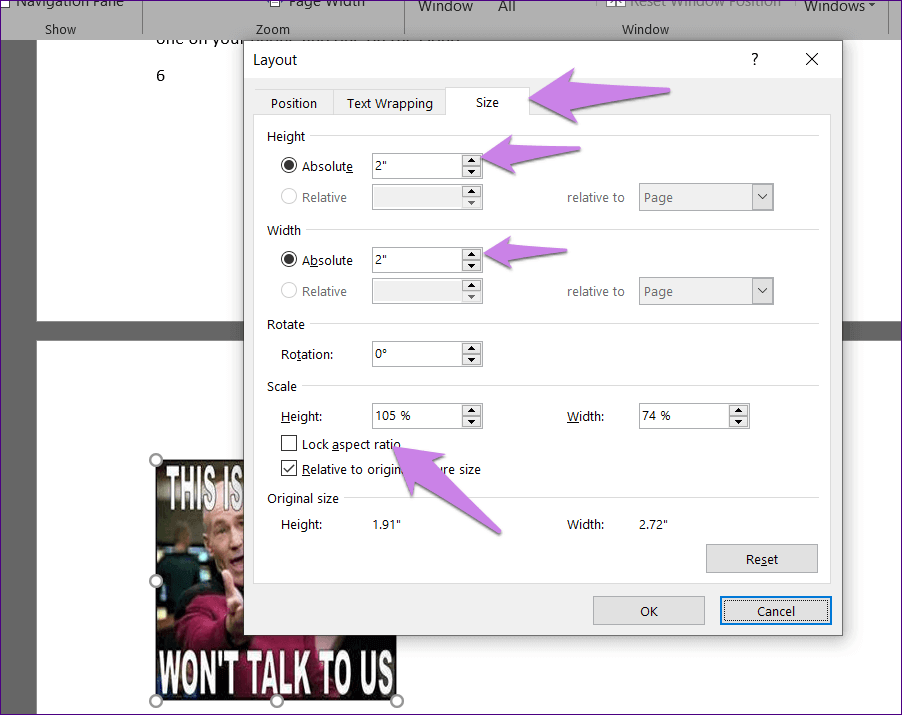
Step 4: You can now see the image size changed to your given dimensions. Click on the images one by one and press F4 or Y keys on them to make all images the same size.
Way 5: Make All Images the Same Size Using BeFunky
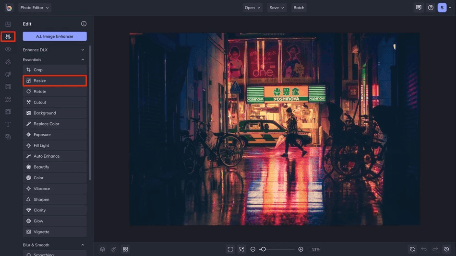
BeFunky is a stunning image resizing solution. It allows you to change the picture size you want without losing details or ratio aspects. Furthermore, it can control pixel by pixel. You can get professional quality results with this tool. Here’s how you can resize any image using BeFunky:
Step 1: Download and install the software on your computer.
Step 2: Click on the Open button to upload all the photos you want to change the size of the app.
Step 3: Optionally, you can select the Lock Aspect Ratio feature. This feature keeps your photographs’ dimensions proportional to one another. When you increase the height, it will automatically increase the width to adjust the height. This feature will help you create creative images without losing the ratio aspects.
Step 4: Change the pixel dimensions as per your requirements. You can also crop your images before resizing. It can help you better change the pixel size to your desired resolution.
Step 5: Now, hit Enter, and quickly your images will have the same size.
Way 6: How do I make all photos the same size in Photoshop
Here comes another method to make all photos the same size using the Photoshop app. Follow these steps to batch-resize images in Photoshop:
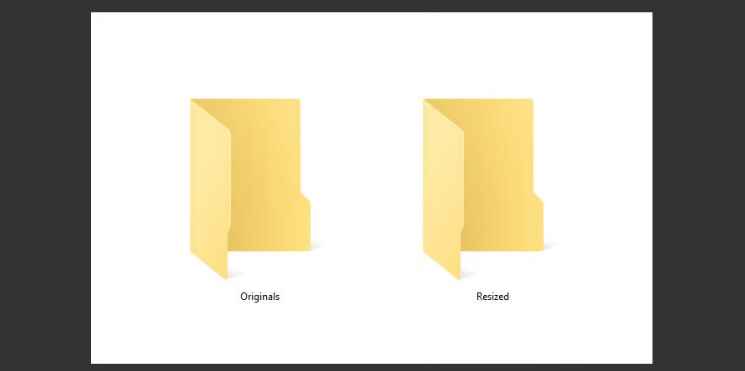
Step 1: Launch Photoshop and make sure that all the images that you need to resize are stored in the same folder. To do so, you can use Photoshop’s Batch feature. Go to “File” > “Automate” > “Batch.” Select the Source folder where your images are located, and choose the Destination for the resized images.
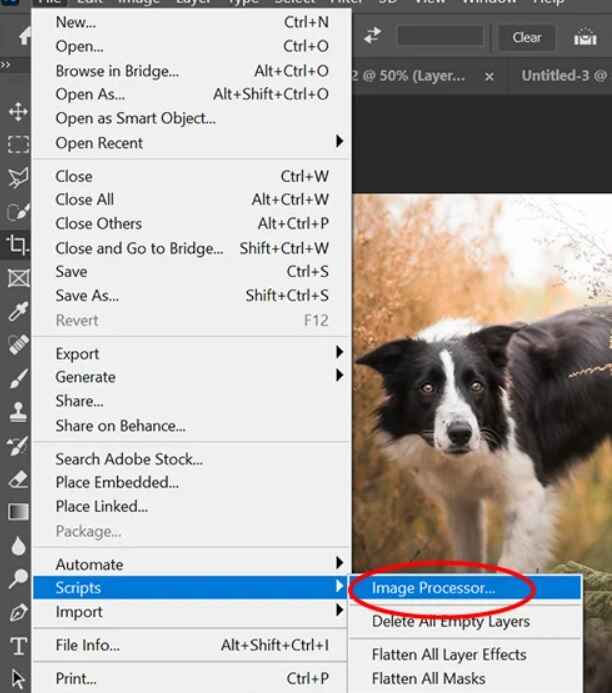
Step 2: Now, select File> Scripts> Image Processor.
Step 3: Select the folder where images are stored.

Step 4: When working with RAW files and planning to resize multiple images, consider editing a single image initially and then applying those edits to the rest. To do this, simply enable the option ‘Open first image to apply settings’ before starting the batch resizing process.
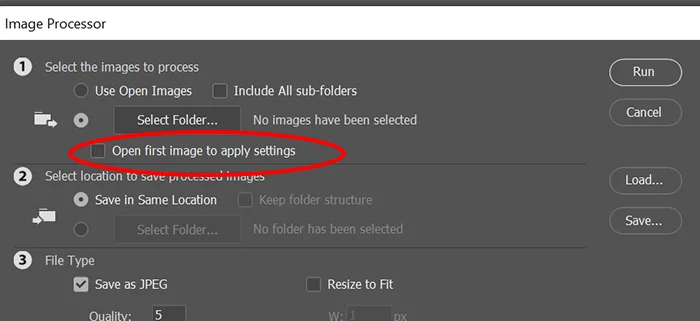
Step 5: Select the folder where the processed images will be stored after being resized.
Step 6: Pick a file type and set the size parameters for resizing. Enter the desired width and height in pixels for your images. You can choose the specific dimensions you want, or you can use a percentage to resize them relative to their original size.

Step 7: And finally, hit on the “Run” button.

The program will take care of the entire process for you, including opening and closing each file automatically.
Way 7: Make Multiple Pics Same Size In CSS
Sure, here’s how to make multiple pictures the same size using CSS:
Step 1: Creating a Class
To get started, we’ll create a special group for these images, which we’ll call `.same-size-img`. This class will help us apply the same size to all the pictures we want.
Step 2: Setting Width and Height
Now, we need to decide how big we want our images to be. Inside the `.same-size-img` class in our CSS file, we’ll set the width and height values.
For example, we can say `width: 300px;` and `height: 200px;` to make them all 300 pixels wide and 200 pixels tall. You can change these numbers to fit your preference.
Step 3: Applying the Class
Next, we’ll head over to our HTML file, where we’ve got our images. Look for the `<img>` tags of the images you want to resize. To make them follow our size rules, we simply add the `same-size-img` class to each `<img>` tag, like this: `<img src=”image.jpg” class=”same-size-img”>`.
That’s it! You can apply this class to as many images as you want to resize.
Step 4: And it’s done
Once you’ve completed these steps, the images with the `same-size-img` class will all conform to the dimensions you set in your CSS. They’ll look super organized and tidy!
Parting Remarks
Size matters! It is important to have all the same size on your document, website, or social media for a better user experience. It will look odd if your images have different dimensions and shapes,
Therefore, you can select the best method to make all the images the same size on your Windows or Mac devices.
That’s it for now! Don’t forget to check out other technical guides on the TC.
Author Bio:
Dinesh Lakhwani 

Dinesh Lakhwani, the entrepreneurial brain behind “TechCommuters,” achieved big things in the tech world. He started the company to make smart and user-friendly tech solutions. Thanks to his sharp thinking, focus on quality and the motto of never giving up, TechCommuters became a top player in the industry. His commitment to excellence has propelled the company to a leading position in the industry.
Popular Post


Recent Post

Top 9 Browsers With Built-In VPN – VPN Browser
Online browsing is no longer private by default. Every website collects data in some form. This includes location details, device information, and browsing habits. Over time, this data builds a clear picture of user behavior. Many people are now uncomfortable with this level of tracking. A VPN browser helps reduce this exposure. It adds a […]

AI In Cyber Security: Who is Winning, Hackers or Security Companies
Cybersecurity once followed clear rules. Companies built firewalls. Users created passwords. Antivirus tools scanned files and removed known threats. When an attack happened, security teams studied it and added new rules. This method worked for many years. It created a sense of control and stability. That sense is gone today. Artificial intelligence has changed how […]

The Biggest AI-Run Cyber Attacks Of All Time
Artificial intelligence is now part of everyday technology. It helps people search faster. It improves medical research. It supports businesses in making better choices. But AI is not used only for good purposes. Cyber criminals have also learned how to use it. This has changed the nature of cyber attacks across the world. In the […]
Switch To a Dark Background Theme on Windows: Enable Dark Mode
People often like a screen that feels gentle on the eyes. A darker style softens bright areas and makes long computer sessions easier to handle. It also gives the desktop a cleaner and more modern feel. When you switch to a dark background theme in Windows, the colors shift to deeper shades that reduce glare […]
![Complete Guide on Managing Audio Input Devices [Latest In 2026]](https://www.techcommuters.com/wp-content/uploads/2025/12/Complete-Guide-on-Managing-Audio-Input-Devices.webp)
Complete Guide on Managing Audio Input Devices [Latest In 2026]
People use microphones for meetings, games, classes, recordings, and voice chats, so any problem with the device can interrupt their work. Even a small system error can make the voice weak or stop it fully. This is why knowing the basics of managing audio input devices is helpful for new and experienced users. Windows includes […]

Resetting Audio Settings on Windows 11: Complete Guide
Sound problems can disrupt work, study, or entertainment. Many users face issues where the audio becomes too low, too loud, unclear, or does not play at all. A common way to solve these problems is by resetting audio settings to their original state. This helps Windows rebuild its sound setup from the beginning. Windows 11 […]
Troubleshooting Headphone Detection: Headphones Not Detected/Working
A lot of users run into sound problems at some point. A common one is when the computer does not pick up the headphones. You plug them in, but the speakers keep playing. This can break your focus during work, movies, music, or calls. It also causes confusion because the reason is not always clear […]
How To Re-Pair Bluetooth Earbuds For Stereo Sound on Windows
Wireless earbuds are often paired with computers for rich stereo sound, but things don’t always go smoothly. Sometimes, the system defaults to mono audio or fails to activate the correct playback mode. This can disrupt music, calls, or gaming, making the sound feel flat and lifeless. These glitches usually stem from improper setup. Windows might […]

How To Manage Camera Permissions for App On Windows: Complete Guide [2026]
Many users run into issues when trying to join video calls or online meetings—their camera simply won’t turn on. This can happen for a few reasons: Windows might be blocking access, or the app may not have the correct permissions. These hiccups often lead to confusion and frustration. Fortunately, Windows provides straightforward tools to help […]
![Help With Color Management In Windows Complete Guide [2026]](https://www.techcommuters.com/wp-content/uploads/2025/12/Help-With-Color-Management-In-Windows-Complete-Guide.webp)
Help With Color Management In Windows: Complete Guide [2026]
Color often decides how we experience a picture, a video, a website, or even a simple chart. Many users feel confused when colors look different on each screen. A monitor may show a softer shade while a laptop shows a sharper one. This creates doubt and slows down work. It can also lead to mistakes […]

