Review – Tenorshare 4DDiG- Best Data Recovery Software For Windows & Mac
Restore lost or deleted files from any storage media using Tenorshare 4DDiG.
Losing important files, images, videos, or for that matter any data is no fun. It leaves us all anxious, frustrated, and stressed. What’s worse, when we don’t have a backup and the same file is urgently required. This creates panic and makes you look irresponsible in front of seniors, customers, and clients.
If you are getting what I am saying or are stuck in a similar situation, no need to panic. There’s a way to recover such lost or deleted files. Using Tenorshare 4DDiG, the best recovery tool, you can retrieve all lost or deleted files from your computer and an external hard drive.
Data Loss Scenarios
Human Errors – Major reason for losing files is accidentally deleting them, emptying recycle bin or trash, formatting without taking backup, and pressing Shift+delete.
File Corruption – Situations like sudden power cuts, attacks, or system crashes are reasons for file corruption and this causes data loss.
virus
Natural Disaster – Unavoidable situations like earthquakes, thunderstorms might damage the system and make you lose data.
Hardware Failure – Lost partition, CPU overheating, no disk image are some of the common reasons for hardware failure and data loss
Review – Tenorshare 4DDiG – Popular data recovery tool to restore data lost due to any reason
Before we dive into details here’s an overview of the best data recovery solution from Tenorshare. Known as 4DDiG this data recovery software offers robust and advanced features. The product helps restore files that have been accidentally deleted, lost due to a cyberattack, or corrupt hard disk. It also shows a preview of scanned files and can be used by both Windows and Mac users.
Supported System
Operating System
- Windows 10,8.1,8,7
- macOS 10.10 and above
RAM (both Windows and macOS)
- 512 and more
Disk Space (both Windows and macOS)
- 200 MB and more free space
CPU (both Windows and macOS)
- 1GHz (32 bit or 64 bit) or above
Languages Supported

- English
- German
- French
- Italian
- Spanish
- Portuguese
- Russian
- Japanese
- Arabic
- Traditional Chinese & Simplified Chinese.
File System Windows –
- NTFS
- exFAT and FAT16/FAT32
File System Mac
- APFS
- NTFS and HFS+
Pricing

- Standard – $49.99
- Professional – $79.99
- Premium – $99.99
| Pros | Cons |
| Easy to use, user interface | No option to scan individual folders for data recovery. |
| Different data recovery modes to retrieve data lost due to any situations | Recovering larger files of more than 3GB is difficult |
| Quick scanning and lost file recovery | |
| Compatible with both Windows and Mac | |
| Efficiently scans external drives to get back lost data | |
| Does not interfere with the working of another program |
Highlights:-
1. Retrieve data lost due to any reason
Tenorshare helps restore data from a corrupt & damaged hard disk, files lost due to a virus attack, and even the information removed from Recycle Bin.
2. Restore files from any storage media
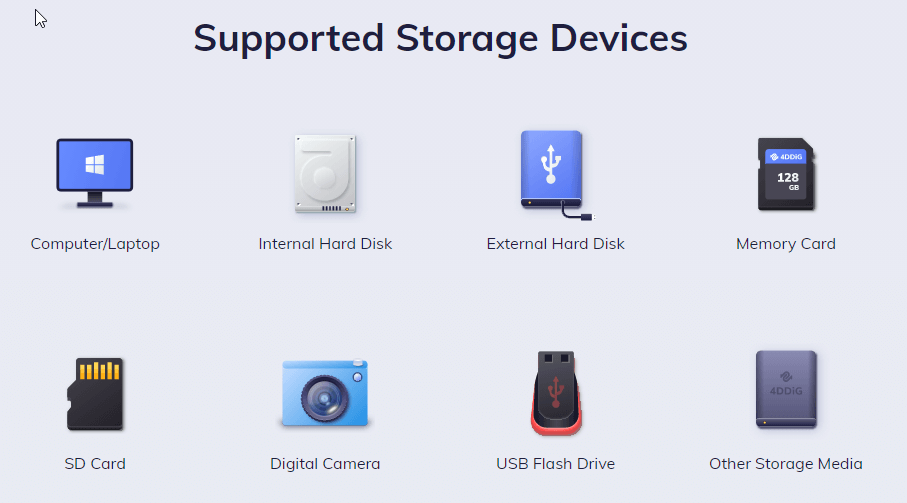
4DDiG recovery software helps get back lost and deleted files from different devices. Whether it be a formatted storage device, external hard drive, USB drive, or internal hard drive, the tool scans all and helps restore data. Using its Deep Scan option, users can easily scan all the partitions and can be sure they have all the lost files.
3. Recover media files
The data recovery tool helps retrieve audio, video, photos, and other media files from damaged storage media. You can restore pictures, videos directly from digital cameras. What’s more, Tenorshare 4DDiG can repair and restore broken or corrupt photos and video files.
4. Undelete different file types
Be it office documents, compressed files, RAR/ZIP, or system files like NTFS/FAT, 4DDiG helps recover all of them.
5. Preview scan results
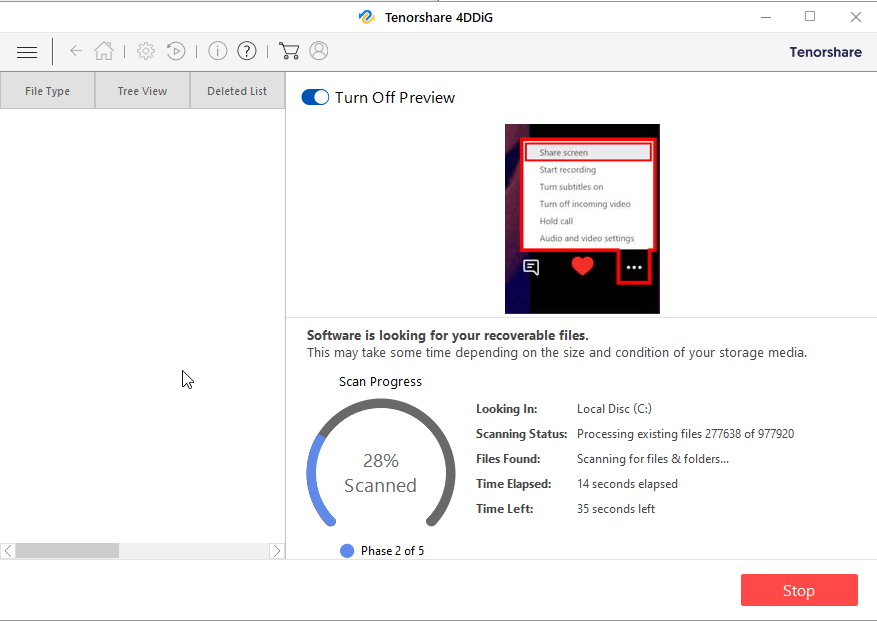
To make the recovery process easy, the recovery tool allows previewing files. This helps make better decisions and restore only those files that you actually want back.
6. Pause and resume scanning
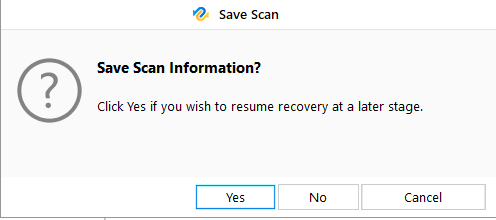
If you have some important work to do and don’t want to leave the system on, when you are not around, no issues. Stop scanning and resume it later whenever you want.
7. File Filter
Locate lost files by date and type or search for the file name using the search bar. This helps save a lot of time.
Tenorshare 4DDiG – User Interface
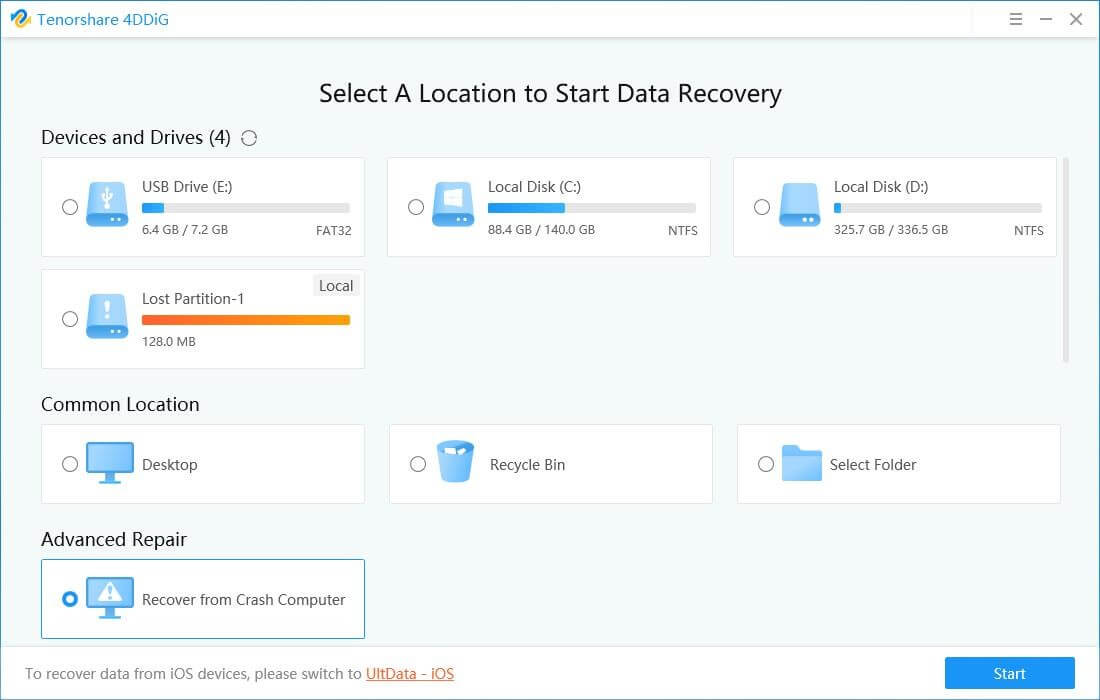
Tenorshare’s 4DDiG user interface is simple and easy to use. When the data recovery tool is launched, the Select What To Recover screen is displayed. From here using any of the three options you start the data recovery process.
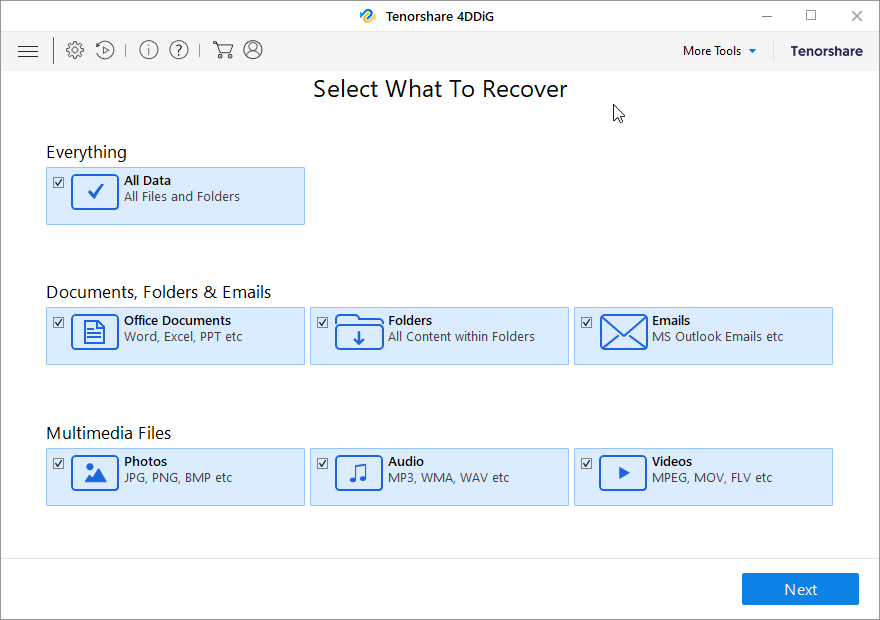
3 recovery options:
- Everything: use this option to restore data from the selected location or drive.
- Documents, Folders & Emails: recover office documents, files, folders, and emails using this option.
- Multimedia Files: lost photos, audio, and videos no worries. Use the Multimedia Files option and get going
To access additional features, click the More Tools button present at the top right corner of the Tenorshare 4DDiG welcome screen.
Brief Description of other buttons you see on Tenorshare 4DDiG:
| Menu | Show/hide the menu bar. |
| Advance Settings | Configure general, file types and recovery settings. |
| Resume Recovery | Resume data recovery. |
| About | Get details about the data recovery software. |
| Help | Access user guide using this button. |
| Buy Online | Buy the software online. |
| Activation | Register purchased version and enjoy restriction-free data recovery tool. |
| Back | Head back to the last screen via this button. |
| Home | Return to the main screen at any point. |
| Next | Go to the next window. |
| Scan | Start the scanning process. |
| Stop | Stop the scanning process at any time. |
| Recover | Save the scanned data. |
Select Specific Location or Connected Drive
Once you click Next, you will see the Recovery From screen. From here, you can select any connected drive or a specific location on your hard drive.
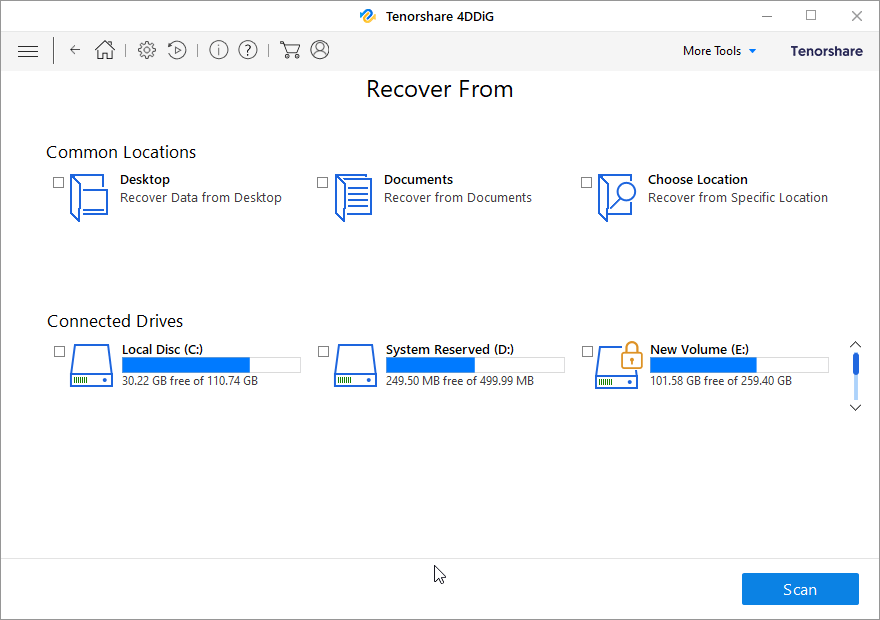
- Common Locations – Common Locations include Desktop, Documents, and Choose Location.
- Connected Drives – These include all the drives and external storage media connected to the system.
How to use 4DDiG Data Recovery Software?
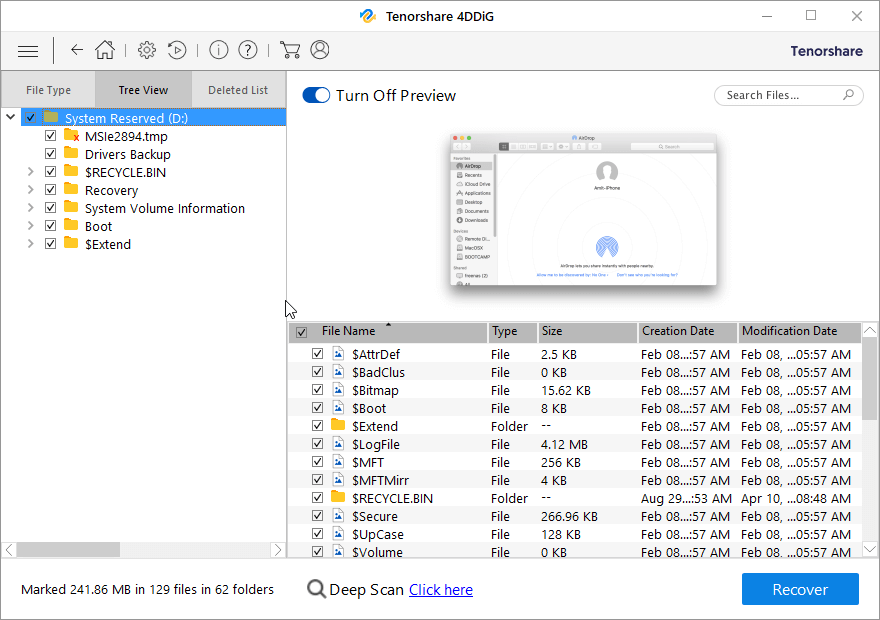
Using 4DDiG Data Recovery Software is a three-step process.
- Download and install the data recovery software.
- Launch the tool > select the location to scan for lost data.
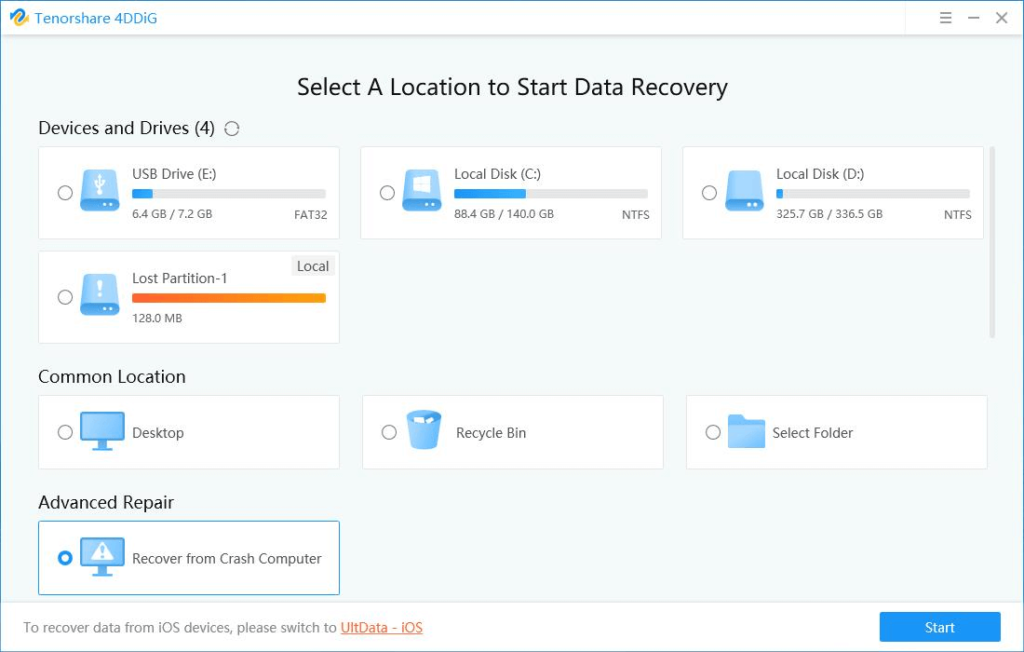
3. Preview scan results
4. Select the files to restore > select the location to restore the files and hit the Recover button.
What Makes Tenorshare the Best Recovery tool?
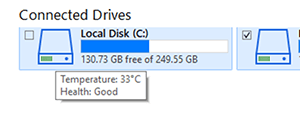
- Tenorshare 4DDiG displays the temperature and health details of connected drives. To view, hover the mouse cursor on the drive in the Recover From screen and you will get all the details as shown in the image below:
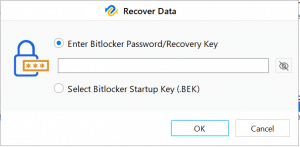
- Helps scan drive encrypted using BitLocker. When you try to scan a locked drive, the tool prompts you to unlock the disk and start the recovery process.
- Deep Scan option to thoroughly scan a drive and locate data that you were unable to locate during Quick Scan.

Tenorshare 4DDiG Worth Giving a Try
To sum up the review, we would like to say that the tool is worth giving a try. Using it you can restore a wide array of files lost due to any reason. Also, you can preview files before recovering them, this helps save time and disk space as only the required data will be put back on the disk. If you are looking for a comprehensive tool to recover any kind of data, Tenorshare is the choice for you.
We hope you find the information helpful and will give this tool a try. Looking forward to hearing from you about the tool and how it helped in retrieving lost or deleted files.
Popular Post
Recent Post
Keyboard Light Settings: Keyboard Lighting Control [Complete Guide]
Keyboards are no longer simple typing tools. Well, yes! Over time, they have evolved to include features that improve comfort, visibility, and overall experience. One of the most useful features today is keyboard lighting. It helps users work comfortably in low-light conditions. It also reduces strain when typing for long hours. Many users first notice […]
Customizing Pointer Appearance: Complete Guide
The way your mouse pointer looks on your computer may seem like a small detail. But customizing pointer appearance can make using your PC more comfortable and visually appealing. Many users do not realize that they can change the pointer size, color, and style to fit their needs. Whether you want a bigger pointer for […]
How To Choose a Computer Monitor: Monitor Buying Guide
Buying a monitor looks easy. Many people think all screens are the same. That belief causes regret later. A monitor is not just a display. It is a daily tool. You read on it. You work on it. You relax with it. Small problems become big over time. Poor brightness hurts eyes. Bad size causes […]
How To Get Help With File Explorer in Windows 11 [Complete Guide]
File Explorer is one of the most important tools in Windows 11. It is used to open folders, view files, and manage stored data. Almost every action on a Windows computer depends on it in some way. When users open documents, save downloads, or organize photos, File Explorer is always involved. Because it is used […]
How To Fix A Frozen Computer: Complete Guide [Windows 11/10]
A frozen computer is one of the most common problems Windows users face. The screen stops responding. The mouse pointer does not move. Keyboard inputs do nothing. You may hear the fan running loudly. Sometimes the system looks alive, but nothing works. This situation often happens when you are busy or working on something important. […]
How to Upgrade Computer RAM: Complete Guide
Upgrading RAM is one of the simplest ways to improve a computer. It helps the system feel faster and smoother. Apps open quicker. Browsers handle more tabs. Games and tools run with less delay. Many users search for how to upgrade computer RAM because it gives real results without high cost. You do not need […]
How To Clean Your Computer Keyboard: Complete Guide
A computer keyboard is touched more than almost any other device you own. It is used during work, study, gaming, and casual browsing. Fingers carry natural oils, sweat, and dirt. Small food crumbs fall between keys without notice. Dust settles each day slowly. Over time, this creates a hidden layer of grime. Many users do […]
Computer Mouse Buying Guide for Beginners and Advanced Users
Buying a mouse looks easy at first. Many people think all mouse work the same way. Well, that idea often leads to regret later. A mouse affects comfort, speed, and daily work. It matters for office tasks, gaming, design, and study. The right choice reduces strain and improves control. The wrong one feels annoying every […]
How To Overclock a Computer: A Complete Guide
Overclocking is the process of making your computer run faster than its factory settings. It mainly affects the processor, graphics card, and sometimes memory. Many people choose this method to improve performance without buying new hardware. It is popular among gamers, video editors, and users who run heavy software. When done properly, overclocking can give […]
How To Find Password Saved on This Computer: Complete Guide
Many people forget their login details at some point. It happens often. We create many accounts every year. Each one needs a username and a password. Over time, it becomes hard to remember all of them. That is why computers offer ways to store login details. These saved details help users sign in faster. They […]
