How To Scan Your Device For Malware In Windows 11 & Windows 10
Malware poses a serious threat to Windows computers. Every day, millions of devices get infected with harmful software. These threats can steal your data, slow down your system, and cause major problems.
Windows 11 and Windows 10 users face constant cyber threats. Viruses, ransomware, and spyware target these popular operating systems. Your personal files, passwords, and banking details are at risk. Regular malware scans help protect your computer from these dangers. When you scan your computer for malware, you create a shield against digital attacks.
Many people think their computers are safe without regular checks. This false sense of security can be costly. Hackers use new methods every day to bypass basic protections.
Running regular malware scans on your Windows system is crucial for keeping it secure. A quick scan can help you avoid significant inconvenience and potential financial risks.
Part 1: What is the Need for Running the Malware Scan on Windows

Every day, modern Windows systems encounter thousands of new threats. Cybercriminals design malware specifically for Windows 11 and Windows 10, and your antivirus may not always detect emerging threats. That’s why regular malware scans are crucial—they help uncover risks that bypass basic security measures.
Without routine scans, malware can embed itself deep within your system. Some malicious programs operate silently, stealing your data without any noticeable symptoms.
By scanning your computer regularly, you can detect these hidden threats early, preventing severe damage to your files and personal privacy.
Part 2: Benefits of Scanning Device for Malware on Windows
Regular malware scanning provides essential protection for your Windows computer. When you scan your computer for malware consistently, you gain multiple advantages that keep your system safe and running smoothly.
- Protects Personal Data: Regular scans prevent hackers from stealing your passwords, photos, and documents when you run a malware scan on Windows.
- Improves System Speed: Removing malware helps your computer run faster and smoother after you scan your device for malware Windows.
- Prevents System Crashes: Malware scans stop harmful programs from corrupting your Windows files and causing blue screen errors.
- Saves Money: Early detection through scans prevents costly repairs and data recovery when you check computer for malware regularly.
- Blocks Identity Theft: Scanning removes keyloggers and spyware that steal your login credentials and banking information.
- Maintains Privacy: Regular scans stop malware from accessing your webcam, microphone, and personal files without permission.
- Preserves System Stability: Consistent scanning prevents malware from damaging Windows registry and system files.
- Reduces Spam and Pop-ups: Scanning removes adware that floods your browser with unwanted advertisements and redirects.
Part 3: Precautions to Take When Scanning Device for Malware

Taking proper precautions before you scan your device for malware Windows ensures effective results. These safety measures help you run a malware scan on Windows without causing system problems or missing threats.
- Close All Programs: Shut down unnecessary applications before you scan your computer for malware to avoid scanning conflicts.
- Update Your Scanner: Ensure your antivirus has the latest definitions before you check computer for malware for best detection.
- Backup Important Files: Save your crucial data to external storage before running deep scans on your Windows system.
- Disconnect from Internet: Go offline during scans to prevent malware from communicating with remote servers during detection.
- Use Safe Mode: Boot into Safe Mode for thorough scans when you suspect heavy malware infection on Windows.
- Avoid Other Tasks: Don’t use your computer for other activities while scanning to ensure accurate malware detection results.
- Check System Resources: Monitor CPU and memory usage to ensure your Windows system can handle the scanning process effectively.
- Schedule Regular Scans: Set automatic scans during off-hours when you’re not actively using your Windows computer for work.
Part 4: How To Scan Your Device For Malware on Windows 11/10
Windows 11 and Windows 10 offer multiple ways to scan your device for malware Windows systems. You can choose between built-in Windows tools or third-party software, depending on your needs. Certain methods are more effective against specific types of malware threats.
Combining different scanning methods gives you the best protection. When you run a malware scan on Windows using various tools, you catch more threats. Some malware hides from certain scanners but gets detected by others. Regular users should try at least two different methods to check computer for malware effectively.
Method 1: Windows Defender (Built-in Security)
Windows Defender comes pre-installed with every Windows system, providing essential malware protection at no extra cost. It automatically updates and runs quietly in the background, ensuring continuous security while you use your device.
This built-in tool offers dependable defense against threats, scanning your system efficiently to detect and neutralize potential risks. Its seamless operation helps safeguard your files without disrupting your workflow.
Steps:
- Use the Windows search bar. Type and select “Windows Security”. Choose “Virus & threat protection”.

- Click “Quick scan” for a basic check or “Scan options” for more choices. Select “Full scan” to scan your device for malware Windows thoroughly. Click “Scan now”. Wait for the process to complete.

- Review results and follow recommendations to remove threats. Restart your computer.
Method 2: Windows PowerShell Command Line
PowerShell offers advanced scanning options for tech-savvy users. This method helps you run a malware scan on Windows using command-line tools. PowerShell scans can detect threats that GUI tools sometimes miss.
Steps:
- Right-click the Start button. Now select “Windows PowerShell (Admin)”. Type “Get-MpComputerStatus”. Press Enter. Now check Windows Defender status.

- Type “Start-MpScan -ScanType QuickScan” for a quick malware check. Use “Start-MpScan -ScanType FullScan” to scan your computer for malware completely.

- Type “Get-MpThreat” to view any detected threats after scanning. Use “Remove-MpThreat” command to clean found malware.

- Type “Update-MpSignature” to update malware definitions. Close PowerShell when scanning and cleanup are complete
Method 3: Third-Party Antivirus Software
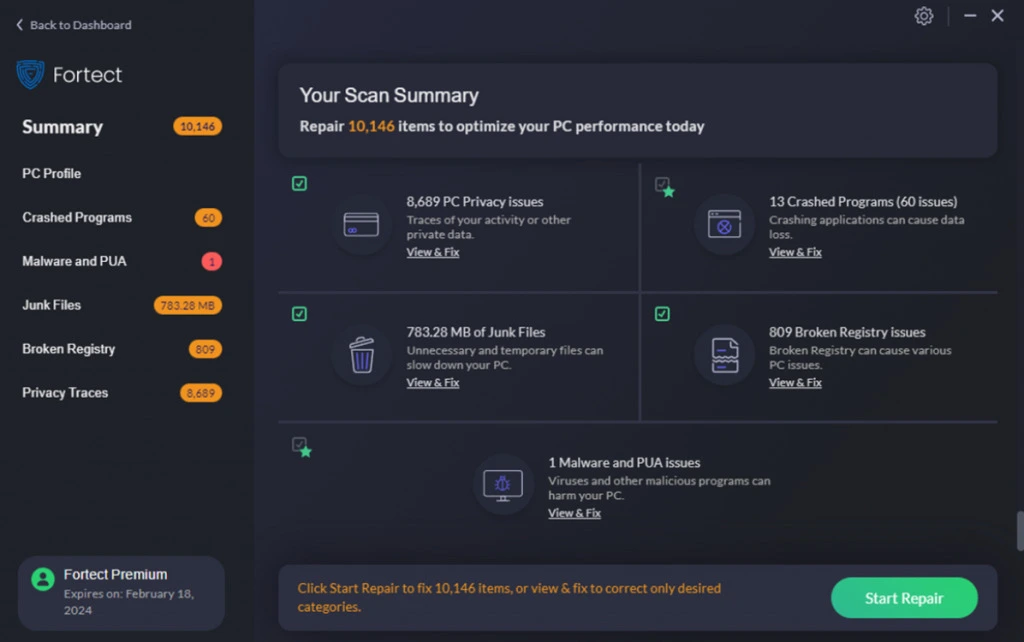
Many malware problems do not stop at detection. They leave behind damaged system files, broken settings, and background processes that slow the PC. This is where a more complete security tool fits naturally into a Windows malware scanning guide. Fortect Antivirus works not only as a scanner but also as a repair-focused solution for Windows 11 and Windows 10 users.
Fortect Antivirus checks your device for malware, unsafe apps, and suspicious system behavior. At the same time, it looks for corrupted Windows files that often appear after an infection. This makes it useful for users who want clean scan results and a stable system afterward, without jumping between multiple tools.
Key Features of Fortect Antivirus
- Deep malware scan for viruses, spyware, and hidden threats
- Repairs damaged Windows system files automatically
- Detects unsafe apps and unusual background processes
- Real-time monitoring to block new threats early
- Lightweight design that does not slow down everyday use
- Works smoothly on both Windows 11 and Windows 10
How to Scan Your PC Using Fortect
Step 1: Download and install Fortect on your Windows PC, then launch the tool and start a full system scan.
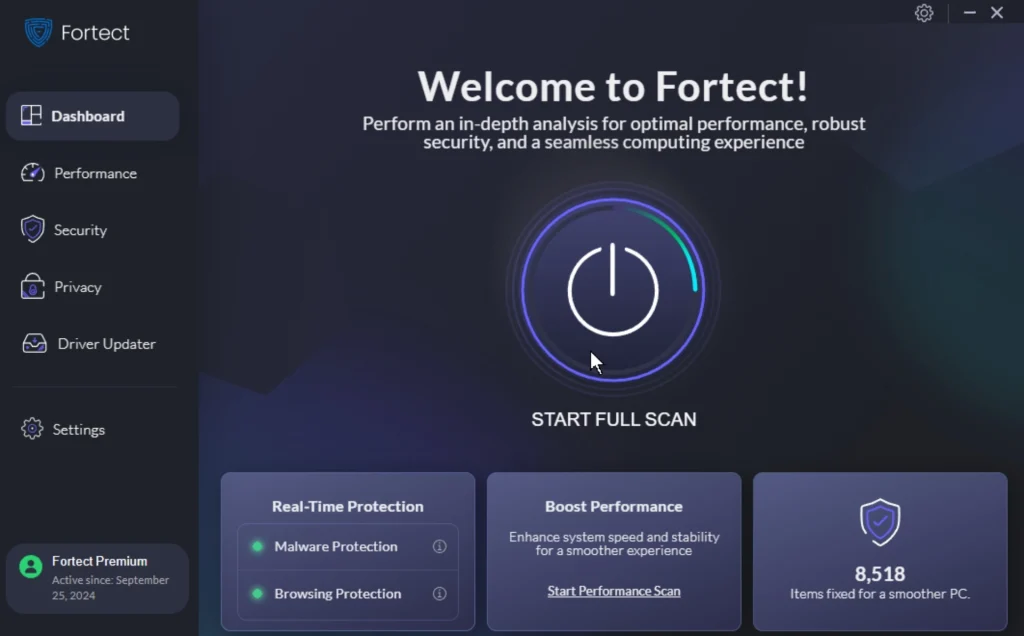
Step 2: Review the scan results and allow Fortect to remove malware and repair affected system files in one go.
Method 4: Windows Recovery Environment (Advanced)
Boot-time scanning works when regular scans fail to clean stubborn malware. This method runs before Windows starts, catching malware that hides from normal scans. Use this when you suspect a serious infection.
Steps:
- Hold the Shift key while clicking “Restart” from the Start menu. Select “Troubleshoot” from the recovery options screen. Choose “Advanced options”, then select “Startup Settings”. Click “Restart” and press F4 to boot into Safe Mode.

- Open Windows Security and run a full malware scan. Alternatively, use third-party rescue disks for deeper cleaning. Allow the scan to complete without interruption. Remove all detected threats and restart normally. Run another scan after normal boot to verify complete cleanup
Author’s Tip
Many users make the mistake of relying only on real-time protection. While this feature helps, it cannot catch everything. You need to manually scan your device for malware Windows at least once per week. Set a reminder on your calendar to run these scans regularly. This simple habit prevents most malware infections.
Don’t ignore scan results or postpone recommended actions. When your antivirus finds threats, deal with them immediately. Delayed action gives malware more time to spread and cause damage. Always restart your computer after removing malware to ensure complete cleanup. This step completes the removal process and prevents malware from returning.
Keep your scanning software updated at all times. New malware appears every hour, and outdated scanners miss these threats. Enable automatic updates for your antivirus program. When you run a malware scan on Windows with current definitions, you catch the latest threats. Updated scanners provide the best protection for your Windows system.
Conclusion
Regular malware scanning protects your Windows computer from serious threats. Whether you use Windows 11 or Windows 10, scanning prevents data theft and system damage. Make scanning a weekly habit to keep your device safe. When you scan your computer for malware regularly, you avoid costly repairs and privacy breaches.
Don’t wait until problems appear to start scanning. Prevention costs less than recovery in both time and money. Use the built-in Windows Defender or install trusted third-party software. Remember to check computer for malware weekly and update your scanning tools regularly. Your digital safety depends on consistent malware scanning habits.
Frequently Asked Questions
How often should I scan my device for malware Windows?
You should run a malware scan on Windows at least once per week for basic protection. Heavy internet users and businesses should scan daily. Quick scans can run every few days, while full system scans should happen weekly. Set automatic scans during off-hours to maintain consistent protection without interrupting your work.
Can I scan my computer for malware using free tools?
Yes, Windows 11 and Windows 10 include Microsoft Defender for free malware scanning. This built-in tool provides good basic protection for most users. You can also use free versions of programs like Malwarebytes for additional scanning. However, paid antivirus programs offer more features and better protection for business users.
What should I do if I find malware when I check computer for malware?
Immediately quarantine or delete the detected threats as recommended by your scanner. Disconnect from the internet to prevent data theft during cleanup. Restart your computer after removing malware to complete the cleaning process. Change all your passwords after cleanup, especially for banking and email accounts. Consider running a second scan with different software to ensure complete removal.
Popular Post
Recent Post
How To Get Help With File Explorer in Windows 11 [Complete Guide]
File Explorer is one of the most important tools in Windows 11. It is used to open folders, view files, and manage stored data. Almost every action on a Windows computer depends on it in some way. When users open documents, save downloads, or organize photos, File Explorer is always involved. Because it is used […]
How To Fix A Frozen Computer: Complete Guide [Windows 11/10]
A frozen computer is one of the most common problems Windows users face. The screen stops responding. The mouse pointer does not move. Keyboard inputs do nothing. You may hear the fan running loudly. Sometimes the system looks alive, but nothing works. This situation often happens when you are busy or working on something important. […]
How to Upgrade Computer RAM: Complete Guide
Upgrading RAM is one of the simplest ways to improve a computer. It helps the system feel faster and smoother. Apps open quicker. Browsers handle more tabs. Games and tools run with less delay. Many users search for how to upgrade computer RAM because it gives real results without high cost. You do not need […]
How To Clean Your Computer Keyboard: Complete Guide
A computer keyboard is touched more than almost any other device you own. It is used during work, study, gaming, and casual browsing. Fingers carry natural oils, sweat, and dirt. Small food crumbs fall between keys without notice. Dust settles each day slowly. Over time, this creates a hidden layer of grime. Many users do […]
Computer Mouse Buying Guide for Beginners and Advanced Users
Buying a mouse looks easy at first. Many people think all mouse work the same way. Well, that idea often leads to regret later. A mouse affects comfort, speed, and daily work. It matters for office tasks, gaming, design, and study. The right choice reduces strain and improves control. The wrong one feels annoying every […]
How To Overclock a Computer: A Complete Guide
Overclocking is the process of making your computer run faster than its factory settings. It mainly affects the processor, graphics card, and sometimes memory. Many people choose this method to improve performance without buying new hardware. It is popular among gamers, video editors, and users who run heavy software. When done properly, overclocking can give […]
How To Find Password Saved on This Computer: Complete Guide
Many people forget their login details at some point. It happens often. We create many accounts every year. Each one needs a username and a password. Over time, it becomes hard to remember all of them. That is why computers offer ways to store login details. These saved details help users sign in faster. They […]
How To Open/Access Computer Management & Advanced Tips
Every Windows computer has many hidden tools. Most users never see them. They only use basic settings. They change wallpapers. They install apps. They adjust sound and display. That is enough for daily work. But problems still happen. The system slows down. Storage fills up. Errors appear without warning. At this stage, normal settings do […]
How To Transfer Photos From Android Phone To PC/Laptop [2026]
Moving photos from a phone to a computer is something most people need to do often. Phones fill up fast. Photos also matter more than apps. You may want a safe backup. You may want to edit images on a bigger screen. This guide explains how to transfer photos from Android to PC without stress. […]
Top 9 Browsers With Built-In VPN – VPN Browser
Online browsing is no longer private by default. Every website collects data in some form. This includes location details, device information, and browsing habits. Over time, this data builds a clear picture of user behavior. Many people are now uncomfortable with this level of tracking. A VPN browser helps reduce this exposure. It adds a […]


