What to Do When You’re Unable to Eject a USB Drive on Windows 11?
Last updated on February 1st, 2026 at 5:38 pm
Are you unable to eject a USB drive on Windows 11? Then, that’s a serious problem because forced USB drive removal can corrupt or damage your data.
Thus, always launch the File Explorer app, right-click on the external drive, and select Eject. This is the safest way to detach a USB drive from your computer.
But, unfortunately, when your USB doesn’t show in the Safely Remove Hardware option, it gets harder to pull out the external drive at the right time.
Why Are You Not Able to Eject USB Drive on Windows 11?
There are several possible reasons behind the USB drive not safely ejecting from your computer. For instance, you might be unable to eject a USB drive on Windows 11 when:
- The external hard drive content is still running in an application installed on your computer.
- As a result, the USB drive might get infected with computer viruses or malware, leading to the Safely Remove Hardware option not showing.
- Your USB drivers have become corrupted or obsolete.
9 Solutions to Try When Unable to Eject USB Drive on Windows 11
USB drives are a vital source for storing and transferring data today. Thus, when you are unable to safely eject a USB drive, don’t try to force-eject it. You will only lose your external drive data in the process.
So, when not able to eject an external hard drive on Windows 11, just try these solutions:
Solution 1. Restart Your PC
When your USB content is used by any program installed on your computer, it might not show the Safely Remove Hardware option. If you don’t know which app is using your USB content at the moment, you can simply restart your computer. Restarting the action will automatically shut down all operations, including external hard disk content. To restart your computer:
Step 1. Press the Windows key and click on the Power icon from the pop-up dialogue box.
Step 2. Click on Restart from the small menu.
Step 3. When your system prepares for shutdown, it automatically closes all active programs. Once your PC reboots, try to eject your USB device.
Solution 2. Use Task Manager
If you don’t want to restart your computer, you can also turn off background apps using the USB drive content from Task Manager.
Simply press the Ctrl + Shift + Escape key combo to open the Task Manager window. Next, click on the Processes Tab.
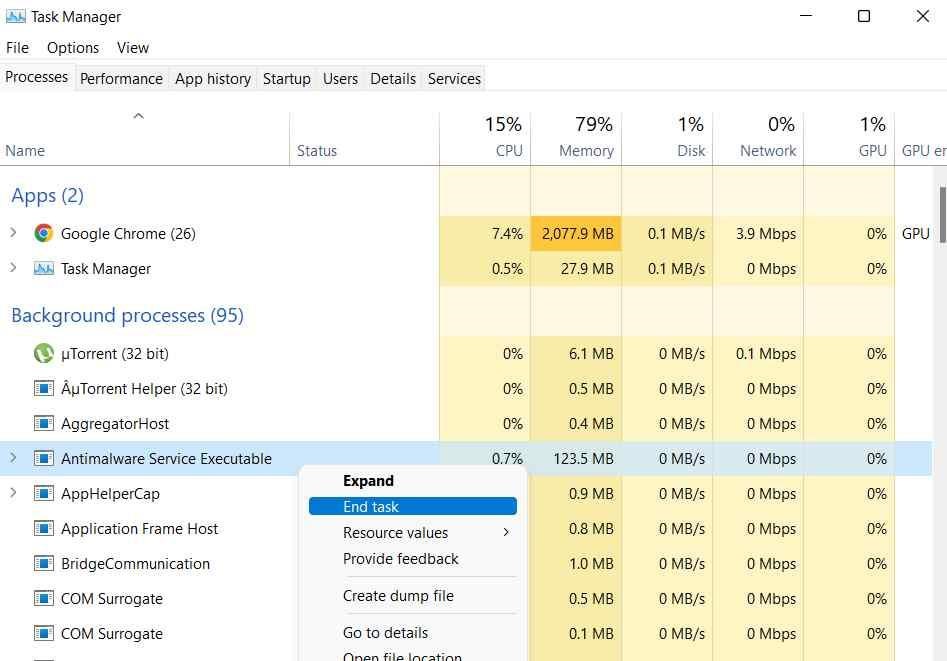
There, you can look for the programs using the USB drive. After that, right-click on the program and select End Task. Restart your device and check if you are unable to eject a USB drive on Windows 11.
Solution 3. Use the Disk Management Utility
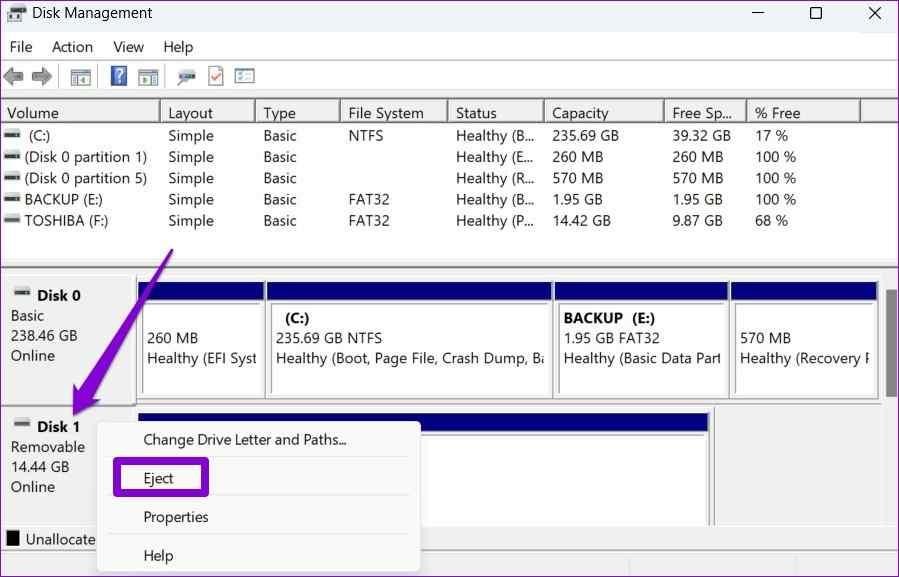
Windows provides various options to eject your USB drive securely. The Disk Management utility is another easy way to eject a USB drive. Here’s how you can do that:
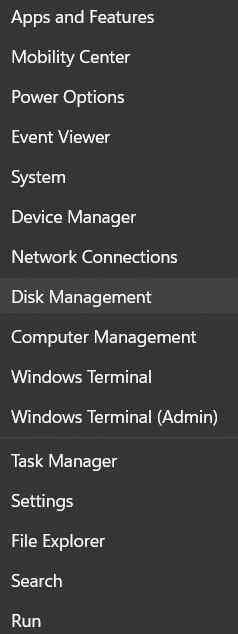
Step 1. Right-click on the Windows icon from the Taskbar and choose Disk Management.
Step 2. On the Disk Management window, right-click on the USB drive you want to remove and select Eject. Then, restart your computer to fix the issue.
Solution 4. Use the Settings App
You can also use the default Settings app on Windows 11 to eject the USB drive. Follow these steps to safely eject your external hard drive from the Settings app:
Step 1. Click on the Windows icon and select Settings.
Step 2. Go to the Bluetooth and Devices category from the left pane.
Step 3. Click on the Devices.
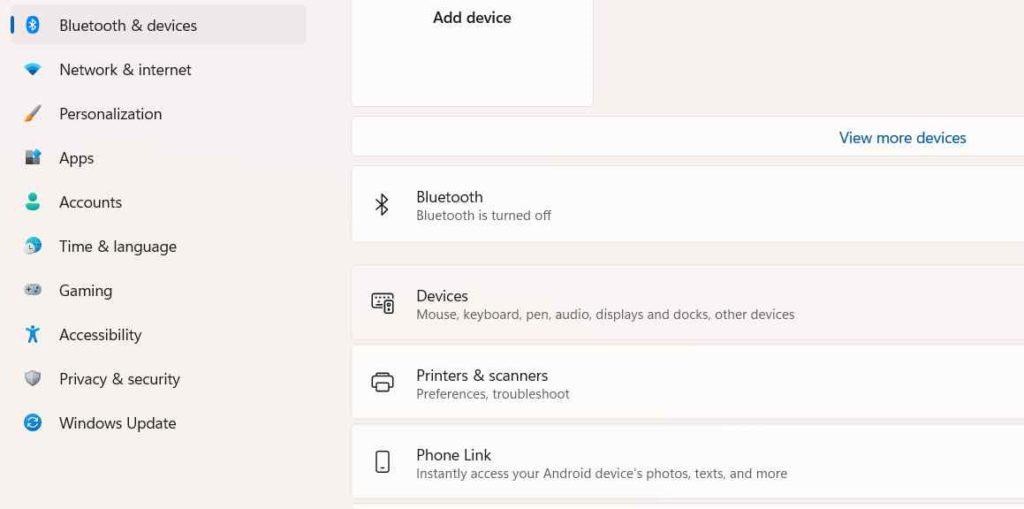
Step 4. Tap on the three-dot icon next to the USB drive and choose the Remove Device option. Press the Yes button to confirm your action.
Solution 5. Use the Safely Remove Hardware
Windows Safely Remove Hardware is the best option to eject the USB drive safely. Simply press the Windows and R keys to open the Run dialogue box.
Enter the following text in the search field:
RunDll32.exe shell32.dll,Control_RunDLL hotplug.dll
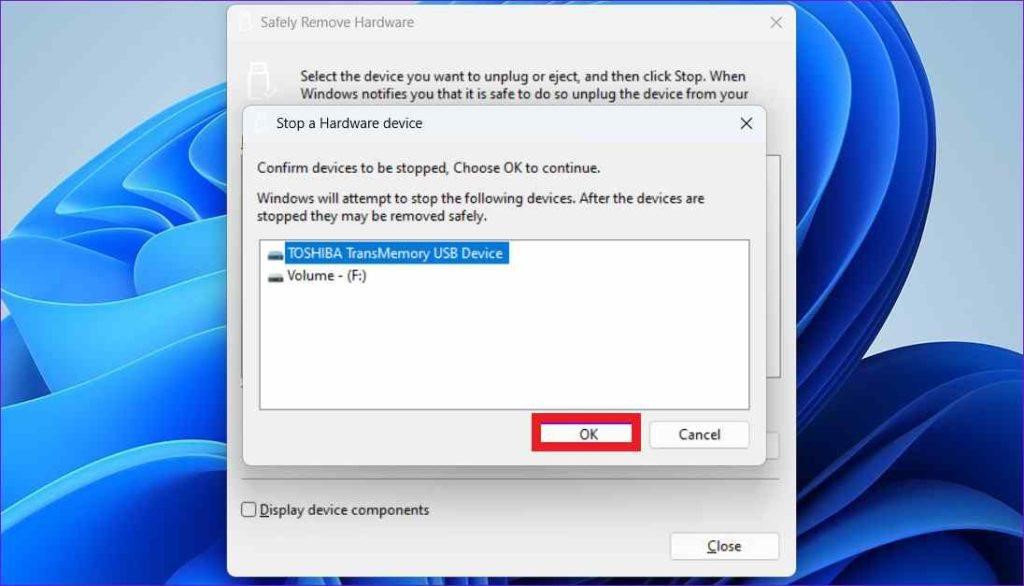
You can now see the Safely Remove Hardware window. Select the USB drive you want to close and hit the Stop button. Press the OK button to confirm.
Solution 6. Use the Device Manager
The Device Manager app is also easy to eject your external hard drive. Follow these steps when you are unable to eject the USB drive on Windows 11:
Step 1. Press the Windows and R key combo to open the Run dialogue box.
Step 2. Type devmgmt.msc in the text field and hit Enter.
Step 3. Once the Device Manager window opens, select Disk Drives.
Step 4. Right-click on the USB drive you want to eject and click on Properties.
Step 5. On the Properties window, move to the Policies tab.
Step 6. Select Better Performance and press the OK button. Reboot your computer before ejecting the USB drive.
Solution 7. Hardware and Devices Troubleshooter
Windows troubleshooting helps you fix most hardware device-related issues with a click. Here’s how you can run the Hardware and Devices Troubleshooter on Windows 11:
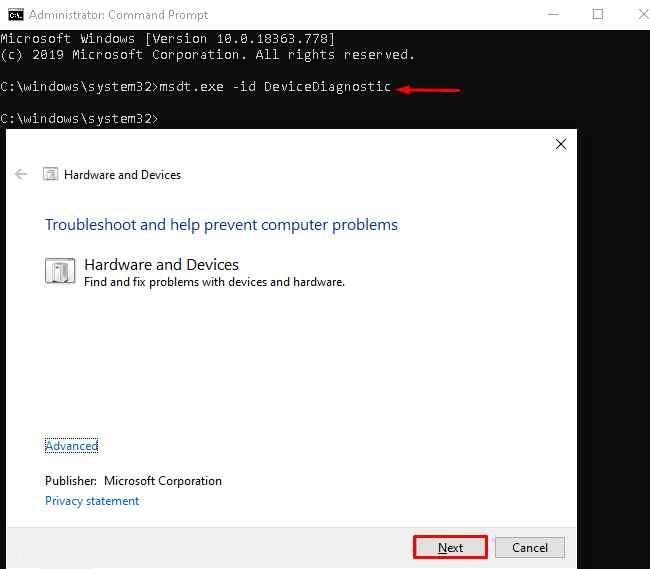
Step 1. Click on the search field in the Taskbar and type the command.
Step 2. Launch the Command Prompt program in admin mode.
Step 3. On the Command Prompt window, enter the following command to run the Hardware and Devices Troubleshooter:
msdt.exe -id DeviceDiagnostic
Step 4. Press the Next button on the Hardware and Devices window to run the troubleshooter.
Step 5. Wait for a few minutes for a troubleshooter to detect and fix the potential problems. Once the process is completed, restart your computer before trying to remove your external device.
Solution 8. Update USB Drivers
Outdated or corrupted USB drivers on your computer can make it impossible to safely eject the USB drive. So, the best solution is to update your USB disk drivers as follows:
Step 1. Press the Windows and X key combination to open the Power User menu. Select Device Manager from the list.
Step 2. Double-click on the Universal Serial Bus Controllers to expand the menu. Check if there is a yellow exclamation mark next to any entry.
Step 3. Right-click next to the entry with a yellow exclamation mark and select Update driver.
Step 4. Now, follow the on-screen instructions to update your outdated USB drivers.
Solution 9. Scan the External Hard Drive for Malware Attacks
People often make the mistake of connecting their USB drives to random devices. This can infect your USB data and conflict with the safe ejection on your device.
Thus, never attach your USB drive to unsafe PCs. Also, frequently scan your external hard drive for malware infections.
Here’s how you can scan your USB drives using Windows Defender:
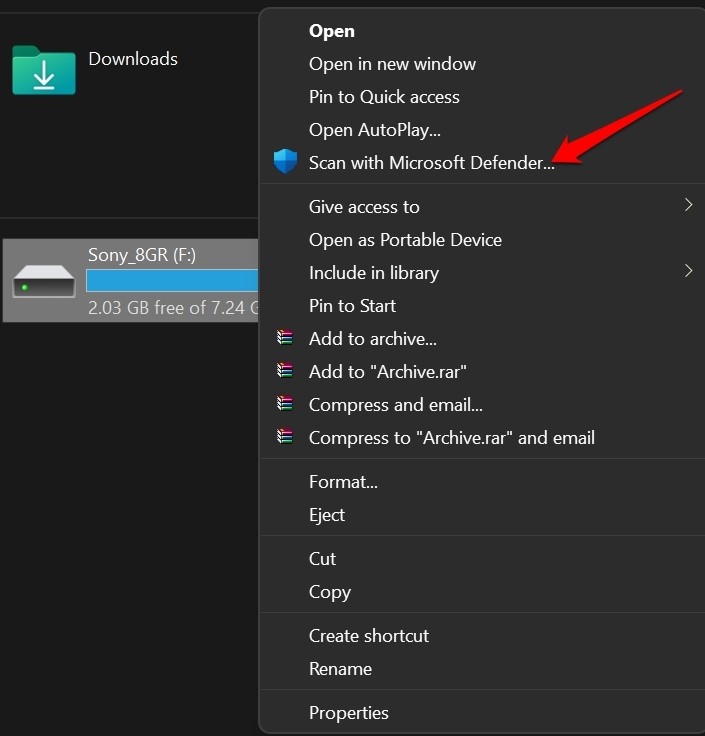
Step 1. Go to This PC and right-click on the USB drive you want to scan for malware.
Step 2. Click on the Show More Options.
Step 3. From the pop-up menu, select the Scan with Microsoft Defender option. Wait for a few minutes to complete the entire external device check-up. If there is an infection, you can fix it to safely eject your USB.
Apart from Microsoft Defender, many other antivirus solutions for Windows are available, like McAfee, Norton, etc. You use a third-party tool to secure your computer and external hard drive.
Parting Note
There you have it, people! Finally, you know what to do when you are unable to eject a USB drive on Windows 11.
First, you should start restarting your computer or scanning for malware on the USB. If it doesn’t work, you can gradually try to update your USB drivers or run a troubleshooter.
However, you can comment if you get stuck somewhere, and our team will definitely help you. For more technical solutions, keep on following this website.
FAQs
Q1. Why can’t I eject my USB drive in Windows 11?
Windows may still be using the drive. A file might be open in the background. File Explorer could be accessing it. Antivirus scans can also block ejection. Even hidden processes may keep the drive active.
Q2. Is it safe to remove a USB drive without ejecting it?
Sometimes yes, but it is risky. If no files are being copied, damage is less likely. Still, data loss can happen. Cached writes may not finish. Ejecting is always safer when possible.
Q3. Will restarting my PC help eject the USB drive?
Yes, often it does. A restart closes all active processes. It releases the USB drive. After the restart, you can unplug it safely. This is a simple and effective fix.
Q4. How can I force Windows 11 to release a USB drive?
Close all files linked to the USB first. Shut File Explorer windows that show the drive. Open Task Manager and end unused apps. This often releases the lock. If it still fails, sign out or restart Windows. These steps safely clear hidden processes.
Q5. Does using “Safely Remove Hardware” really matter in Windows 11?
Yes, it still matters. Windows may cache data in the background. Removing the drive too early can corrupt files. Safely Remove ensures all read and write tasks stop. It protects both the drive and the data stored on it.
Q6. What should I do if this problem keeps happening?
Check the USB for errors. Use the built-in scan tool. Update USB and chipset drivers. Avoid unplugging during transfers. If issues continue, the drive may be failing. Replace it after backing up your data.
Author Bio:
Dinesh Lakhwani 

Dinesh Lakhwani, the entrepreneurial brain behind “TechCommuters,” achieved big things in the tech world. He started the company to make smart and user-friendly tech solutions. Thanks to his sharp thinking, focus on quality and the motto of never giving up, TechCommuters became a top player in the industry. His commitment to excellence has propelled the company to a leading position in the industry.
Popular Post


Recent Post

How To Change Default Apps For File Types In Windows
Windows is designed to make using your computer easy. One way it does this is by assigning default apps to different file types. This means when you open a file, Windows automatically opens it with a specific program. For example, photos may open with Photos, music with Groove Music, and PDFs with Edge. These default […]

How To Adjust The Mouse Pointer Speed: Complete Guide
Using a computer every day means you use the mouse a lot. The mouse pointer moves on the screen and helps you click, scroll, and select items. Many people never think about the speed of the mouse pointer. They have used the default setting for years. This can cause small problems over time. A slow […]

How to Change Mouse Scrolling Settings In Windows
A mouse is one of the most used computer tools. People use it every day. They scroll through emails. They scroll through documents. They scroll through websites and images. The movement becomes automatic. Most users do not notice it. That is why problems often go unnoticed. Scrolling problems show up slowly. At first, it feels […]

Keyboard Light Settings: Keyboard Lighting Control [Complete Guide]
Keyboards are no longer simple typing tools. Well, yes! Over time, they have evolved to include features that improve comfort, visibility, and overall experience. One of the most useful features today is keyboard lighting. It helps users work comfortably in low-light conditions. It also reduces strain when typing for long hours. Many users first notice […]

Customizing Pointer Appearance: Complete Guide
The way your mouse pointer looks on your computer may seem like a small detail. But customizing pointer appearance can make using your PC more comfortable and visually appealing. Many users do not realize that they can change the pointer size, color, and style to fit their needs. Whether you want a bigger pointer for […]

How To Choose a Computer Monitor: Monitor Buying Guide
Buying a monitor looks easy. Many people think all screens are the same. That belief causes regret later. A monitor is not just a display. It is a daily tool. You read on it. You work on it. You relax with it. Small problems become big over time. Poor brightness hurts eyes. Bad size causes […]

How To Get Help With File Explorer in Windows 11 [Complete Guide]
File Explorer is one of the most important tools in Windows 11. It is used to open folders, view files, and manage stored data. Almost every action on a Windows computer depends on it in some way. When users open documents, save downloads, or organize photos, File Explorer is always involved. Because it is used […]

How To Fix A Frozen Computer: Complete Guide [Windows 11/10]
A frozen computer is one of the most common problems Windows users face. The screen stops responding. The mouse pointer does not move. Keyboard inputs do nothing. You may hear the fan running loudly. Sometimes the system looks alive, but nothing works. This situation often happens when you are busy or working on something important. […]

How to Upgrade Computer RAM: Complete Guide
Upgrading RAM is one of the simplest ways to improve a computer. It helps the system feel faster and smoother. Apps open quicker. Browsers handle more tabs. Games and tools run with less delay. Many users search for how to upgrade computer RAM because it gives real results without high cost. You do not need […]

How To Clean Your Computer Keyboard: Complete Guide
A computer keyboard is touched more than almost any other device you own. It is used during work, study, gaming, and casual browsing. Fingers carry natural oils, sweat, and dirt. Small food crumbs fall between keys without notice. Dust settles each day slowly. Over time, this creates a hidden layer of grime. Many users do […]

