How To Connect a Scanner to Your Device Windows 11 In 2026
Have you ever needed to scan a document in a hurry and did not know how to begin? Many people face this problem when they buy a new scanner or a new computer. Windows 11 includes helpful tools that make the process easy, but you must know the right steps.
This guide explains each method in a clear way. You will learn how to set up your scanner, how to scan documents without trouble, and how to pick the right method for your situation. With these steps, you can soon manage your work in a smooth and confident way.
Important Precautions Before You Begin: Connect Scanner to PC
Before you start, it is wise to make sure your setup is ready. A few simple checks can prevent problems and save time. This short preparation also protects your scanner from damage and keeps your computer safe.
Here are a few points to keep in mind:
- Check your cables: Look for loose or damaged wires. A faulty cable can stop the scanner from working.
- Place the scanner on a steady surface: A stable surface prevents vibration. This helps the scanner capture clear images.
- Update Windows first: New updates fix old problems. They help the system detect your scanner faster.
- Scan for malware: A clean system runs better. It also prevents conflicts with scanning software.
- Clean the scanner glass: Dust or fingerprints affect the scan quality. A soft cloth will help.
- Check for driver support: Some scanners need special drivers. Make sure they match Windows 11.
- Avoid using USB hubs: Many hubs do not support scanners well. Connect directly to your computer.
- Keep your Wi Fi signal strong: For wireless scanners, a weak signal can interrupt the scan.
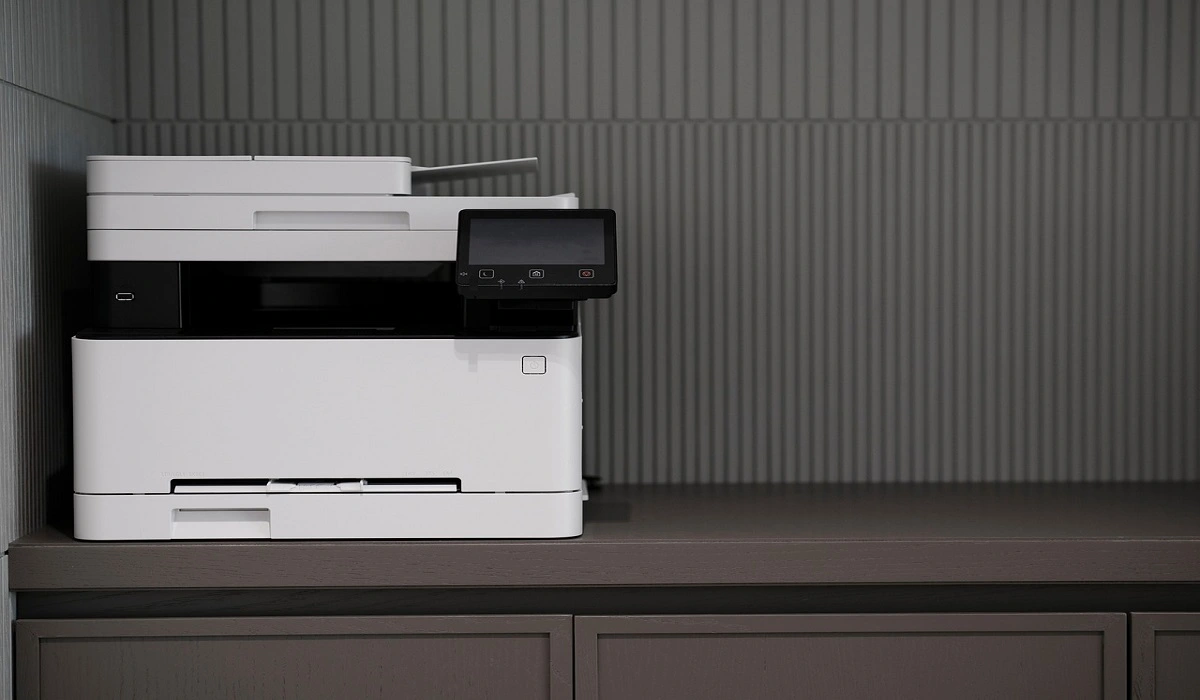
How To Connect a Scanner to Your Device in Windows 11
You can connect your scanner in several ways. Windows 11 supports USB, Wi Fi, and software based scanning tools. Each method has its own benefits. You can pick the one that matches your device and daily work.
Method 1: Connect via USB and Use Windows Settings
When you want the simplest setup, choose a direct USB connection. This method works well for home users and small offices. It avoids network issues and gives a steady link between the scanner and your computer.
A USB connection is also useful when your scanner is older. Many older models work best with a wired link. This method is also helpful when the Wi Fi around you is slow or unstable. It gives you full control with very little setup time.
When to use this method:
- You want a simple and quick setup
- Your Wi Fi signal is weak
- You prefer a stable connection
- Your scanner is an older model
Steps:
Step 1. Connect the USB cable from your scanner to your computer and turn the scanner on.

Step 2. Open Settings, go to Bluetooth and Devices, select Printers and Scanners, and add your scanner.
Method 2: Connect Wirelessly via Wi Fi
A wireless connection gives you more freedom. You can place your scanner anywhere in the room and still use it from your computer. Many modern scanners support Wi Fi and link to your network in a short time.
A wireless setup is helpful in shared work areas. Several people can scan documents without passing cables around. It is also useful if your computer sits far from the scanner. Windows 11 can find wireless scanners once they join the same network.
When to use this method:
- You want to scan without cables
- You plan to share the scanner with others
- Your device supports Wi Fi with a good range
- You want a clean and open workspace
Steps:
Step 1. Use the scanner control panel to connect it to your Wi Fi network.

Step 2. Open Settings, go to Printers and Scanners, and add your scanner from the list.
Method 3: Install Manufacturer Software or Drivers
Some scanners work best with special tools from the manufacturer. These tools often include useful features like color correction, advanced scan modes, and clear file options. Installing these can help your scanner perform at its best.
This method is helpful when Windows does not detect your scanner at once. The driver software helps Windows understand how the device works. Once installed, scanning becomes smoother and more reliable.
When to use this method:
- Windows does not detect your scanner
- You need special scan features
- Your scanner is a professional model
- You want the highest scan quality
Steps:
Step 1. Visit the official website of your scanner brand and download the Windows 11 driver.

Step 2. Install the software, restart your computer, and add the scanner again.
Also, please read this guide on how to update drivers installed on your computer to keep your PC performing at its best.
Method 4: Use Windows Fax and Scan or the Scan App
Windows includes built-in tools that help you scan documents without extra software. Windows Fax and Scan works well for simple tasks. The modern Scan app gives a clean design and supports most scanners.
These tools are helpful when you want a simple workflow. They work with both USB and wireless scanners. Once the scanner is added to the system, you can start scanning with only a few clicks.
When to use this method:
- You want a built-in tool with a simple layout
- You do not want to install extra software
- Your scans are basic documents
- You share your computer with others
Steps:
Step 1. Open the Windows Fax and Scan app from the Start menu.
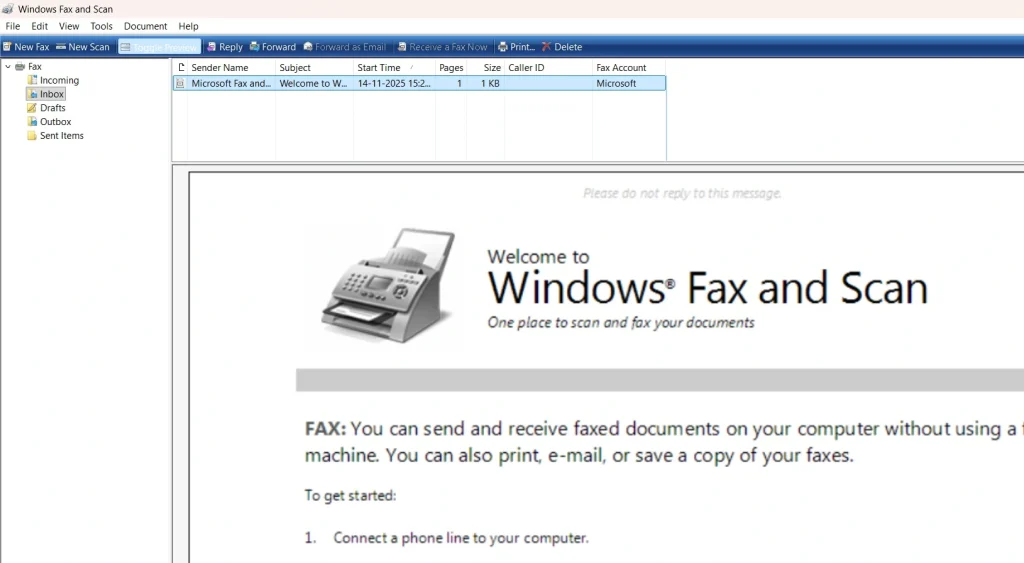
Step 2. Choose your scanner, select your file type, and start the scan.
Tips for Both Advanced Users and Beginners
Scanning can feel simple or advanced depending on your needs. Some users scan once in a while. Others handle many files each day. These tips help both kinds of users work faster and avoid common issues.
You can follow them at any time. They save time and keep your scanner working well. They also help Windows recognize your device without trouble. With these tips, both new and experienced users can enjoy a smooth scanning experience.
- Use a high DPI only when needed: High DPI gives clear images but creates large files. Choose it only for photos or detailed scans.
- Create a fixed folder for saved scans: A single folder keeps everything organized. It also helps you find files quickly.
- Restart the scanner when Windows cannot detect it: A quick restart fixes many small issues.
- Use the scanner preview feature: This helps you select the right area and avoid scanning mistakes.
- Avoid scanning over a weak network: Slow Wi Fi can stop the scan halfway. A strong signal keeps the process smooth.
- Check the scanner firmware once in a while: Updates can improve speed and fix small bugs.
- Avoid touching the scanner glass: Fingerprints create marks on scanned pages. Keep it clean for better results.
- Store your scanner in a dry place: Moisture can damage internal parts and affect the scan quality.
Conclusion
Anyone can learn to connect a scanner to a Windows 11 device by following clear steps. The system includes easy tools, and most scanners work well once they are set up the right way. Start with a simple method and move to advanced methods only if you need them.
Your scanner can handle many tasks, from office documents to family photos. With the right setup, you can scan quickly and keep your files organized. If you repeat these steps in the future, the process becomes even easier. You will soon feel confident each time you want to connect a scanner to your Windows device.
FAQs
1. Why is my scanner not showing up in Windows 11?
New users often expect Windows to detect the scanner at once. When this does not happen, it can feel confusing. The usual cause is a driver issue or a loose cable. Restart the scanner first, check the cable or Wi Fi link, and install the latest driver from the manufacturer. After that, add the scanner again through Settings. This solves the problem in most cases.
2. Why does my scanned image look blurry or unclear?
Many people worry when their scans look faint or unclear. The cause is often a dusty scanner glass or a low DPI setting. Clean the glass with a soft cloth and select a higher DPI for detailed scans. Make sure the document sits flat. After you adjust these points, your scan should look sharp again.
3. Can I use the same scanner on two computers?
Yes, but the method depends on your scanner type. A USB scanner works on only one device at a time, so you must move the cable each time. A Wi Fi scanner can stay on the same network and work on several devices. Install the right drivers and add the scanner on each computer. This setup helps many users share one scanner in an easy way.
Author Bio:
Dinesh Lakhwani 

Dinesh Lakhwani, the entrepreneurial brain behind “TechCommuters,” achieved big things in the tech world. He started the company to make smart and user-friendly tech solutions. Thanks to his sharp thinking, focus on quality and the motto of never giving up, TechCommuters became a top player in the industry. His commitment to excellence has propelled the company to a leading position in the industry.
Popular Post


Recent Post

How To Check If Your PC Is Infected? [Complete Guide]
Computers now sit at the center of almost everything we do. Well, yes! From sending emails to watching videos, we depend on them without much thought. Because of this, even a small issue can disrupt daily tasks. One common problem is hidden malware. It does not always show clear signs at first. It can enter […]

Repair Apps And Programs: Repair Apps That Aren’t Working
Computers have become an essential part of everyday life, supporting work, study, communication, and entertainment. Most of these activities rely on apps and programs, so when one stops functioning, even simple tasks can be disrupted. Common problems include error messages, frozen screens, or apps that fail to open. On Windows systems, such issues often arise […]
Troubleshooting Microphone Privacy Settings: Complete Guide
Sound is a basic part of how we use computers today. People attend meetings, record audio, speak to others, and use voice tools almost every day. A working microphone makes all these tasks easy. When the microphone fails, even simple work becomes difficult. Many users first think the device is broken. In reality, the issue […]
Windows Sound Settings – Sound Control Panel: Complete Guide
Sound plays an important role in how we use a computer every day. It supports both work and leisure. You need it for meetings, videos, music, and alerts. When audio fails, even simple tasks become difficult. Many users feel stuck when sound issues appear. This usually happens because they are not familiar with Windows Sound […]
Run a Troubleshooter For PC Issues Windows: Complete Guide
A computer plays an important role in everyday life. People use it for work, study, communication, and entertainment. When a problem appears, it can interrupt everything. Even a small issue can waste time and create frustration. Many users feel unsure about how to fix such problems. They often think they need expert help. In reality, […]
![Adjusting Audio Output Settings Complete Guide [2026]](https://www.techcommuters.com/wp-content/uploads/2026/03/Adjusting-Audio-Output-Settings-Complete-Guide.webp)
Adjusting Audio Output Settings: Complete Guide [2026]
Sound is part of almost everything we do on a computer. It lets you watch videos, join calls, play music, and hear alerts. When the audio stops working the right way, it can interrupt both work and daily use. That is why adjusting audio output settings matters for every user. Many people get unsure when […]

Artificial Intelligence Explained: Concepts, Terminology, Benefits, and Future Trends
Artificial Intelligence, or AI, is basically computers doing things that usually need a human brain. We’re talking about stuff like learning from experience, figuring out problems, understanding language, and making decisions. It’s not magic, just a lot of data, pattern-spotting, and math behind the scenes. Now, AI doesn’t actually think or feel like we do. […]

Resolving Microphone Detection Problems: Latest Guide [2026]
Microphones are important tools in daily life. People use them for office meetings, online classes, interviews, gaming, customer support, and content creation. When a system fails to detect a microphone, communication stops at once. This situation can cause stress and confusion. Many users believe the microphone is damaged. In reality, most problems are simple and […]
How To Switch To A Dark Background Theme In Windows [2026]
Most people spend many hours each day in front of a computer screen. Office work, online classes, editing, browsing, and streaming all require long screen time. A bright white background may look clean at first. However, over time, it can feel sharp and tiring. The strong contrast between white backgrounds and black text may cause […]
How to Switch From Local To Microsoft Account On Windows
Many users begin with a local account when they set up a new Windows computer. A local account works only on that single device. It stores settings, files, and preferences locally. It does not connect to online Microsoft services. For basic offline use, it works well. However, as digital needs grow, many users want better […]

