Review – Tenorshare 4DDiG- Best Data Recovery Software For Windows & Mac
Restore lost or deleted files from any storage media using Tenorshare 4DDiG.
Losing important files, images, videos, or for that matter any data is no fun. It leaves us all anxious, frustrated, and stressed. What’s worse, when we don’t have a backup and the same file is urgently required. This creates panic and makes you look irresponsible in front of seniors, customers, and clients.
If you are getting what I am saying or are stuck in a similar situation, no need to panic. There’s a way to recover such lost or deleted files. Using Tenorshare 4DDiG, the best recovery tool, you can retrieve all lost or deleted files from your computer and an external hard drive.
Data Loss Scenarios
Human Errors – Major reason for losing files is accidentally deleting them, emptying recycle bin or trash, formatting without taking backup, and pressing Shift+delete.
File Corruption – Situations like sudden power cuts, attacks, or system crashes are reasons for file corruption and this causes data loss.
virus
Natural Disaster – Unavoidable situations like earthquakes, thunderstorms might damage the system and make you lose data.
Hardware Failure – Lost partition, CPU overheating, no disk image are some of the common reasons for hardware failure and data loss
Review – Tenorshare 4DDiG – Popular data recovery tool to restore data lost due to any reason
Before we dive into details here’s an overview of the best data recovery solution from Tenorshare. Known as 4DDiG this data recovery software offers robust and advanced features. The product helps restore files that have been accidentally deleted, lost due to a cyberattack, or corrupt hard disk. It also shows a preview of scanned files and can be used by both Windows and Mac users.
Supported System
Operating System
- Windows 10,8.1,8,7
- macOS 10.10 and above
RAM (both Windows and macOS)
- 512 and more
Disk Space (both Windows and macOS)
- 200 MB and more free space
CPU (both Windows and macOS)
- 1GHz (32 bit or 64 bit) or above
Languages Supported

- English
- German
- French
- Italian
- Spanish
- Portuguese
- Russian
- Japanese
- Arabic
- Traditional Chinese & Simplified Chinese.
File System Windows –
- NTFS
- exFAT and FAT16/FAT32
File System Mac
- APFS
- NTFS and HFS+
Pricing

- Standard – $49.99
- Professional – $79.99
- Premium – $99.99
| Pros | Cons |
| Easy to use, user interface | No option to scan individual folders for data recovery. |
| Different data recovery modes to retrieve data lost due to any situations | Recovering larger files of more than 3GB is difficult |
| Quick scanning and lost file recovery | |
| Compatible with both Windows and Mac | |
| Efficiently scans external drives to get back lost data | |
| Does not interfere with the working of another program |
Highlights:-
1. Retrieve data lost due to any reason
Tenorshare helps restore data from a corrupt & damaged hard disk, files lost due to a virus attack, and even the information removed from Recycle Bin.
2. Restore files from any storage media
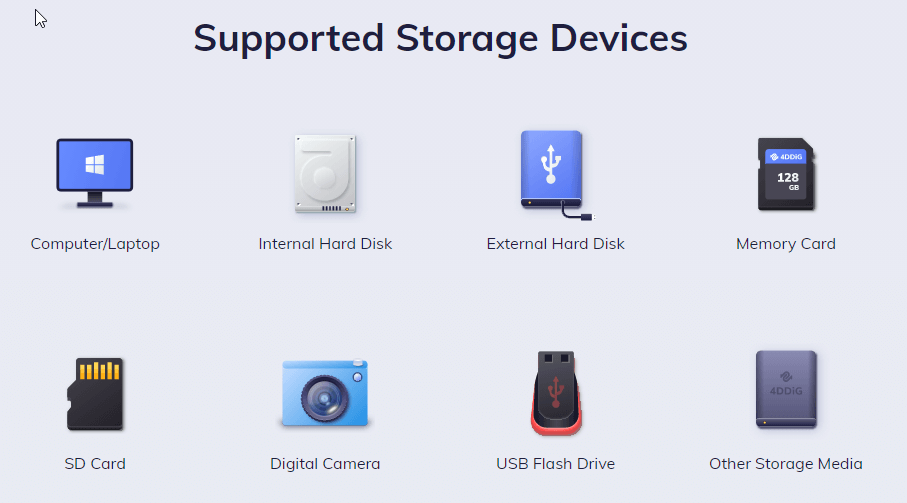
4DDiG recovery software helps get back lost and deleted files from different devices. Whether it be a formatted storage device, external hard drive, USB drive, or internal hard drive, the tool scans all and helps restore data. Using its Deep Scan option, users can easily scan all the partitions and can be sure they have all the lost files.
3. Recover media files
The data recovery tool helps retrieve audio, video, photos, and other media files from damaged storage media. You can restore pictures, videos directly from digital cameras. What’s more, Tenorshare 4DDiG can repair and restore broken or corrupt photos and video files.
4. Undelete different file types
Be it office documents, compressed files, RAR/ZIP, or system files like NTFS/FAT, 4DDiG helps recover all of them.
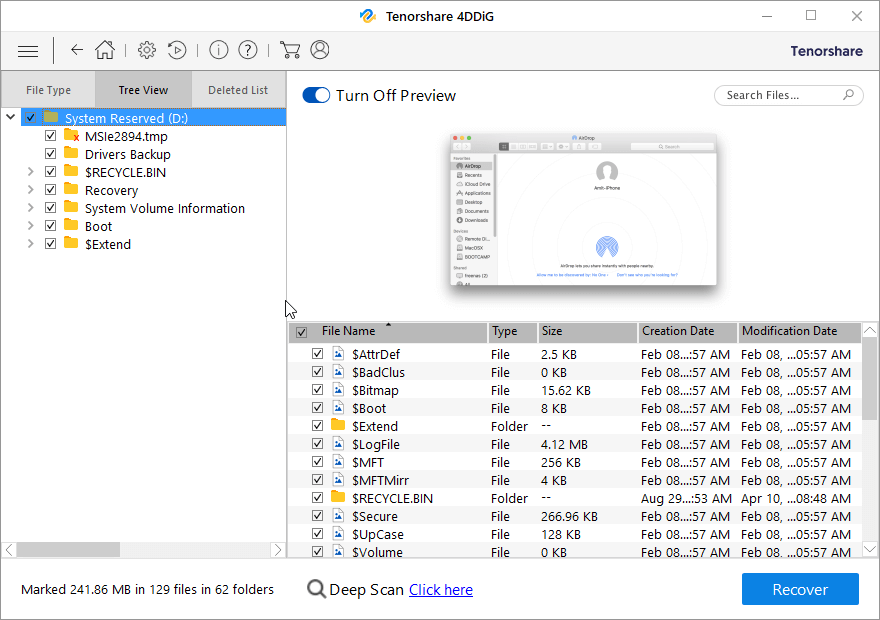
5. Preview scan results
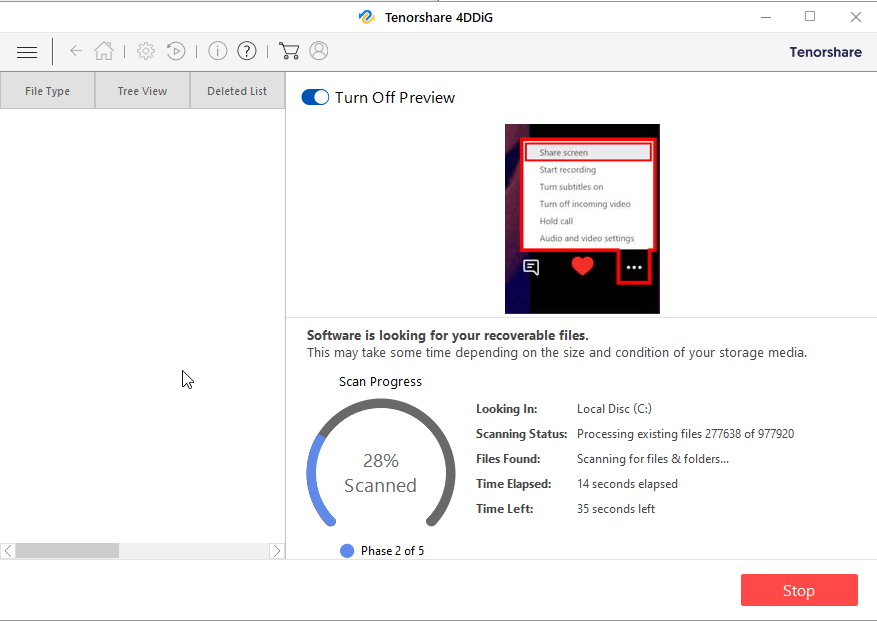
To make the recovery process easy, the recovery tool allows previewing files. This helps make better decisions and restore only those files that you actually want back.
6. Pause and resume scanning
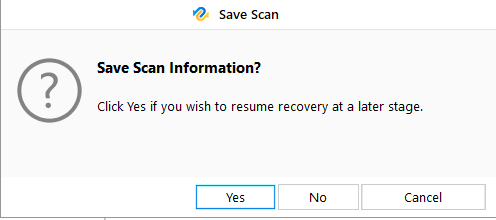
If you have some important work to do and don’t want to leave the system on, when you are not around, no issues. Stop scanning and resume it later whenever you want.
7. File Filter
Locate lost files by date and type or search for the file name using the search bar. This helps save a lot of time.
Tenorshare 4DDiG – User Interface
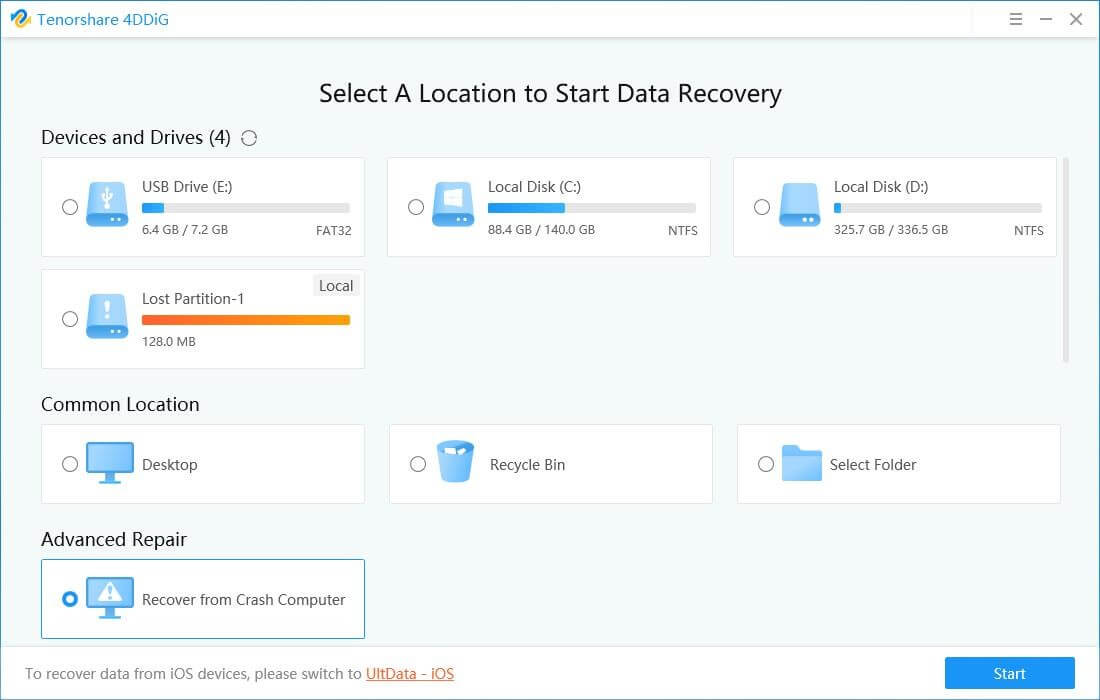
Tenorshare’s 4DDiG user interface is simple and easy to use. When the data recovery tool is launched, the Select What To Recover screen is displayed. From here using any of the three options you start the data recovery process.
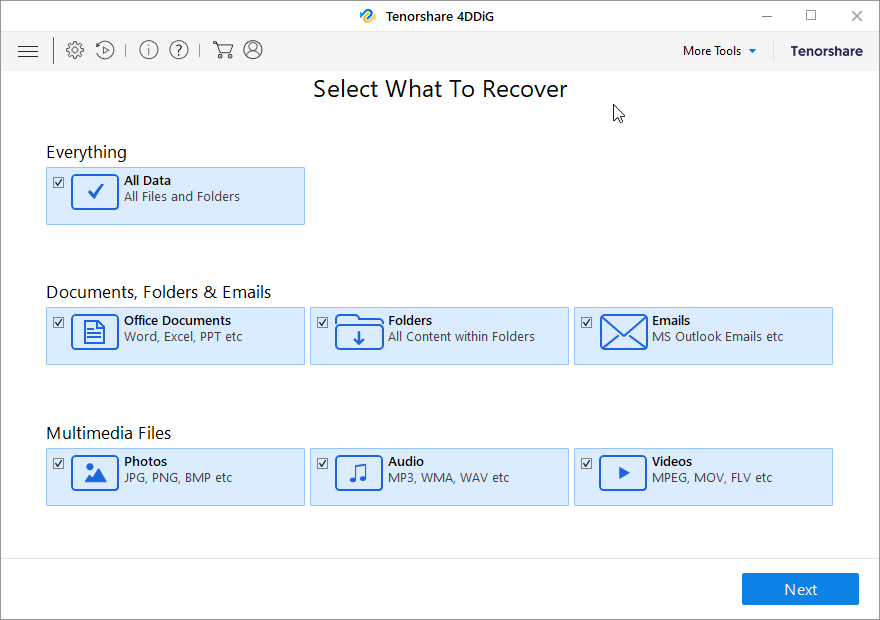
3 recovery options:
- Everything: use this option to restore data from the selected location or drive.
- Documents, Folders & Emails: recover office documents, files, folders, and emails using this option.
- Multimedia Files: lost photos, audio, and videos no worries. Use the Multimedia Files option and get going
To access additional features, click the More Tools button present at the top right corner of the Tenorshare 4DDiG welcome screen.
Brief Description of other buttons you see on Tenorshare 4DDiG:
| Menu | Show/hide the menu bar. |
| Advance Settings | Configure general, file types and recovery settings. |
| Resume Recovery | Resume data recovery. |
| About | Get details about the data recovery software. |
| Help | Access user guide using this button. |
| Buy Online | Buy the software online. |
| Activation | Register purchased version and enjoy restriction-free data recovery tool. |
| Back | Head back to the last screen via this button. |
| Home | Return to the main screen at any point. |
| Next | Go to the next window. |
| Scan | Start the scanning process. |
| Stop | Stop the scanning process at any time. |
| Recover | Save the scanned data. |
Select Specific Location or Connected Drive
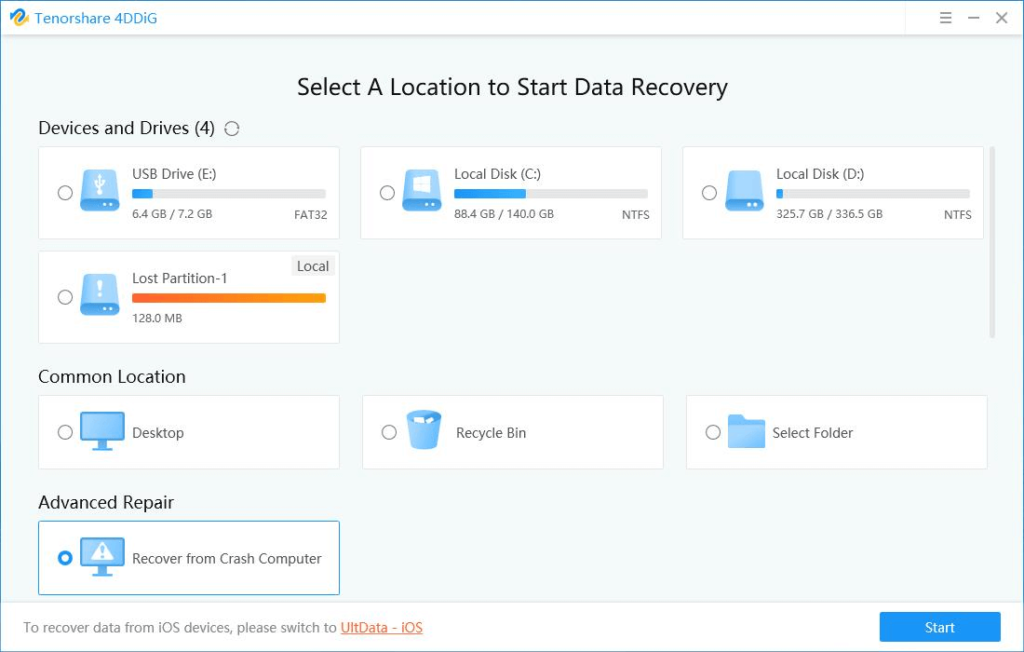
Once you click Next, you will see the Recovery From screen. From here, you can select any connected drive or a specific location on your hard drive.
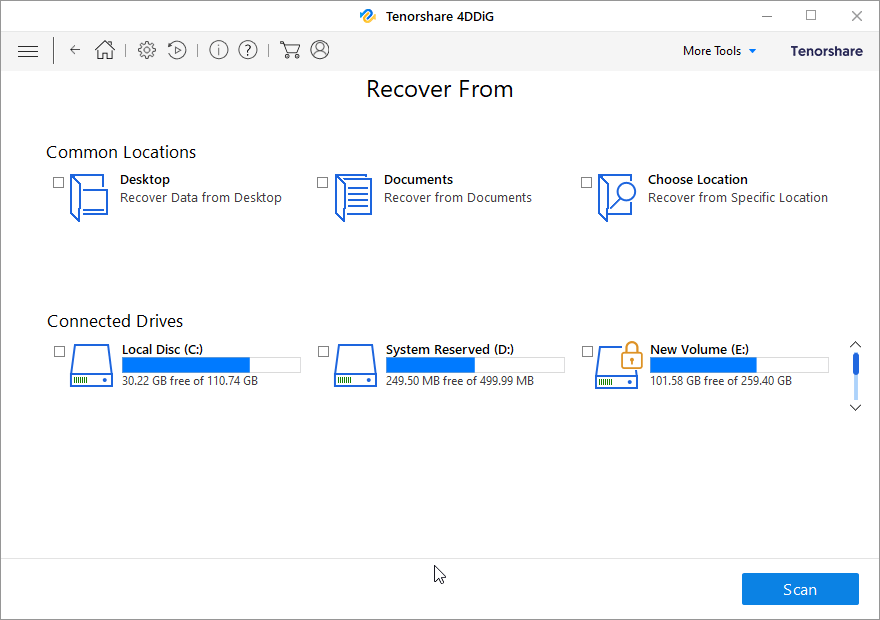
- Common Locations – Common Locations include Desktop, Documents, and Choose Location.
- Connected Drives – These include all the drives and external storage media connected to the system.
How to use 4DDiG Data Recovery Software?
Using 4DDiG Data Recovery Software is a three-step process.
- Download and install the data recovery software.
- Launch the tool > select the location to scan for lost data.
3. Preview scan results
4. Select the files to restore > select the location to restore the files and hit the Recover button.
What Makes Tenorshare the Best Recovery tool?
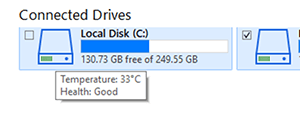
- Tenorshare 4DDiG displays the temperature and health details of connected drives. To view, hover the mouse cursor on the drive in the Recover From screen and you will get all the details as shown in the image below:
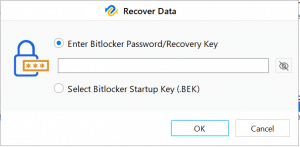
- Helps scan drive encrypted using BitLocker. When you try to scan a locked drive, the tool prompts you to unlock the disk and start the recovery process.
- Deep Scan option to thoroughly scan a drive and locate data that you were unable to locate during Quick Scan.

Tenorshare 4DDiG Worth Giving a Try
To sum up the review, we would like to say that the tool is worth giving a try. Using it you can restore a wide array of files lost due to any reason. Also, you can preview files before recovering them, this helps save time and disk space as only the required data will be put back on the disk. If you are looking for a comprehensive tool to recover any kind of data, Tenorshare is the choice for you.
We hope you find the information helpful and will give this tool a try. Looking forward to hearing from you about the tool and how it helped in retrieving lost or deleted files.
Popular Post
Recent Post
Importance of the Best Mirrorless Camera for Travelling
It can be difficult to find the best mirrorless camera for under 1000 dollars. This blog post discusses some of the best models on the market and provides a link to Amazon where you can purchase them. We are going to give you a couple of the best mirrorless cameras that are under 1000. We […]
How to Reset Network Settings on a Mac
Macs are usually always trustworthy, although you may experience issues attaching to the web or experiencing poor surfing speeds at times. The web may be operating well on your additional devices, which might be frustrating. That’s not always clear what’s causing an issue, or whether one exists at all. When you discover yourself in a […]
How to Create a Timeline in Google Slides
Timelines are an excellent method for displaying sequential listings of activities from start to end. It is a visual display of information that includes lists, charts, or visuals. A timeline is written down and organized in the same chronological sequence. A timeline is a smart method to condense information and better explain your brand using […]
How to Undo and Redo on a Mac
Almost every Mac software includes the option to implement an “Undo,” that would be, to overturn the previous action. Similarly, practically every single Mac software offers the capability to “Redo,” that would be, to completely upend the most recently undone operation. The Mac shortcut keys for doing Undo as well as Redo have always been […]
How to Increase Internet Speed on Windows 10
Internet connectivity is a mandated requirement for many routine works on Windows 10 systems. Whether it is some official work or personal work, having a smooth internet connection is important for both. However, internet connectivity is not so smooth for all Windows 10 users. This is due to multiple reasons like geographical issues, increased traffic, […]
How to upgrade to Windows 11 for free
Windows 11 offers the ultimate experience to the users and comes with multiple features. Hence, all devices require an updated version of Windows for seamless operations. Many times a user has to go to purchase the costly Windows 11. Due to the cost constraints, it is not feasible for all Windows users to purchase the […]
11 Best File Encryption Software for 2024
The finest encryption software enables keeping your files private and safe for security considerations, as well as protecting them against intrusion. When it relates to securing your data and documents, encryption software seems to have become increasingly vital. Hacking attempts and privacy breaches have made it simpler for total strangers to access the most private […]
How to record screen on Windows 10/11
Have you often pondered how to display your desktop on whether you’re a Windows 11,10 user or recently updated towards the beta windows version 11? It is a question that almost all of us have asked. Using a display capturing app is the most straightforward approach to record a screen. And TweakShot is one of […]
How to recover permanently deleted files in Windows 11?
Windows 11 is the leading operating system that is used on multiple systems globally. Many times users have the issue of recovering the permanently deleted files in Windows 11. There can be multiple reasons that may lead to the permanent deletion of files on this operating system. The good news is that technology helps the […]
How to Burn DVD on a Mac
Are you looking for a way to save movies on DVD, Blu-ray discs and share them with loved ones? You are at the right place; we will share steps to burn DVDs on Mac. Need of Burning Movies to DVD In pursuit of moving users to iCloud, Apple, for some years now, has been moving […]
