How to Use Split Screen on a Mac
Introduction:
In today’s fast-paced digital world, maximizing productivity is the key. Period. And being able to juggle multiple tasks seamlessly is a skill worth mastering. If you’re a Mac user looking to boost your multitasking abilities, you’re in luck. Apple’s macOS offers a powerful feature known as Split Screen, which allows you to effortlessly divide your screen real estate and work on multiple applications simultaneously.
Whether you’re a student trying to take notes while researching, a professional multitasking on a project, or simply someone who loves to optimize their workflow, understanding how to use Split Screen on Mac can be a game-changer. In this blog post, we’ll take you through the steps and techniques to make the most out of this powerful feature, ensuring you can tackle multiple tasks with ease.
What is Split View on Mac?
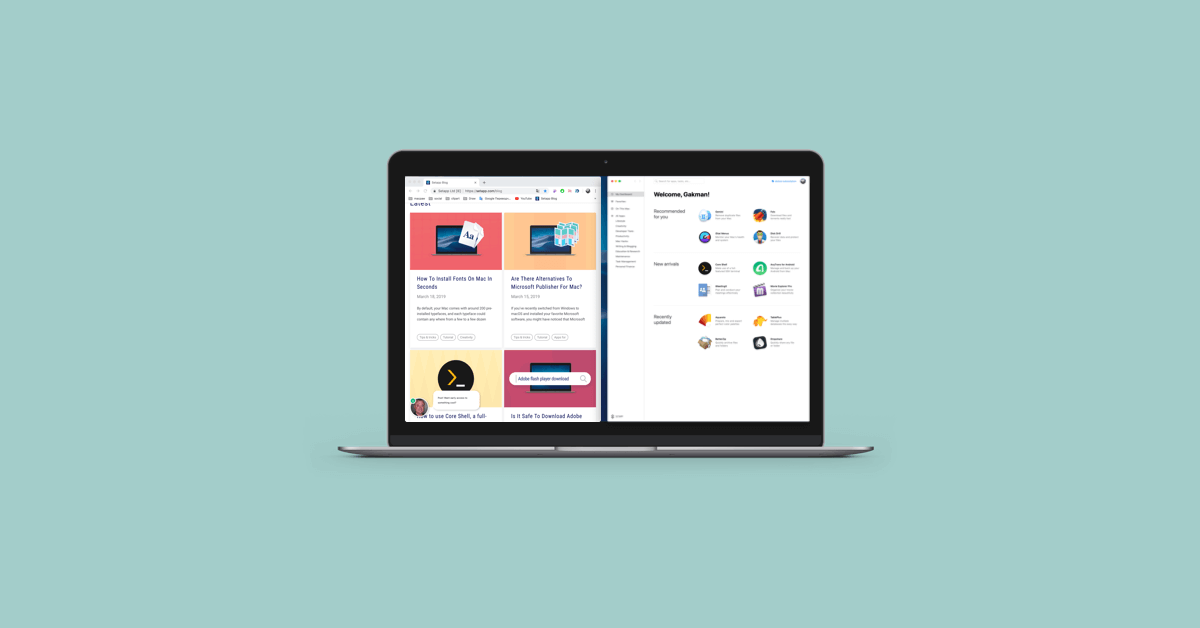
Split View is a feature available on macOS that allows you to divide your screen into two separate windows, displaying different applications side by side. It enables you to work on multiple tasks simultaneously, enhancing your productivity and streamlining your workflow.
With Split View, you can easily divide your screen space into different applications, enabling you to view and interact with them simultaneously without the need to constantly switch between windows. This split screen on MacBook feature is particularly useful when you need to reference information from one app while actively working on another, or when you want to compare and analyze data from different sources.
How to Use Split Screen on MacBook?
Using Split View on a Mac is straightforward and can be accomplished in a few simple steps. Here’s a step-by-step guide to use split screen on Mac:
- Open the applications you want to use in Split View: Ensure that the applications you want to work with are already open on your Mac.
- Enter Full-Screen mode: Click on the green button located at the upper left corner of the application window you want to use in Split View.
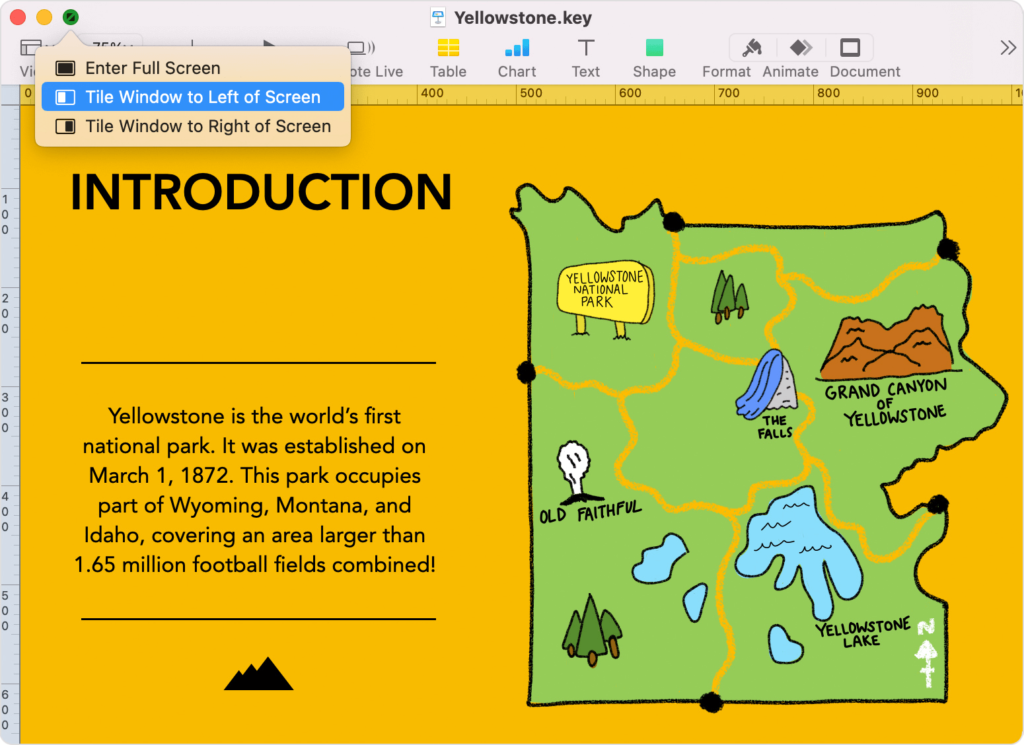
- Activate Split View: Once you’ve entered Full-Screen mode on the first application, move your cursor to the top of the screen to reveal the menu bar. You can either select “Tile window to left of the screen” or “Tile window to the right of the screen”, as per your preference.
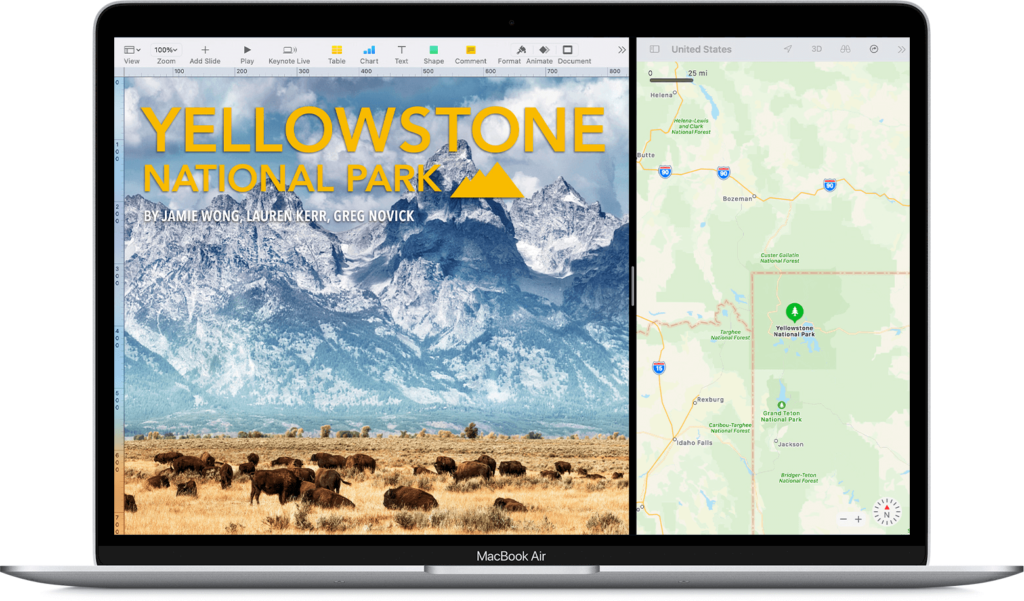
- Drag the second application to the other side: Click and hold on to the second application’s thumbnail and drag it to either the left or right side of the screen. Release the mouse button to drop the application into place.
- Adjust the Split View window size: You can adjust the size of each application window by positioning your cursor on the vertical divider between the two windows. Click and drag the divider to resize the windows according to your preference.
How to Switch Screens in Split View?
In Split View mode, managing and switching between screens becomes a breeze, allowing you to enhance your productivity. To switch screens, you have multiple options at your disposal. Firstly, you can simply click on the window you want to activate, instantly shifting your focus to that particular application. This straightforward method enables smooth transitions between different tasks.
If you prefer to rearrange the position of your windows within Split View, you can effortlessly switch their positions. By clicking and dragging a window from one side to the other, you can easily swap their locations.
How to Exit Split Screen View on Mac?
Exiting Split Screen on a Mac is a straightforward process. Here are a couple of methods to gracefully exit Split View:
- Tap on the green button: To exit Split View, move your cursor to the top of the screen and locate the green button on one of the windows. Clicking on this button will restore that particular window to its original size and exit Split View. The other window will automatically switch to full-screen mode.
- Keyboard shortcut: Another way to exit Split View is by pressing the “Esc” (Escape) key on your keyboard. This will immediately exit Split View and transition the windows accordingly. The window you’re currently focused on will return to its normal size, while the other window will expand to full-screen mode.
To access the full-screen window after exiting Split View, simply press the Mission Control button (F3) on your keyboard.
How to Use Split Screen on Mac Using Keyboard Shortcuts?
Do you want to know how to use the keyboard shortcut for Split View on a Mac? It’s simple! First, enter full-screen mode by pressing Control + Command + F. Once in full-screen mode, you can activate Split View using the F3 key to open Mission Control. Then, you can drag another application onto the full-screen app to create a split-screen view.
Finally, click on one of the windows to activate the Split View mode and start multitasking effortlessly. With these steps, you can quickly and easily enter Split View and make the most of your Mac’s capabilities.
Conclusion
Mastering the art of Split Screen on your Mac opens up a world of possibilities for efficient multitasking and increased productivity. In this blog post, we have explored the ins and outs of using Split Screen on Mac, from activating it to managing windows and switching between applications seamlessly.
By following the step-by-step instructions provided, you can make the most of the split screen view on macOS to enhance productivity and multitask efficiently.
Author Bio:
Dinesh Lakhwani 

Dinesh Lakhwani, the entrepreneurial brain behind “TechCommuters,” achieved big things in the tech world. He started the company to make smart and user-friendly tech solutions. Thanks to his sharp thinking, focus on quality and the motto of never giving up, TechCommuters became a top player in the industry. His commitment to excellence has propelled the company to a leading position in the industry.
Popular Post


Recent Post

Top 10 Bass Booster & Equalizer for Android in 2024
Overview If you want to enjoy high-fidelity music play with bass booster and music equalizer, then you should try best Android equalizer & bass booster apps. While a lot of these apps are available online, here we have tested and reviewed 5 best apps you should use. It will help you improve music, audio, and […]

10 Best Video Player for Windows 11/10/8/7 (Free & Paid) in 2024
The advanced video players for Windows are designed to support high quality videos while option to stream content on various sites. These powerful tools support most file formats with support to audio and video files. In this article, we have tested & reviewed some of the best videos player for Windows. 10 Best Videos Player […]

11 Best Call Recording Apps for Android in 2024
Whether you want to record an important business meeting or interview call, you can easily do that using a call recording app. Android users have multiple great options too. Due to Android’s better connectivity with third-party resources, it is easy to record and manage call recordings on an Android device. However it is always good […]
10 Best iPhone and iPad Cleaner Apps of 2024
Agree or not, our iPhones and iPads have seamlessly integrated into our lives as essential companions, safeguarding our precious memories, sensitive information, and crucial apps. However, with constant use, these devices can accumulate a substantial amount of clutter, leading to sluggish performance, dwindling storage space, and frustration. Fortunately, the app ecosystem has responded with a […]

10 Free Best Barcode Scanner for Android in 2024
In our digital world, scanning barcodes and QR codes has become second nature. Whether you’re tracking packages, accessing information, or making payments, these little codes have made our lives incredibly convenient. But with so many barcode scanner apps out there for Android, choosing the right one can be overwhelming. That’s where this guide comes in! […]

11 Best Duplicate Contacts Remover Apps for iPhone in 2024
Your search for the best duplicate contacts remover apps for iPhone ends here. Let’s review some advanced free and premium apps you should try in 2024.

How To Unsubscribe From Emails On Gmail In Bulk – Mass Unsubscribe Gmail
Need to clean up your cluttered Gmail inbox? This guide covers how to mass unsubscribe from emails in Gmail using simple built-in tools. Learn the best practices today!
7 Best Free Methods to Recover Data in Windows
Lost your data on Windows PC? Here are the 5 best methods to recover your data on a Windows Computer.

100 Mbps, 200 Mbps, 300Mbps? What Speed is Good for Gaming?
What internet speed is best for gaming without lag? This guide examines whether 100Mbps, 200Mbps, or 300Mbps is good for online multiplayer on PC, console, and mobile.

Top 10 Child-Friendly Browsers – Kids Friendly Web Browser
As parents, ensuring our children’s online safety and exposure to age-appropriate content is a top priority. With the vast expanse of the internet and its potential risks, finding a reliable and secure web browser for kids has become increasingly important. Fortunately, numerous developers have recognized this need and have created specialized Kid-friendly web browsers designed […]

