Your Mac Lags After the macOS Monterey Update? Here’s What to Do

Last updated on March 16th, 2024 at 10:27 am
If you have just upgraded your macOS Monterey 12 to find your Mac is also lagging, getting stuck, or running slow, you have come to the right place. Here we will discuss quick troubleshooting tips to get your Mac back on track.
Before we get into details, let us try to understand the root of the issue. Things you should be looking out for:
Hardware issues –
Overheating is one of the issues you may encounter on your Mac device. Closing background apps or quick system restart could help you fix the problem.
Software problems –
If you face slowdowns after updating to macOS Monterey and your Mac has not been optimized for a long time, try using CleanMyMac X.
The tool will help clean junk files, free up storage space, disable auto startup items, and a lot more.
Below we will explain more about the tool and easy fixes for a slow Mac.
Create a Backup –
Once you’ve identified the issue, move ahead to learn how to fix the problem. However, before you do any troubleshooting, take a backup of your data; this helps stay covered if anything goes wrong. You can use Time Machine to take a backup.
When will Apple release macOS Monterey 12?
Announced in WWDC on June 7th, 2021, macOS will be released on October 25th. Although it is not as big as BigSur, still it offers excellent features :
- Safari revamp
- Privacy-focused features
- Shortcuts app
- Live Text and Visual Lookup
- Universal control across devices
- Focus modes
- FaceTime upgrades – SharePlay, spatial audio & more.
Why is Monterey Slow?
If you wonder why Monterey is slow, like other macOS upgrades and updates, Monterey is no exception; it comes with its share of issues.
Luckily, we have got you covered, and in this post, we will discuss ways to speed up Mac. However, before getting into details, a quick note – Mac’s released before 2012 aren’t compatible with macOS Monterey.
Best Ways to Fix Mac Slow Performance Issues
1. Restart Mac
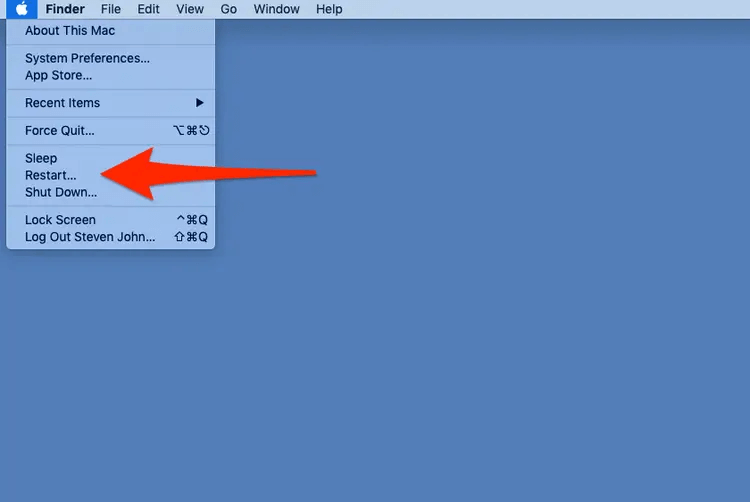
Even if this solution sounds mundane, it works in most cases. Hence, never overlook this one. If right after updating to Monterey your Mac is feeling slow, restart your Mac.
Since most apps and services keep running in the background, taking up unwanted memory and space, the best way to refresh RAM is to restart the device.
- Click the Apple logo.
- From the drop-down list, select Restart.
2. Check for free disk space
Let us face it; if you don’t have enough free disk space, you will undoubtedly meet freezing and stalling issues after upgrading to macOS Monterey .
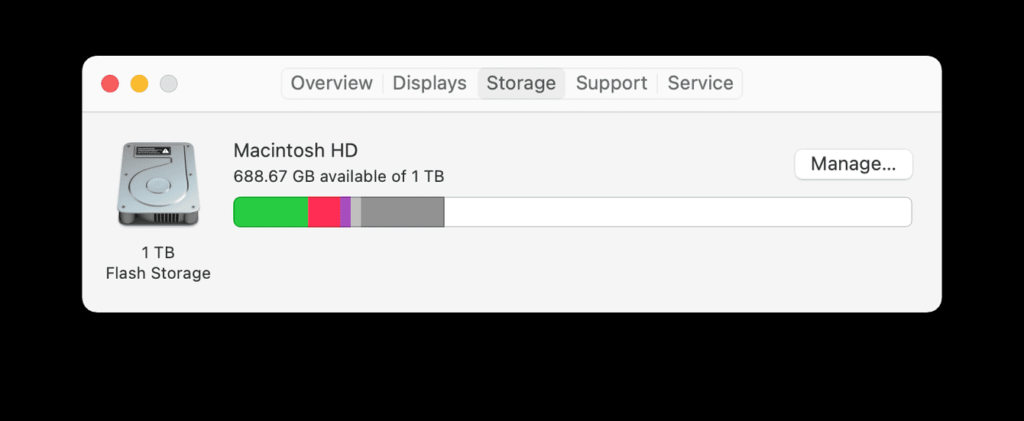
To check for available disk space, follow the steps below:
- Click the Apple icon > About This Mac > Storage
- Here you can see the available and consumed space.
If you have enough space, jump to the next step. However, if you are running short of space, try these fixes:
- Go to the Downloads folder and remove all old or partial downloads.
- Empty Trash.
- Get rid of duplicate data and move media files to external or cloud storage.
In case you don’t have time to delete the junk manually, try CleanMyMac X. The tool helps declutter your Mac and make space for essential data.
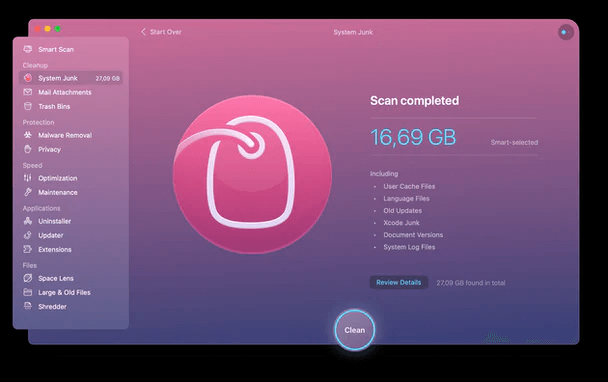
- Download and install CleanMyMac X
- Click System Junk from the left pane.
- Run the scan and clean all junk files.
This will help free up a good amount of space occupied by junk files.
3. Manage Storage with in-built tools
In addition to using a third-party app using Apple’s built-in tool, you can manage storage. To do so, follow these steps:
- Click the Apple icon > About This Mac > Storage
- Click the Manage button.
- Go through Apple’s recommendation and follow on-screen instructions.
This will help free up some amount of space.
4. Disable auto startup items & background apps
Another reason for slow Mac startup is too many apps running at boot time and in the background.
To fix it, you’ll need to disable unwanted startup items.
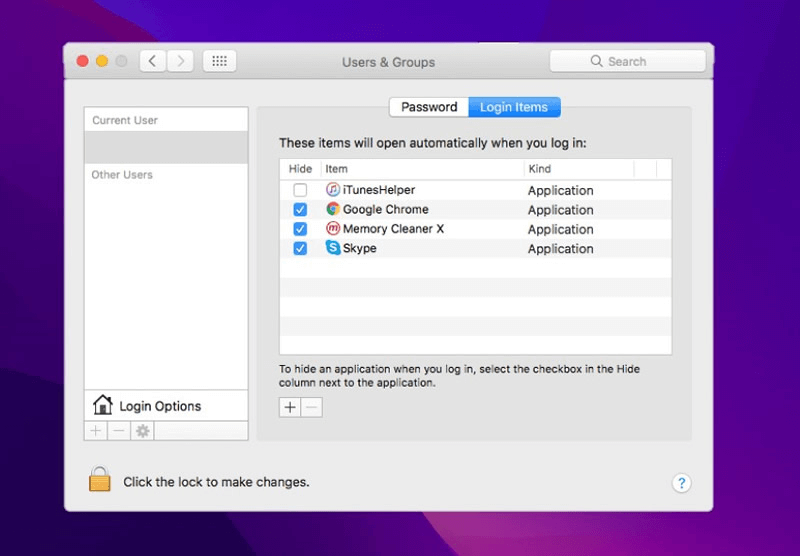
1. Click the Apple icon > System Preferences > Users & Groups
2. Select the username you are logged in with > Login items
3. To make changes press the lock icon when asked to enter the admin password
4. To remove/disable items> select it > click the – icon.
In addition to this, follow the steps below to close unwanted processes running in the background.
1. Go to the Finder window > Applications > Utilities > Activity Monitor.
2. Click the CPU tab > sort processes by %
3. Look for the application that takes the most amount of resources. If you don’t want it to run > select the application > press the X button at the top.
If all the above steps are overwhelming, you can try CleanMyMac X. The tool will notify you of a significant performance drop. Also, you can use it to uninstall unwanted apps that take up unnecessary space. To use it, follow these steps:
- Download and install CleanMyMac X
- Launch the tool
- Click Optimization under speed and run the scan.
- Go through the list of Login Items, Launch Agents, Hung Applications, and Heavy Consumers.
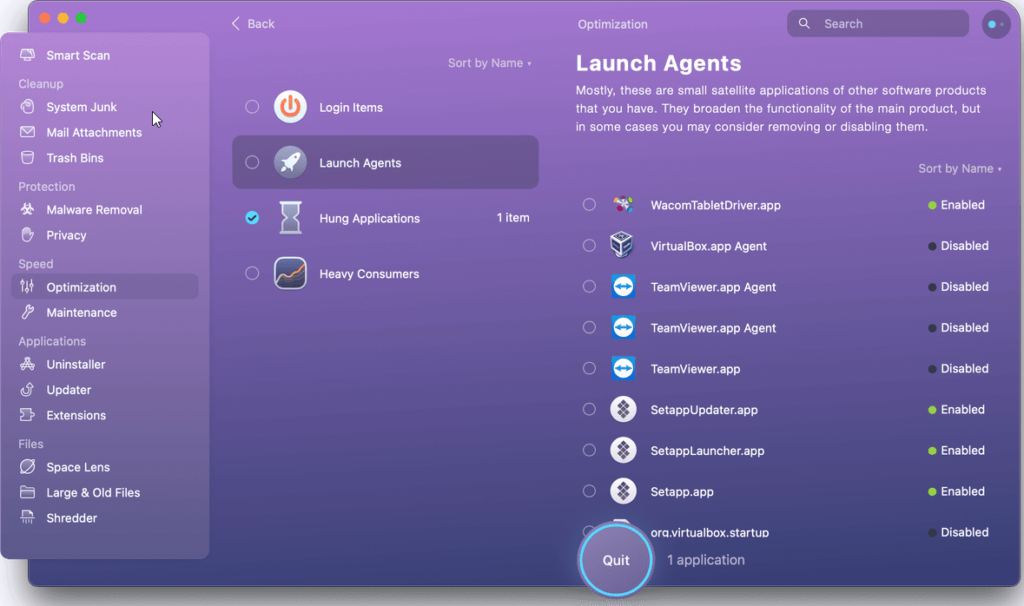
5. Disable apps you don’t want to run at boot time and get rid of Heavy Consumers.
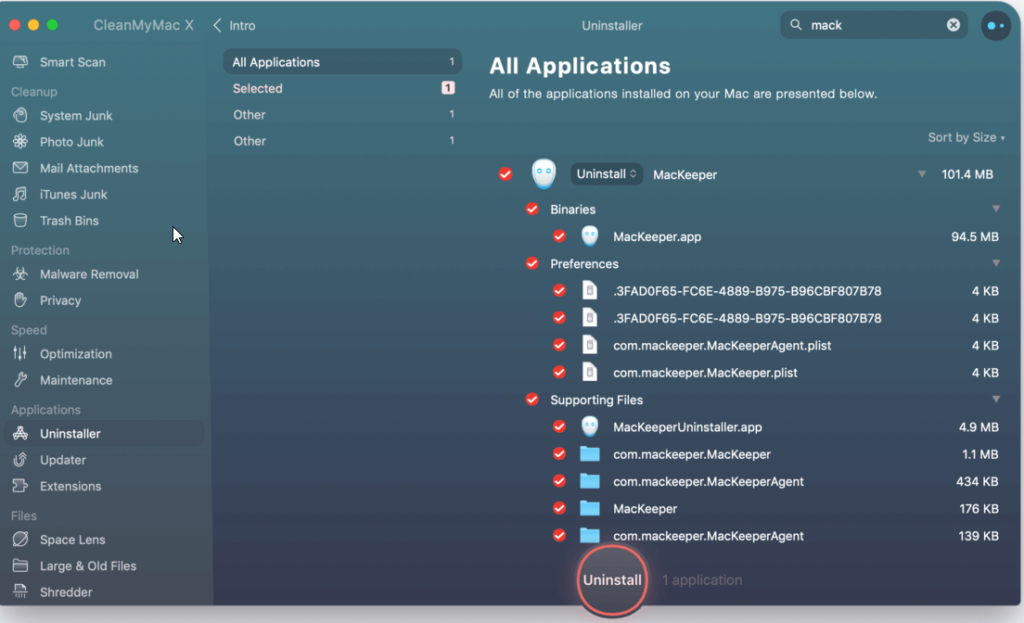
6. Once this is done, go to the Uninstaller module under Applications.
7. Run the scan
8. Select the unwanted applications and remove them from your Mac.
5. Adjust Visual Effects
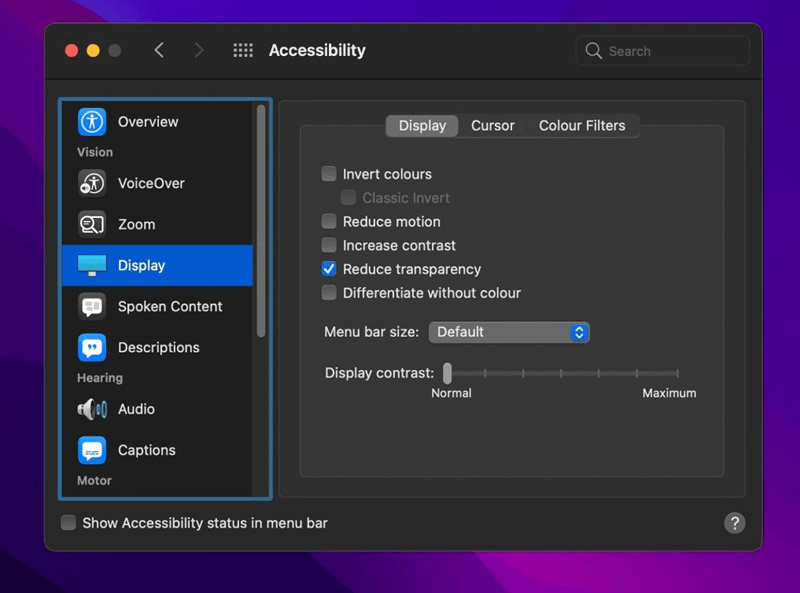
Transparency and motion visual effects are significant to work with, but they take up too many resources. Hence, to make the Mac run faster, we need to disable Reduce Motion and Reduce Transparency.
- 1 Click the Apple icon > System Preferences
- Accessibility > Display > Check the boxes next to Reduce Motion and Reduce Transparency.
6. Clear Cache
Whether it is macOS, Windows, Android, or iOS, Cache is a big part. Generally used to speed up processes, they take up unwanted storage space and decrease system performance when the cache files increase.
Note: We do not recommend clearing the System Cache as it might create specific issues with the functioning of the applications.
To do so:
1. Go to Finder > Go > Go to Folder > enter ~/Library/Caches path.
2. Select all cache files present in the folder and delete them.
Furthermore, clear Cache and Cookies saved in your browser.
7. Reset SMC/NVRAM
If none of the above solutions have helped, try resetting SMC (System Management Controller) and NVRAM (Non-Volatile RAM)
Reset SMC for MacBook Air, MacBook Pro, or MacBook:
- Power off the MacBook and detach the charging cable.
- Wait for 15 to 20 seconds and plug in the charging cable.
- Power on the Macbook by holding the left shift + Option + Control and Power keys for at least 10 seconds and unhold the keys as soon as your MacBook turns on.
Reset SMC
- Power off your Mac and detach the power cord.
- Wait for at least 15 to 20 seconds before attaching the power cable.
- Wait for another 5 seconds and power on your Mac.
Reset NVRAM
- Turn off your MacBook or Mac and wait for around 30 to 50 seconds.
- Now, start the Mac by holding down the Option + Command + P and R keys simultaneously.
Note: Follow the instructions carefully.
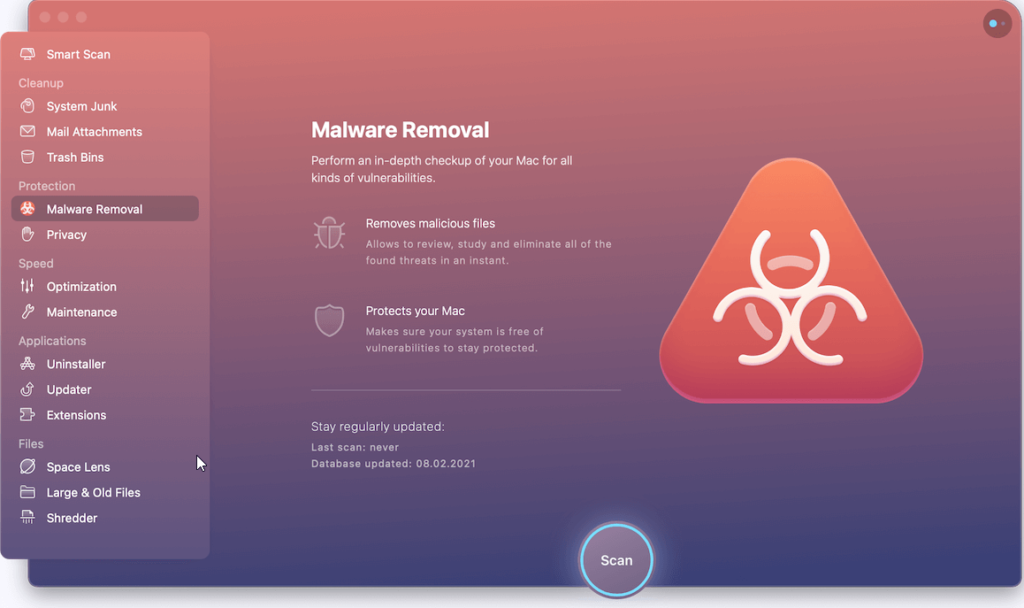
8. Clean Malware from your Mac
Another common reason for slow and sluggish Mac is malware. Even after following all the above steps, scan it for malware infection if your Mac is still slow.
To scan the system, you can use XProtect or even the Malware Removal tool provided by CleanMyMac X.
To use it, follow these steps:
- Launch CleanMyMac X.
- Click Malware Removal under Protection.
- Run the scan > review scan results > remove infections.
4. Restart the Mac to apply changes.
Bonus Tips :
- Update all outdated apps
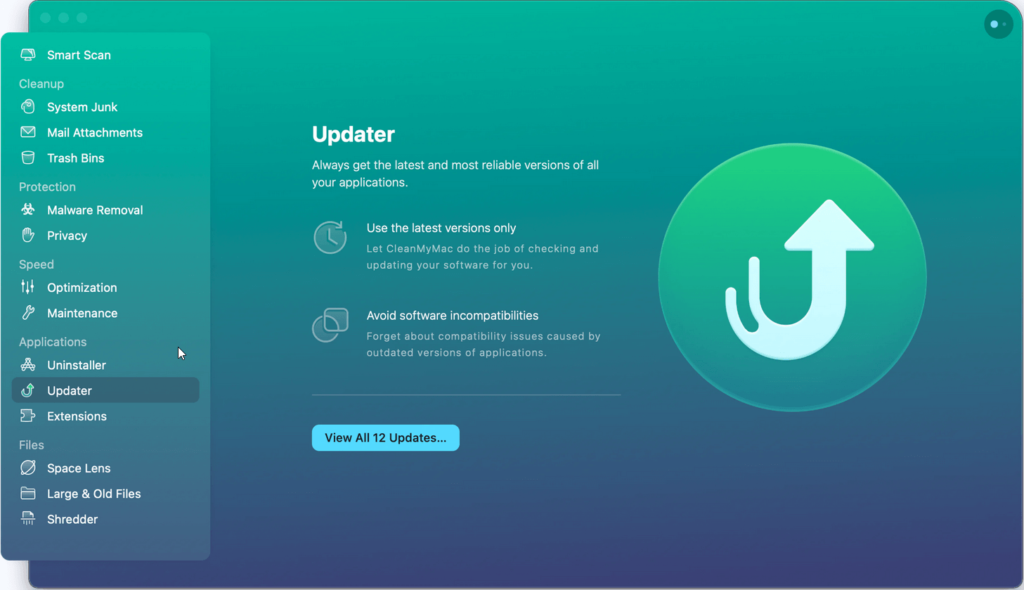
To fix bugs and improve applications, publishers keep releasing updates. Therefore, if you haven’t updated apps in a while, try updating them. Probably, due to outdated apps, you might be facing the issue. To update all apps at once, launch CleanMyMac X > click Updater under Applications > scan Mac to check for outdated apps > update them, and that’s it.
- Keep MacBook plugged in for better performance.
- Downgrade to macOS BigSur – If nothing helps, go back to macOS BigSur.
Final Words
The above fixes will surely help fix the slowdown and performance issues you faced after updating to macOS Monterey 12. If you have tried something else and it worked, don’t hesitate to share it in the comments below.
Author Bio:
Dinesh Lakhwani 

Dinesh Lakhwani, the entrepreneurial brain behind “TechCommuters,” achieved big things in the tech world. He started the company to make smart and user-friendly tech solutions. Thanks to his sharp thinking, focus on quality and the motto of never giving up, TechCommuters became a top player in the industry. His commitment to excellence has propelled the company to a leading position in the industry.
Popular Post


Recent Post

How To Record A Game Clip On Your PC With Game Bar Site
Learn how to easily record smooth, high-quality game clips on Windows 11 using the built-in Xbox Game Bar. This comprehensive guide covers enabling, and recording Game Bar on PC.

Top 10 Bass Booster & Equalizer for Android in 2024
Overview If you want to enjoy high-fidelity music play with bass booster and music equalizer, then you should try best Android equalizer & bass booster apps. While a lot of these apps are available online, here we have tested and reviewed 5 best apps you should use. It will help you improve music, audio, and […]

10 Best Video Player for Windows 11/10/8/7 (Free & Paid) in 2024
The advanced video players for Windows are designed to support high quality videos while option to stream content on various sites. These powerful tools support most file formats with support to audio and video files. In this article, we have tested & reviewed some of the best videos player for Windows. 10 Best Videos Player […]

11 Best Call Recording Apps for Android in 2024
Whether you want to record an important business meeting or interview call, you can easily do that using a call recording app. Android users have multiple great options too. Due to Android’s better connectivity with third-party resources, it is easy to record and manage call recordings on an Android device. However it is always good […]

10 Best iPhone and iPad Cleaner Apps of 2024
Agree or not, our iPhones and iPads have seamlessly integrated into our lives as essential companions, safeguarding our precious memories, sensitive information, and crucial apps. However, with constant use, these devices can accumulate a substantial amount of clutter, leading to sluggish performance, dwindling storage space, and frustration. Fortunately, the app ecosystem has responded with a […]

10 Free Best Barcode Scanner for Android in 2024
In our digital world, scanning barcodes and QR codes has become second nature. Whether you’re tracking packages, accessing information, or making payments, these little codes have made our lives incredibly convenient. But with so many barcode scanner apps out there for Android, choosing the right one can be overwhelming. That’s where this guide comes in! […]

11 Best Duplicate Contacts Remover Apps for iPhone in 2024
Your search for the best duplicate contacts remover apps for iPhone ends here. Let’s review some advanced free and premium apps you should try in 2024.

How To Unsubscribe From Emails On Gmail In Bulk – Mass Unsubscribe Gmail
Need to clean up your cluttered Gmail inbox? This guide covers how to mass unsubscribe from emails in Gmail using simple built-in tools. Learn the best practices today!
7 Best Free Methods to Recover Data in Windows
Lost your data on Windows PC? Here are the 5 best methods to recover your data on a Windows Computer.

100 Mbps, 200 Mbps, 300Mbps? What Speed is Good for Gaming?
What internet speed is best for gaming without lag? This guide examines whether 100Mbps, 200Mbps, or 300Mbps is good for online multiplayer on PC, console, and mobile.

