How to Format an External Storage Device in macOS
Introduction:
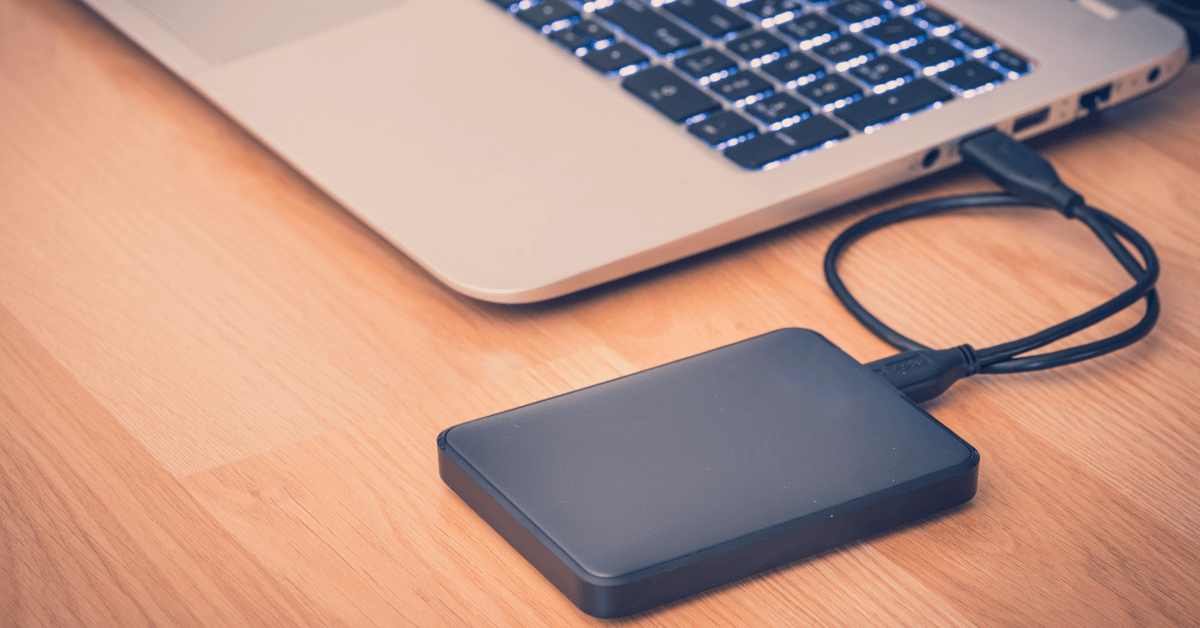
Are you ready to supercharge your Mac’s capabilities by connecting an external hard drive? Well, before you can embark on this storage adventure, there’s an important task at hand: formatting your external hard drive to work seamlessly with your Mac. Don’t worry, we’ve got you covered!
In this comprehensive blog post, we’ll walk you through the process of how to format external hard drive Mac with step-by-step instructions. Whether you’re a seasoned Mac user or a newcomer to the world of external storage, we aim to make the process as straightforward as possible, so you can get done with this task within no time.
What is Disk Utility on Mac?
Disk Utility is an essential utility that comes pre-installed on macOS, empowering users to effectively manage and optimize their storage devices. Whether it’s internal or external hard drives, SSDs, USB drives, or disk images, Disk Utility offers a range of powerful tools and functions for comprehensive disk management.
With Disk Utility, users can effortlessly format their storage devices to different file systems, tailor-made for specific requirements.
How to Format External Hard Drive on Mac?
To format external hard drive Mac using Disk Utility, follow these steps:
- Connect the external hard drive to your Mac using a compatible USB cable or adapter.
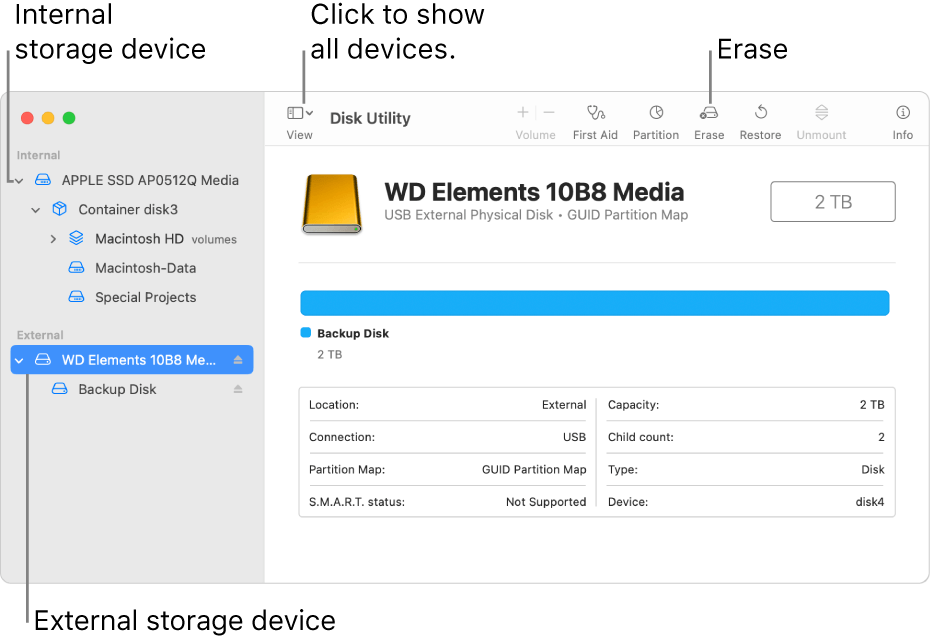
- Launch Disk Utility. You can find the Disk Utility tool in the Applications folder, under Utilities, or you can also search for it using Spotlight.

- In Disk Utility, you will see a list of all available drives and volumes. Locate your external hard drive in the left sidebar and select it. Make sure you have selected the correct drive because formatting an external drive will erase all data on it.
- After selecting the external hard drive, Hit the “Erase” button located at the top of the Disk Utility window.
- A new window will appear, allowing you to configure the format options for your external hard drive.
- Provide a name for your drive in the “Name” field.
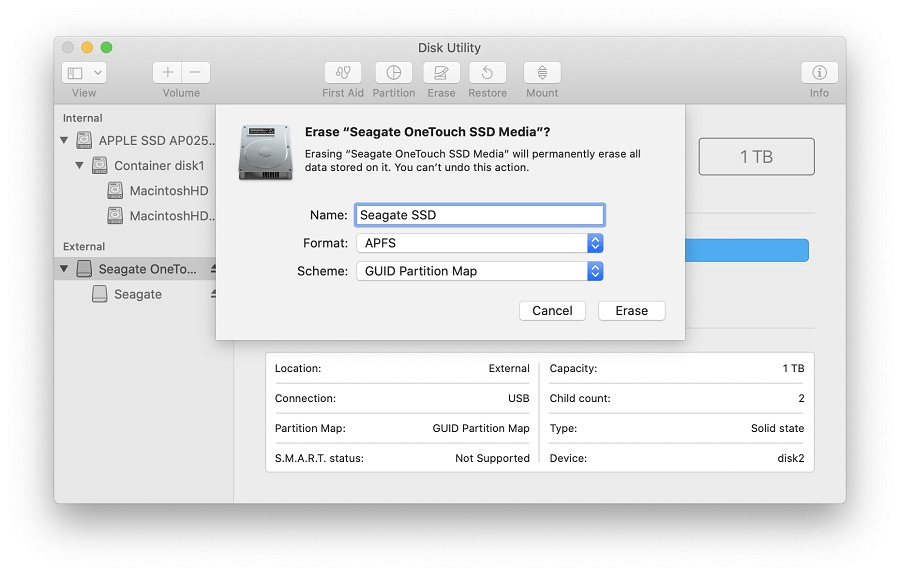
- Choose the desired format. You can select “ExFAT.” because it is compatible with both Mac and PC. If you only plan to use the drive with Macs, you can choose “Mac OS Extended (Journaled)” or “APFS.” which is compatible with the latest versions of Mac including macOS 10.3 and later.
- Here comes the next crucial step. Choose the partition scheme for an external drive. For most drives, you can leave it set to “GUID Partition Map.”
- Review the settings and make sure everything is correct. Formatting will erase all data on the drive, so ensure you have a backup if necessary.
- Once you are ready, click the “Erase” button to begin the formatting process.
- Disk Utility will erase the drive and format it with the specified settings. This may take a few minutes, depending on the size of the drive.
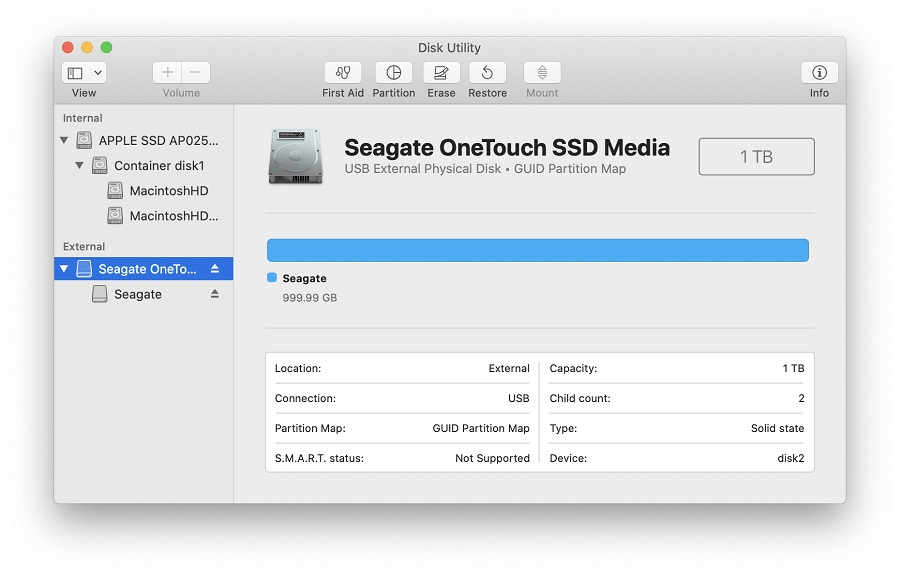
- Once the formatting is complete, you will see a confirmation message. You can now use the external hard drive with your Mac.
Remember to be cautious while formatting, as it will erase all data on the drive. Also, make sure to back up any important files before proceeding.
How to Partition External Hard Drive on Mac?
As you have now learned all about how to format external hard drive Mac, the next step is to create disk partitions to split the storage. Disk Utility allows users to create multiple partitions on a single disk, providing dedicated spaces for various purposes. Partitions can be used for Time Machine backups, creating bootable backups of the operating system, or even separating personal and work data.
In addition to this, partitioning offers an extra layer of protection for your data, as it helps prevent corruption or loss if a particular partition becomes damaged or infected with malware. This way, the data contained within one partition can remain safe and unaffected, while other partitions can be repaired or erased as necessary.
Follow these steps to partition an external hard drive on Mac:
- Launch Disk Utility on your Mac.
- In Disk Utility, you will see a list of all available drives and volumes. Locate your external hard drive in the left sidebar and select it.
- Tap on the “Partition” button located at the top of the Disk Utility window.
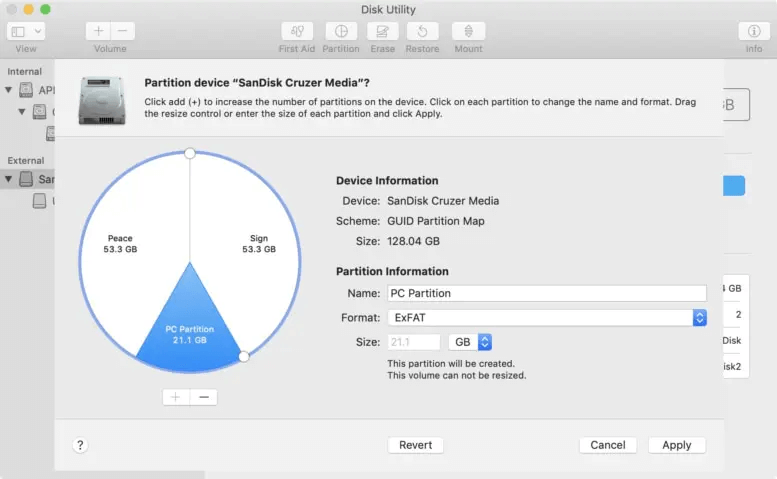
- A new window will appear, showing a graphical representation of the drive and its current partition setup.
- To add a new partition, hit the “+” button at the bottom left corner of the window.
- Adjust the size of the new partition by dragging the resize handle left or right.
- Choose a name for the new partition.
- Select the desired format for the partition. If you plan to use the partition only with Macs, choose “Mac OS Extended (Journaled)” or “APFS.” For cross-platform compatibility, you can select “ExFAT.”
- After reviewing the partition layout, hit on the “Apply” button to begin the process.
Disk Utility will create the new partitions on the external hard drive. Once the partitioning process is complete, you will see a confirmation message. The new partitions will be visible in the Disk Utility sidebar, and you can start using them.
Conclusion
This wraps up our comprehensive guide on how to format external hard drive Mac. Formatting an external storage device in macOS is a straightforward process that can be accomplished using the built-in Disk Utility. Whether you want to prepare a new drive for use, switch to a different file system, or resolve issues with an existing device, Disk Utility provides the necessary tools for efficient disk management.
By following the steps outlined in this blog, you can easily format your external storage device and select the appropriate file system based on your specific needs. Remember to back up any important data before formatting, as the process will erase all existing information on the drive.
Author Bio:
Dinesh Lakhwani 

Dinesh Lakhwani, the entrepreneurial brain behind “TechCommuters,” achieved big things in the tech world. He started the company to make smart and user-friendly tech solutions. Thanks to his sharp thinking, focus on quality and the motto of never giving up, TechCommuters became a top player in the industry. His commitment to excellence has propelled the company to a leading position in the industry.
Popular Post


Recent Post

How To Record A Game Clip On Your PC With Game Bar Site
Learn how to easily record smooth, high-quality game clips on Windows 11 using the built-in Xbox Game Bar. This comprehensive guide covers enabling, and recording Game Bar on PC.

Top 10 Bass Booster & Equalizer for Android in 2024
Overview If you want to enjoy high-fidelity music play with bass booster and music equalizer, then you should try best Android equalizer & bass booster apps. While a lot of these apps are available online, here we have tested and reviewed 5 best apps you should use. It will help you improve music, audio, and […]

10 Best Video Player for Windows 11/10/8/7 (Free & Paid) in 2024
The advanced video players for Windows are designed to support high quality videos while option to stream content on various sites. These powerful tools support most file formats with support to audio and video files. In this article, we have tested & reviewed some of the best videos player for Windows. 10 Best Videos Player […]

11 Best Call Recording Apps for Android in 2024
Whether you want to record an important business meeting or interview call, you can easily do that using a call recording app. Android users have multiple great options too. Due to Android’s better connectivity with third-party resources, it is easy to record and manage call recordings on an Android device. However it is always good […]
10 Best iPhone and iPad Cleaner Apps of 2024
Agree or not, our iPhones and iPads have seamlessly integrated into our lives as essential companions, safeguarding our precious memories, sensitive information, and crucial apps. However, with constant use, these devices can accumulate a substantial amount of clutter, leading to sluggish performance, dwindling storage space, and frustration. Fortunately, the app ecosystem has responded with a […]

10 Free Best Barcode Scanner for Android in 2024
In our digital world, scanning barcodes and QR codes has become second nature. Whether you’re tracking packages, accessing information, or making payments, these little codes have made our lives incredibly convenient. But with so many barcode scanner apps out there for Android, choosing the right one can be overwhelming. That’s where this guide comes in! […]
11 Best Duplicate Contacts Remover Apps for iPhone in 2024
Your search for the best duplicate contacts remover apps for iPhone ends here. Let’s review some advanced free and premium apps you should try in 2024.

How To Unsubscribe From Emails On Gmail In Bulk – Mass Unsubscribe Gmail
Need to clean up your cluttered Gmail inbox? This guide covers how to mass unsubscribe from emails in Gmail using simple built-in tools. Learn the best practices today!
7 Best Free Methods to Recover Data in Windows
Lost your data on Windows PC? Here are the 5 best methods to recover your data on a Windows Computer.

100 Mbps, 200 Mbps, 300Mbps? What Speed is Good for Gaming?
What internet speed is best for gaming without lag? This guide examines whether 100Mbps, 200Mbps, or 300Mbps is good for online multiplayer on PC, console, and mobile.

