The Definitive Guide to Managing Your Mac’s Storage Space

Last updated on March 24th, 2024 at 4:25 pm
Are you struggling with low storage space on Mac? Wondering what is taking up so much space?
You are at the right place. Here we will discuss how to reclaim space on Mac.
Gone are those days when you used Mac machines only for p
rofessional purposes. Now, everything from downloading movies to streaming content, saving 4K videos, creating high-resolution videos, and whatnot Mac is used; due to this, the dreaded “Your disk is almost full” error is often encountered.
If this bothers you, we will explain what you can do to free up space on Mac in this post.
So, without wasting any time, let us learn how to clean up space.
Page Contents
Best Ways to Manage Storage Space on Mac
4. Empty Trash
5. Moving Files and Photos to iCloud
6. Delete Old Bookmarks from Browser
14. Delete Unnecessary Language Files
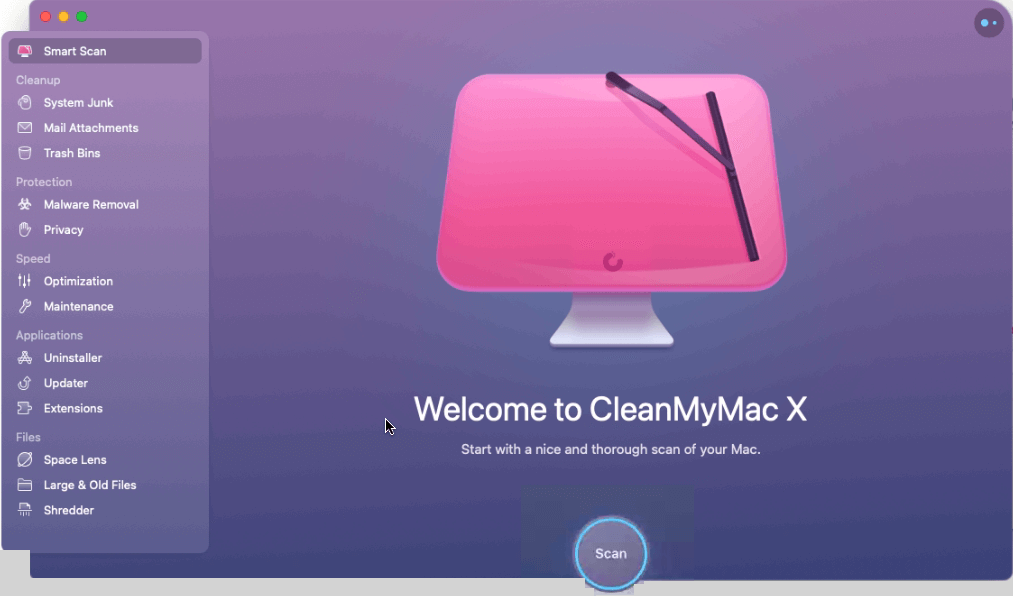
| Before we start – A Quick Solution Junk, old downloads, large files, unwanted language files, and a whole lot more can take an enormous amount of space. Locating and getting rid of this data manually is an uphill task for beginners and advanced users. If you don’t like this idea, here’s a tip: Try CleanMyMac X and remove user cache, app leftovers, iTunes and Photos junk, old mail downloads, junk files, malware, and much more from your Mac. Using the app is a straightforward task; you will be surprised to see how CleanMyMac X works. |
Now that you know how to recover gigabytes of storage space automatically. Let us learn other best ideas & manual ways to identify what is taking up space on your Mac & how to clean up and manage storage space on Mac.
| Fact: You need 10% storage free to run Mac smoothly. This means to avoid facing any issues you must know how to manage storage space on Mac. |
Best Ways to Manage Storage Space on Mac
There are multiple ways to free up disk space on Mac. However, if you are in a rush and you want to free up a limited amount of space to save an important task, here are a few quick tips:
- Clean Old Downloads
The downloads folder is a dumpster of old zip files, duplicates, and other junk data. It is the best place to start when you want to free up space on Mac.
Note: To avoid deleting any important data, sort files by size. This makes sifting through each file easy.
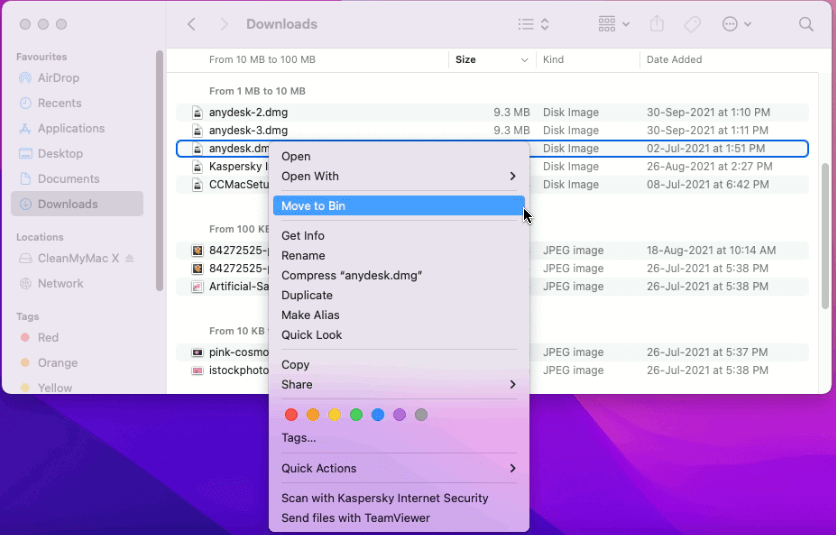
1 Open Finder > Go > Downloads folder
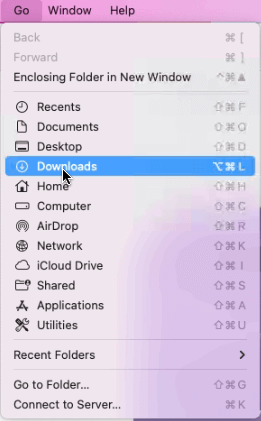
2 Sort files by Date Added and select old downloads or files you know you don’t need.
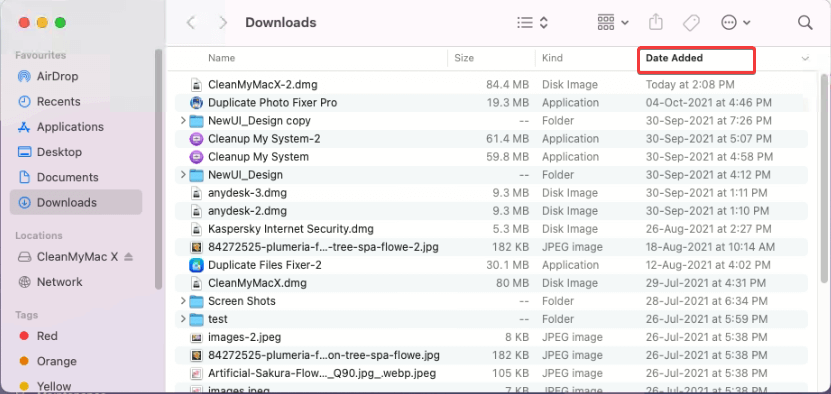
3 Right-click > Move to Bin/Trash.
- Remove large files
- Open Finder > Go > Home folder or press Shift + H
- Next, click the search icon to find the files. You can also sort files in different folders. To open them double click the folder.
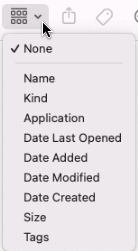
- After that click the drop-down as shown in image below and select Size option.
- You will now see files sorted from 100 MB to 1 GB
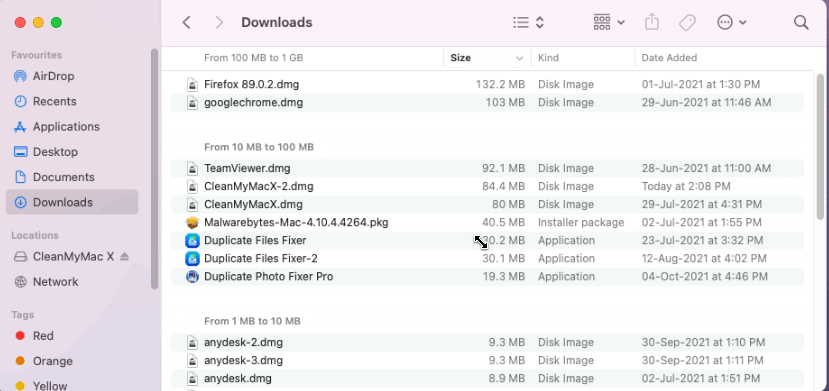
5. Select the ones you don’t need right-click > Move to Bin
Using the same steps, you can sort files by Date Added. For this, instead of choosing ‘size’’ select from either of the date options – Date Last Opened, Date Added, Date Modified, & Date Created.
Select the file you don’t need > right-click > Move to Bin.
3. De-clutter Desktop
If your desktop is a mess, and you save everything on it, removing documents and files from there to recover space is a good idea. To do so, follow these steps:
- Launch Finder > Go > select Desktop folder
- Sort by Size and delete unnecessary things that are particularly large.
3. Alternatively, you can sort by Kind and locate media files that take more space compared to other file types.
4. Select files > right-click > Move to Bin.
In addition to this, you can also use Stacks to categorize files based on the file types automatically.
Steps to use Stacks
- Right-click desktop > select Stacks from context menu.

That’s all. Your desktop will now be clean and tidy.
4. Empty Trash
Like Windows has Recycle Bin, Mac also has a Trash folder where all deleted files are moved. To permanently remove these files you need to clean the Bin. To do so, follow these steps:
Right-click Bin > Empty Bin.
This will help recover a decent amount of storage space.
However, if you need more and don’t want to see the unpleasant running out of space message again, check your Mac to know what is taking up space.
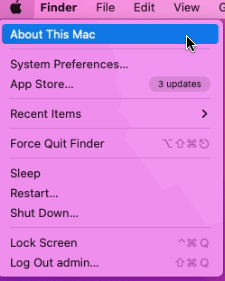
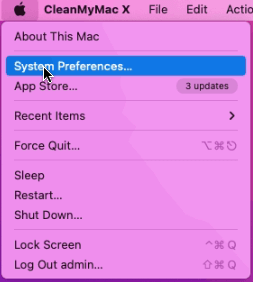
- Click on the Apple logo > About This Mac.
2. Click the Storage tab > wait for the space calculation process to finish.
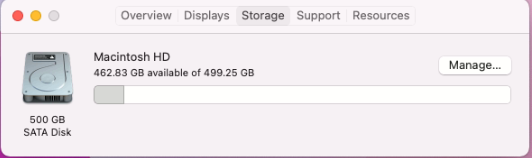
3. You will now get different bars indicating free and occupied space.
4. To see what each represents, hover over the bars. This will help know which file types are taking more storage space.
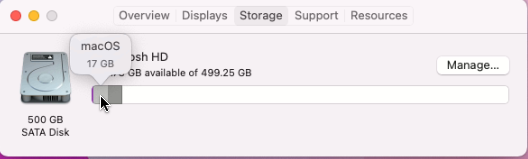
If photos and videos take the most space, move them to iCloud.
| Note:- Apple gives 5GB of free iCloud storage. If that isn’t enough, you can pick from any storage plans Apple offers to buy more space. |
5. Moving Files and Photos to iCloud
- Click on the Apple logo > About This Mac > Storage > Manage.
- You will now get a new window to store files in iCloud click Store in iCloud.
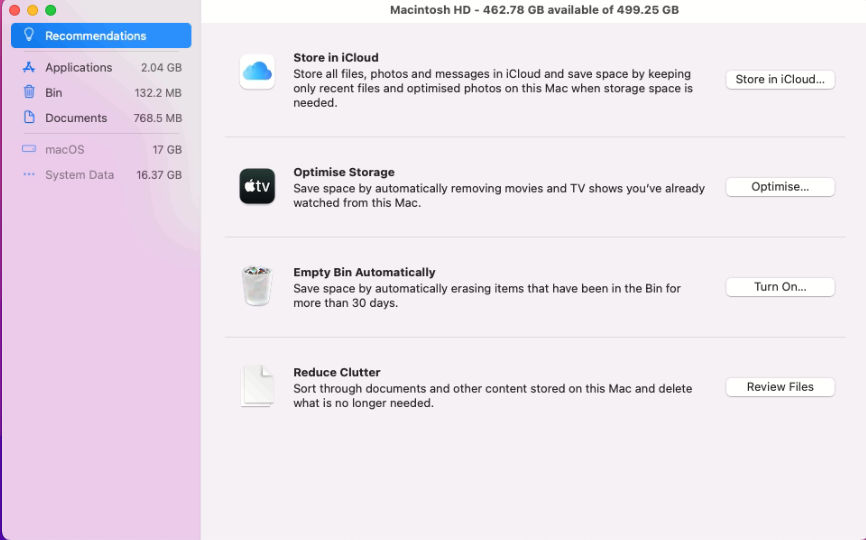
3. Select the files > click on Store in iCloud.
6. Delete Old Bookmarks from Browser
- Launch Safari, the default web browser.
2. Select Bookmarks option from the top menu > Edit Bookmarks > right-click > Delete
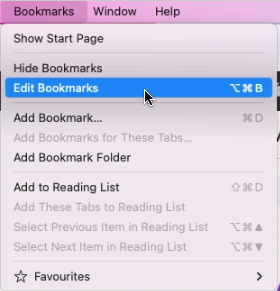
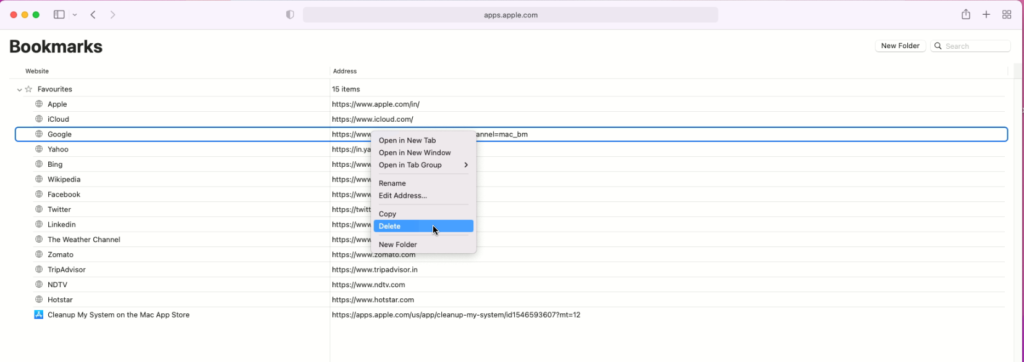
This will decrease page load time, and the browser will be faster.
7. Optimise Storage
Another way to avoid getting storage clogged up is to enable Optimise Storage on Mac.
| Note: Alongside removing already watched TV shows or films, Optimise Storage will also delete old email attachments. Remember, email attachments will still be available on the email server, and the purchased show will be available on Apple’s iTunes Store. |
1 Click Apple icon > About My Mac.
2 Hit the Storage tab > Manage and click on Optimise Storage.
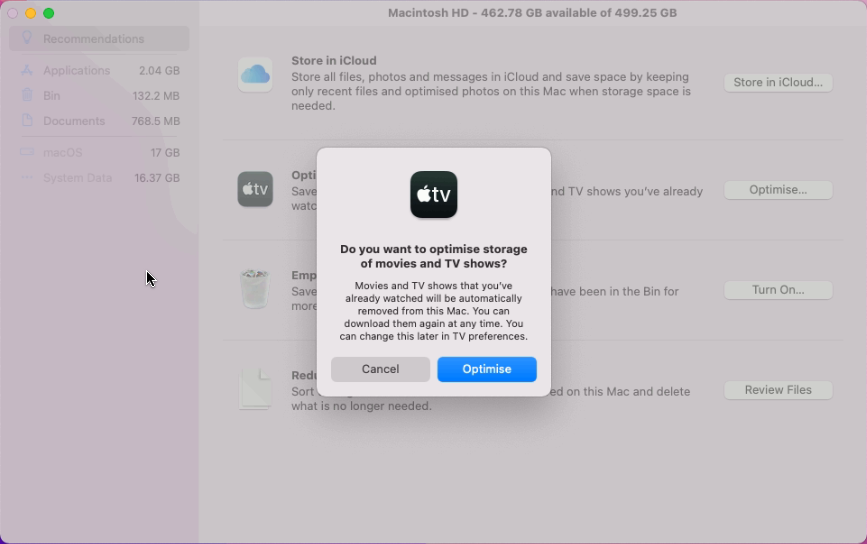
Once the option is enabled, storage will be optimised.
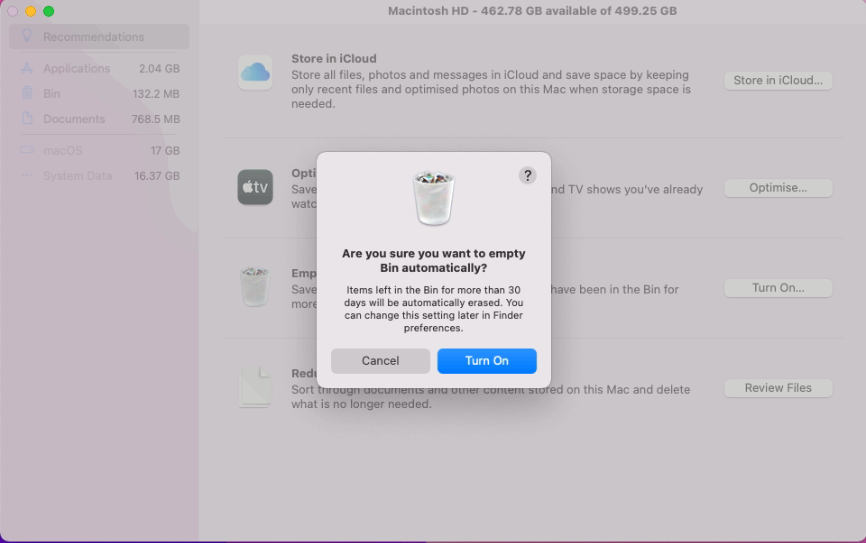
8. Empty Trash Automatically
The feature will work on files that have been in the bin for 30 days.
To empty Trash automatically, follow these steps:
- Click Apple logo > About My Mac > Manage.
- Choose the Empty Trash Automatically option and enable it
- You get a confirmation box asking if you want to erase Trash automatically.
9. Remove duplicates
If you have a large photo collection, the chances of having duplicate pictures are more. These duplicate images unnecessarily occupy space. There are apps in the market that help detect and delete duplicate photos on Mac.
10. Clean System Junk
Applications leave temporary, broken files and other items behind. This makes cleaning system junk on Mac essential. To perform this task, you can use a dedicated System Junk module.
- Launch CleanMyMac X. (*Affiliate Link)
2. Click System Junk > Grant Access > Press Scan button.
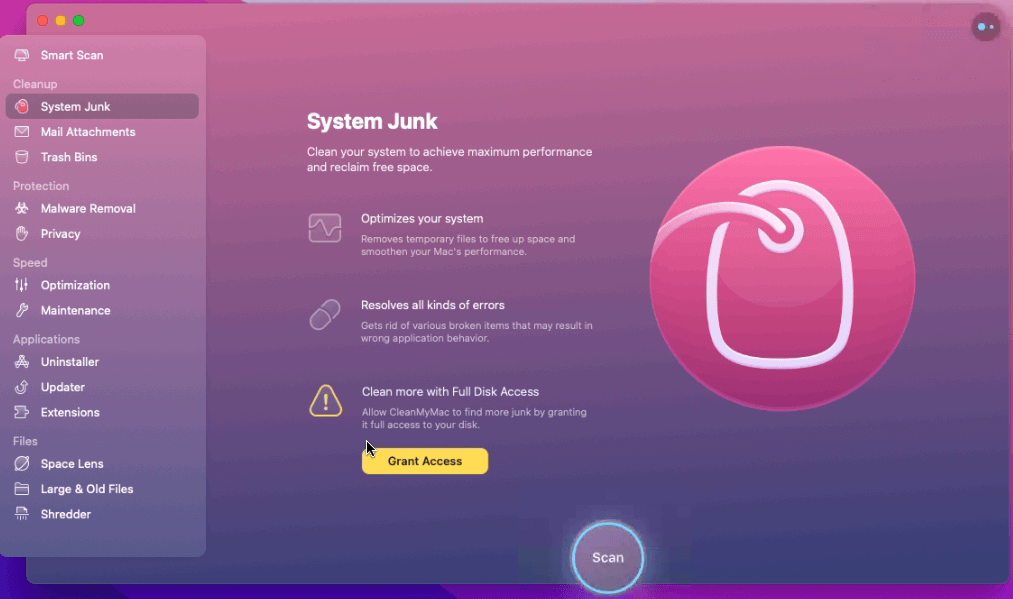
3. Wait for the scan to finish, review results > press Clean.
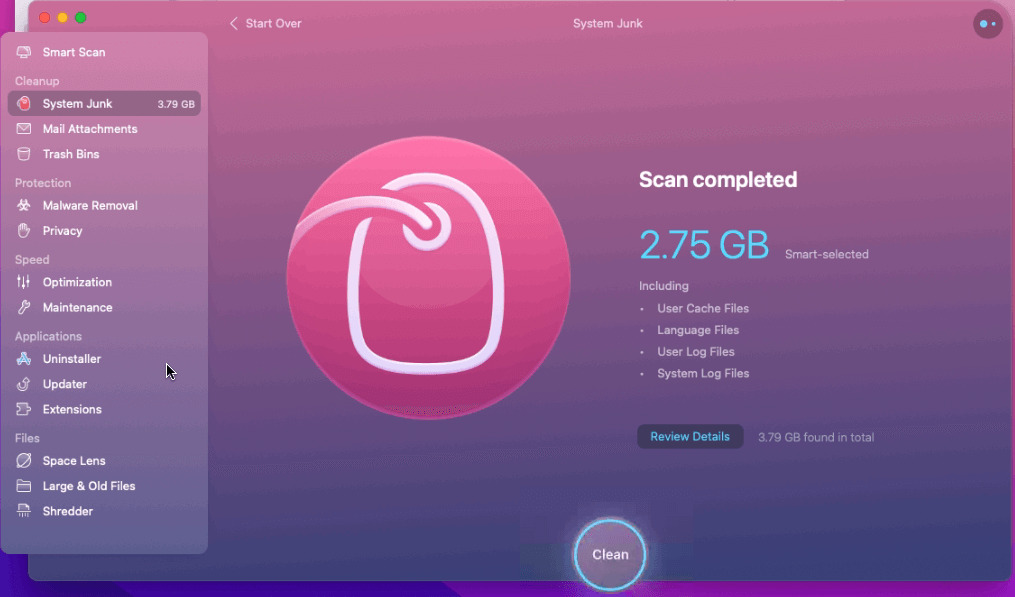
This will clean system logs, temporary files, and user cache files that you no longer need.
11. Manage login items
When you remove unwanted data from the system, why leave the startup. To improve Mac’s performance, remove unnecessary login items.
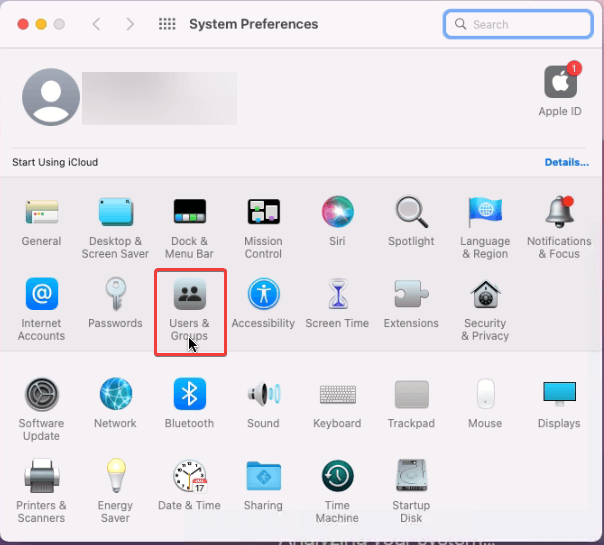
- Click Apple menu > System Preferences
2. Select Users & Groups
3. Select the user name > Login Items tab
4. Select the item > click padlock > click ‘-‘ from the bottom left corner to remove items from here.
12. Uninstall Unused apps
Another way to manage storage and optimize Mac is to uninstall apps you no longer use.
To do so follow these steps:
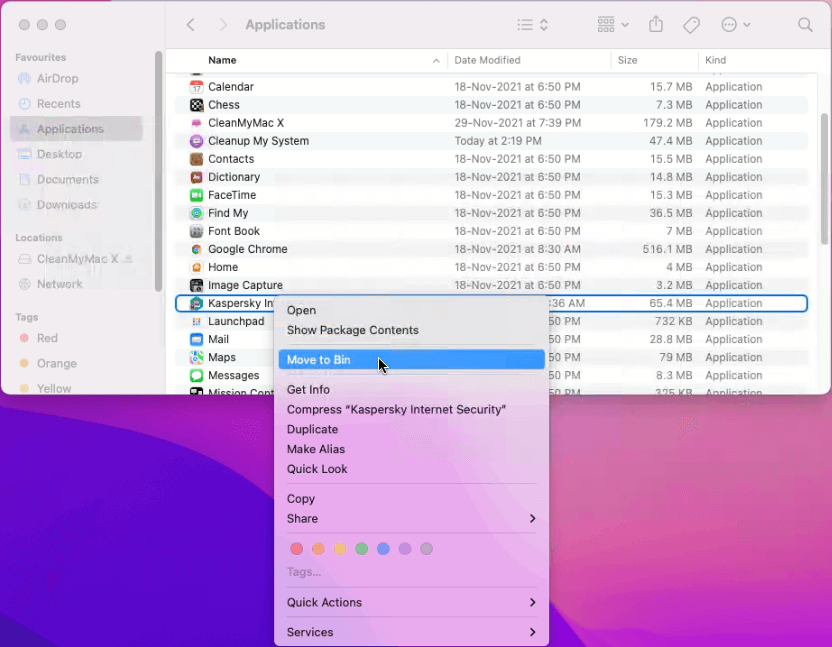
- Launch Finder > Go > Applications.
- Select the application you no longer use > right-click > Move to Bin
In addition to this, you can use CleanMyMac X. The advantage of using this best Mac optimizer and uninstaller is that it completely removes applications and clears the leftover data.
Manual method sometimes leaves corresponding files adding up to the junk data. But with CleanMyMac X this is not the case.
13. Clean Cache Files
Cache files help Mac load applications quickly. They are like a blueprint of programs and activity of the users.
However, these cache files accumulate over time and take unwanted space. Therefore, to keep performance-optimized and storage space free, clean these files.
To remove Cache files:
- Launch Finder window > Go > Go to Folder
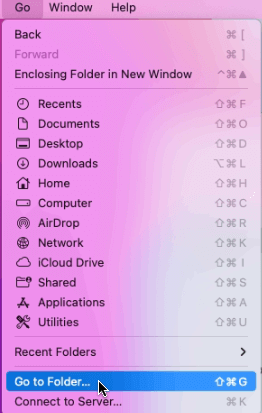
2. Type in ~/Library/Caches and delete the files/folders taking up the most space.
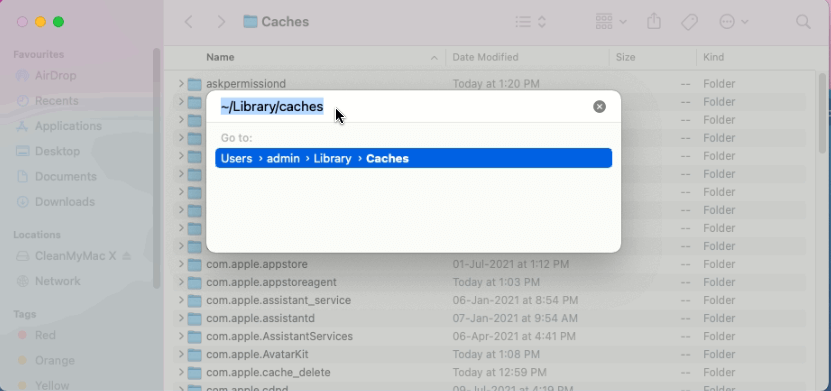
3. Next, again click on Go to Folder.
4. Type in /Library/Caches (simply lose the ~ symbol)And, again, delete the folders that take up the most space.
14. Delete Unnecessary Language Files
Language packs, also known as Localization files, take up the most amount of unnecessary space. To clean space taken by these packs, follow these steps:
- Launch CleanMyMac X
- Click the System Junk option from the left pane
- Review scan details > click Language Files.
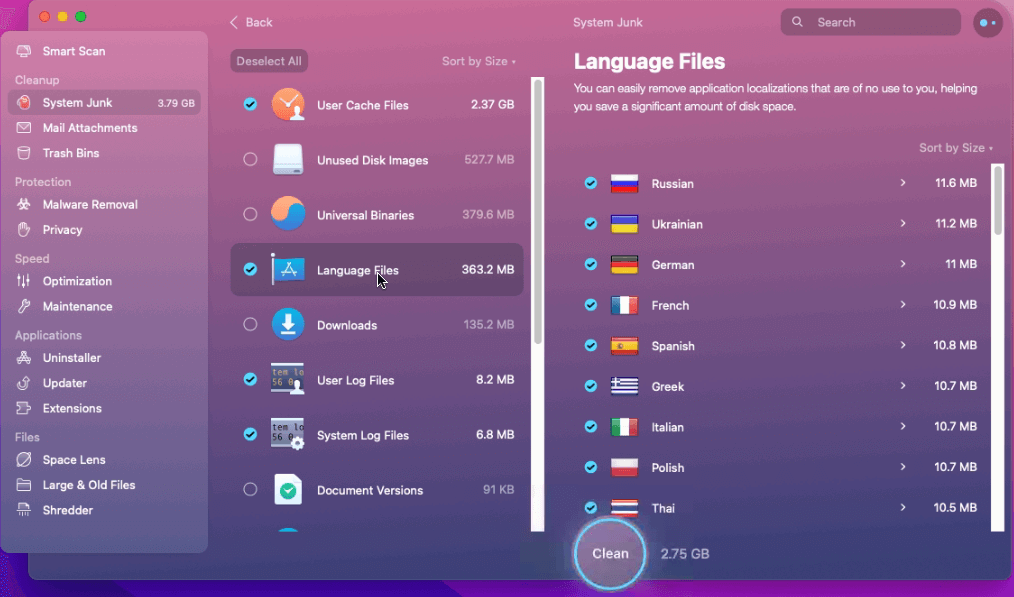
4. Select unwanted languages > Clean.
That’s all for now. Using this descriptive guide you can easily clean and manage storage space on Mac efficiently. Obviously you can use manual ways to free up space but it will be time consuming and requires technical knowledge. Therefore, if you are looking for an effective way to manage space and optimize Mac, then try CleanMyMac X that helps clean and optimize Mac intelligently.
We hope you enjoyed the post and will use the tips. Do share your feedback about the tutorial and CleanMyMac X app.
Author Bio:
Dinesh Lakhwani 

Dinesh Lakhwani, the entrepreneurial brain behind “TechCommuters,” achieved big things in the tech world. He started the company to make smart and user-friendly tech solutions. Thanks to his sharp thinking, focus on quality and the motto of never giving up, TechCommuters became a top player in the industry. His commitment to excellence has propelled the company to a leading position in the industry.
Popular Post


Recent Post

Solo App Developers: A Detailed Guide
In today’s world, many self-employed or freelancer developers are working. If you work alone and are the main individual that works from start to finish and performs the majority of your tasks, there are many things you should be aware of. Since that is the scenario, we want to provide tips for increasing your productivity […]

10 Best Free Appointment Scheduling Software
For every organization, time is the most valuable and limited resource. Booking appointments, handling client reservations, and managing with last-minute disruptions may all take up a large portion of your day. Appointment scheduling applications and reservation programs assist in automating routine tasks of organizing meetings with new and existing clients. It helps to function without […]

10 Best Free & Paid YouTube Intro Maker
Social networks and video streaming services enhance the video content on the internet. With customers spending their maximum hours viewing YouTube videos every day, the marketplace is becoming more competitive. Therefore, YouTube producers require all the assistance to stand forth in the market. This is where a highly produced video introduction can make a huge […]
10 Best Download Manager for Windows 11
Downloading files on your Windows 11 system is one of the common functions for different users. Hence, many people look for dedicated download manager software for Windows 11 that facilitates error-free and quick downloads. While all Windows 11 browsers come with an in-built download manager, not all are as effective as they are marketed to […]

How To Check Screen Time On android?
Digital Well-being is an essential health aspect that you need to take care of. It is very important to understand that mobile phones should not be used so much that it becomes a threat to your social life. Additionally, with several applications that are interesting, you could get addicted to using your mobile. However, to […]

What Is Onion over VPN and How Does It Work?
Security and privacy are the two main challenges of any modern digitized system. While data is vulnerable during the transfer from one system to another, unauthorized access compromises the privacy of the crucial information. Hence, the IT world is struggling to develop modern tools and technologies that add an extra layer to the existing security […]

How to Optimize CPU Speed In Windows 10 PC? – 10 Tips
Undoubtedly, Windows 10 is one of the fastest and robust operating systems. But over time, Windows 10 PCs start to slow down due to malware attacks, less disk space, heavy temp files, and so on. There’s nothing to worry about if your Windows 10 PC is also running at a bulk cart speed. You can […]

10 Best Free Drawing Apps for MacOS
A Mac’s HD display with brilliant colors is the ideal partner for every digital designer. In addition, employing the best-in-class art programs on the computer will satisfy your desire to create fantastic art. However, suppose professional drawing programs like Adobe Illustrator and Corel Painter are too expensive for you. In that case, you may need […]

How to find your Windows 11 product key?
Many users know that Windows 11 is a free upgrade to Windows 10 users. However, there is the need for the product key when the activation is lost after switching from Windows 10 to Windows 11. It is easy to find the Windows 11 product key using different methods. There are four different ways to […]

How to Set a Sleep Timer Shutdown in Windows?
At some point in an individual’s work life, we all had to stay up late to complete a project assignment. However, with the exhaustion of working so much, we doze off after some time, leaving our work and computer on. When this occurs, you awaken several hours afterwards to find that the pc has been […]

